Decoupage in eggshells under a snake of bottles. Decoupage with eggshells: master class with photos
Let's make this rare wine bottle.
We will need: - the bottle itself (cleaned and washed of all stickers); - eggshells (you must first remove the inner films from it - this is easier to do in running cold water); - PVA glue; - wide flat brush (preferably synthetic); - napkins for decoupage; - a toothpick or a thin wooden stick; - white acrylic paint; - paint of a contrasting color (in my case it’s brown); - varnish for the finishing coat (in my case it is regular parquet varnish). Well, that seems to be it. I warn you right away that the work, in principle, is not difficult, but in terms of pasting the bottle with eggshells, it is long and painstaking. Begin? There is a method when they smear glue on the surface of the object to be decorated and apply a piece of shell to it, and crush it in place, for example, with the blunt end of a brush or scissors, pushing the resulting small pieces apart with a toothpick... But for some reason it was inconvenient for me.
2.
I did this: take the shell, put it on the table,
3.
we immediately crush it into smaller pieces with a simple finger press,
4.
and for work we use these ready-made small fragments.
5.
Apply glue to a small area of the bottle (it is more convenient to start working from the top from the neck and move downwards around the circumference
6.
Using the tip of a toothpick (at the beginning of work, you can moisten it a little so that pieces of eggshell stick to it more easily, in the future this will not be necessary - from working with glue, the toothpick will already become a little sticky and picking up shells will be quite easy) take a suitable piece of eggshell
7.
and apply it to the area greased with glue,
8.
pressing down a little so that it sticks better.
9.
And thus, carefully and slowly cover the entire surface of the bottle with eggshells, with the exception of the bottom.
10.
Let the bottle dry thoroughly and cover it with white acrylic paint.
11.
This is what our bottle looks like now - covered with shell and painted with white acrylic.
12.
Then we take brown paint (by mixing and diluting the colors, we achieve the desired shade), pour it into a saucer (or any other small dish)
13.
and use a regular kitchen dishwashing sponge to paint the entire surface of the bottle.
14.
We do this in order to highlight our future “cracks”: the paint will be erased from the surface of the shells, and they will remain light, and brown paint will remain in the recesses BETWEEN the shells - these will be our “cracks”. Like this:
15.
Let's start with the actual decoupage. We tear out the fragments that suit us from the napkin, separate the top layer with the pattern and glue it in the right place. (We tear out, rather than cut out, the fragments because SO the edges of the picture will not be so clear and less noticeable. And we glue it as follows: attach the fragment to the surface of the bottle, apply a drop of glue to the center of the picture and carefully move the brush from the center to the edges to thoroughly coat the entire drawing. We try not to pass over one place several times and not to put too much pressure on the brush, so as not to tear the soaked napkin. It’s better to start with larger fragments, and then place the smaller ones on the remaining voids).
16.
Here's what we got:
17.
18.
19.
20.
21.
And don't forget about the bottle cap :)
22.
When the glue is completely dry, we can coat our work with varnish. At first I took aerosol varnish for this purpose. But I didn’t like the result: it doesn’t have the gloss and shine that I wanted to achieve in the end...
23.
Therefore, for the next layer I used ordinary parquet varnish, purchased at a hardware store (and, in my opinion, also at a SOVIET hardware store;))). But there is one peculiarity here: almost all varnishes for woodworking (including my parquet one) give the treated surface some yellowness - one is darker, the other is lighter - but EVERYONE turns yellow. Because This yellowness did not interfere with my motive at all, I took parquet varnish. But if you need an exceptionally transparent and colorless coating, then you should buy something from acrylic varnishes - it is better to consult with the seller in the store.
24.
To be honest, I didn’t count how many layers of varnish I got. But probably something like five...
25.
26.
27.
28.
30.
And this is what our finished work looks like.
Easter is approaching, which means there will be a lot of colored eggs in every home. So, it's time to learn a new craft technique: eggshell crafts.
Eggshells are an excellent material for creativity. And we offer you two options for using it:

Materials and tools for crafts made from eggshells
- eggshell
- PVA glue and brush
- thick cardboard or other surface (box, vase, etc.)
- tweezers
- a small wooden stick for pressing shells (a manicure stick is great)
- acrylic paints if the mosaic is made from white shells
- napkin for decoupage (if necessary)
First you need to prepare the material. To do this, the collected eggshells are washed in warm water (and for better degreasing, you can even put them in boiling water with a soda solution). After this, the shell must be dried, the inner film removed from it and arranged by color.
Professionals use shells from raw eggs, because heat-treated shells lose their hardness and their surface becomes more friable. But for children's crafts, you can use any shell, including those left over from boiled Easter eggs.
Eggshell mosaic

To make a mosaic from eggshells with your own hands, you will need a template for the future design. If you have artistic abilities, then simply draw a template on a piece of paper. If not, you can take any drawing intended for children to color. All the contours are clearly drawn there and usually do not require a large number of colors. Glue the sheet with the pattern onto thick cardboard.
Now we begin to glue the shell. To do this, grease a small fragment of the pattern with PVA glue and place a piece of shell on top. If the shell is too large, then you just need to press on top with a stick, the shell will crack and fall apart into several small pieces. Make sure that there is approximately the same distance between the shells.

Having completed one fragment of the picture, we move on to the next.
After filling the entire design, set it aside until the glue dries completely. If you used a white shell, then only after drying can the drawing be painted with acrylic paints.
The finished work must be varnished. The result is a unique version of eggshell appliqué.
Look what wonderful paintings real craftswomen make from eggshells!


If you decide to do decoupage using eggshells, then first select a blank for the future craft. It could be a box, a key holder, a bottle or even a vase.

Master class on decoupage on eggshell wooden box

This box is wooden, so first we sand the entire surface (both internal and external) with sandpaper. If you started decoupaging a bottle with eggshells, then the surface must first be degreased with alcohol.


It depends only on you how large the shell pieces will be and the distance between them.

We fill the entire surface like this.

And once again we cover everything with a layer of PVA glue.


After this, we cover the entire workpiece in several layers with white acrylic paint.

And we move on to gluing the napkin, i.e. directly to the decoupage itself.

Let me remind you that three-layer napkins are usually used for decoupage. We only need the top layer - the one with the drawing on it. Coat the work surface with PVA glue. If the surface is very large, or you are working with round objects (vases, bottles), then it is better to cut the napkin into two or three fragments. We place the napkin element on the surface and immediately apply PVA glue on top. We brush from the center to the edges to expel the air from under the napkin.
In this way we glue the box on all sides.

Set aside for a while to dry completely.
And then there are two options (depending on your imagination). The finished work can simply be varnished. You can also age the box. To do this, you can paint the shells with silver acrylic paint, and apply black pastel to the edges of the box using a foam sponge.
Glad to welcome everyone!
Friends, decorating glass bottles is a very interesting activity and such things are perfect for decorating your home interior.
In this article, we will make a very beautiful bottle decor with eggshells.
For decoration we will need:
- Glass bottle;
- Paper napkins;
- Thin cotton lace;
- PVA glue or other polymer glue;
- Eggshell;
- Solvent or alcohol;
- Acrylic paints;
- Acrylic lacquer.
Step 1.
First of all, you need to remove the labels from the bottle, wash it and degrease the surface with solvent or alcohol.

Step 2.
We dilute PVA glue 1/1 with water and, using this solution, cover the bottle with paper napkins. Don't try to make the surface smooth; on the contrary, you want to create a slight texture. Let it dry for several hours.


Step 3.
We draw on the bottle the pattern that we want to get in the future.

Step 4.
Along the lines of the drawn pattern, apply PVA glue and carefully glue a thin cord. In the same way, we glue the cord to the threaded part of the neck, wrapping it around it. After gluing, it is advisable to apply glue to the lace again with a brush, this way we will better strengthen it on the surface. Dry the glue.


Step 5.
We break the eggshells into small (but not very small) pieces, apply PVA glue inside the lace patterns and glue the shells. For more accurate and precise gluing, use a toothpick or other similar object. After this work, it is advisable to dry the glue. For speed, you can use a hair dryer.


Step 6.
As in the previous step, apply glue to the remaining areas without shells, additionally crush the eggshells into a smaller fraction and sprinkle these areas. For better adhesion, you can press the shell with your finger. Dry the glue.


Step 7
The most difficult part of the work is over and now you need to paint the entire bottle with black acrylic paint, dry it and tint it with lilac or purple acrylic paint. In general, the color scheme of the decor is naturally to your taste.


Step 8
Using the “dry brush method” we paint the areas with the shell with bronze or golden acrylic paint, thereby highlighting our decor and, after drying, cover everything with acrylic varnish.


This completes our decor tutorial! As always, it turned out very original and beautiful))).
Don't forget to share our MKs on social networks! All the best!
Decoupage of bottles in different versions (photo)Decoupage of bottles in different versions (photo)
Nowadays, most needlewomen are fond of decoupage, namely, they decorate various objects with paper appliqué. And, to be more precise, decorations are made from special decoupage napkins, which are sold in a wide assortment on the shelves of specialized stores intended for needlework. The decoupage technique is done on many things made of wood, metal and plastic. But the most popular is decoupage on glass, or rather decoupage of bottles.
Every housewife always has empty glass containers, for example, cans for bulk products, intended to be thrown into the trash, depending on how long they have been used. Don't rush to do this yourself. You can try to remake a completely unnecessary thing into an interesting vase, which, in the future, will decorate your interior, for example, in a marine style. Especially when original ideas are much more valuable than factory decoupage on glass. 


Not only used alcohol bottles can be decorated, but also other glass objects that have lost their appearance. Decoupage of a vase will be very relevant.
Bottle for Women's Day
If you don’t know how to make glass decoupage on a champagne bottle for the 8th of March holiday, then the presented master class and instructions tell you how to decorate and create decoupage bottles with your own hands.
Prepare a bottle of champagne by removing all labels from it. Then, degrease it with alcohol or window cleaner. Now, you should paint the bottle with light acrylic paint in several layers, as shown in the photo. 

Select
, from which you can make an eight for the holiday of the eighth of March. Cut out the circles and make them in pairs. 

Take acrylic-based paints and mix them to create a subtle shade of salad green. Thus, we will make a non-traditional bottle background. Apply this paint using a washcloth to the entire surface of the product. The bottle will turn out to be a beautiful spring shade, as shown in the photo. 


Now we do the usual decoupage for beginners. Attach cut out circles from a napkin to the bottle and coat them with decoupage glue. After the glue has dried, we can consider that the master class is finished, but that’s not all. It is necessary to decorate the ornament with an acrylic outline or glitter, circling them around the picture, as shown in the photo. 


In the center of the bottle, make an inscription for the eighth of March, it will be quite useful. When the green glitter dries, it will shimmer beautifully. Cover all the work done with acrylic varnish, which will add incredible shine. Now, a festive bottle of champagne is ready to decorate the table on March 8th. In the video you can see how to decoupage a vase. 


Video: Decoupage glass vases
Decorate the bottle with eggshells
The decoupage technique of bottles decorated with eggshells can be safely given to your friends or loved ones. Because such work looks original and beautiful, acquiring a three-dimensional appearance. To work you need the following accessories:
- wine containers;
- alcohol;
- eggshell;
- napkin, decoupage glue and brush;
- priming.
Wash the bottle well under running warm water so that the labels can be easily removed with your own hands. Then, the entire surface is degreased with alcohol or washing liquid. 

For primer, acrylic paint is perfect. Apply it to the bottle using a kitchen sponge. Leave the product for a short amount of time to dry, as shown in the photo. 


To make the layer look more even, apply another layer of paint, as shown in the photo. Using a sponge will help get rid of streaks. This time, drying will take about 30 minutes. 

Meanwhile, you need to continue the master class with eggshells and start cutting out pictures from napkins in decoupage style. Place the pictures on a stationery file and blot them with water. Using careful movements, place it on the main part of the bottle. The following manipulations follow the same course as for beginners, using glue and brushes. The workpiece is left to dry for one day. 


Decoupage with eggshells begins with the production of the base material. Rinse the shell under water and dry. Coat the entire surface of the bottle with glue and use tweezers to lay out the shell like a mosaic. The eggshell ornament will be made on two sides, namely the top and bottom of the bottle. After a break of 20 minutes, apply background paint. This decoupage takes on a voluminous appearance. 


The last stage is to paint the resulting areas with eggshells in a darker shade and open them with varnish. Now, decoupage on glass is completely done by hand. You can watch the video on how to make reverse decoupage on glass in an interesting style. 


Video: Making reverse decoupage of a bottle
Wedding champagne bottle
Wedding attributes are always given special attention. This even applies to wedding glasses and champagne. You can create decoupage of a bottle of champagne for a wedding yourself. The example presented in the master class with step-by-step photos is perfect for beginners, using a postcard or picture. Prepare the following materials:
- champagne;
- pictures or postcards;
- acrylic based varnish;
- acrylic paint;
- washcloth.
Remove all labels from the glass bottle by soaking it in water. Then, degrease the surface with alcohol. Paint the product with primer. The master class involves the use of postcards. Cover it with acrylic varnish and dry. Now, remove the top tier of paper and cut out a suitable motif. 


The bottle is smeared with glue, and the selected pictures are applied on top. Use gentle movements to smooth out the pattern to avoid any bubbles or creases.
It is necessary to dilute the paint that, in your opinion, matches the color of the bottle. Use a brush to draw a darker outline. Dip a foam pad into a light tone of paint and create a haze, smoothing the edges of the image. 


Now all that remains is to paint the veins in silver using an old brush and draw in the details. The final touch is to varnish the entire surface of the champagne. Decoupage of a bottle of champagne for a wedding, successfully done. This craft will perfectly decorate wedding tables. Watch the video for a master class on how to decoupage bottles with fabric. 

Video: Bottle decor with fabric
Bottle decoration with tights
In order to implement such an interesting and voluminous master class, and create glass decoupage with tights, you will need the following list of materials: a bottle, craquelure, alcohol, tights, PVA glue, acrylic varnish and napkins, as well as
, a washcloth and acrylic-based paint.
Take the bottle and degrease it using alcohol. Take nylon tights and dip them completely into the glue solution. Then, stretch them over the item that is being decorated and form folds. The napkins are also soaked in glue; you need to make flowers out of them. Drying time is one or two days. 

After this, the product is coated with black acrylic paint. Let it dry for a while. Select the picture motif you like and apply it to the bottle, covering it with several layers of glue. Remember to take breaks between layers. 
Wait until it dries and boldly apply golden acrylic paint with a washcloth, painting over the black color. Next, the craquelure is applied with a synthetic brush, and after four hours, the second layer is applied. When another two hours pass, you will see how the craquelure turns into cracks. Using bitumen patina, we create the effect of aging of the craft by rubbing over the cracks. The final touch that appears after using craquelure is the application of acrylic varnish to consolidate the creative work. 

Decoupage from toilet paper
Decoupage on glass with toilet paper begins with preparing the fittings:
- bottle or jar for bulk products;
- toilet paper;
- acrylic based paints;
- napkins;
- glossy varnish;
- scissors;
- brush, PVA glue and washcloth.
Prepare a bottle, or if you want, you can use several cans, after wiping it with alcohol. Cut out suitable miniatures from a napkin. Small squares are cut out of toilet paper. To apply glue to paper, you will need a thin brush. Now, apply the cut-outs evenly to the bottle as shown in the photo. We leave it to dry. 


Toilet paper is very thin, so we paint it with white acrylic paint. Large pictures are glued in the central part of the bottle, and small ones on the cap. 

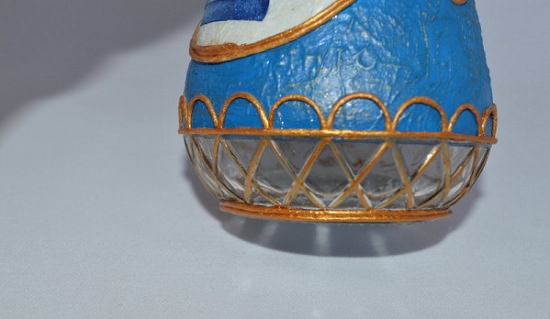
After everything is thoroughly dry, cover the entire light part of the bottle with blue acrylic paint. The next stage is painting it golden, applying it to a washcloth. 

Twist thin ropes from a napkin and paint them gold. When they are dry, you need to make an ornament out of them and glue them to the bottle. After this, the entire surface is varnished. Decoupage of a glass bottle, safely made with your own hands, using toilet paper. 

Craquelure in bottle decoupage
The next master class for beginners will teach you how to use craquelure when working on crafts. We wash all the tags from the bottle and degrease it with alcohol or nail polish remover. We prime the container with white. 


Now, we will need toilet paper, which we will use to decorate the bottle. Soak the paper in glue and apply it to the bottle, making small folds. This procedure must be done very quickly. After this, the craft will take on a three-dimensional appearance. Tear out a suitable motif from the decoupage card and glue it with PVA glue. The photo shows the result. Leave the bottle to dry for about 6 hours. 


Take acrylic paint of the same color as shown in the photo. Apply it to the surface, not all over, but in parts to make the craquelure more effective. Apply the craquelure and wait for about two hours. Then, cover the product with light acrylic paint. Paint the areas where the toilet paper is also white. 


After drying, the bottle is coated with finishing varnish, as shown in the photo. This is where the extensive master class ends. If you want to learn how to do reverse decoupage on glass or decoupage bottles with napkins, we suggest watching a video that shows how to work on a bottle in a nautical style. 

As you can see, the instructions and master class on decoupage of bottles and cans for bulk products are simple and interesting. It will be clear, even for beginners. A variety of master classes and even voluminous ones will give your imagination flight.
6303 0 0
Bottle decor - 5 best ideas for creating a small work of art
If after some festive event you still have a beautiful glass bottle, don’t rush to throw it away, believe me, it will still come in handy. For example, it can make an excellent vase or just an original accessory that decorates a room. I will tell you below how to create a unique bottle decor with your own hands without any special financial costs.
How to create an original and unusual bottle?
It seems to me that decorating is good for absolutely everyone. This is both a way to create a stylish item without spending money on expensive materials (you can decorate it with whatever you can get your hands on), and an opportunity to feel like a real artist, using all your imagination to decorate glass. In addition, this is an excellent calming and peaceful pastime.

I have selected several of the simplest options for decorating bottles, which even those who have never done hand-made can easily handle. About them below.
Idea 1. Salt
When I said that you can decorate a bottle with your own hands using almost anything you can find in your apartment, I wasn’t joking. Did you know that regular kitchen salt is a great decorating tool? I’ll tell you how best to use it now.
There are two options for decorating glass products using salt. I'll share both of them with you.
Method 1

For this option you will need:
- salt;
- the bottle itself;
- heat-resistant dishes;
- fork and sieve;
- kitchen funnel;
- acrylic paint.
Mix salt with your favorite paint and knead the resulting mixture thoroughly with a fork. In a heat-resistant container, place the mixture in an oven preheated to 100 degrees for about an hour.

After the allotted time has passed, remove the bowl, mash the salt again with a fork and sift it through a sieve. Thus, you will end up with small crystals of colored sand. Make several different types of mixtures, changing the color of the paint.
To make your craft look even more original, do not hesitate to combine and mix shades with each other, thereby creating an extraordinary color scheme.
Using a funnel, begin adding salt one at a time, alternating layers of shades. Having filled the vessel to the top, simply seal it with a decorative stopper and place it in a visible place.
Method 2

Another simple way to decorate a bottle with salt involves using regular rubber bands and white paint. The only condition is that their width must be more than 5 mm.
Wind several rubber bands around the bottle in a random order and cover the glass with a layer of paint. After it dries, treat the surface with glue. Sprinkle a sufficient amount of salt on a sheet of plain paper and roll the accessory in it.

Make sure that the salt evenly covers the product, then remove the rubber bands. As a result, you will get a fabulous decorative bottle covered with a literal layer of snow. This decor option will be a wonderful decoration for the New Year holidays or for someone who misses winter.
You can do without using rubber bands - then the improvised “snow” will cover the glass in an even layer.
Idea 2. Decoupage
This decoration method is a little more complicated than the previous one, but the effect is truly amazing.
So, in addition to a beautifully shaped bottle, you will need:

- acrylic paint white and a couple of other shades;
- brushes of different shapes and sizes;
- PVA glue;
- napkin for decoupage with your favorite pattern;
- acetone;
- cotton wool;
- eggshell;
- coating varnish.
The sequence of actions is extremely simple:

- Remove labels from the bottle, rinse it and degrease the surface with acetone.
- Using a small piece of sponge coated with white paint, paint the entire bottle except the bottom using dotted movements. It should be treated after the rest of the surface has dried.
- After the first layer has hardened, repeat the procedure.
- Separate the top layer of the napkin with the selected pattern from the other two. Place it on the surface of the bottle and coat it with PVA glue. You must act very carefully, as the napkin tears easily.
It is best to coat the material with a fan brush from the center towards the edges.

- After this, you need to give the product the desired color. Most often, bottles in the interior have delicate pastel colors, but you can choose any shade you like. Just make sure that it is in harmony with the pattern and does not overlap it.
- To add texture and volume to the bottle, I recommend using eggshells. It must be thoroughly washed and cleared of the thin film, then crushed into many pieces of different shapes and sizes.
- Alternately lubricating a section of the surface with glue and pressing pieces of shell onto it, treat the entire bottle. Next, you should paint it to match the color of the product.
- After decorating with eggshells, you need to use a thin brush and a different shade of paint to paint over the cracks that have formed.
- Finally, varnish the product and enjoy the result.
Decorating a bottle using the decoupage technique takes more time than other methods, however, in the end you will get a unique and stylish vase or decorative element. By the way, you can decorate the neck with beautiful satin ribbons or lacing.
Idea 3. Plaster

You can create texture and add relief using, what would you think? Plaster!
Yes, modern craftswomen even manage to create miracles with plaster.
And let me tell you, the result is worthwhile:
- Mix plaster with water and a tablespoon of PVA glue to a creamy consistency.
- Next, you will need a small piece of fabric: gauze, chintz or cotton.
- Dip the fabric into a plaster solution and apply it to the bottle, giving it a relief texture.
- Paint the surface with white acrylic paint.
- Next, we proceed in the same way as I described in the previous section about the decoupage technique. We apply the selected design and treat it with glue.
- We paint the bottle in the desired color and wait for it to dry. Afterwards we treat the edges of the formed folds with mother-of-pearl and apply a layer of varnish.
Idea 4. Threads

A bottle decorated with threads will add home warmth and comfort to your interior.
It's incredibly easy to make; you just need thread of any size and color, as well as double-sided tape.
- Cover the bottle from the neck to the bottom with double-sided tape.
- Start wrapping the product with thread. Make sure that each new row fits tightly to the previous one and does not create gaps.
- Feel free to combine thread colors. The brighter the shades, the more original the final result will be.
I would also like to note that instead of tape, you can use regular PVA glue. Then each thread should be thoroughly moistened in glue and only then applied to the glass surface.
In a similar way, you can create decor with twine. Finally, it would be appropriate to decorate the product with cute buttons or beads, gluing them to the material with special glue.

Idea 5. Cereals and pasta
Agree, using pasta as a decorative element is quite an interesting and unusual idea.
To create such a non-trivial decoration, you will also need some peas, cereals, a hot glue gun and acetone.
- Degrease the bottle with acetone and lubricate it with glue.
- Glue peas to the bottom of the bottle, and use several types of cereals a little higher for decoration. By combining them, create a pattern on the surface.
- Divide the bow-shaped pasta into 4 parts. Using a heat gun, connect them into a small flower; instead of the core, use a small pea. Glue the resulting flowers to the bottle in random order.
- As a finishing touch, paint the entire pattern with gold paint.
Believe me, in the end, no one you know will even guess what your stylish bottle is made of.
Results
In fact, I have listed only the most popular and simple options for decorating glass products. You can give a second life to a bottle of wine or champagne using applique, nylon tights, mesh, beads or even toilet paper - whatever is at hand.
Decorating glass products is a great way to make the most of your imagination and show off all your talents and abilities.