Do-it-yourself voluminous paper leaves. Maple leaf made of paper folded like an accordion
Hello dear readers. Lately I've been so into scrapbooking and creating postcards. Probably, for me, this is an activity from which I get great pleasure. I’m very glad to share the creation of flowers, leaves, and cards on the blog. I'm a student, so my stories and master classes are more likely to be for beginners than for professionals. But everything starts with the first step, even the longest journey. Gradually you improve and you get beautiful work. When you become imbued with something, it becomes a part of you. I think creative people will understand me.
I am very happy when beauty is born in the form of a beautiful postcard. This is a new activity for me, but very interesting. There is already a large stack of postcards. My daughter suggests making an exhibition.))) This is an activity “for the soul”; when I make postcards, I relax. Interesting activity.)))
Every time you collect knowledge bit by bit you create beautiful things. Today I have simple paper leaves for a rose. I made a master class for you. I'll tell you how I make rose leaves.
Paper leaves for roses. Master Class. Scrapbooking
To create the leaves I will need green paper. My recent purchases were not limited to just dark green paper.
I buy paper at a craft store. My paper is double-sided, thick.
I will also need a simple pencil and scissors.
You can use a template or cutting to create leaves. I will draw the leaves by hand. I haven’t purchased any cuttings for myself yet.
On a piece of green paper I draw a rose leaf with a simple pencil. I cut out the leaf with scissors. I save a lot of paper))
Recently, prices for materials have been constantly rising. I don't know about you. Tell me where I can profitably buy materials for scrapbooking, if you know.
I take different photos to make it clear how I fold the leaf. First you need to roll and then unfold the leaf. This is how you get such a “miracle leaf”. Very plausible, in my opinion.
I was taught how to make such leaves at a master class that our daughter attended in the summer. I asked the teacher a question and received step-by-step instructions. For which she was very grateful. This is how I make leaves now.
The result is leaves very similar to rose leaves, with veins. To create the leaves, I use green paper of different shades. The results are gorgeous leaves.
If you make leaves for roses differently, then share how you do it below in the comments.
I make different roses, I shared this option on the blog so far. As it turns out, it’s not at all difficult to do, as I previously thought. It’s with flowers that I glue leaves on cards. Looks great!
Making autumn leaves from paper.
The master class is designed for children of senior preschool age, students, teachers and parents.
Purpose: interior decoration, gift making.
Unnoticed, the beautiful autumn approached stealthily. I love the way the leaves fall from the trees - like golden showers.
Signs of autumn:
There are a lot of rowan trees in the forest - autumn will be rainy, few - dry.
If the cranes fly high and sing, it will be a good autumn.
Thunder in September foreshadows a warm autumn.
Until the leaves fall from the cherries, no matter how much snow falls, the thaw will drive it away.
Clouds are rare - it will be clear and cold.
If there are a lot of nuts but no mushrooms, the winter will be snowy and harsh.
If birch trees turn yellow from the top in autumn, next spring will be early, and if from below, then late.
Birds from the yard and honey mushrooms at the stump - autumn time has come.
In autumn, a goose flies towards rain, and a swan flies towards snow.
Proverbs and sayings about autumn
Autumn is stocky, winter is stocked up.
Autumn will give orders, and spring will say its own.
Autumn is the queen: jelly and pancakes; and spring is a stepmother: sit and watch.
He grumbles like a skinny fly in autumn.
In autumn the sparrow has beer too.
In autumn, the crow also has a head of hair, not only the black grouse.
In autumn, the crow has a shock of bread.
Spring says: I’ll tuck it, and autumn says: as I want.
The leaves are falling and spinning
And they lie down at my feet.
I'll extend my palm
And I’ll take one leaf.
And then another and a third...
They are good, believe me!
Hello from autumn
I'll put it in a big bouquet!
To work you need: colored office paper, scissors, PVA glue, pastel, hot glue, sheet of A3 paper, stapler, sponge, watercolor paints, 3 mm quilling strips, quilling tool, vases.
Step-by-step process for completing the work:
1. Fold a sheet of A4 paper in half. Trace the maple leaf template along the fold line. It turns out two blanks from one sheet
2. Cut. Use a sponge and watercolor paints to tint the sheet. If the paint is liquid, nothing will work. You need to take a thick one.
Spraying (point droplets-splashes) is used to age the product. Usually it is combined with scuffs, it looks more interesting. Some people use a regular bristle brush for spraying - they run their finger along the top of the bristles in a “toward” motion and make splashes. In this case, the splashes turn out to be rather uneven, in large spots, and do not lie evenly. Or you can even stain the product or drip paint onto it. This requires skill.
3. When the workpiece is dry, fold it into an accordion shape measuring 1.5 cm.
Important: Start the fold from the widest part.
4. Secure in the center with a stapler. Coat the longest edges of the leaf with glue and glue it together.
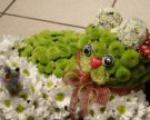
5. Cut strips of large fringe 1.5 cm wide from office paper. Using a quilling tool, twist a yellow strip into a tight roll. Without removing the roll and tool, we begin to glue the fringe, periodically coating the strip with glue. Fluff the flower.
6. Tint a sheet of paper with pastels. Glue the photo of the vase onto PVA. Start assembling with hot glue.
First we attach the chrysanthemums, and then the leaves.
7. In the end it turned out like this, but it seemed to me that something was missing. I added bunches of real rowan berries.
Thank you for your attention. I will be glad if MK is useful to someone.
How to make autumn leaves from paper with your own hands (3 methods + templates).
Autumn is probably the most colorful season of the year, thanks to the fact that the leaves of trees and shrubs are painted in bright colors. For many people, autumn leaves are often a source of creative inspiration.
Autumn leaves are a beautiful, but not very durable material, so you can make them from paper with your own hands.
How to make autumn leaves with your own hands
One way to make autumn leaves is to cut them out of colored paper, preferably double-sided. The edges of small leaves can be cut with curly scissors.
Leaves brought home from a walk are suitable as a template. But if you need to do a craft urgently, and there is no way to collect them, then here are leaf templates especially for blog readers "MORE creative ideas for children" :)
All leaves, except the oak one, are symmetrical, so they are applied with a dotted line to the fold line of a sheet of colored paper folded in half. After cutting, straighten the leaf and cut off the excess part of the branch.
The maple leaf template is in the article.
Another way to make autumn leaves with your own hands is to put the leaves you brought from a walk with the convex side of the veins up (the color of the leaves is not important, and Rita and I chose small leaves based on size), cover them with a sheet of regular office paper, and shade them with pastel crayons or very soft pencils suitable colors(we used watercolor pencils).
The contours of the leaf and veins themselves will appear in the drawing.
Leaves of different colors can be made from the same sample.
You can draw single-color leaves, or you can use several colors for one leaf.
In order for the leaves to turn out more openwork (so that only the veins of the leaves are printed), you need to apply almost no pressure on the pencil, and hold the pastel chalk flat.
Cut out the finished leaves.
And another way to make bright colorful leaves with your own hands is to print with leaves.
Cover the actual sheet with paint using a brush (you can use several shades of the same color or even several different colors).
Place the painted side on a sheet of paper. Press tightly with your hands, trying not to move it.
Carefully remove the painted sheet from the paper by the stem.
If you make another print with the same sheet without covering it with more paint, you will get a more openwork sheet.
Rita and I did it in the same way. We also painted the squirrels and bunnies for this landscape using leaf prints.
Read the article about what can be made from such leaves.
Happy creativity! Especially for blog readers "MORE creative ideas for children"(https://site), with sincere respect, Yulia Sherstyuk
All the best! If the article was useful to you, please help the development of the site by sharing a link to it on social networks.
Posting site materials (images and text) on other resources without the written permission of the author is prohibited and punishable by law.
Describing autumn leaves, poets find many epithets and metaphors, and this is not surprising, because they amaze everyone with their variety of shapes and colors. Yellow, red, crimson, green leaves can become a highlight in the decor, decoration for various products and even accessories. Of course, you can collect them during leaf fall, but, unfortunately, sooner or later they lose color and shape. We suggest making autumn leaves, and then they will delight the eye in their original form for a very long time, because they were made with their own hands.
Learn how to make autumn leaves with your own hands using the origami technique
Anyone, even a child, can make cute autumn leaves using origami.
For this you need fairly cheap material:
- multi-colored paper;
- glue;
- scissors.
A variety of colors are suitable - green, red, yellow, orange, it is best if it is painted on both sides. You can take white paper, then color the leaves with paints, pencils or felt-tip pens.
- Take a sheet of the chosen color and fold it in half.
- Draw a diagonal from one corner to another, cut along this line.
- We fold the resulting triangle like an accordion.
- Cut a strip from the remaining piece of paper and twist the flagellum to form a stem.
- Glue the stem to the leaf.
If you cut a “Christmas tree” in place of the diagonal, you will get a maple leaf.
Using the described method, you can make leaves from corrugated paper; from this material they turn out textured. You can also use a simpler method: cut out double leaves using templates and glue a cutting of floral wire inside.
These leaves can be used in flower arrangements, as well as to create autumn wreaths for heads and doors.
Making simple and bright leaves using the quilling technique
Let's consider another option for making autumn leaves from paper, only in this case the quilling technique will be used, which allows you to create three-dimensional products.
Required materials:
- paper strips for quilling in red, yellow, orange, brown colors;
- thick paper or cardboard for the base;
- toothpick;
- PVA glue.
We twist dense spirals from multi-colored circles, fix the tip with glue, use our fingers to shape “eyes”, and also make several “triangles”. We glue the elements together, as in the photo. You need to make five such blanks.
We assemble the resulting blanks into a maple leaf, glue the elements together, fill the middle with “triangles,” and add a stalk.
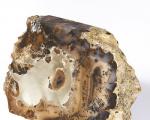
Let's consider creating autumn leaves from foamiran
Unusually beautiful and natural autumn leaves can be made from foamiran. We will prepare for them:
- sheets of foamiran of a suitable color (yellow, red, green, brown);
- scissors;
- mold with leaf texture;
- sponge;
- oil paints;
- floral wire;
- iron.
- Download from the Internet or draw templates of the required leaves on paper and cut them out.
- We trace the templates on foamiran and carefully cut out the leaves using them.
- Using a sponge we add shades to the leaves; you can do this by looking at a living leaf or in a photo.
- We heat up the iron, apply a piece of paper to it for a couple of seconds, then press the workpiece to the mold. Now the product has natural veins.
- Glue pieces of wire to the leaves in the place where the stalk should be.
- Heat the leaves again and crumple the edges.
The result is very realistic autumn leaves that can be used for topiary, accessories, door wreaths and other compositions.
With children you can make bright leaves from plasticine and cardboard. This option is also suitable for those who need to quickly make similar products from a minimum of materials.
For plasticine leaves you will need:
- cardboard;
- scissors;
- leaf patterns;
- multi-colored plasticine.
Using the template, cut out a leaf, pinch off a small piece of plasticine, knead it in your hands, then smear it over the workpiece with your finger. If you use several shades of plasticine, the leaf will turn out more interesting and realistic.
Knitting autumn leaves with knitting needles in a step-by-step lesson for beginners
Knitting lovers can knit an autumn leaf. This work is quite painstaking, but the end result is a real masterpiece!
The “leaf” knitting pattern allows you to create various accessories and use them for panels.
As you can see, any technique has its own ways of creating beautiful autumn leaves, so every needlewoman will find a method to her liking.
Video selection on the topic of the article
In conclusion, we offer you to watch a video with master classes on making autumn leaves using different techniques.
Galina Gavrilina
Master Class
"Maple leaves from crumpled paper"
Every season is beautiful in its own way... Autumn is a time of colorful colors. Inspired by the arrival of the autumn sorceress, the guys and I decided to decorate our group with this kind of collective work.
This bright autumn tree gave us its smile and good mood!
The basis for our tree was a paper tree from a purchased design kit. You can also make a tree yourself: draw a trunk and crown without leaves on a piece of whatman paper, then cut it out along the contour.
For work we will need:
A sheet of white writing paper;
Paints (gouache or watercolor);
Brush;
Jar of water;
Maple leaf template;
Felt pen;
Colour pencils;
Scissors.
Sequence of work:
1. Crumble a sheet of white paper into a ball with your hands.

2. Soak in cold water.
3. Gently squeeze it out and straighten it.
4. Cover the wet sheet with another clean white sheet and place it under a press (thick book) to smooth it out. After drying, the sheet should look like this.
5. Take paints and randomly color the resulting white sheet in the colors of autumn: yellow, orange, red, light brown, yellow-green, etc.
After drying, we place the sheet under the press again to straighten it.
The sheet on the left is painted with watercolors, and the sheet on the right is painted with gouache.
6. Apply a maple leaf template to a dried multi-colored leaf and trace it with a felt-tip pen or pencil (the template can be made by tracing a regular maple leaf).
7. Cut along the contour with scissors.
8. Thanks to the crumpled paper, the leaves already have veins. If desired, you can add large veins with colored pencils.
These are the leaves you should get. We attach the finished leaves to the branches of the tree.
Our autumn tree is ready. The leaves turned out just like real ones!
I wish you creative success!
Publications on the topic:
Dear colleagues! I want to show you our works that we create with our kids (3-4) years old in joint activities from.
Summary of GCD in the middle group Drawing using the poke method and the crumpled paper method Summary of GCD in the middle group Drawing using the poke method and the crumpled paper method “Animals of hot countries. Elephant" Topic: Animals of hot countries. Elephant.
Dear colleagues and caring parents! This master class will be especially valuable for preschool workers whose students do not yet know how to do this.
I bring to your attention a simple DIY craft. Module of autumn leaves. Required material for making the module: -Double-sided.
Vytynanki is a very ancient type of applied art of the Slavs. It was used to decorate homes both in everyday life and for holidays.
A wonderful time of year has come and I decided to decorate my group with autumn leaves. Just draw and cut out colored leaves? No.