Tree applique made from natural material. Applications made from natural materials: a bright butterfly and a wise owl
Autumn time opens up many new activities for children. On the territory of kindergartens and schools, fairs and exhibitions are held on the theme of harvesting and everything that is closely related to autumn activities. This is the time of the brightest colors, changeable weather and eternal thoughtfulness. When else to create, if not in the fall?
Create wonderful crafts - It's exciting, but not at all an easy activity. First, we need material from which masterpieces will subsequently be created.
Collection of material
Of course, to complete this task we must at least go out into the yard. The first thing that comes to mind when we talk about autumn crafts is chestnuts and acorns. But, believe me, in order to create something unique, you need to walk a little longer in autumn parks and rainy streets. You need to feel the mood of nature at this time of year...
No, without a doubt , other seasons also have their magic of colors and shapes. For example, we will never see poplar fluff, except in summer. In winter we collect seeds, and they, by the way, also have different colors and shapes. Spring is the time for different plants and flowers. Nature at every time of the year gives us the opportunity not only to enjoy its beauty, but also to receive a lot of inspiration for creating future masterpieces. And now, when the material is collected, dried and ready for use, it’s time to look for an idea.
Gallery: applique made from natural material (25 photos)


Types of applications
There are many techniques thanks to which we can create a unique applique from natural material. Among the types of applications the simplest is the invoice. It does not require cutting out parts from natural material, so you can safely take your child and create appliqué masterpieces together. One of the simplest examples is the butterfly applique. This craft is perfect for kindergarten, and most importantly, children will not remain indifferent to it.
To create a butterfly using the applique method, we will need:
- cardboard base;
- glue;
- brush;
- pencil or felt-tip pen;
- leaves of maple or ash trees, dried flowers;
- Ash lionfish.
 The process of creating a butterfly is very simple: First, we need to draw the outlines of the future insect with a pencil on our cardboard base. Then we divide the general outline into zones: the abdomen and wings. We begin to apply glue to the body of our butterfly with a brush. The abdomen can be an oblong willow leaf, for example. To form the wings, we need symmetrical leaves of linden or maple, for example. Dried flowers will help us decorate the leaves.
That's all. So simply and quickly we got a unique and beautiful butterfly craft. In order to further embellish our picture, we can add clouds and grass using grains of rice or millet painted in the desired colors.
The next type of applique is silhouette. To create crafts using this technique, we will need scissors. And to introduce your child to the inhabitants of the underwater world, we can create an applique of shells and pebbles on a sea theme.
In addition to scissors and shells, we will need:
- corrugated cardboard in blue and brown colors;
- pebbles;
- feathers;
- maple leaves;
- dry grass;
- yellow salt;
- plasticine;
- pencil;
- brush and glue;
- frame (optional).
 Creating the background of the picture, adjusting it to the size of the frame. We will use blue cardboard as water; the additional relief will add a 3D effect and greater realism. And instead of the bottom there will be the same brown cardboard. Our algae will be dried grass. It is important to say that symmetry is not important here - give free rein to your imagination! The underwater world is almost ready, just a few details left to add.
We can make absolutely any sea creature from pebbles and shells - again, everything is in your hands. We recommend making crab. To do this, we need to select shells of the required sizes and, starting with the body and front legs, glue them onto a cardboard base. Feather-shaped fish will swim around the crab in our picture. We will make their eyes and fins from plasticine.
Decorating the bottom small shells, the remains of dry grass and casually sprinkle the “bottom” with yellow salt - it will give the picture bright colors.
It is important to say that such activities develop not only imagination in kindergarten children. Children learn to think, speak coherently, and describe objects they see every day. They can now compare the objects they created with real ones, learn to notice details, and understand symmetry. It is important that with such activities the child develops fine motor skills.
 Babies develop a sense of beauty, aesthetics, rhythm, as well as a sense of style, because when complementing and decorating future masterpieces, the child relies entirely on his own taste. An adult can only help in processing and collecting materials, suggest an idea or theme for a future masterpiece: everything else is the work of a young master who, clumsily, but with burning eyes, will shred dry leaves and tear dried grass, and all for the sake of just one craft. But what a surprise his teacher and friends in kindergarten will be at the sight of this masterpiece.
There are many innovations in the modern world: tablets, phones, TVs. Many people forget how much interesting things there are around. Nature is diverse and provides an innumerable amount of materials for children's creativity. Working with natural materials calms, develops perseverance, reveals the “hidden” capabilities of nature, develops the child’s fine motor skills, thinking and imagination. There are the following main types of work: applique from cereals, leaves, flowers, seeds, sunflower seeds, grains and berries, applique with shells, quilling. You can combine these techniques and supplement them with others, for example, plasticine appliqué. Another name for appliqués made from natural materials, compositions, and the creation of paintings from improvised means is ecoplastics. Recently, this type of creativity has gained popularity among adults.
"Butterfly" from cereals
For a kindergarten, the applique can be the most common, from a couple of types of cereals, for example. Let's look at a step-by-step example of the “Butterfly” application.
Required materials: cardboard with a butterfly pattern (you can use a stencil), PVA glue with a brush, buckwheat and millet.
Let's get started:
1. Apply glue liberally to the body of the butterfly and cover it with buckwheat, as shown in the photo.

2. We do the same with the antennae.


3. Now it’s the turn of the wings. We do them one by one. First, generously coat the first wing with glue and cover it with millet.

4. We do the same with the second wing. Let the cereal dry a little and shake off the excess. The butterfly is ready!

Bunch of grapes
Another good example of DIY creativity will be the “Grapes” applique for schoolchildren.
Necessary materials: pistachio shells, a sheet of white cardboard, white paper, glue, paints, green nail polish (can be replaced with paint), scissors, pencil, dry grape sprig with tendrils.

Let's get started:
1. Fold the white paper several times. We draw grape leaves on it randomly or using a stencil. Cut out and color. The veins can be painted on with nail polish.


2. Apply varnish to the grape sprig and antennae.

3. Glue the branch and antennae onto a cardboard blank for applique, as shown in the photo.

4. Now we begin to form a bunch of grapes. We take pistachio shells and glue them with the “belly” side up.

5. Lubricate the shells with glue. Place another layer or two on top.

6. Paint the shells with green nail polish. If necessary, then in several layers.

7. Glue the leaves prepared earlier. With your own hands you can create a real masterpiece that will decorate your interior. The picture is ready.

"Owl" made from cereals, seeds and grains
Using combined techniques and a variety of materials, you can create a real masterpiece. Let's present the “Owl” master class.
Materials you will need: PVA glue with a brush, a sheet of cardboard, gouache paints and a brush, a pencil. From cereals we will take different seeds, rice, peas, seeds, buckwheat. To secure the painting, colorless furniture varnish or silicate glue is useful.
Let's start working on the painting:
1. On a sheet of white cardboard, using a stencil or randomly draw an owl.

2. Using gouache, paint the sky. Glue on the owl's nose, eyebrows and eyes. The eyes and nose are bones, and the eyebrows are made from seeds.

3. Apply glue around the eyes and on the bottom of the head. Cover these areas with rice. Next, carefully lubricate the body and cover it with buckwheat.

4. We also generously lubricate the head with glue and cover it with buckwheat.

5. Let's start with the wings. You should start from the bottom of the wing. Lay out the seeds and cereals in layers. The white seeds will be the first. They are most similar to feathers - they have sharp ends and are large in size.

6. The next layers for the wings will be green coffee, black seeds, pasta and peas.

7. Cover the moon with peas and paint with yellow gouache. For decoration, we suggest using small star pasta. We also paint them yellow. Draw the eyes.

8. Place the painting under a press until it dries completely. For example, under a stack of books. After drying, open with varnish or glue and insert into the frame. Karina is ready.

A bright applique made from natural materials will be an applique made from pre-dyed rice. Such variety will greatly interest the child.
Dyed rice maki
Materials: white rice, as well as green, red and pink rice; millet, dyed green; yellow pearl barley: green barley; template with a picture of a poppy; glue; pencil or felt-tip pen.

A little about painting cereals. Cereals are painted with acrylic or watercolor paints. You can use food coloring. After painting, the grain should be spread out and completely dried.

Let's get started with the application.
1. Take a pre-prepared template with images of poppies. We work with each flower of the bouquet one by one. Apply glue to the petals of the first flower.

2. Lay out the outline of the petal with brown pearl barley. Fill the middle of the petal with red rice.
Applique lesson with children
Applications made from natural materials
The purpose of classes with natural materials:
■ Introduce the child to nature, show its diversity and beauty.
■ Stimulate creativity, thinking, hard work.
■ Develop artistic taste and imagination.
How to prepare material for such applications?
Method one: drying plants in books and magazines that are placed under a press. If the preparation is made for a herbarium, the plants need to be strengthened a little. To do this, dip them in a solution of water and 20% PVA glue, after which dry the plants again, but without a press.
Method two: drying plants in bunches. This method is used to dry plants with fruits or flowers. Plants are formed into small bunches and hung in a dry place. They should not be exposed to sunlight.
Method three (fast): Plants are ironed with a hot iron. To do this, first cover the ironing board with newspaper, then a napkin, then lay out the plant and in the reverse order - napkin and newspaper. Then carefully set everything aside for several hours. The ironing procedure is repeated 3-4 times until the plant is completely dry.
Lesson 1. “Herbarium”
Do not use plants that you do not know to compile a herbarium; they can be poisonous.
Purpose of the lesson: visual study of nature. (From the same tree, for example, you can collect samples in spring, summer and autumn, and observe how it changes.)
You will need: thick album sheets, thread and needle, PVA glue, colored markers, prepared dried plant.
Stages of work:
■ Attach the plants to a landscape sheet; branches can be attached by sewing, leaves can be glued. If you have collected samples of different stages of a plant (flowering, appearance of buds, change in leaf color), attach them to one landscape sheet for clarity.
■ In the lower right corner, write the name of the plant, the family to which it belongs, the location (meadow, forest, front garden, etc.) and time of collection. Your herbarium is ready!
You can make a picture like this from the herbarium

Lesson 2. “Mushroom glade”
You will need: a sheet of cardboard, PVA glue, a glue brush, a glue container and leaves.
Stages of work:
■ Show your child how to make a mushroom out of leaves. Tell them that mushrooms grow in groups, so you need to make several mushrooms.
■ Let the child decide where the mushroom will be placed. This is where you need to apply glue. You should not apply glue to the leaf itself; it may crumble.
■ First glue the leaf for the mushroom stem, then the cap.
You can make as many of these mushrooms as you like and in different sizes.
You should not trim the leaves to give them the ideal shape, as this will cause them to lose their originality and break.
Lesson 3. “Tree”
A tree can be made in different ways:
■ Glue several leaves in the form of a fan, and one leaf on top in the middle.
■ Draw the trunk and branches of the tree, and take the real leaves, only very small ones.
■ Use paints to draw the trunk and main branches, and take large leaves of different colors and shapes.

Lesson 4. “Butterfly”
You will need: a landscape sheet, a pencil, PVA glue, a glue brush, a container for glue, dry leaves and flowers.
Stages of work:
■ Help your child draw the outline of a butterfly.
■ Apply PVA glue to it.
■ Let the child choose the leaves and flowers from which his craft will be made.
■ Let the craft dry. Ready!
.jpg)
The time of year is autumn. Development of creative abilities of primary school children
Dailidenok Lyubov Evgenievna, novice teacher, Kostroma.
Description:
The material is intended for primary school students, teachers and parents.
Target:
Expanding your horizons. Development of creative abilities. Making a painting from unusual materials.
Tasks:
1) Summarize knowledge.
2) To develop the ability to make a picture from unusual materials.
3) Cultivate accuracy, perseverance, and attentiveness.

Autumn
I love you, autumn, for your unprecedented beauty,
For elegant leaves and belated warmth,
For the harvest harvest, the flying web,
For mushrooms and for rain, for real sadness,
For the azure blue, for the gray mists
And behind the smoothly running caravans of clouds.
I love you, autumn, and, like Pushkin, I dream -
I glorify the beauty of my region in poetry.
(author A. Lysikov)
Autumn is perhaps the most mysterious and charming time with special colors of the season.
Autumn is a time for artists and photographers who lose their peace every fall, capturing the beauty of autumn in parks, squares and forests, trying to steal a piece of its beauty from autumn.

Proverbs and sayings about autumn:
Father September does not like to pamper.
October is crying cold tears.
In November, winter and autumn are fought.
In autumn bad weather there are seven weathers in the yard: it sows, it blows, it twists, it stirs, it tears, it pours from above and sweeps from below.
Riddles (with answers):
There is no sun, there are clouds in the sky,
The wind is harmful and prickly,
It's blowing like this, there's no escape!
What's happened? Give an answer!
(Late fall)
The leaves are spinning in the air,
They lie down quietly on the grass.
The garden sheds its leaves -
It's simple…
(leaf fall)
Red Egorka
Fell on the lake
I didn't drown myself
And he didn’t stir up the water.
(Autumn leaf)
Who beats on the roof all night
Yes he knocks
And mumbles, and sings, lulls you to sleep?
(rain)
It became gloomy outside the window,
The rain is asking to come to our house.
The house is dry, but outside
Appeared everywhere... (puddles)
The clouds are catching up,
Howls and blows.
Prowls the world
Sings and whistles.
(Wind)
The boy is almost seven years old.
I have a backpack behind me.
And in the hands of a large bouquet,
There is a blush on the cheeks.
What holiday date is this?
Answer me guys!
(1 September is the day of knowledge)
The days have become shorter
The nights have become longer
Who's to say, who knows
When does this happen?
(Autumn)

The main autumn natural phenomena are rain, falling leaves, strong cold winds, first frosts, first snow.
Now let's move on to the creative part.
Material used:Cardboard, scissors, glue, plasticine, natural materials, beans, peas, seeds, buckwheat, rice.

Using scissors, cut a circle out of white cardboard. (The size depends on how big you want your painting to be).

Next, take a piece of plasticine (any color to suit your taste) and make a cake.

We attach this cake to the cardboard. Take brown beans and insert them into plasticine in the form of petals.

Add buckwheat to the middle of our flower, pressing it into the plasticine with your finger.

Then again we take a piece of plasticine (a different color is possible), mold it into a cake and attach it to the cardboard.

Now for the flower we will take the seeds and insert them into the plasticine in the form of petals in two rows.

We will add peas (in halves) to the middle of our flower.

Again, take a piece of plasticine, make a cake out of it, and attach it to the cardboard.

Using white beans (first row) and seeds (second row) we will make flower petals.

Add rice to the center of the flower, pressing it with your finger into the plasticine.

Next, we decorate our picture with natural material (spikelets). We insert the spikelets into plasticine.

Now, using glue, we decorate the picture with dry leaves.

We make “sausages” from plasticine and attach them along the edge of our picture.

We decorate our picture with seeds and peas (large size). (I also added another dry sheet at the bottom so that there was no empty space)

The picture is ready!
Many of us like to bring home pieces of nature after traveling or simple walks. These could be pebbles and shells from the sea coast, pine cones and leaves from a noisy forest, or beautiful flowers from the fields. All these gifts of nature can be used in making crafts. For those who want to become better acquainted with the techniques of making appliqué from natural materials, this article offers some useful tips and ideas with photo and video selections.
Learn how to make your own appliqués from natural materials
Nature's gifts can be collected all year round, however, the richest time for this is autumn. The main thing is to guess the moment when the foliage acquires a beautiful color, and collect it to your heart’s content.
Winter is the time to collect seeds. Maple and ash winglets are often used in appliques. In the spring, various plants are collected and dried; in the summer, poplar fluff and all kinds of flowers are collected. Various pebbles, shells and shells are brought from the seas.
We are preparing the material for work.The collected leaves should be sorted by type and dried. This can be done by placing them between the pages of old thick books or magazines. Or put a sheet of paper folded in half and place a weight on top. There is an option to smooth the leaves with a hot iron.
All kinds of plant seeds and eggshells are washed and dried, then sorted into different boxes. Stones and shells are also washed and dried; they can be coated with varnish or paint. Poplar fluff is cleared of debris.
The cones can be left in the form in which they were collected, or the scales can be cut off, which will then need to be dried.
Types of applications.The easiest way is the overlay appliqué technique. It does not require cutting out parts from natural materials; a picture is created by superimposing leaves and flowers on top of each other. Silhouette applique, on the contrary, involves cutting out the necessary parts from materials.
Modular technique or mosaic involves gluing together many identical materials. For example, this technique is used to create fish scales or bird tails.
Butterfly applique.A very simple job that is perfect for kindergarten.
You will need:
1) Cardboard or paper base;
2) Glue and brush;
3) Tree foliage, flower petals, maple wings;
4) Pencil.
Manufacturing process:
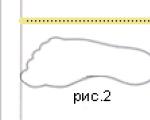
1) Draw the outline of a butterfly on the base with a pencil.
2) Apply glue to parts of the drawing one by one. Let's start with the abdomen.
3) Then we form the wings by gluing large leaves symmetrically to the abdomen. We decorate them with flower petals.
4) Form the butterfly's head. It can also be made from a petal, or you can use a dried berry, for example, rowan.
5) At the end we make antennae from maple lionfish. The butterfly is ready!

Poplar fluff is a very convenient material for children's creativity. Soft and pleasant to the touch, it will instantly win your child's heart. Because of its texture, down is most often used to depict animal fur. Below is a MK with the general basics of creating an applique from poplar fluff without using glue.
You will need:
1) A sheet of velvet paper;
2) Poplar fluff;
3) Chalk (a piece of dry soap);
4) Toothpick.
Manufacturing stages:
1) On a sheet of velvet paper, draw the outline of the future picture using chalk or a piece of dry soap.
2) Then apply a thin layer of fluff to the design, pressing and smoothing it with your fingers. Add a few more layers on top to create a three-dimensional image.
3) We correct the work by combing the fluffs and removing unnecessary details from the outline using a toothpick.
4) To create small details, be it the antennae of an animal or a nose, you should roll the fluff into a ball.

Now let’s try to create an original painting with our own hands, using shells and other natural materials.
For this you will need:
1) Corrugated cardboard in blue and brown colors;
2) Shells of different sizes, pebbles;
3) Feathers;
4) Dry grass;
5) Yellow salt;
6) Plasticine;
7) Pencil;
8) Glue and brush;
9) Scissors;
Stages of work:
1) We make the background of the picture, adjusting it to the size of the frame. Most of the background will be occupied by water (blue paper), the bottom will be at the bottom (brown paper). We fix it.
2) We depict algae; to do this, we glue dry blades of grass in selected places in the picture.
3) Lay out the crab, choosing shells of appropriate shapes and sizes. Carefully glue all the parts, starting with the body and front legs.

4) We make fish from feathers and shells and let them “swim” in the sea. We make the eyes from lumps of plasticine.
5) Add some more dry blades of grass to represent algae.
6) Decorate the bottom with shells, glue yellow salt for brightness. It is made by staining with regular salt gouache.
And a few more photos of possible works made from natural materials.

Video on the topic of the article