Modular origami flowers assembly diagram step by step instructions. How to make a paper flower
Covers a wide variety of topics. Paper can be used to make flowers, animals, cars, buildings. The choice is very large. Origami from the "Flower" modules is a wonderful addition to any room interior. Such a craft will look great on a bookshelf, on a windowsill next to indoor flowers or in a “living corner”.
The amazing art of origami
Origami refers to ancient creative processes. Initially, it was used in various rituals and rituals. But later art became popular not only in China, but also outside the country. Children liked it and now it is widely used in extracurricular activities and art circles. The most common type of creativity is modular origami. Volumetric figures are formed from small pieces of paper.
When a child is fascinated by such a process, he figuratively enlivens the figures he created. Such art not only develops children's thinking, imagination, but also helps the development of fine motor skills. After such additional workshops, children improve their memory and thinking.
Creating modules
To make flowers from origami modules, you need to prepare the modules themselves. To do this, you need A4 sheets. They are cut into 16 equal blanks. Then the sheet is folded in half, then folded in half again. After that, the sheet should be turned over with the fold towards you. The edges roll towards the center. The lower lapels are bent upwards, and the corners - into a triangle. The sheet is folded. The triangles are folded along the resulting outlined lines. Then the lapels are again bent up. The sheet is folded in half. The result should be a module of the correct proportions.
The simplest preparation
You can quickly and efficiently perform origami "Flowers". This scheme is very simple. It does not require a lot of time and material. It eliminates the creation of a large number of modules, so it is perfect for beginners. For manufacturing, you will need green, white and yellow paper or cardboard. To create one voluminous flower, you will need 1 sheet of yellow paper and 16 sheets of white. We add 17 special modules. It is important that such a module has two small pockets and two corners.

To form lines, you need to form a rhombus. For this process, the prepared sheet is evenly folded diagonally. The remaining folds turn inside out. To the main line formed vertically, the side faces of the rhombus are neatly wrapped. The procedure is repeated 4 more times. At the end, the side line should appear in the middle of the figure. When making origami paper (modules) "Flowers", you need to make a blank with six even edges.
Bouquet of excellent flowers
The lower corners of the rhombus are gently bent towards the center of the workpiece. The procedure is then repeated for all corners. The sheet of paper unfolds smoothly. In the end, you should get a blank with bent lines for collecting a flower. The workpiece is bent along the marked lines from all angles. Then the sharp corners are wrapped in the middle. Thus, the core of the flower should turn out. To make origami from the "Flower" modules, the workpiece is laid out with the short side to the center.

In this case, paper 8x8 cm is used for the petals. After that, 8 modules are stacked in 1 row in a circle. In the middle of the resulting ring, a yellow shade module is placed. To decorate the stem, green colored paper twisted into a tube is used. You can glue petals on it or put a bow on it. To get flowers from origami modules as a bouquet, the creation scheme is repeated several times. For example, for a bouquet of 9 flowers, 153 modules will be needed. Of these, 9 are yellow and 144 are white.
Making the stem and leaves
As a stem, you can use a straw, a straw or a small stick. The material is pasted over with thick green paper. The width of the sheet should not exceed 1 cm. The wrong side is smeared with clerical glue and pressed against the workpiece. Then it is wound in a zigzag on a stick. To make leaves, you need a sheet of paper or cardboard 15x15. It must be folded diagonally, and then turned back. The edges of the workpiece must be rolled to the middle. Then fold to the center on the other side. For veins near the sheet, all folds are ironed. The sheet is turned over, and the edges are wound onto a pencil or the edge of scissors. This process produces beautiful curls.
simple colorful flower
To create origami from triangular modules "Flowers" you will need 105 basic modules. To form the height of the flower, it is necessary to line up the first three rows of 15 modules. Each row should close into an even ring. Then it flips over to the other side. Accuracy is very important in this process.

The result should be one side of the modules, turned outward. Then 2-4 more rows are made in an identical way. The height of the flower is at the discretion of the author. All rows can be done in one color or different. If you use multi-colored sheets of paper, then in the end you should get a seven-color flower.
Creating a three-dimensional flower
This scheme is based on modules that are inserted into each other, gathering into a constructor. Origami from modules "Flower" is made from 10 modules on each row. When assembling the first row, 10 modules are placed on the short side. They are bent in the form of a circle. Then 10 more modules of the second row are attached to them. When creating 3 rows, the modules are already installed on the long side. Then the tails of neighboring modules are connected.

The result should be a scheme for connecting modules in a checkerboard pattern. After that, the flower turns over. The remaining rows will be made up of modules on the short side. 4 row is identical to the previous ones. On the 5th row, two modules must be put on for each module. That is, for the 5th row, they will need not 10, but 20. The free pocket should be inside. 6 row - the last. It will consist of 30 modules. 3 modules are put on 2 elements. When creating a figure, free pockets must be inside the workpiece. The result should be origami from the "Flower" modules.
Some masters make real masterpiece flowers from paper. Looking at them, it seems that we are unlikely to be able to do something like that. But in fact, there are options for making paper flowers that even children can master. And the option presented below is just that - simple, not requiring a lot of effort, time and patience.
What you need to make a paper flower:
Colored paper (in this case, very convenient colored sheets for notes);
glue stick.
Step 1. Making a Petal
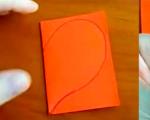
We will form a flower petal from a 9x9 square. In this case, blocks with stickers for records are indispensable!

Fold the square in half diagonally.

We combine the corners of the resulting triangle with its top.

We get a rhombus.

We wrap the edges of the rhombus towards the central axis.


We straighten the resulting workpiece.

On both sides, we turn out the "tails" as shown in the photo.


We get the following structure.

We bend the “ears” that go beyond the edge of the rhombus inward.


We wrap the edges inward along the already existing line.


We wrap the petal, connecting the wrapped edges.


Glue one of the glued sides with glue.

We glue, we get a petal.

Petals can be from 5 to 10-15.

Step 2. We glue the petals together.
Lubricate the end side of the petal with glue.

Glue the two petals together.

We glue all the petals one by one and get such a paper flower.

The final look of the craft. Photo 1.

The final look of the craft. Photo 2.
This modular origami flower is very easy to make with your own hands. In this case, you can vary the number of petals, glue the “stamens” inside the flower together, paint them in a contrasting color. You can add a bead to the center if you like. Such a paper flower can become the basis for making a topiary or an original element of gift wrapping. And if you like other flowers, then do not rush to leave our site, because we will show you how to make paper tulips. In our opinion, the craft is very beautiful!
How to assemble a bouquet of flowers from paper triangular modules step by step with a photo
For the manufacture of winter flowers, we will use paper of red, blue, blue and white colors.
Single module size in our case, 6 cm by 4 cm (modules can be made in other sizes and colors).
Need to collect for the manufacture of 3 colors 285 modules.
We will also need green paper for leaves, plastic tubes (cocktail tubes), thin double-sided tape.
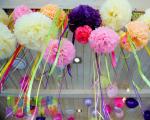
These are the flowers we will collect from paper modules
.jpg)
Step-by-step process of assembling flowers from paper modules
1. We collect 10 red modules
.jpg)
We collect from them two rows of 5 modules, as shown in the photo.
This is the center of the flower.
.jpg)
2. Let's move on to the assembly of flowers.
We collect blue and white modules.
.jpg)
The petals of the flower are assembled by combining the modules of the tops of two mirror halves, made by connecting 8 modules in a chain.
We collect 8 modules for one half.
.jpg)
And the same 8 modules for the other half of the petal.
We connect the halves together.
.jpg)
3. We put the petal on the corners of two adjacent modules of the core.
.jpg)
4. In the same way, we perform and put on the second petal on the core.
.jpg)
5. Add the third petal by analogy.
.jpg)
6. We collect and fix the fourth petal.
.jpg)
7. We collect and fix the last fifth petal.
.jpg)
8. We fix the flower on the stem.
.jpg)
Glue the center with glue.
.jpg)
9. Similarly, we collect a blue and white flower.
.jpg)
We fix the flowers on the stems.
.jpg)
All three flowers together.
.jpg)
10. Take a green sheet of paper, fold it in half and cut out the sheet. Cut out teeth on it.
.jpg)
We unfold the resulting sheet and glue the double-sided tape.
.jpg)
Remove the protective film and glue the leaf to the stem of the flower.
.jpg)
flower ready
Do the same with other colors.
.jpg)
.jpg)
Bouquet of flowers is ready.
.jpg)
.jpg)
Hello dear masters and craftswomen. I present to your attention a master class on making such an origami swan, and I called it “Swan in Pink”. How to make an origami swan? We will make a pink drawing, highlight the swan with pink modules around the perimeter and put it on a round stand, and also glue small eyes. Please watch this video on making an origami swan. AT […]
Hello dear masters and craftswomen! Today I bring to your attention a master class on making a tricolor Swan from triangular modules. It would seem, what else can you think of, what other options are there for making Swans using the modular origami technique. But it turns out that there are still options and this is not the last thing in my arsenal. The tricolor swan is so simple […]
Hello dear masters and craftswomen! I bring to your attention a new master class on making a Swan in black from 3D modules. In the last lesson, we made a Swan in red, and now I decided to change the style a bit and make a Swan in black. The scheme is not complicated and will suit anyone, even a beginner in modular origami. Specially […]
Hello dear masters and craftswomen! I bring to your attention a new master class on making a Swan in red shades. On the Internet, you can find a huge number of different schemes and master classes for making Swans using the modular origami technique. I am sure that you have never seen such a swan. This scheme is quite simple and even […]
Swan in blue. Video tutorials and diagram. Part 3. In the third part of the master class, I offer you two video tutorials and a detailed origami diagram of how to make a swan. The first video shows how to make a swan neck and how to make a small stand. The second video talks about how to glue a swan better and faster. Lesson 6 (neck and […]
Swan in blue. Video tutorials and diagram. Part 2. In the second part of the "Swans in Blue" mater class, we complete the torso. I have prepared for you two video tutorials and a detailed origami swan diagram from modules. To assemble the swan, you will need 1438 1/16 size modules, of which: 317 - purple modules 471 - blue modules 552 - blue […]
Swan in blue. Video tutorials and diagram. Part 1. I bring to your attention a new master class on making an origami paper swan from 3D origami modules. The scheme is rather unusual and the appearance of the wing is not quite classic. In the photo you can see small through holes and a mesh pattern. Frankly, the scheme is quite complicated! Especially for this scheme, I […]
“Rainbow Swan” scheme and video tutorials (part 3). The third part of the "Rainbow Swan" master class consists of three video tutorials on assembling the stand. And I also decided that a video tutorial on gluing the "Rainbow Swan" would be very useful to you. Lesson 5 (stand part 1) Lesson 6 (stand part 2) Lesson 7 (stand part 3) […]
Simon Svetlana
I want to bring to your attention a master class manual for the development of breathing colorful flowers manufacturing in engineering « origami» .
It is worth noting that modular diagrams are one of the most interesting in art origami. After all, if from one sheet you can create a great beauty, then just imagine what you can do with a few sheets of paper and a good lesson origami!

For today's craft, you will need 8 square-shaped sheets, and a little more trick that is not typical for traditional figurines. origami, - glue. But, in this case, it will not play a particularly serious role, because our goal is to create a truly luxurious flower for the development of breathing.


In order to make these flowers You will need colored paper, glue, scissors, simple pencil, ruler.
To make one flower you will need 5 sheets color paper in the form of squares with a side of 7 cm. One square - one petal flower.

Fold it in half diagonally.

Bend the left and right corners to the center of the resulting triangle.

Bend the top corners of each of the resulting triangles to the side, aligning the outer edge of the fold with the edges that are under them.

And now attention: unfold both parts completely and fold in the form of a diamond. Bend inward the protruding corners so that the outer edge of the fold is in line with the edge of the underlying layers. And now wrap the resulting triangles along the fold inward.

Apply glue to these two folded halves and glue them together. This will be the first petal.

Make 7 more petals in the same way. Glue them together. flower ready


And now the most important thing: a lush middle and shaggy leaves, with the help of them we will develop breathing.


Finished flowers insert into decorative candles. Help is ready.