Original birthday cards for dad step by step. Homemade bookmarks for dad's books
Children make their own cards for all holidays to their parents at any age. Kids make crafts from paper, pencils and glue, and adults already use high-quality materials and their artistic vision. Both mom and dad will be pleased to receive a handmade card from their child. Dad will be touched no less than mom by such a manifestation of love and care.
Men's cards are often even easier to make than women's ones, unlike the abundance of flowers and lace, here you can focus on the plot. Remember what your dad loves most, what his hobbies are. Use them as a basis when creating a birthday card. Don't forget to add a congratulatory inscription and the card is ready.
Postcards for children under 10 years old
Children enjoy drawing, sculpting and making paper crafts. With mom's help, both daughter and son will be able to create a simple postcard for dad with a touching congratulation. The inscription inside in uneven handwriting “To my beloved daddy” will be treasured by my father all his life.
- Postcard with a picture pencils , paints or crayons.
- Postcard with applique. You can cut out pictures from magazines, print them on a printer, or choose a suitable color of paper and create an interesting collage.
- Postcard with origami figurine on the cover, this postcard is interesting for its volume.
- Postcard with photo dad in a beautiful frame.
- Postcard with plasticine elements.
In some cases, the child will need his mother’s help to carefully glue small parts, cut out appliqué elements, and for other still complex work.
A card for dad reflecting his interests
In adolescence and adulthood, you can already create more professional and interesting postcards. At first, you can use special diagrams that show the correct arrangement of elements, and then move on to independent creativity.
Men's cards are most often made based on the interests of the birthday boy, if he likes technology, then its pictures are used in the decor, ships and anchors are also suitable for a lover of the sea, and a lover of cycling should make a postcard with a bicycle.
In this video master class you can see how a man's postcard is made, and what materials and tools you will need to create it:


Postcard in masculine style
Men's style in cardmaking is most often built not only on men's hobbies, but also on accessories. These are items of clothing, watches, chains, pince-nez and much more. Some time ago, mustache prints came into fashion. You will be able to find designer papers that play up this masculine element of the look, paper decorations and much more.
In addition, you can choose purely masculine scrapbooking styles for making postcards - steampunk, grunge, and also mixed media. Paint, texture, metal elements and much more play a role here.
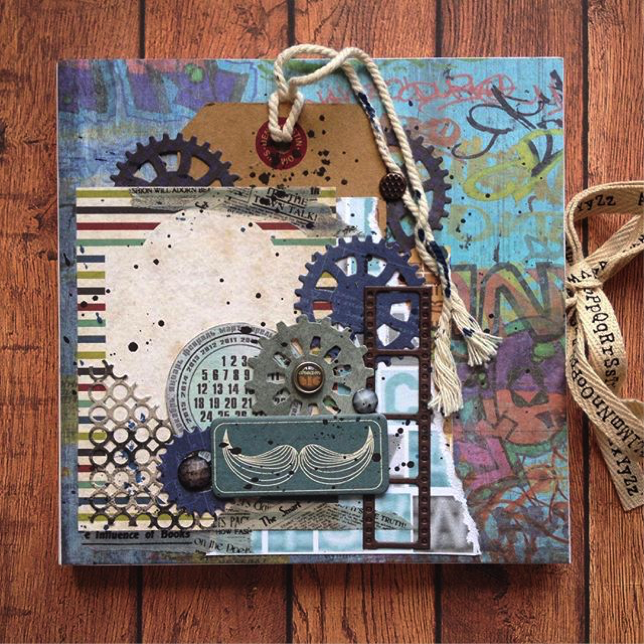
Paper for men's cards is usually selected in blue, gray, brown tones, but it does not necessarily have to be dark. Many cards are made on a light blue, sand, or beige background, which is also appropriate for men’s work.
When making a card for dad, a daughter or son is faced with the task of selecting appropriate decorations; if everything is clear for a mother’s gift, you need a lot of flowers, then a man’s work raises questions for many.
First, you should decide on the style of the postcard; it will help you choose decorative elements. For example, you chose a nautical style and printed a picture of a sailboat, how can you complement it:
- Waxed cord imitating tackle;
- Paper with wood planks under deck;
- Seagulls;
- Sea waves;
- Screws or nails.
For sea postcards with lighthouses you can take:
- Shells;
- a net representing a seine;
- starfish;
- paper can be combined in sand and sea colors.
If you choose steampunk, then the main decorations will be gears. You need to create an interesting composition from them so that they cling to each other and turn the mechanism. Along with gears, you can use images of pocket watches on a chain or large dials.
When making a postcard for dad’s hobby, it’s worth choosing several elements of different sizes that emphasize the main idea. For example, the main element would be a picture of a fisherman in a boat or a fish. Together with it, you can use reeds, mesh fabric, a float in decoration, and take the base blue, like river water.
Unlike women's decor, men's decor carries meaning. Try to choose not just jewelry that is suitable for a man, but ones that support your story or your idea. You can use not only printed pictures. Professional decor will help you make your postcard complete and interesting. Take a look at the chipboard, brads, and die-cuts that suit the purpose. Designer paper with the desired design and all other decorations can be found in craft stores.
A card for dad should be made from the heart, even if it is not perfect, the main thing is that you put your love and tenderness into it, write important words and leave a memory of this birthday.
Sometimes, in a handicraft impulse, you want to make something beautiful with your own hands, but as luck would have it, nothing comes to mind, and so as not to suffer again, I decided to put together a selection of examples of how to make a postcard with your own hands. Here are different examples of postcards and small descriptions of how to make this or that postcard.
I tried to select as many different images as possible, both in style and theme, so that there was plenty to choose from. Of course, each postcard is just an example of how you can make postcards with your own hands.
To mom
How to make a card for mom? It’s clear that it should be the most beautiful and touching, but I want some specifics, right? The first thing you need to do is focus on the reason, it could be:- an unplanned card for no reason;
- Mother's Day or March 8;
- New Year and Christmas;
- birthday or name day;
- professional holidays.
Of course, no one can stop you from making and giving your mom a postcard dedicated to the first snow or even the release of your favorite TV series, but in general, the main reasons are indicated quite clearly.


A New Year's card for mom can be ordinary (from the point of view of New Year's greetings, of course), it is not necessary to somehow emphasize the special relationship. But a birthday or Mother's Day are special holidays on which it is worth presenting a personal card with the signature “To my beloved mother.”
How to make a birthday card for mom? Sketch out a sketch with a simple pencil, add a little color to get an idea of the color scheme and understand what shades you will need during the work process. So, you need to buy or find in the bins:
- a blank for your needlework (thick and thin cardboard is suitable);
- background image - it can be scrap paper, colored paper, any sheet that you like with its ornament, or you can simply artistically splash paint on a sheet of white thick paper or even use monotype and marbling techniques;
- chipboard for inscription - it is better to purchase a ready-made one or use a special stapler to decorate the edge;
- a couple of decorative elements - flowers, butterflies, beads and leaves;
- one or two large decorative elements - flowers or bows;
- decorative tape;
- good glue;
- scalloped ribbon or lace.
First you need to glue the background image to the blank, then arrange large flowers, and only then complement the resulting composition with small decor and lace. Dry the finished work well, decorate it with small decorations and sparkles, and then sign it - mom will be happy with such a sign of attention.
Now you know how to make a card for Mother's Day, and you can easily figure out what a card for an anniversary or angel's day should be like.
Another original option: the essence is that you need to cut out circles from colored paper, and then cut each circle in a spiral and twist it into a bud, you will get cute flowers with which you can decorate a postcard.


To dad
A DIY birthday card for dad is always very touching and sweet. Choosing a particular "papal" theme is not too easy, but there is a wonderful straw to grab onto - style. If you make a stylish card, then the father will undoubtedly be happy to receive it, even if it does not contain the usual symbols of “masculinity,” which in our country often include cars, weapons and fishing.
Naturally, if the father is celebrating the anniversary of his driving experience, then a car on a postcard is quite appropriate, but on dad’s birthday it is better to present a neutral and beautiful greeting card.

What kind of cards do men like:
- not too colorful;
- in a calm, slightly muted palette;
- with clean lines;
- in which a lot of effort has been visually invested.
Men admire the process, so before you make a nice card using the scrapbooking technique, think about how you can put your work into the card? This can be working with threads or embroidery, spirography and paper cutting, pyrography and much more.
Incorporate a few elements of hard work and love into your work and your dad's birthday card will be stunning.

So, we make paper cards with our own hands for our beloved daddy. Start by choosing a subject - this could be some element of a male portrait - a stylish beard and glasses in the spirit of hipsters, or the silhouette of dad's favorite pipe, you can also make some kind of heraldic flag or symbol.
Choose colors - they should be calm and beautiful, and also look good in harmony with each other.
Make a pattern for the future postcard and get to work - if this is a regular applique, then cut out all the elements and carefully lay out the future composition. And in the case of artistic cutting, it is better to spend time on the pattern and drawing. By the way, for this work you will need a good breadboard knife.
After all the main elements have been cut out, assemble the card - if you planned it using the scrapbooking technique, then you can simply glue the composition, and if you are trying to create a thin openwork product from cardboard and paper, then select shading colors for each layer - so that the work looked really delicate, you will need to choose shades that will highlight all the slits.
Make a central element on your card, and then put it under a press - this will help prevent the paper from deforming from the moisture contained in the glue.
In honor of the wedding
Making beautiful cards with your own hands for a wedding is not an easy task, and here it is better to watch master classes.

A wedding is one of the most important events in the life of a young family, and therefore it is not enough just to draw a card, you need to carefully design and package it, and perhaps supplement it with some other elements.


How to make a beautiful card for congratulations on your wedding day:
- come up with an idea;
- find out from the bride and groom the main color of the wedding, or the main theme of the celebration;
- look at various options for postcards - using scrapbooking techniques, with embroidery, ribbons, and so on;
- choose several interesting lessons;
- make a rough postcard from paper and cardboard (and if you are not sure of your result, then it is better to do this step several times);
- make original cards with your own hands;
- choose packaging and make it a little more unique;
- label the envelope and postcard.
Other occasions and recipients
Rest assured, handmade birthday cards will delight the recipients - after all, this is not just a DIY postcard made in a master class, it is a real man-made miracle that keeps a piece of the soul.


You can make cards for mom and dad with your own hands, or you can delight your friends before each holiday with an original greeting - all you need is free time, good master classes and a little patience.
3D postcards look especially impressive. How to make a three-dimensional postcard? Come up with (or look at experienced authors) an idea on how you can shape it so that you get voluminous postcards. You may want to use more decorative elements, or you may decide to make a simple DIY birthday card with 3D elements.

By the way, if you are wondering how to make a postcard for your mother or friend with voluminous paper elements, take a closer look at children's books. Surely you still have several copies, when opened, carriages and castles, trees and horses appeared between the pages.
Take a close look at how these elements are made and glued together - you may be able to reproduce this in your sketch.

Or try to do something in the shabby chic style and scrapbooking with your own hands - it’s not as difficult as it seems, the entire main volume effect is created by layering elements. By the way, flat cards are also good. :)
I think now you have enough ideas for creating greeting cards, postcards and tags - craft for your own pleasure and bring joy to your loved ones!

Moving card - “Waterfall of Hearts”:
Some more ideas for inspiration:


Did you know that a handmade postcard can be an original and welcome addition to a gift for dad?
To do this, you will need very simple materials that are likely to be found in every home and very little time. The main thing is to show your imagination and have a great desire to please dad!
In addition, you will need materials and tools such as:
- colored paper;
- colored and white cardboard;
- glue;
- acrylic paint;
- scissors;
- double-sided tape;
— buttons — 3 pcs.
For the base of the postcard you need a sheet of cardboard, preferably white, but if this is not available, you need to choose the lightest shade.

The middle of the postcard will be voluminous! To do this, a smaller sheet of colored paper is glued into the middle of the postcard using a glue stick.

The shade of the sheet used can be chosen to suit your taste. Leave the product to dry for a few minutes!
Meanwhile, the middle of the card is made from colored paper of a different shade. A sheet of paper must be folded in half.

Draw lines on the side of the fold along which the slits will be made in the future.

As a result, you will get something like this, which will be located in the middle of the postcard.

Using a glue stick, you need to glue the workpiece in the right place, that is, inside the craft. When applying glue to the surface of the sheet, do not treat the walls of the “cubes” with glue; they must remain unglued! It should look like this.


Now you need to leave it until the glue dries completely. It is better if it is in expanded form.
Afterwards, on the cover, stepping back a little from the edge, draw a square with acrylic paint.

Then, add these “lines” to it. By the way, if you have a sewing machine, you can make these stitches using it. This will be a small piece of the shirt.

After the “shirt” is ready, you should start making the butterfly. A blank for a butterfly is cut out of colored paper.

You can choose the shade of this element of the postcard at your discretion! Next, by folding the blank and securing it with glue, you will get a butterfly like this.

It needs to be attached to the cover using double-sided tape. You can put white dots on the butterfly, it will look great!

After the butterfly has been secured, three buttons need to be attached in the same way.

On the “shirt” you need to place white dots.
Then, you need to cut out thin strips from colored paper, which decorate the craft and give it a finished look.


Afterwards, attach with double-sided tape the following inscription: To the Pope.

Now all that's left is a few finishing touches to the middle of the card... Wide strips are cut out of wrapping paper and then glued to the sides of the "boxes".


And on top of the stack of “boxes”, a small bow is glued to double-sided tape.
That's it, the postcard for dad is ready!

The final look of the craft. Photo 1.

The final look of the craft. Photo 2.

The final look of the craft. Photo 3.
Dad will certainly appreciate your efforts and time spent on making the craft. In addition, such a wonderful addition to the gift will be very original and exclusive!

The final look of the craft. Photo 4.
Every father will be pleased to receive a hand-made postcard from his daughter or son for his birthday, or on February 23rd. A postcard for dad is an excellent and memorable present that remains not only on a shelf or in a frame, but also in the heart.


A postcard in the form of a mosaic is fast, unusual and cute. You can please your father with this product on February 23rd.
The basis should be a regular sheet of A4 paper. Suitable color is white. We bend it in half and get the desired shape.
Now let's get to the interesting creative part - drawing. It is necessary to depict something that has a connection with February 23 - tanks, planes, stars, St. George ribbons and, of course, be sure to depict the pope in military uniform.
It is better to place the main composition on the cover. It is advisable to depict the background and the main character on it. You can place the rest of the items inside the card, but first you need to write a congratulation there so that the mosaic does not overlap it. It is better to write the text by hand, because laying out small letters from paper is not too easy.

The next step is to create the paper pieces. This requires regular colored paper in different colors. Take a piece of paper and tear it into small pieces.
Next, you need to paste over the drawing with pieces. To simplify the creation of a mosaic, you need to apply glue not to each piece, but to the whole piece. It's better to start with background elements so that important elements of the composition look more impressive.
It is not necessary to try to make each element from pieces of the same color. For example, a tank and clothes can be made in a camouflage color scheme, that is, pieces of green paper of different shades can be combined in one piece. You can also make the inscription multi-colored.
All small details must be cut out separately from paper and glued onto the mosaic. If they are too small, you can draw them. This should be done only after the glue has had time to dry, so that the drawing does not “move out”.
Postcard to your beloved dad yourself (video)
Card for dad on February 23rd or birthday with a boat
If your father’s life is somehow connected with the sea, for example, he served in the navy, you can make a postcard with a boat. There are many different variations of such gifts, and if it’s hard for you to imagine what at least one of them might look like, follow the instructions.

The main material is light blue paper, which should be folded in half. At the bottom of the cover you need to glue a blue rectangle with a wavy top - this is the sea. We cut out and attach a sun from yellow paper, and clouds from white paper. 
The base of the boat is a brown unequal-sided trapezoid, with a larger base at the top and a sharper and raised corner on the right. The left sail is a triangle of any bright color with a right angle at the bottom right, the lower side of which should be parallel to the top of the trapezoid. The right sail is a right triangle, the base of which should be rounded and point to the right. It should also be located parallel to the top of the trapezoid.
Important details are the helm, windows in the cabins, lifebuoy and flag. The flag can be made of red paper and attached to the top of the starboard sail, the lifebuoy should be on the port sail and the base of the ship, and the windows in the cabins should be on the base of the ship on the right. The helm can be placed near the bow of the ship. 
Inside the postcard we draw a sailor on the deck and seagulls. Be sure to add the inscription “Happy February 23” or “Happy Birthday” and a wish, because on such a day it is very important to please the father with good words.
Birthday Card for Dad
A stylish option for a small present for Father’s Birthday is a tuxedo card. It is extremely easy to make, without requiring a large amount of material or time.
The base material is black cardboard. If you think this color is too gloomy for a birthday, you can replace it with either brown or blue. Another way to add color is to cover the inside of the cardboard with brightly colored paper. 
Useful tips
Gifts for dad:
Gifts for grandfather:
Gifts for brother:
Gifts for your loved one:


A gift made with your own hands carries with it love and respect the one who made it, the person for whom this gift is intended.
Sometimes it can be difficult to choose the right gift, and that's why we turn to the Internet.
Here you can find several original, simple and not so gifts that you can do it yourself, and which a man might like.

What gift to make for dad with your own hands? And. Car T-shirt.

This T-shirt can be made for dad so that he can relax and play with the children at the same time. This is a great gift for a birthday, New Year or other holiday, and also a good way to play with children.
You will need:
White T-shirt
Fabric paint or markers
Cars for driving on the roads!
You can use the same picture as in this example, or you can come up with your own road with traffic lights, parking lots, etc.
In this example, the drawing was made on a computer and then printed. 4 pages were printed, which were then combined into one large picture.


In any case, it is best to make the road design on paper and only then transfer it to the T-shirt.
1. Prepare a drawing on paper

2. Place the patterned paper inside the shirt, under the first layer. Not only will it be easier for you to see the design through the jersey, but the paint you apply will not transfer to the back of the jersey.

* If you use paint, it will be a little more difficult and longer to paint and wait for the paint to dry (this especially applies to drawing black lines). If you want to make things quicker and easier, try using fabric markers.


DIY birthday gift for dad. Treats for dad.

You will need:
Sixpack (pack of 6 bottles)
Graphite paint and chalk (optional)
Washi tape or thin colored paper (optional)
Small treats (candies like Skittles or M&M's, nuts)
1. First you need to empty the bottles of soda (beer), wash them and leave them to dry.
* When you open the bottles, do it so that the caps do not bend too much, they will be needed later. There are bottles with screw caps - these are ideal.
2. Cover the packaging with graphite paint so that you can then write on it with chalk. Apply one coat first and let it dry before applying a second coat. This step is optional.
3. You can decorate the bottles using washi tape, a Japanese decorative self-adhesive tape. Such paper can be found in specialized craft stores.

As an alternative, you can use thin colored paper, cut out any patterns from it and glue it to the bottle using PVA glue.
4. It's time to fill the bottles with treats. Make sure all treats are small enough to be easily removed from the bottle.

5. Close the bottles with caps.
If you used graphite paint, you can write your congratulations with chalk on the packaging.
Alternatively, you can write a message on construction paper and tape the paper to the package.


DIY gift for dad. Keychain with tie.
Such a gift or addition to a gift can be made in a hurry (taking into account that you already have all the necessary details).

You will need:
Old unnecessary tie
Keychain
Scissors
1. Insert the tie into the ring of the key ring (about 12 cm).

2. Lay the tie so that you can see the seams and bend it to the left.


3. Wrap the end of the tie around where it goes through the ring.


5. Pull until the tie is securely attached to the key ring.
6. Turn the tie over and cut off the excess with scissors.


7. You can leave it as is, or you can bend the ends of the back of the tie and glue them so that this part looks like the front.


8. It remains to add the keys. You can put the key on thick paper and circle it. After that, cut out the key and write a wish on it.

* You can make several similar keys with several wishes.
What to give dad with your own hands. Dad's personal hanger
Even a child can make such a gift, but he will still need a little help.

You will need:
Hanger
Poster panel or thick cardboard
Hole puncher
Stickers and/or pencils
Scissors
1. Place the hanger on a thick sheet of cardboard, trace it around the inside, and then cut it out.

2. Use a hole punch to make holes in the paper. The distance between 2 holes is about 4 cm.

3. Decorate the cardboard with stickers, draw something beautiful with pencils - just use your imagination.

4. Prepare a thin, brightly colored rope or thread and thread it through the holes and around the hanger as shown in the image.
How to make a gift for dad with your own hands. Sleeve for a coffee cup with a photo frame.

You will need:
Fabric (in this example, ribbed corduroy and fleece)
Square plastic (can be cut from a freezer bag)
Velcro
Scissors
1. Measure and cut 2 rectangles from fabric.

2. Prepare the fleece, insert it between two pieces of corduroy and secure everything with pins.
3. Sew around the perimeter.


4. Wrap the cup around the blank so you know where to sew the Velcro. Mark the location with pins.
5. Sew on the Velcro.

6. Prepare a photo frame. Cut a square from corduroy and fleece. In this example, the square measures 8x8 cm.

7. Place one square on top of the other, measure approximately 1.5 cm from the sides and draw another square (5x5 cm) inside. Carefully cut out this square. Stitch around the perimeter of the square to join the corduroy piece to the fleece.

8. Place the frame in the middle of the workpiece and sew it (the seam goes around the perimeter).

9. Make a copy of one of the photographs and cut it out so that it can be placed in a frame.
10. Insert the photo into the frame, and insert plastic of the same size on top of it.

* You can insert any picture of what dad loves.
DIY gift for grandfather. Convenient hanger for things.
To make such a gift, you need to have some understanding of how different tools work, including a drill.

You will need:
Shock absorbing cable (can be replaced with a thick rubber band)
stain
Picture hanging set
Lighter
Stapler
Hammer

1. Drill two holes in opposite places on the board. The holes should be slightly larger than the diameter (width) of the elastic.

2. Cover the board with stain. Use a rag or paper towel to cover the entire surface. Leave to dry for 10 minutes.

3. Prepare an elastic band, insert it into the hole and attach it with a stapler on the back side. Repeat the same with the other end of the elastic band. It is worth noting that it is advisable to tighten the elastic band a little and then secure its other end with a stapler.

*If necessary, use a hammer to drive the staples all the way in.

4. It's time to hang the board on the wall and you will have a good hanger for all sorts of things: towels, wires, etc.

What a gift to give your grandfather with your own hands. Suspender.
DIY braces will be very useful as a gift. They can be given to both dad and grandfather and even brother and soulmate.

You can choose any colors and even choose a different color for each suspender. If, for example, your brother or boyfriend loves bright colors, you can make an elastic band in different bright shades.

You will need:
2.5-3 meters of elastic (in this example, the width of the elastic is 2.5 cm)
Sewing machine

* To choose the right size, you can try on the elastic band on the man himself. Let him hold them in front of his belt, where the suspenders will be attached, and you stretch them to your lower back.
* It is advisable to tighten them a little, but not too much so that you can walk with them comfortably. Once you have the desired length, cut the elastic.
1. When you have chosen the right size, insert the elastic into the eye of the clip and sew it on. You should end up with 2 pieces of elastic and 4 clips.

* Do this so that the seam is on the inside of the suspenders.
2. After you have sewn the clips, place one elastic band on top of the other in the letter X. You need to do this so that the X (the place where they connect) is from the back, slightly below the middle (see picture).

It is also worth making sure that the suspenders are not placed widely.
3. Secure both elastic bands with a stitch. The shape of the stitch should resemble a diamond.
DIY gift for brother. Case for cables, headphones, etc.
This craft will help you conveniently organize cables and headphones for mobile phones, as well as small players and flash drives.

Such a gift will not only be pleasant for your brother or beloved man, but also very useful.
You will need:
About 20 cm natural or artificial leather
Scissors or utility knife
Metal ruler
The board on which you will cut the material
Pencil
This example shows 3 types of covers: small, medium and large.

Here's how to measure the size of case you need:

* A small case can hold a wall charger.
* A medium-sized case can hold a phone charger, headphones, an additional wire and a USB cable.
* A large case can hold a laptop charger, headphones, additional cables, etc.
1. Cut out the material (faux or genuine leather) to the size you need. In this example the size is medium.
* It is very easy to cut artificial leather using a stationery knife and an iron ruler.
2. Once you have the desired piece of material ready, start making small cuts that will turn into cord holders.

This is what it looks like:

3. To add a button, use a pencil. Place all the cords in the holders, roll the cover and mark with a pencil where the pieces of your cover will meet when you roll it up.


4. Insert the button at the marking location. Attach the required parts and you're done!

Small case:

Large Case:


Birthday gift for brother. Bike bag.
This bag can be used to store both tools and food if the trip promises to be long.

This bag is attached to the bicycle frame, and it is very convenient to use.
You will need:

Velcro
Scissors
Sewing machine
* Since the seam will be approximately 1.5 cm from the edges, the final bag will measure approximately 18 cm x 2 cm. But you can choose any size, depending on the items that will be transported.
1. Prepare a “strip” and attach it with a stitch from the outside to the front of the bag (to the “square”).

2. Fold the fabric 0.5 cm on each side and stitch again.

3. Sew the back of the bag (“rectangle”) in the same way as in the previous steps.