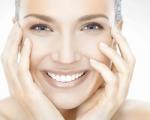
Cheekbone lift exercise: "Apples". Program against nasolabial folds and flabby cheeks
- Sit up straight. Sit in a chair with your back straight. Pull down on your shoulder blades and relax your shoulders completely, putting as little strain on this area of your body as possible. Your chest should openly protrude forward.
- Open your mouth slightly. Imagine that you are having a normal conversation with someone in low to moderate tones. Open your mouth in the position you would normally hold it during such a conversation. At this stage, it is also necessary to turn both the lower and upper lips inward so that they cover your front rows of teeth.
- At the same time, you must pull the corners of the mouth back, bringing them as close as possible to the molars. The corners of the lips should be drawn back in the same direction and at the same level or vertical position of your face. The chin should move forward a little.
- Hold this facial expression for 30 seconds. You should feel the muscles in your cheeks and mouth stretch. Then gently return your face to its normal free position.
-
Pinch your cheeks. Proceed carefully, slightly pinching both cheekbones up and down. This slight pinching may not make your cheeks fuller, but these actions can give your skin a natural flush, resulting in brighter cheeks. Bright cheeks look fuller to the naked eye than pale ones.
-
Moisturize your cheeks. Apply a moisturizing facial lotion or cream to your cheeks after every shower and every time you wash your face. Let it dry naturally and do not rinse with water.
- If possible, find an emollient cream. These creams are specially formulated to soothe the skin so that the cheeks are hydrated and cracked or damaged.
- Even if you shower in the morning, it's a good idea to apply moisturizer at night before bed.
-
Use shea butter and sugar scrub. Mix 1 cup (250 ml) melted shea butter with 3/4 cup (185 ml) granulated sugar, stirring evenly. This mixture can be stored in the refrigerator until firm. Then apply it on the skin of the face after washing with warm water. Leave on for five minutes and then rinse with warm water.
- Apply the scrub in gentle circular motions. You should also pat your skin dry with a soft towel at the end of the procedure.
- Shea butter is high in fatty acids, so it helps to improve the elasticity of the skin on the cheeks. As a result, the skin looks younger and fuller.
- Sugar is a mild exfoliant, so it can clear away dead skin cells on the cheeks that make it look dull and emaciated.
-
Try apples. Apples contain many nutrients and vitamins that will benefit your skin, so eating them and using them topically can work wonders. This fruit contains antioxidants such as vitamins A, B, and C, all of which help prevent tissue damage and wrinkles. Apples also contain collagen and elastin, which help your skin look soft and supple.
- Red Delicious and Granny Smith are your top picks, followed by Braeburn.
- Cut a whole apple into pieces and use a masher or hand blender to finely mash it to the consistency of a sauce. Apply this paste on your cheeks with gentle, circular motions. Leave on for 15-30 minutes, then rinse with warm water. Repeat daily.
- Another way to use the beneficial properties of apples is to make a special apple drink. Combine three apple slices with three carrots and 1/2 cup (125 ml) lemon juice. Beat with a blender until smooth. Drink this juice every morning until you notice results.
- The potassium found in carrots helps prevent dry skin. This vegetable also has anti-inflammatory properties that revitalize and tone the skin. Carrots also produce more antioxidants and more vitamins A and C.
- Lemon juice will provide your skin with extra doses of vitamins A, B, and C, as well as other antioxidants.
-
Apply aloe vera. Apply aloe vera gel directly to your face, massaging in gentle, circular motions. Do this for about 30 to 60 minutes before rinsing off. Repeat daily.
- Alternatively, you can drink a glass (250 ml) of aloe vera juice every morning until you notice results. Make sure you only drink edible juice.
- Aloe vera reduces inflammation and helps increase skin elasticity.
-
Prepare a mixture of equal parts glycerin and rose water. This mixture should be applied every night before bed. Glycerin and rose water have properties that can benefit and nourish the skin on the cheeks.
- Glycerin maintains moisture levels in the skin and can influence the rate of cell division.
- Rose water soothes irritated skin and hydrates dry skin. It also has mild antiseptic properties that keep the skin on the cheeks clean and healthy without drying out or irritation.
-
Use honey. Honey helps your skin in several ways. When applied topically, honey acts as a humectant, attracting and preventing moisture loss. As a result, the skin looks healthier and firmer. When consumed or applied topically, it infuses the skin with antioxidants that protect it from harmful emissions and bacteria.
- One of the easiest ways to use honey is to find an organic or natural mask with honey as an ingredient. Such masks can be even more effective if they contain milk, cream and kefir.
- Another way to use is to eat honey for 1 tbsp. spoon (15 ml) every day.
- You can make your own honey mask. Mix 1 teaspoon (5 ml) honey with 1 teaspoon (5 ml) papaya. Apply this mask on your cheeks and leave on for 10 minutes before washing off with warm water.
- Another way to use honey is as a breakfast food. Combine 1 cup (250 ml) milk, 1 teaspoon (5 ml) softened butter, 1 teaspoon (5 ml) honey, 2 teaspoons (10 ml) grated cheese, 1 tbsp. spoon (15 ml) of oats. Have this breakfast in the morning with orange juice.
- It is believed that milk and other dairy products moisturize and soothe the skin, eliminate irritation and redness of the skin, thereby improving its appearance.
- Oats can relieve skin from dryness and irritation.
- The vitamin C in orange juice helps prevent wrinkles and makes the skin look younger.
Try facial yoga. You can do simple, gentle facial exercises to stimulate circulation in your cheeks and make your skin look radiant and plump. No excess fat or extra skin will actually appear, but your narrow cheeks will look rounder if you do this exercise daily.
Guys, we put our soul into the site. Thanks for that
for discovering this beauty. Thanks for the inspiration and goosebumps.
Join us at Facebook And In contact with
Makeup gives us self-confidence, allows us to emphasize dignity and make the skin well-groomed. But have you ever thought that some techniques may not decorate, but add a couple of extra years? Surely each of us made such mistakes.
We are in website collected the top 10 common tricks that make us older.
1. Too much foundation
Many girls, wanting to achieve the effect of perfect matte skin, often make mistakes and overdo it with tonal products. Too thick a layer and an incorrectly selected foundation color can accentuate wrinkles. And add a few extra years. Makeup artists advise ditching heavy foundations in favor of light and fluid fluids with shimmery particles that will make skin look healthier, more natural without being overwhelming.
2. Mascara on lower lashes
Lightly tinted lower eyelashes with an accent in the corner of the eye will only add expressiveness to the look. But if you paint over them completely, and even with voluminous mascara, then do not be surprised that others will pay attention not so much to your eyes as to the wrinkles around them, because too dyed eyelashes on the lower eyelid focus on them.
3. Lipstick tone
Definitely, lips should be painted and not be afraid of saturated shades fashionable this season. But do not forget: if you are the owner of thin lips, then the dark color will make them visually even thinner. If they already lack volume, it is better to apply just above the contour of your lips.
4. Dark shadows
Dark shadows applied all over the eyelid can make you look older. If you want to look younger, apply a dark shade only to the outer corner of the eye.
5. Black eyeliner on the lower eyelid
6. Blush on the "apples"
Say goodbye to dark and bright blushes and turn to light, pinkish or peach blushes. Apply them on the upper cheek area, not in the middle. Highlighting the apples of your cheeks used to be a good idea, but we change as we age, so don't draw attention to this area - apply your new shade of blush to the top of your cheekbones and not very close to your nose. The soft and natural shade will give your face a romantic, youthful look, and the blush applied on the cheekbones will give the effect of a mini-lift.
7. Bright eyebrows
Brightly colored eyebrows can give your face an untidy look and add a couple of extra years. Opt for shades that are one tone lighter than your own brow color.
Blush has long been trusted as a skin care product that gives it a healthy scarlet color. But when it comes to knowing exactly where to apply the product (apples? cheekbones? cheekbones?), finding a definitive answer can be harder than you'd like. Luckily, celebrity makeup artists claim that the location of your blush really depends on what shade you're using.
Before the beginning
To get started, first perfect your face with a foundation, powder, or tinted moisturizer. You can also save the blush for last when all the makeup is done.

Step 1
Pink blush should only be on the apples of the cheeks. They are designed to mimic the iridescent blush that really shows up in this area, as this is where blood naturally rushes to your cheeks. But the color should not lie too close to the line of your smile, otherwise it will look unnatural. First place one finger on the side of your mouth and along your smile line to determine where the blush should end.
Step 2
To find the apples of your cheeks, just smile a little. The apples are the front parts of the cheeks that rise when you smile.
Step 3
Dip a dense, domed brush into the pink blush powder of your choice. A small domed brush with dense and flattened bristles, such as Sonia Kashuk Dense Blush/Powder Brush No.24, will help to concentrate the color directly on the apples.
Step 4
Rub the blush into the apples of your cheeks in a circular motion.
Final view
Note the puff of healthy color on the front of the cheeks, not reaching the smile line.

Plum blush is suitable for medium to dark skin tones, while pink blush traditionally goes best with fair skin. In other words, these berry shades should be applied in the same way as their more pink counterparts - on the apples of the cheeks. However, women with swarthy or dark skin can still use pink blush if they find a bright enough shade. Then plum blush should be left in reserve for a tanning makeup kit. The goal is to choose a color on the apples of the cheeks that stimulates the blood under dark skin for a healthy tone.

Step 1
Since peach tones are naturally more similar to many natural skin tones than pink ones, peach blush should be used mostly to sculpt the shape of the cheeks and add just a little bit of color to them. Cool pink blush can look too streaky when applied for correction, so warmer shades like soft peach or coral create the illusion of perfect cheeks better. To start, place three fingers along the side of your mouth, covering the apples. This will indicate where the color should end.
Step 2
Then bare your hiding cheekbones with your best Mackayla Maroney sideways grin.
Step 3
Dip an angled brush such as the Sigma F40 Large Angled Contour Brush into the pressed powder of your peach blush. The angled brush is specially shaped to help sculpt the cheeks.
Step 4
Form the outlined cheeks by brushing along the cheekbone, starting from the back, close to the ear, and working the color forward. If you're still having trouble finding very hidden cheekbones, a good general tip to give here is that you should start applying the blush from the tragus (the little pointed flap near the ear hole) and pull the brush forward as you don't reach the beginning of the bullseye.
Final view
Notice how the lion's share of the color is concentrated mainly towards the back of the cheek, and not on the apples, and then follows the line of the cheekbones.

Step 1
Since beige and brown blushes are most similar to natural skin tones, they should be applied to both the cheekbones and the apples to add warm undertones and some plumpness to the cheeks without the bright color. The distribution of beige blush all over the cheek adds fullness and roundness to it. Choose a product with shimmery shades so that the shadow appears on the face and really looks like a blush, otherwise the skin will look dirty. First place two fingers on the side of your mouth to mark where the blush should end. In this case, it is necessary that the color touches the highest point of the apples, but does not go far ahead, otherwise it will cover the entire side of the face entirely.
Step 2
Dip a thick, rounded brush like M.A.C. 129 Powder/Blush Brush, into a pressed powder of shimmery beige blush. This large brush with a slightly tapered shape is best for achieving a solid veil of color on the cheeks.
Step 3
Start by applying blush to your cheekbones to accentuate their shape.
Step 4
Then add color to the apples to make the cheeks look more rounded. Keep the two-finger trick in mind, remembering to leave a third of the apples without blush at the very front so that the powder doesn't cover the entire side of the face.
Final view
Result? A shimmery beige blush that gives cheeks a natural glow and defines a healthy shape.
face shape
Applying color to certain areas can make a round face look longer and a long face look shorter and soften sharp features. For example, women with square faces will benefit from blush applied directly to the apples of their cheeks in a circular motion. This will soften sharp features by drawing attention to the rounded parts of the face. Many stars have this shape: Olivia Wilde, Gwyneth Paltrow, Nicole Richie.
If you have a diamond-shaped face, then your goal is to bring attention to the lower half of your face. Apply blush along the top of your cheekbones, working towards your ears to draw the eye down - and use highlighter on your cheekbones! Stars with this face shape: Ashley Greene, Audrey Tautou, Elizabeth Hurley.
Blush, like bangs, is a great way to correct a long face. Apply the blush horizontally, which will make your face appear wider. You have two choices: apply from the apples of your cheeks to your ears, or start at the top of your cheekbones, working your way up to your temples. Celebrities with long faces: Joan Smalls, Sarah Jessica Parker, Liv Tyler.
Unfortunately, out of the 57 muscles on the face, we only work with full force, except for the chewing ones, and even then, not quite. But the mimic muscles, which form the expression of the face, and on the tone of which the general appearance of the face largely depends, are involved very weakly. But in order not to atrophy, these muscles also need work. Of course, facial muscles require a special approach, they are unlike other types of muscles, these are skin muscles - weak, thin, tender, they move not parts of the skeleton, but the skin. Under the influence of these muscles, folds, tubercles, pits appear on the skin - the facial expression changes.
While the skin is young and elastic, these folds and pits quickly straighten out after the muscle stops working, but when the elasticity drops, the folds become permanent. And what happens - the habit of frowning eyebrows will sooner or later lead to the formation of deep wrinkles between the eyebrows, and the habit of pursing the upper lip and lowering the corners of the mouth hello to the appearance of nasolabial folds. Skin that has lost its elasticity cannot straighten itself out, and weak and also muscles that have lost elasticity cannot return it to its original state.
Here we have outlined two ways to prevent and combat facial contour changes: firstly, to maintain skin elasticity (proper care, masks, creams, procedures), and secondly, to do special exercises every day, thanks to which the facial muscles will be in good shape. A systematic exercise for a certain muscle group can achieve a lot, even to a certain extent, changing the shape of the face.
The simplest, most useful and pleasant thing you can do to improve the shape of your face and prevent its changes is to smile and kiss! A kiss sets in motion 29 (according to other sources - 34) muscles of the face: such training is an excellent prevention of wrinkles. To smile from the heart, you need to use 40 facial muscles - also an excellent gymnastics that increases their elasticity, reactivity, tone and strength.
No chance for a double chin
A double chin doesn't look good on anyone! And if you don’t have it, you are very lucky, and so that it never appears, you need to take the following preventive measures - get rid of high pillows, pay attention to posture, fight to maintain skin elasticity on the neck and under the chin.
It is very important not to lower your head when walking, the chin should be slightly raised (30 degrees to the horizon), of course you need to look under your feet, but only with your eyes.
Every morning, without getting out of bed, you can perform this exercise: starting position - lying on a flat surface, slowly raise your head by about 45 degrees, slowly lower it. We do 3 sets of 15 times. If there are no problems in the cervical spine, the exercise can be made more difficult - hang your head over the edge of the bed and lift it from this position. With this exercise, many muscles are involved - the occipital, cervical, including the subcutaneous (or wide) cervical muscle (m.platysma). It is this muscle that experts consider the main responsible for the formation of a second chin. In many people, this muscle is so thin that it is divided into several fibers, and in about a quarter of women it is completely absent. In this case, exercises to strengthen the muscle, of course, will not give any effect. Under such circumstances, the skin is supported only by its own firmness and elasticity. And it is necessary to fight against the appearance of a second chin, firstly, by reducing the thickness of the fat layer (if any), and secondly, by maintaining the elasticity and firmness of the skin.
To enhance skin tone, after washing, beat your chin with a towel soaked in the following solution: 1 tbsp. l. salt, 1 tbsp. l. vodka, 1 tsp. l. vinegar or lemon juice and 1 cup water. To improve skin elasticity 1-2 times a week, a compress of boiled potatoes, pounded to the consistency of sour cream with 1 yolk, 1 tsp, is useful. honey and 1 tsp. vegetable oil.
To maintain the beauty of the neck, the condition of the so-called digastric muscle is also important - this strong muscle contributes to the correct (direct) angle between the chin and the neck, its weakening affects the condition of the chin zone. One simple and fun exercise to strengthen this muscle is to lift the tip of your nose and try to "bite" your nose with your lower lip.
Another exercise is to press the tongue against the upper palate, tighten the tongue (the digastric muscle tenses with it), then relax it. Perform from 10 to 100 times, then move the tongue under the front lower teeth from the inside, and strain again from 10 to 100 times.
A simple exercise is to write the alphabet (any - Latin or Russian) with your nose in the air. Perform at least twice a day
Down with the "mournful" folds
To avoid nasolabial folds and vertical wrinkles on the upper lip, you should get rid of the habit of tightening and keeping the upper lip tense. Let it be relaxed and slightly ajar.
Exercises against nasolabial folds, as well as for general facial modeling:
1.Puff out your cheeks strongly and release air slowly through your mouth;
 2. Place the index fingers of both hands at the corners of the mouth and hold them in this position throughout the entire exercise. Try to push the corners of your mouth up while preventing this movement with finger pressure.
Performing this exercise, try to relax the facial muscles that are not participating in it as much as possible.
To have apple-cheeks, move your ears ...
In order for the cheeks to retain elasticity, the condition of the masticatory muscle is very important. It would seem that this is the muscle that everyone uses to the maximum, why even train it on purpose! BUT it's not that simple!
Being one of the heaviest, this muscle, weakening, sags, forming bags, "bulldog cheeks", coarsening, weighting the oval of the face, depriving it of grace and youth.
Yes, we train this muscle all our lives by eating hard raw vegetables and fruits, but this is not enough. We also need special gymnastic exercises that can return this muscle and other muscles associated with it - the temporal and three ear muscles - to their original position. As practice shows, one of the most effective exercises that help maintain the tone of the masticatory muscle is wiggling the ears.
Although this skill is not easy for women, it can be mastered with perseverance.
Mentally imagine how your ears and face rise at the sides, and try to engage the corresponding muscles. Then, imagine your ears pulling back as your cheeks expand.
Don't be discouraged if you don't feel any movement at first. Over time, everything will turn out ... The movement of the ears not only strengthens the muscles of the cheeks, but also contributes to the “erasing” of mimic wrinkles around the eyes.
Another exercise to strengthen the muscles of the cheeks: touch the tips of your middle fingers to the corners of your mouth. Smile, stretching the corners of your mouth up - towards the temples (count to six). You should feel your muscles rise with each movement. Hold this position for 6 seconds, and then slowly, counting to six, return to the starting position.
Clear oval
To maintain a clear oval of the face, in addition to moving the ears, a number of other exercises can be offered.
1. Tilt your head slightly back, push your chin forward, pull in your lips. Smile slowly. Hold this position for five seconds. Return to the starting position with five slow movements.
2. Form a small elastic ball of air behind the upper lip. Tightly squeezing your lips, with effort move this ball in a circle under the right cheek, under the lower lip, under the left cheek, under the upper lip. Stop for a couple of seconds. Repeat a few more times until you feel a strong warmth in the lips and cheeks.
This exercise is an excellent prevention and correction of sagging cheeks, smoothing wrinkles of the nasolabial triangle, and correcting the chin line.
Well, let's get down to business, or rather for the face! We remember the simple rules - we touch the face with clean hands, we do everything in front of the mirror carefully, slowly, gently and with a great mood.
Looking at a picture in a magazine, we always notice how the model has makeup on her eyes and what color her lips are, but we pay little attention to blush: what shade they are, how they are applied, and whether they exist at all. In vain! With the help of blush, you can achieve exactly that "natural" beauty that men appreciate so much in us.
What are they needed for?
You will look healthier.
- You will have fashionable now high cheekbones.
- You will protect your skin. All modern cosmetics are equipped with solar filters.
Make a choice!
Texture
From her right choice depends on how natural the makeup will look and how long it will last. Usually, a powdery texture blush is used with powder, and creamy with a toner.
Suitable for dry skin, as well as daytime makeup, when only foundation is used, it is almost impossible to put dry blush on it evenly;
- Dry suitable for all skin types. With their help, you can create softer nuances of shades, and also use them to adjust the shape of the face.
- Liquid blush is suitable for oily skin. Often they have a "chemical" effect, that is, very corrosive.
Place
Well, if you have a perfectly shaped face, then, of course, you can follow any fashion trends. Otherwise, use blush to correct facial features.
A wide face will appear narrower if the blushes are placed obliquely.
- Narrow face "expand" horizontally placed blush.
- Round face: never apply color to the highest part of the cheeks. "Shape" the cheekbones by applying blush to the most sunken places. For convenience, pull in your cheeks.
- Long face: apply blush on the most protruding parts of the so-called apples.
- Square face: the oval will appear sharper if you draw a line of blush from the temples to the nose.
Way
Usually blush is put last before making up lips. Sit in front of a window so that the light falls directly and on your entire face.
Dry blush is applied with a special brush, as if mixing them with powder in a circular motion. Before touching your face with a brush, shake off excess product on the back of your hand: it is better to repeat the procedure several times.
- Cream blush (as well as lipstick, which can be used for other purposes) is best applied with your fingers. And only on an unpowdered face. With light patting movements, mark the places that should be the brightest, and then rub until completely absorbed.
- When applying liquid blush, the main thing is speed. Since they are instantly absorbed and then very hard to "etch".