Embroidery roses with ribbons for beginners step by step. Ribbon embroidery roses: a master class with step by step photos and videos
Ribbon embroidery - very popular handicraft. And this is justified, making a picture with the help of ribbons is easy and simple, even a child can handle it, and the result will exceed all expectations. After all, embroidered patterns look very cool and beautiful. Such embroidery can not only create paintings or panels, but also decorate clothing items And interior. For example, napkins, tablecloths, bags, favorite dresses or blouses.
Usually, various flowers are chosen as motifs for embroidery, but roses are especially common. It is this pattern that will be discussed in this master class for beginner needlewomen.
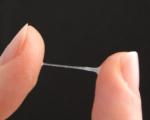
![]() Before you start embroidering, you should prepare all the necessary materials and tools for work. In order to embroider roses you will need:
Before you start embroidering, you should prepare all the necessary materials and tools for work. In order to embroider roses you will need:
- Textile on which to embroider. It can be anyone, but it is better for novice craftswomen to take a canvas.
- Needle with a sharp end and a large eye. If the embroidery will be done on the canvas, then you need a needle with a blunt end. It is more convenient for her to work on such fabric.
- Ribbons any will do: size, material, color - choose to your taste. But keep in mind, the most suitable size is considered to be ribbons about two centimeters wide.
- Threads, in some types of embroidery, thread is used to secure ribbons. Choose the most similar in color to the ribbons. Otherwise, the embroidery will look sloppy and clumsy.
Basics of embroidery
Most likely, at first you will experience difficulties in the formation of flowers. Video tutorials will help you understand everything.
Pattern embroidery
Experienced needlewomen, when working on paintings, use special schemes. They are transferred to the fabric and used as an outline for embroidery. For many beginner needlewomen, this approach seems too dreary and redundant.
Try this method when embroidering a small picture. Transfer the design to the fabric using a piece of crayon or a bar of soap. You will immediately notice how much easier it is to work. You will know exactly where a certain flower should be, as well as what size the elements should be.
We bring to your attention simple patterns for embroidering roses with ribbons. Perhaps you will like any of the paintings and you will bring it to life.
![]()
![]()
Do not underestimate the role of video tutorials when learning rose embroidery techniques. In this master class, the author embroiders according to the pattern on the fabric. See how much easier it makes the job, and draw conclusions - is it worth it for you to spend time transferring the pattern of the picture to the fabric or not.
Roses for beginners
If you want to make a picture with roses from ribbons, but you can’t cope with embroidery or just don’t have the desire to learn the techniques of execution, try this easiest way. It is suitable for absolutely everyone - children, beginner craftswomen, people who do not know how to do with a needle and thread.
To create a picture you will need:
- Imagine how the finished picture should look like, mark the points on the fabric where the buds, flowers and leaves will be attached.
- Twist the required number of buds and roses from the ribbons of the desired colors. Sew them, lightly burn them from below and sew them onto the canvas.
- Cut out leaves from wide ribbons. Finish the edges with a lighter, sew to the canvas.
To diversify the composition, a picture with roses can be decorated with ribbon loops or ribbon knots.
Don't forget to watch video tutorials. They explain and show step by step how to quickly make beautiful roses from ribbons.
Roses made in this technique are more voluminous than flowers made in the previous way. Watch the video tutorial in order to better understand the technique and see it visually.
Thread embroidery
![]() This version of rose embroidery is also suitable for beginners. When using this technique, twisting the buds is not required, roses are embroidered directly on the fabric. For this:
This version of rose embroidery is also suitable for beginners. When using this technique, twisting the buds is not required, roses are embroidered directly on the fabric. For this:
- Fasten the thread to the fabric and make five stitches of the same length, in different directions from the place of fastening, like the rays of the sun. The size of the stitch will determine how magnificent the flower will turn out.
- Bring the thread to the right side in the middle of the "sun" and start embroidering it in a circle, under and over the stitches.
- Do not tighten the embroidery too much, the flower may be squeezed.
- Instead of a thread, you can immediately use ribbons.
How to embroider kanzashi roses with ribbons
![]() Kanzashi- art that came from Japan. And this is noticeable - kanzashi roses do not have rounded petals, as in most techniques, but voluminous and pointed. They are somewhat reminiscent of origami flowers, but not from paper, but from fabric.
Kanzashi- art that came from Japan. And this is noticeable - kanzashi roses do not have rounded petals, as in most techniques, but voluminous and pointed. They are somewhat reminiscent of origami flowers, but not from paper, but from fabric.
A rose embroidered with kanzashi ribbons will decorate any picture. Let's move on to a step-by-step tutorial on making kanzashi roses.
You will need:
Let's get to work:
- Cut out squares from the ribbon, we will make petals from them. The size of the squares will depend on the size of the rose you are going to make.
- To make it convenient to hold small workpieces, do this with tweezers.
- We fold the petals according to the photo instructions.
- We do not need extra corners, cut them off.
- One flower will require about seven petals. After you have the required number of petals, we proceed to collect the bud.
- Take one petal, process with adhesives and roll into a tube. Treat the second petal with glue too and roll it around the tube obtained from the first petal.
- Moisten the rest of the petals with glue too and wrap them in turn around the bud from the first two flowers.
The flower is ready. The size of a rose directly depends on the number of petals. The more petals you used to make the rose, the bigger the flower will be.
Make the required number of roses and you can proceed to composing compositions. Sew flowers onto the fabric, sew with ribbons if necessary. Decorate with leaves and knots.
If you are interested in this technique, watch the video tutorials on creating kanzashi flowers. From there you can get the necessary information and visually trace the creation of roses.
Embroidery roses step by step
![]() In conclusion of the article, we suggest that you familiarize yourself with the step-by-step photo instructions for embroidering roses on fabric.
In conclusion of the article, we suggest that you familiarize yourself with the step-by-step photo instructions for embroidering roses on fabric.
- Prepare the tools for work, you will need: ribbons, fabric, hoop, needle with a large eye, extra. needle, thread, scissors.
- Thread the tape into the needle.
- Now you need to fasten the other end of the tape. To do this, bend it into a loop and sew it like the middle of a rose.
![]()
![]()
![]()
![]()
![]()
![]()
![]()
![]()
![]()
![]()
![]()
![]()
![]()
![]()
![]()
![]()
![]()
![]()
![]()
![]()
![]()
![]()
![]()
This step by step photo tutorial offers a basic and easy way to embroider roses. Watch the video to consolidate the material and learn other techniques to create voluminous beautiful and unusual paintings using different embroidery methods.
Ribbon embroidery roses with diagrams and photos
![]()
The very first embroideries that have survived to this day were made by Chinese craftswomen using silk, hair, gold and silver threads. Ribbons for decorative purposes widely used in ancient Rome and Greece. But sewing with ribbons became especially widespread thanks to the French, becoming one of the most beautiful and popular types of embroidery.
Using the technique of embroidery with ribbons, you can depict any flowers, but the most chic pictures are obtained if create whole roses or their individual petals. We have prepared information about the sewing technique itself, found the most beautiful ideas for doing work, and selected several lessons for beginner craftswomen on video.
Features of the technique of embroidery with ribbons of roses
To make the embroidery of a rose from ribbons beautiful, voluminous and pleasing to the eye, in creating a rose, follow the following step-by-step instructions:
- It is better for a novice craftswoman to try to make the first rosette of ribbons without attaching to the base.
- Take a wide satin ribbon (2.5-3 cm) 15 cm long, burn the ends with a lighter so that they do not bloom.
- Wrap the edge of the ribbon in a bag and sew in two layers with a thread that matches the color of the ribbon.
- Twist the bag with a tube, forming the middle of the rose. Bend the ribbon as you like, wind it around the middle of the flower, stitching with a needle.
- The farther from the center, the larger form the petals.
The next rose from ribbons try to embroider on a regular canvas:
- Fasten a knot on a thin (1 cm) ribbon at the very edge.
- Not far from the end of the ribbon, twist a small bud with your hands and sew it with a thread - this is the basis of the future flower. Attach the base to the canvas.
- Thread the tape into a special needle and start winding it around the middle, making small stitches. Make sure that the shiny side of the ribbon is always on top - this will make the rose brighter.
![]()
When you start to get such simple roses, you can start embroidering full-fledged -pictures- with ribbons.
Ideas for embroidery with ribbons of roses with execution patterns
We picked some not the most difficult ideas for embroidery with ribbons of roses with a photo of the scheme and the final result.
Heart of roses
This simple the pattern will decorate any pillow or a decorative napkin.
Scheme:
![]()
Details:
- Spider web roses are used in the work, they can be replaced with rose flowers that are more suitable for you.
- When creating embroidery, French knots are used, which eliminates the need to create rosebuds.
- In such embroidery, ribbons 1 centimeter thick are used.
Result:
![]()
Bouquet of three flowers
Scheme:
![]()
Details:
- To make lush roses, you need a ribbon 3 to 5 centimeters wide.
- The leaves for work are not stitched, but cut out of the tape, the edges must be melted with a lighter.
- If you have a kit for making artificial flowers, you can use it to add volume and texture to the leaves.
- It is convenient to work on the hoop - it is easier to fix the rose petals on the canvas.
- You need to start work with clean hands. Because of their pomp, roses are difficult to wash and dry.
Result:
![]()
flower twig
Scheme:
![]()
Details:
- The work looks good if you use translucent tapes. Use ribbons 2-3 centimeters wide.
- Roses are stitched using the cobweb method.
- French knots are used to decorate the work.
- The work is not too voluminous, it can be used to decorate household items.
Result:
![]()
Bouquet of small roses
Details:
- To create a picture, we recommend using ribbons 1 centimeter wide.
- Roses are created using the cobweb method.
- Buds are envelopes twisted and sewn to the canvas from the edges of the tape.
- We recommend sewing a tied bow before attaching it to the embroidery.
Scheme and result:
![]()
Basket with roses
Simple but effective work.
Details:
- For roses, use multi-colored satin ribbons 1 centimeter wide.
- First, create a sufficient number of small stitched roses, and then place and fix them on the canvas.
- The ribbons that make up the basket should only be sewn along the edges, not pulling too hard. This will make the basket look larger.
- The work comes out not very lush, which greatly facilitates washing and drying the product.
Scheme and result:
![]()
Video with the lessons of the master class of embroidery with satin ribbons of roses for beginners
- The video shows the first steps in ribbon embroidery. It clearly shows what types of stitches are, how to fasten the ribbon on the needle and how to fasten the future rose on the fabric.
- This video shows a master class on embroidering a rose and a bud using satin ribbons. The technique is shown how to do all the work in eight, maximum ten stitches. Even a novice needlewoman can easily cope with such work.
- This video shows you how to get started on making a ribbon rose. It is described in detail how to build a sketch for a future rose. The process of creating perfect, beautiful petals is shown step by step and in detail.
Advantages of Ribbon Embroidered Roses
Drawings made in the technique of embroidery with ribbons are very beautiful, voluminous and always pleasing to the eye. With a little practice, even a beginner can create a real masterpiece with their own hands. Ribbon embroidery is universal, this technique can create postcards, pillow covers, real paintings. Such an embroidery on clothes looks insanely beautiful, especially in the bodice area.
Ribbon embroidery roses in a step by step tutorial
Dear needlewomen, this step-by-step master class will teach you how to embroider with straight stitches. They are of two types - straight and lateral. Most often, mistresses choose such tones as cream, yellow, orange, burgundy, pale pink, sometimes red and white. Ribbon embroidery roses and the whole idea of a still life depends on your imagination. We present to your attention examples of the work of experienced needlewomen:
![]() chic roses in pictures
chic roses in pictures
![]()
![]()
![]()
Accessories and materials for embroidery
- Canvas
- hoop
- Ribbons
- Scissors
Fabric and hoop
For starters, you can use any fabric, color too. For beginners, it is better to take a canvas, since it is easier to learn from it. In the future, it is already possible to choose the basis of the best quality so that embroidery can decorate your interior or a gift that could pleasantly surprise others. It is necessary to fill in a stretch, in the hoop. They can be rectangular or round. We embroider a rose from a satin ribbon.
![]()
Bud embroidery technique
Embroidery of roses in two steps. First, a twisted middle is made, and then the outer petals are embroidered.
The core and outer petals of the flower
For the twisted middle, you need a ribbon 2.5 cm wide, you will also need a needle and thread in the same color. We cut off a small amount, about 1 m, bend the tip - 3 centimeters with our right hand at a right angle (it doesn’t matter which side to start from - from the front or from the wrong side), it will still spin. Then we bend again, then put the fingers of the left hand - the index finger lies on the upper edge, and the thumb under the bottom.
![]()
We bend the top edge under the bottom, pull out the thumb, and a small triangle is formed. Now with the right hand we tightly twist it towards ourselves three times, aligning along the upper edge.
We sew the center of the inflorescence with a needle and thread, all the turns. And so we twist to the end of this geometric figure, which was formed on the left side during the bend, that is, turned - flashed. The first is always tightly twisted. As soon as the tape was fixed with a needle to the end, the fingers were again placed correctly - the index finger on the upper edge, and the large one under it. We bend the next triangle. And now you need to twist more freely, the petals seem to deviate from each other. We repeat the same process of twisting and flashing with each turn. A new coil is fixed with a needle, turned again and stitched.
The next one is laid even more freely. A properly laid out ribbon is guaranteed to be an elegant creation. When many layers are wound, you can no longer pierce this bud with a needle, but only pick up a new coil to the bottom one. We twist the bud so that the diameter of the rose becomes 25 millimeters.
Detailed video lesson for needlewomen. Just five minutes and the rose is ready.
Where there was the first bend, there was a small tip. This is where the process needs to start. We pierce a hole in the middle of the base of the fabric with an awl. We insert the tail of our flower and send the needle and thread to the wrong side there.
From the wrong side, it is necessary to stretch the tip so that the rose fits snugly against the canvas. We fix it with a thread and then cut off the excess along with the thread.
Now we thread our tape into a large needle with a wide eye. If you look from above at the bud, which is embroidered and inserted into the canvas, it will become clear in what sequence the petals need to be twisted and stitched, that is, we twist in a circle.
![]()
We twist the tape into a soft fold and pierce it under the petals. On the wrong side, we retreat 2 millimeters, bring the needle to the front side of the fabric, and again create a soft fold. We repeat the puncture under the turns of the flower and make sure that everything is tightly and neatly packed. No gaps should be visible between already stitched ones. When embroidering, you need to be careful when laying. Try to make them look pretty, turn the turns as you like, the tape should fit as it should.
Further, after two petals, the third turn must be sewn differently. We advise you to pay attention to the jumpers that turned out when piercing the main working material (there is a distance of 2 mm between them). They must be covered with a third petal.
So, from the jumper we move 1.5 cm to the right. We twist the ribbon into a soft fold and pierce it. We sew the fourth petal further, retreating from it by 2 mm. Thus, we lay them in a circle. We form the fifth turn of the rose, while not forgetting to overlap the jumpers. Immediately correct, tighten and stack them, then it will be difficult to do. And we make sure that the level is the same. In this sequence, step by step, we sew eight blanks.
Reception "from the ninth petal"
Video master class “Embroidery roses with ribbons for beginners”
We embroider rosebuds with ribbons: 7 ways, 7 beautiful flowers
When embroidering a flower arrangement of roses, quite often the question arises of how to embroider a bud. Today we will look at several types of buds, but first we want to remind you that most of the roses that we have already made in our master classes have their central part formed at the beginning of work. She, too, may well act as a bud. Let's show with examples.
In this workshop, we made roses based on a straight basting stitch, first forming a center that can be used as a bud. If you stop at this stage (photo below) or twist the ribbon a little more, you will get a pretty bud that can be sewn to the fabric.
![]()
There we also made another rose, folded in a special way, before laying the basting seam. It can also turn into a bud. The photo below shows what it would look like.
![]()
Here we made a folded rose and also formed its center. This is how the bud will turn out if you stop only at the central part of the flower.
![]()
Now consider 4 new ways for us to make buds.
For work we need:
- Tapes of different widths (for example, 15, 25 and 50 mm)
- Scissors
- Fabric for sewing on buds
- hoop
- Needle and thread to match the ribbon
- Lighter
- Possibly sewing pins
![]()
We have prepared the materials, we start making buds.
We cut off 10–12 cm from a tape 25–30 mm wide and carefully singe the edges of the tape so that they do not turn out to be rough.
![]()
Fold it in half lengthwise.
If you have a double-sided satin ribbon, then you do not need to fold it.
![]()
We wrap the tape diagonally. The edge of the tape should go beyond the edges by 2 mm.
![]()
![]()
Fasten with a few stitches.
And we begin to twist the tape.
![]()
We twist to the desired size, not forgetting to fix the turns.
![]()
We wrap the free end of the tape diagonally away from us.
![]()
We fix. The button is ready.
![]()
![]()
Sew it to the fabric.
![]()
We cover the lower part of the bud with a leaf.
![]()
We take a tape 25 mm wide and cut off a piece 15 cm long from it, lightly singe the edges.
![]()
On the right side of the tape we make a cone (previously, such paper bags were made in the store for shopping).
![]()
We lay a basting seam along the edges.
![]()
On the other hand, fold the tape in half lengthwise and bend the corner, as in the first version.
![]()
From the corner we twist the tape into a roll, not reaching a cone of 15–20 mm.
![]()
We put our roll into the cone so that its top is at the top of the cone.
![]()
And we fix along the fold with another basting seam, as if continuing the previous seam. In the photo below - the red line is drawn near the first seam, the blue one - at the second.
![]()
![]()
We tightly tighten the thread (everything that seems superfluous is hidden inside the cone).
![]()
And tightly fix all the layers of the tape. The button is ready.
![]()
We sew it to the fabric, hide the base under the leaf.
![]()
Detailed video on making such a bud from Tatyana Ulanova (bud from the 6th minute)
If you need a very small bud, then you can embroider it directly on the fabric using the stitches that we have already considered. We take two small pieces of ribbon (20 cm is enough) with a width of 15 mm, for example, a pink ribbon for a bud and a green one for its cup.
With a pink ribbon we make a bud with a stitch Loop with an attachment:
![]()
And with a green ribbon we make a cup for a bud with a stitch Half-loop with an attachment with fixation of the attachment:
![]()
The Half-Loop Locking Stitch can be sewn not just with the Straight Stitch, but with the Twisted Straight Stitch. Such a stitch will look more like a stem.
Here we have such a small bud.
![]()
And one more bud, which will surely not leave you indifferent. To make it, we need a red ribbon 50 mm wide and a green ribbon 20 mm wide.
We cut off 4 pieces of 12 cm from the red ribbon. We singe the edges with fire.
From one edge of the tape we make a bend about 1 cm wide and fix it with sewing pins.
![]()
We bend the corners of the tape as in the photo, fix it with pins. Lay a basting seam along the bottom edge of the tape.
We tighten the basting seam, we fix the basting.
Corners do not need to be sewn together!
![]()
We get the first petal.
![]()
From the remaining pieces of red ribbon we make three more of the same petals. We twist one of the petals.
![]()
Fasten with a few stitches with a needle and thread to match the ribbon.
![]()
We take the second petal, wrap it around the first blank and fix it with stitches.
![]()
We collect the rest of the petals in the same way, fixing with stitches.
![]()
![]()
The button is almost ready.
We cut off the excess tape at the base and reliably singe it with fire.
![]()
Now you need to make a cup for the bud. Cut off 10 cm from the green ribbon.
![]()
Fold in half, cut out the corners so that it turns out as in the photo below. We burn in slices.
![]()
Fold in half and sew to make corners.
![]()
![]()
Cut the tape near the seam and singe.
![]()
We twist. This is such a cute cup.
![]()
We put a button in it.
![]()
We fix with a few stitches with a simple green thread.
![]()
Bud is ready! We sew it to the fabric, we make the stem. I made it from twisted ribbon. We love and are proud)
![]()
![]()
Leaves can also be embroidered on the stem. Many thanks to Raisa Andrianova for the idea of creating the last bud.
Examples of embroidered works in which rosebuds were used.
![]()
![]()
![]()
![]()
How to embroider a rose with ribbons?
What are the master classes for embroidering ribbons of roses with your own hands?
![]()
Embroider with ribbons is an incredible pleasure. Flowers are obtained as if they were alive.
In order to embroider a rose we need a satin ribbon about two centimeters wide, a canvas (it is convenient to embroider on it), a hoop.
You should start embroidering a rose from a bud. To do this, twist the ribbon in your hands to make a bud. Like this:
![]()
Then we sew the bud to the canvas and make a petal from the tail of the satin ribbon. Making a petal is easy when you thread the ribbon into the needle. Each next petal must be formed with your fingers, and then fixed on the canvas. Like this:
![]()
So we sew until the rosette becomes the size you need.
By the way, you can embroider roses from ribbons of different colors.
A good tutorial for a beginner is here.
I offer several visual step-by-step schemes for creating a delicate rose bud using ribbons, threads, needles, scissors and a fabric cloth on which the rose will be attached.
![]()
![]()
![]()
I also propose to consider the possibility of creating an unopened rosebud.
![]()
Ribbons of any width and even any structure are suitable for a rose: silk, satin, tapestry, plain cotton, chintz. But it is best to take satin, this ribbon keeps its shape perfectly, has the shine necessary for a rose on one side of the ribbon, elastic, but soft, pliable to give the desired shape of the petals to the future volumetric flower. If you decide to use a transparent ribbon made of tulle, keep in mind that the rose will turn out good for everyone, but it will be transparent, this hides the effect of the bulk of the flowers, they are lost somewhere, turning into an airy ghostly pattern, where there will be glimpses of roses.
To prevent the tape from moving out of the position given to it, it is necessary to hold it from behind with your finger, at this time the front part of the tape is carefully laid out on top, the exit from the fabric should also be leveled and the direction of the petal should be set immediately. In order for the petal to keep its volumetric shape, it is necessary to bend the tape obliquely, as if you had folded a sheet of paper diagonally in half. If the fold is forward, then the needle with the tape is inserted before the exit from the petal tissue, if the fold is backward, then the tape is inserted from behind under the exit at a distance of about 2-3 millimeters. Make sure that the tape does not shrink when the petal is tightened, does not change shape, the bend angle should be clear.
For a small rose, it is enough to make 5-6 petals in a circle so that the center of the previous petal is the beginning of the next one. In other words, having made one petal, the next one begins to form from the middle of the past, bringing the needle with the tape behind the petal, everything should be tightly packed in front. 5-6 petals go to each tier of the flower. All subsequent ones are made from a wider ribbon or from the same one, but they tighten it to the base less to give the rose a larger volume in height. The distance at the exit point and the entry point of the needle with the tape when creating the petal is also increased, for large elements you need to retreat up to 5 millimeters, look at the situation and how the petal lies. No matter how hard you try, each rose leaf will be individual and will fall as it suits him, so you need to adapt to the situation.
The article was written based on materials from sites: myhobby.guru, www.joxin.club, podelkiruchkami.ru, nacrestike.ru, www.bolshoyvopros.ru.
Embroidery with roses for inspiration


MASTER-CLASS OF EMBROIDERY OF ROSES
Roses are embroidered with satin stitch, cross-stitch, beaded and, of course, made from ribbons that look so much like delicate petals. This is what we will do now.
COLLECTED ROSES
A fairly simple craft, which is done using the technique of picking up with thread or wire tape. Ribbons of any length and width are suitable for such a rose. To begin with, you can take a four-centimeter-wide tape and practice to approach the manufacture of a flower fully armed. Combining several beautiful multi-colored roses, adding leaves and other decorations to them, you can quickly make a brooch or hair clip.

You can start with a wire tape four centimeters wide, and from 46 to 60 in length. You can make a rose by gathering on wire or using a U-stitch. To make a smaller rose, for example, you need to take a smaller wire ribbon for a brooch (the width remains the same - four centimeters, and the length should be 20-25 centimeters).
ROSES FROM WIRE TAPE OWN HANDS
- It is necessary to expose one and a half centimeters of wire at one end of the tape and connect them together. From the opposite end of the tape, gather on the wire, sliding the fabric to the fixed edge.
- After you get a lush assembly, the remaining ends need to be fastened together. Bend one end of the wire tape (long enough to hold the flower) and sew it into place.
- Now we twist all the length we have.
- Do not forget to make stitches, this will secure the rows. At the end of the twisting, the raw edge of the ribbon must be folded under the base of the flower and sewn securely.
- All excess tape and wire are removed, and the resulting rose is sewn to the right place or sits on the stem.

U-shaped shirring
- Before laying a line, you need to remove one wire.
- Then, on the rest, the assembly is done. One end of the tape is folded and twisted in the same way as in the previous version. As you twist, it is necessary to secure the assembly with stitches.
- The rest of the tape is folded under the base of the rose and stitched through all layers for a stronger fixation. The rose is ready to be sewn on or planted on a stem.
If you want the rose to look different, when twisting the ribbon, its top edge must be folded down.
BUDS FROM RIBBONS
Small pink and flat buds are made from ribbons 1.5-2 cm wide and 5 cm long. Well suited for a flat composition. For a cup, you need to take a green ribbon 2.5-6 cm. For such small buds, the remains of ribbons are well suited.
- The ribbon from which the bud will be made is folded, gathered tightly and secured with a thread.
- The gathered bud is wrapped with cup tape and sewn together.
- The ends of the bud are cut off, and the bud itself is sewn to the bead or used at your discretion.

FOLDED SATIN RIBBON ROSES
This technique is used to quickly make roses. Folding is a rather difficult technique to master, but, on the other hand, the fastest. Once you've learned how to fold your ribbon at will, you'll want to fold any ribbon you see.
You can practice on a tape four centimeters wide and from 30 to 50 in length. Sometimes, you can simply fold the ribbon and cut it to the desired rose size.

It must be remembered that the edges of the rose should be at the same level so that the center does not bulge forward.
- We bend the tape on the right side.
- Bend across the previous fold again, and then wrap around several times so that you get a twisted center of the flower. Such a beautiful curl will be the secret of the future flower. For greater reliability, you can flash it. You don't need to cut the thread.
- We bend the tape on the left side. To increase the space between the folds of the rose, the center of the bud needs to be slightly rejected. We twist it along the diagonal of the bent tape. To better secure the layers of the flower, they need to be stitched.
- Again we bend the tape on the left side and twist it with a fold around the flower. There should be enough space between the layers for the petals to breathe. Fasten with stitches. This sequence of actions is repeated several times, depending on the size of the future rose. Don't be afraid to experiment. The worst option may be to unravel the tape and repeat all the steps again.
- At the final stage of work, we bend the tape down and sew the raw edge to the base of the flower.
- The excess tape is cut off, and the newly made rose is attached to the right place.
- If you want to attach a stem to a rose, you need to insert a wire into the base of the finished flower and fix it with glue.

You need to pay attention to the shape of the petals. As a rule, the edges of roses are not processed according to the folds, so they look unnatural and uninteresting. To make the rose more natural, you can properly process the edges: pinch or turn the ribbon in some places in the desired direction, the rose will become like a living thing.
Master class from Nataliya k
For work you will need: A pink and green satin ribbon, 1.5 cm wide (about 2 meters each), canvas (burlap or other fabric - I do not recommend starting with dense fabrics, because it is more difficult to pull a needle with a ribbon through a dense fabric) ,
threads to match the ribbons (mulina), a special needle for embroidery with ribbons "chenille" - a thick needle with a large eye and a sharp tip.
It is good to embroider with this needle on fabrics with fine weaving: silk, organza), or a “tapestry” (“knitwear”) needle - with a large eye and a blunt tip, it is more convenient to embroider on canvas, burlap, knitwear.

For a rose, lay 5 carcass threads emanating in a beam-like manner from the center, taking into account the diameter of the rose (in this case, the beam is 2 cm).

Bring the tape to the front side and start wrapping the gimp threads, passing the tape either above or below the gimp thread. Make sure that the tape lies face up.

Lay the tape loosely, without tightening.


Our rose is ready

Now let's make a few rosebuds with loops attached


Embroider the leaves around the buds with long stitches with curls (holding the tape with the front side up, bending the tape to the wrong side, in the opposite direction, make a puncture with a needle from above vertically in the middle of the tape, according to a certain stitch length. It turns out an acute angle with symmetrical curls of the edges in the middle of the tape


Embroider rose leaves with loops with attachment (like buds). Sew twisted ribbons for stems with hand stitches. Our roses are ready. It remains only to arrange the composition. Good luck!

Regarding the fixing of the “tails” from the wrong side, as a rule, I just imperceptibly hem them with a regular needle and thread.


When embroidering a flower arrangement of roses, quite often the question arises of how to embroider a bud. Today we will look at several types of buds, but first we want to remind you that most of the roses that we have already made in our master classes have their central part formed at the beginning of work. She, too, may well act as a bud. Let's show with examples.

And with a green ribbon we make a cup for a bud with a stitch Half loop with an attachment with fixation of the attachment:

The Half-Loop Locking Stitch can be sewn not just with a Straight Stitch, but with a Twisted Straight Stitch. Such a stitch will look more like a stem.
Here we have such a small bud.

Option 4
And one more bud, which will surely not leave you indifferent. To make it, we need a red ribbon 50 mm wide and a green ribbon 20 mm wide.
We cut off 4 pieces of 12 cm from the red ribbon. We singe the edges with fire.

From one edge of the tape we make a bend about 1 cm wide and fix it with sewing pins.

We bend the corners of the tape as in the photo, fix it with pins. Lay a basting seam along the bottom edge of the tape.

We tighten the basting seam, we fix the basting.
Corners do not need to be sewn together!


From the remaining pieces of red ribbon we make three more of the same petals. We twist one of the petals.

Fasten with a few stitches with a needle and thread to match the ribbon.

We take the second petal, wrap it around the first blank and fix it with stitches.

We collect the rest of the petals in the same way, fixing with stitches.


We cut off the excess tape at the base and reliably singe it with fire.

Now you need to make a cup for the bud. Cut off 10 cm from the green ribbon.

Within every soul there is a Rose. All divine qualities are installed in us from birth, they grow in the midst of the thorns from our mistakes. Many of us look at ourselves and see only these thorns, defects. We despair, thinking that nothing good can come from us.
One of the greatest rewards that a person can have is the ability to get through the thorns and thorns of another and find the Rose inside him. This is one of the properties of Love… to see a person, to know his mistakes and not drive him out of your life, respecting the nobility that is in his soul. Help others to understand that they can overcome their mistakes. If you show them this "Rose" in them, they will overcome their thorns. Only then will they continue to bloom...
Diana Hristova
Rose is my favorite flower, my favorite subject, my first successful ribbon embroidery. I go back to roses all the time.
The photos were taken in different lighting, please excuse the quality.
Necessary materials for work:
- the fabric on which we will embroider, I have panne velvet;
- ribbons made of artificial and natural silk with a width of 4 to 25 mm in different colors.
1) We stretch the fabric on the frame.
2) We select tapes.
3) We embroider the rose with pink silk, the ribbon width is 25mm.
Here is a master class on embroidering roses with ribbons from a wonderful embroiderer SVETLANA GERASIMOV. I myself also learned to embroider roses according to a similar MK.
We twist the middle of the rose as follows
Here is such a beautiful rose.
3) Embroider rose stems and leaves using the following stitches.
We start with stems and twigs. With ribbons 4 and 13 mm wide, we perform twisted straight stitches.
The leaves are embroidered with ribbon stitch with 25mm ribbons.
Ribbon stitch.
The tape passes not only through the base, but also through itself. Offsetting the puncture to the edge of the tape allows you to achieve very interesting effects in the embroidery of leaves and petals. Experiment with different directions of tape tension.
4) I like to embroider flower buds. Each time they turn out differently. For volume, I sew on beads.
With a pink ribbon, we sheathe the beads with a ribbon stitch.
We embroider greenery at the buds with 4mm ribbons also with ribbon stitches.
Slightly tint the tips of the petals with watercolor pencils.
Work is ready!
I just attached the frame to the embroidery.
Thank you very much for your attention!
The very first embroideries that have survived to this day were made by Chinese craftswomen using silk, hair, gold and silver threads. Ribbons for decorative purposes widely used in ancient Rome and Greece. But sewing with ribbons became especially widespread thanks to the French, becoming one of the most beautiful and popular types of embroidery.
Using the technique of embroidery with ribbons, you can depict any flowers, but the most chic pictures are obtained if create whole roses or their individual petals. We have prepared information about the sewing technique itself, found the most beautiful ideas for doing work, and selected several lessons for beginner craftswomen on video.
Features of the technique of embroidery with ribbons of roses
Ribbon embroidery technique requires accuracy, attentiveness and perseverance. Also, the craftswoman will not hurt to master the “French knot”, which is often used to decorate work with roses from ribbons. Well-executed works are obtained by “volumetric embroideries.” Such paintings correspond to “rococo embroidery” due to floral ornaments and raised elements.
To make the embroidery of a rose from ribbons beautiful, voluminous and pleasing to the eye, in creating a rose, follow the following step-by-step instructions:
- It is better for a novice craftswoman to try to make the first rosette of ribbons without attaching to the base.
- Take a wide satin ribbon (2.5-3 cm) 15 cm long, burn the ends with a lighter so that they do not bloom.
- Wrap the edge of the ribbon in a bag and sew in two layers with a thread that matches the color of the ribbon.
- Twist the bag with a tube, forming the middle of the rose. Bend the ribbon as you like, wind it around the middle of the flower, stitching with a needle.
- The farther from the center, the larger form the petals.

The next rose from ribbons try to embroider on a regular canvas:
- Fasten a knot on a thin (1 cm) ribbon at the very edge.
- Not far from the end of the ribbon, twist a small bud with your hands and sew it with a thread - this is the basis of the future flower. Attach the base to the canvas.
- Thread the tape into a special needle and start winding it around the middle, making small stitches. Make sure that the shiny side of the ribbon is always on top - this will make the rose brighter.

Ribbon embroidery often requires not only lush flowers, but also rosebuds. They can be easily made by sewing a bag of tape and inserting the rest of the tape rolled up into it.
When you start to get such simple roses, you can start embroidering full-fledged “pictures” with ribbons.
Ideas for embroidery with ribbons of roses with execution patterns
We picked some not the most difficult ideas for embroidery with ribbons of roses with a photo of the scheme and the final result.
Heart of roses
This simple the pattern will decorate any pillow or a decorative napkin.
Scheme:

Details:
- Spider web roses are used in the work, they can be replaced with rose flowers that are more suitable for you.
- When creating embroidery, French knots are used, which eliminates the need to create rosebuds.
- In such embroidery, ribbons 1 centimeter thick are used.
Result:

Bouquet of three flowers
Beautiful work, consisting of three lush roses and four buds. You can change the number of all elements at will.
Scheme:

Details:
- To make lush roses, you need a ribbon 3 to 5 centimeters wide.
- The leaves for work are not stitched, but cut out of the tape, the edges must be melted with a lighter.
- If you have a kit for making artificial flowers, you can use it to add volume and texture to the leaves.
- It is convenient to work on the hoop - it is easier to fix the rose petals on the canvas.
- You need to start work with clean hands. Because of their pomp, roses are difficult to wash and dry.
Result:

flower twig
This ribbon embroidery pattern is suitable for beginners.
Scheme:

Details:
- The work looks good if you use translucent tapes. Use ribbons 2-3 centimeters wide.
- Roses are stitched using the cobweb method.
- French knots are used to decorate the work.
- The work is not too voluminous, it can be used to decorate household items.
Result:

Bouquet of small roses
Details:
- To create a picture, we recommend using ribbons 1 centimeter wide.
- Roses are created using the cobweb method.
- Buds are envelopes twisted and sewn to the canvas from the edges of the tape.
- We recommend sewing a tied bow before attaching it to the embroidery.
Scheme and result:

Basket with roses
Simple but effective work.
Details:
- For roses, use multi-colored satin ribbons 1 centimeter wide.
- First, create a sufficient number of small stitched roses, and then place and fix them on the canvas.
- The ribbons that make up the basket should only be sewn along the edges, not pulling too hard. This will make the basket look larger.
- The work comes out not very lush, which greatly facilitates washing and drying the product.
Scheme and result:

Video with the lessons of the master class of embroidery with satin ribbons of roses for beginners
- The video shows the first steps in ribbon embroidery. It clearly shows what types of stitches are, how to fasten the ribbon on the needle and how to fasten the future rose on the fabric.
- This video shows a master class on embroidering a rose and a bud using satin ribbons. The technique is shown how to do all the work in eight, maximum ten stitches. Even a novice needlewoman can easily cope with such work.
- This video shows you how to get started on making a ribbon rose. It is described in detail how to build a sketch for a future rose. The process of creating perfect, beautiful petals is shown step by step and in detail.
Advantages of Ribbon Embroidered Roses
Drawings made in the technique of embroidery with ribbons are very beautiful, voluminous and always pleasing to the eye. With a little practice, even a beginner can create a real masterpiece with their own hands. Ribbon embroidery is universal, this technique can create postcards, pillow covers, real paintings. This “embroidery on clothes” looks insanely beautiful, especially in the bodice area.
The flowers on the canvas amaze with their liveliness and are especially pleasing to the eye in winter, when fresh flowers are not available.