What knitting with facial loops looks like. Knitting stitches
Are we knitting correctly...
Masterful execution begins with the correct knitting of knit and purl stitches. How to know if you are knitting correctly or not. It's simple, tie the sample with a 1x1 elastic band.
A) If you get even braids of loops, as in our test up to the first green stripe, you are knitting correctly. You don't have to read any further. Knitting needles in your hands!
B) If you see that the loops are wandering a little, that is, one loop in the braid is facing up, and the other is slightly slanting to the side (see the area between the green stripes), you are knitting the purl stitches incorrectly.
C) If your elastic is as “rolly” as in our test above, you are knitting the knit stitch incorrectly. So we will treat you! But first, let's talk about the structure of the loop...
Loop structure
Look at the loop on the knitting needle. Mentally divide the loop in half lengthwise at the highest point. The part of the loop that is on the side of the needle closest to you is called the front wall. The part of the loop on the other side is the back wall.
Now we can continue the conversation about knit and purl stitches.
Classic and English methods of knitting a knit stitch
For a knit stitch, knitting behind the front wall is considered correct, or classic (see picture). In all knitting magazines it is generally accepted that needlewomen knit this way.
Classic facial
Sometimes some amateurs knit a knit stitch behind the back wall (see picture). This loop is called the “English knit” loop, and sometimes the “granny” loop.
English facial.
If you knit this way, I advise you to relearn, although you need to know how to knit the English knit stitch. This method of knitting a loop is quite often used, especially in openwork. In the symbols for such a loop, a special sign is introduced, and the loop is called “face crossed.” If all the loops are knitted in the classical way, and one loop is knitted in the English way, then this loop will be clearly different from the others. It will seem to be twisted. I even saw in some magazine the term not “crossed loop”, but “twisted”, but I like the word “crossed” better.
English and classic methods of knitting a purl loop
It is simply impossible to explain knitting a purl loop without a pattern, so look closely at how the arrow shows the movement of the knitting needle. (see picture).
Purl English
If the yarn is right in front of the stitch and you simply pull it into the stitch on the needle, this is the English way.
The correct purl loop must be knitted “with air”, as shown in the figure below.
Purl classic
If you find out that you knit in a non-classical way, you don’t have to give up knitting at all. I admit that my mother taught me how to knit using English stitches. When I took up knitting professionally, I had to relearn. I can't say that it was easy for me. Now I knit only in the classical way, but at the relearning stage I often cheated.
What was the trick? The fact is that knitting in the classical way is fundamentally openwork and relief patterns, as well as elastic bands. Garter stitch and knit/purl stitch can be worked using English stitches. I actively used this to take a break from the unusual tension in my hands, which required learning a new way of knitting. But only if you are also cunning like this, knit both purl and knit stitches in the English way. If you knit one row in the classic way and the other in English, it will turn out badly.
In this tutorial I will show you how to knit a purl stitch and a knit stitch. This type of knitting is also called stocking.
Purl is the second stitch in knitting. The first, as you remember, is the front loop.
Knowing how to knit knit and purl stitches, you can knit a great variety of patterns and products that use a combination of only these loops.
The purl loop, like the front loop, can be knitted in the classic and “granny” way.
Just like in the front classic loop, in the classic purl loop the right wall of the loop is located in front.
For me personally, knitting a purl stitch using the “grandmother’s” method is somewhat easier than the classic way. In general, the purl loop requires somewhat more strength and patience to master than the front loop. But I am sure that you have enough desire to achieve the desired result, which means everything will definitely work out!
Purl loops in the classic way


Schematic knitting of a classic purl loop 
Purl loops in the "grandmother's" way
We make a cast-on row and knit the first (front) row with facial loops, as we did in MK about facial loops. We are turning the work around. Remove the first loop without knitting.

Schematic knitting of a purl loop "grandmother's way" 
If you understand how knit and purl stitches are knitted, then you can knit the fabric using stockinette stitch or as it is called stockinette knitting.
Facial surface
To do this, you need to make a cast-on row, knit the first row (front side) with knit stitches, and the second row (wrong side) with purl loops.
So, continuing to alternate the front and back rows, you need to knit as many as you need.
To get an even braid along the edge, when knitting each row, you need to remove the first loop (edge) without knitting, and always knit the last loop (it is also called an edge loop).
I’ll say right away that some people do it differently. For example, the last stitch is always purled, the first stitch is always knitted. But that doesn't matter in this case.
Our task is to get a pigtail along the edge and we got it. Look here. 
And here is the result of my MK
Front side 
The wrong side of the stockinette stitch with a pigtail along the edge again 
Since ancient times, handmade things have been highly valued and in high demand. Everyone sought to learn some kind of handicraft in order to provide themselves and their family and friends with exclusive clothing, fakes or original interior items.
Hand knitting is one of the most common types of needlework. Possessing such skill, you can look stylish and fashionable without any special financial expenses. Scientists say that this is not its only advantage: while knitting, a person calms down, relaxes and is distracted from disturbing thoughts.
This article contains sequential lessons that describe in detail how to learn to knit. For beginning needlewomen, it will be a real help.
Lesson #1: Where to start?
For those who are just beginning to master the knitting technique, it is necessary to familiarize themselves with the tools with which the process is directly carried out.
The first thing to start knitting any knitted product is a set of loops with knitting needles. In order to know how to choose the right ones for a certain type of mating, you need to understand the main types.
Standard (ordinary) knitting needles
This type is used for all types of knitting, except circular. They are made from lightweight materials such as plastic, metal, aluminum, wood. They differ in thickness, from 1 mm to 25.5 mm, and in length. They have one working edge, and on the other there is a tip that acts as a limiter.

Stocking needles
Used for circular knitting, in particular socks, since it is not recommended to knit them with 2 knitting needles. They are sold in a set of 5 pieces. They have two working edges. The knitting process is carried out as follows: the product is placed in an equal number of loops on 4 knitting needles, and subsequent rows are knitted with the 5th.

Knitting needles for braid and braid patterns
Due to the bend in the middle of the knitting needle, their use greatly simplifies the process of crossing stitches. Their diameter can be 2-4 mm, selected according to the thickness of the yarn.

Marking paper clip
It is used to control the number of loops or mark a specific place on the product.
Circular knitting needles
They consist of 2 working tips connected by a metal or silicone line. They are used for certain patterns, circular knitting, or when the fabric is wide enough.

Pin
It is used to remove loops that at a certain stage do not need to be knitted. The dimensions of such a device can be different (10-15 cm).

Lesson No. 2. Introduction to types of yarn
Opening fashion magazines, you can see that clothes, depending on the seasonal purpose, are knitted from different types of yarn. Seeing such beautiful things, every second person asks the question: “How to learn to knit?” A lot of information has been published for beginner knitters with detailed step-by-step descriptions. However, in order to create a truly beautiful and original item, you will need to choose the right yarn for it.

Wool thread
Refers to natural species. Sheep wool is used to make it. Features a wide selection of colors. It is mainly used to knit winter items and is suitable for any type of pattern.
Cotton yarn
Ideal for any type of knitting. It is pleasant to the touch and does not cause allergies. A product made from this thread has a chic look.
Melange yarn
It consists of a percentage of synthetic and natural threads. Due to its texture, the products are lush and airy. Looks great on three-dimensional drawings.
Mohair
Designed for knitting warm items. This thread is very fluffy, so it is not recommended to use it for those things that are directly adjacent to the body. Large drawings are most relevant for her.
Fancy yarn
It is made by following a certain technology, which consists of combining threads of different texture, color and quality.
Lesson No. 3. Casting the first row
When starting to knit any fabric, you will need to make a set of loops with knitting needles. To do this, make a loop of yarn, which is draped over the thumb. One end of the thread passes through the index, and the other simply goes down. After this, both threads are fixed with the remaining three fingers. Having thus secured the yarn, loops are made using a knitting needle, from which the fabric will be knitted directly.
1st step

2nd step

3rd step

4th step

5th step

Lesson No. 4. Knit loop
Having learned how to cast on the first row, you can proceed to the main type of knitting - facial loops. They are fundamental to any drawing. In order to make a front loop, the thread is knitted with knitting needles in a certain way. To do this, you need to hook the loop onto the back wall with a free knitting needle and pull the working thread through it. If the drawing indicates the method of knitting behind the front wall, then a similar manipulation is performed, only the upper part of the loop is grabbed with a knitting needle.

Lesson No. 5. Purl loop
The next stage in mastering knitting techniques is purl stitches with knitting needles. They can be knitted in two ways - behind the front and back wall. The more common type is considered classic. To do this, the working thread is thrown over the fabric, the front part of the loop is grabbed with a knitting needle, through which the thread is pulled, which forms a new purl loop.

Lesson No. 6. Yarn over
Yarn over - air loop. It is formed by throwing on a working thread, holding it with a finger, and the subsequent knit stitch is knitted with knitting needles as usual. On the side where the purl loops are, knit a yarn over with knitting needles without twisting, so that a hole is formed. This knitting technique is used to create a product with an openwork pattern.
Lesson No. 7. Edge and edge loops
When knitting any fabric, you need to pay attention to the first and last loops. They occupy the main place in the manufacture of quality products. Thanks to a certain technique, the canvas has smooth and unstretched edges. Edge and edge loops are knitted in the following order. At the beginning of the row, the first one is removed without knitting, and at the end the last one is knitted with a knit stitch.
Lesson No. 8. How to knit elastic with knitting needles? Types and description
There are many different ways to knit elastic. As a rule, almost any product begins with it, so it is very important to learn how to knit it correctly and beautifully. The main condition for it is not to stretch the loops in order to maintain good density.

So, how to knit an elastic band with knitting needles, let’s look at simple options.
Elastic band 1 x 1
The simplest type. First row: alternate 1 knit stitch and 1 purl stitch. Subsequent rows are knitted according to the pattern.
Elastic band 2 x 2
It is knitted like the first option, only the row consists of 2 purl loops and 2 knit stitches.
Double elastic band is hollow
In order to knit it, you need to sequentially alternate 1 knit stitch, remove 1 loop without knitting. Knit like this on both sides of the product.
English gum 1 x 1
This option is more difficult for a beginner, but you can try.
An even number of loops are cast on the knitting needle. Next it is knitted as follows.
1st row: Knit 1, yarn over the next stitch and slip onto a working needle, alternating like this.
2nd row: a loop with a crochet is knitted, and the next one is yarn over and removed, repeat until the end.
3 throw: from the beginning of the pattern.
Lesson No. 9. How to learn to knit? For beginners: knitting a scarf
Having learned the basics of knitting, it’s time to try your hand at making a small accessory. You can already decide to knit a scarf for yourself or your family. Such a gift will be the most desirable for them. Any knitting patterns are suitable for it. Width is an individual value: if for a child, then 10-20 cm, for adults - from 15 cm. The length can vary from 1 m or more.
For a scarf, you can use threads of various thicknesses and colors, the main thing is that it is in harmony with the rest of your clothes.
Those that do not have a reverse side are better suited as a design.

An example of a simple scarf with a checkerboard pattern is given below.
Description:
The number of loops should be a multiple of 5, plus 2 edge loops.
1st row: 5 persons. p., 5 p., alternate to the end of the row, knit the last one.
2nd row and all even: according to the drawing.
3rd row: alternate knit 5, purl 5, edge knit.
5th row: knitted like the 3rd.
7th row: 5 purl, 5 knit, copied to the end of the row, the last edge.
9th, 11th rows: knit as 7th.
13th row: play from the 1st row.
| 13 | . | ■ | ■ | ■ | ■ | ■ | □ | □ | □ | □ | □ | . |
| 11 | . | □ | □ | □ | □ | □ | ■ | ■ | ■ | ■ | ■ | . |
| 9 | . | □ | □ | □ | □ | □ | ■ | ■ | ■ | ■ | ■ | . |
| 7 | . | □ | □ | □ | □ | □ | ■ | ■ | ■ | ■ | ■ | . |
| 5 | . | ■ | ■ | ■ | ■ | ■ | □ | □ | □ | □ | □ | . |
| 3 | . | ■ | ■ | ■ | ■ | ■ | □ | □ | □ | □ | □ | . |
| 1 | . | ■ | ■ | ■ | ■ | ■ | □ | □ | □ | □ | □ | . |
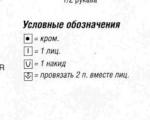
Lesson No. 10. Diagrams and symbols
Any knitting patterns can have a description or diagram that tells you exactly how to knit this pattern. From the previous lesson you can see examples of descriptions and diagrams. However, in order to understand what is written, you need to familiarize yourself with the symbols and learn to read the diagrams correctly. At first glance, they seem incomprehensible, with some kind of squares, diamonds, arrows, triangles.

However, this complexity is deceptive; standard abbreviations are not difficult to understand. In any edition of a magazine or book there is always a “Conventions” item; as a rule, all abbreviations in the text and symbols used are deciphered there.
For example, the main ones are:
- persons - front loop;
- purl - purl loop.
Looking at the diagram under the pattern you like, you need to look for symbols. They may be printed at the end of the book or just below the diagram.
For example, it looks like this:
.
- edge;
□ -
purl loop;
■
- front loop;
▲
- 3 loops together;
Ώ
- yarnover
Lesson No. 11. Patterns, diagrams and descriptions
We will describe simple patterns that need to be knitted; we will place the diagrams side by side for better perception. When trying to connect the proposed drawings, you need to try to understand the symbols as much as possible, since the quality of the entire product will depend on this.
Pattern "Diamonds"

| 19 | ■ | □ | □ | □ | □ | ■ | □ | □ |
| 17 | □ | ■ | □ | □ | ■ | □ | □ | □ |
| 15 | □ | □ | ■ | ■ | □ | □ | □ | □ |
| 13 | □ | □ | ■ | ■ | □ | □ | □ | □ |
| 11 | □ | □ | ■ | ■ | □ | □ | □ | □ |
| 9 | □ | ■ | □ | ■ | ■ | □ | □ | □ |
| 7 | ■ | □ | □ | □ | □ | ■ | □ | □ |
| 5 | □ | □ | □ | □ | □ | □ | ■ | ■ |
| 3 | □ | □ | □ | □ | □ | □ | ■ | ■ |
| 1 | □ | □ | □ | □ | □ | □ | ■ | ■ |
Description:
1st, 3rd, 5th rows: 6 p., 2 knits.
2-20th rows: according to the drawing.
7th row: k2, p4, k2, p2
9th row: P2, k1, p2, k2, p3
11th, 13th, 15th rows: 2 p., 2 knit., 4 p.
17th row: P1, k1, p2, k1, p3
19th row: k1, p4, k1, p2
21st row: repeat from the beginning.
For symbols for the diagrams, see lesson No. 10.
Star pattern

Description:
1st row: from 3 loops, knit 3 facial loops *, 1 knit.
2nd, 4th rows: out.
3rd row: 2 knits, from 3 loops 3 knits, 1 knit.
5th row: like 1st row.
*3 out of 3 loops - k1, yarn over, k1.
Pattern "Putanka"

| 3 | □ | ■ | □ | ■ |
| 2 | ■ | □ | ■ | □ |
| 1 | □ | ■ | □ | ■ |
Description:
1st row: P1, k1, duplicate to the end.
2nd row: K1, P1, alternate opposite to the previous row.
3rd row: repeat from the 1st row.
Now a frequently asked question is “How to learn to knit?” for beginners it will no longer be so scary and incomprehensible. If you follow the lessons provided exactly, you will have the opportunity to learn how to create original knitted masterpieces in a fairly short time.
Let's look at the very basis of knitting, namely, let's talk about loops. Here we will look at the basic rules for knitting purl stitches. Each loop consists of four parts: front wall, arc, back wall, broach. The distance between the loops forms a loop step. This structure of the loop allows it to be knitted in several ways. Let's look at two ways to knit a purl loop in detail - these are the classic and grandma's purl loops. Classic and granny purl loops differ from each other in the way they capture the working thread. Knitting in the classic way gives a knitting that is less dense than knitting in grandma's way.

Knitting a purl loop in the classic way.
 This method of knitting a purl loop is considered classic. This is what is most often referred to in knitting literature. As a rule, if you need to use a different method to knit a loop, then this is specifically stated. If there are no reservations in the knitting description, then this method is used. This knitting of a purl loop corresponds to knitting a knit stitch in the classical way.
2. Starting position:
3.
One way to remove an edge loop: insert a working knitting needle into the edge loop from right to left and transfer the loop to it. The thread remains on the index finger of the left hand. The outer loop is always removed without knitting, unless otherwise stated.
4. Then insert the working needle into the next loop from right to left, while the working thread remains in front of the needle. Next, grab the working thread, wrapping it with a working knitting needle counterclockwise. We pull the resulting turn on the knitting needle into the loop. We have a new loop, which we place on the right knitting needle next to the edge one. Remove the loop on the left knitting needle through which we pulled the thread from the knitting needle. Thus, we knitted a purl loop in the classic way.

7. Repeating steps 2 to 6 the required number of times, you will get a knitted fabric from purl loops. This knitting is called garter stitch from purl loops knitted in the classical way.
Knitting a purl stitch using grandma's method.
 Now let's look at another way to knit a purl loop. This method is called the grandmother's purl loop.
When this method of knitting a loop is used, it is specifically stated in the knitting instructions. If there are no reservations, then use the first method.
1. Cast on the stitches of the initial row on the knitting needles in any way you like.
2. Starting position:
Take the knitting needle with the cast-on stitches in your left hand (left knitting needle), in the other hand take an empty knitting needle - it will be the working or right knitting needle. We place the thread coming from the ball on the index finger of the left hand and pinch it between the index and middle fingers, then it passes between the ring and little fingers.
3. Before knitting the first loop, remove without knitting the outermost loop - the edge loop.
One way to remove an edge loop: insert a working needle into the outer loop from right to left and transfer the loop to it. The thread remains on the index finger of the left hand. The edge loop is always removed without knitting, unless otherwise stated (You can read more about the methods of knitting edge loops).
4. Then insert the working needle into the next loop from right to left, while the working thread remains in front of the knitting needle. Next, we bring the working thread to the end of the right knitting needle and pull it into the loop. We have a new loop, which we place on the right knitting needle next to the edge one. Remove the loop on the left knitting needle through which we pulled the thread from the knitting needle. Thus, we knitted a purl stitch using grandma's method. This purl stitch corresponds to knitting a knit stitch in grandma's way.

5. Repeat step 4 with all remaining stitches from the starting row. This way you have formed the first row. Your left knitting needle has become free and will now become your working right knitting needle.
6. Now we start knitting the second row. To do this, take the working knitting needle in your right hand, and take the knitting needle with the work in your left hand and turn it with the opposite side towards you.
7. Repeating steps 2 to 6 as many times as necessary, you will get a knitted fabric from purl granny stitches. This knitting is called garter stitch from purl granny stitches.
So, often in the literature the purl loop is conventionally designated.
Knit and purl stitches- This is the basis of knitting. There are many ways to knit and purl. But there are two main ones: classic and “grandmother’s”.
Important! There are no classic, granny, French, English, etc. knits and purls. Knits are knits, purls are purls. There are just different ways to knit these stitches.
Today we will start mastering the classical method.
1. If knitting a pattern requires, for example, 15 loops, then cast on 17 loops on the knitting needles, because the first and last loops in the fabric are edge loops (marked in purple). They do not count towards the loops of the pattern itself. Therefore, in verbal descriptions they usually indicate: “cast on such and such a number of loops plus two edge loops.”
Once knitted, turn the knitting needle clockwise to the other side. This direction should be followed constantly when moving from row to row:
2. As a result, the tail and the working thread from the ball should be near the right hand:

3. The first loop in the row is considered to be the loop following the first edge stitch. The last loop in the row is the loop that goes before the last edge stitch. The edge stitches in the photo are marked in purple, the first and last loops are marked in pink:
4. We throw the working thread (the one that stretches from the ball) through the index finger of the left hand and place it between the palm and the remaining fingers of the hand:

5. Take the second knitting needle in your right hand. We do not knit the first edge stitch, but transfer it from the left knitting needle to the right one, inserting the right knitting needle into the loop on the left one, moving from right to left. So we retake the first edge in all rows: front and back. Let me immediately note that this is only one of the ways to design edges; others will be discussed in the following lessons. :

The edge was removed. She is now on the right knitting needle:

6. We will knit the first row with facial loops. To knit a knit stitch, insert the right knitting needle into the loop on the left knitting needle, moving from left to right. By moving the knitting needle from top to bottom, we pick up the working thread:

And pull it towards you into the loop on the left knitting needle (pink color). Drop the loop from the left needle (purple) from the left needle:

The front loop is knitted:

7. We knit the row to the end. We knit the last edge stitch. In all other rows (front and back), the last edge is the front one.
We turn the knitting to the reverse side for the second row, which we will perform with purl loops.
Purl loops.
1. Insert the right knitting needle into the loop on the left knitting needle from right to left and place the right knitting needle on the working thread as shown by the arrow:

2. We pull the right knitting needle together with the working thread into the loop on the left knitting needle as shown by the purple arrow, while pointing the index finger with the working thread towards ourselves for convenience:

3. Drop the loop from the left needle:

The purl loop is knitted:

This is what the side of the fabric with purl loops looks like:

If we knit only knit stitches on the front side of the fabric, and only purl stitches on the back side, then this pattern will be called facial surface. When we knit a knit stitch, on the other side of the fabric it looks like a purl stitch, when we knit a purl loop, on the other side it looks like a knit stitch, so with knit stitch it turns out that on the face of the fabric all the stitches are knit, and on the wrong side - purl .
When knitting in the round, for example, when we knit socks and mittens, we do not turn the fabric after each row, but knit in the round all the time only along the front side of the fabric with facial loops. Therefore, such a pattern in this case is called stockinette stitch.
Closing the loops of the last row when knitting.
When we have knitted the last row, we need to close the loops from the knitting needle:

There are several ways to close the loops of the last row. Today we will study the most basic one.
We remove the edge from the left knitting needle to the right one. We knit the next loop according to the pattern and throw the edge loop through the knitted loop. We knit the next loop again according to the pattern. What does the picture mean? This means that if we have a knit stitch on the knitting needle, then we knit it with a knit stitch, if we have a purl stitch, we knit it with a purl stitch. We are now closing the loops in the front row, so according to the picture - front loops:

So, we knit a knit stitch. Knitted. There are two loops on the right needle. Now we insert the left knitting needle into the first of two loops on the right knitting needle and throw it through the second loop on the right knitting needle. So we close all the loops. Just try not to tighten the loops, but to stretch them freely:

The closed row will be in the form of a pigtail:

Knit and purl loops in the classic way video tutorial: