How to cut a detachable collar on a dress. Removable collars
Collars at the peak of their popularity are not the first season in a row and are not going to give up their positions. Buying a ready-made dress or blouse with a collar, or picking up a detachable collar to complete the look of any style, you will not regret and find yourself in the spotlight.
Fashion designers of well-known and not so well-known brands generously decorate their products with various collars. But personally, I, with both hands, are for detachable collars, which can be used to refresh the old, most beloved and perfectly fitting blouse, which, depending on the mood, can be worn with different dresses or even sweaters, and ideally, I am in favor of having a whole army of detachable collars, the most different - delicate lace or satin, embroidered with beads or natural stones, decorated with rivets, spikes or chains ...

Anyone can make a decorative removable collar. First you need to decide on the desired shape of the collar and its style. Next, we decide on the fastener of the collar - a ribbon, decorative cords, chains, buttons .... Have you decided? We go further - below are the patterns of the most popular collars, select the one you need and transfer the pattern to paper in the size you need.

Then we cut out a paper pattern and transfer the contours to the fabric. Any fabric for collars will do, but remember that details for a collar made of thin fabrics must first be planted on interlining and, when cutting, add an allowance for the seams. Collars for full embroidering with beads and beads are best cut out of felt, artificial leather or ironed in 4-6 layers of interlining. If you decide to make, for example, a satin collar with partial embroidery with beads, then you need to put the front of the collar on several layers of non-woven fabric, sew on the beads, and only after that sew on the wrong side of the collar.

Below is a simple tutorial on how to make a detachable leather collar. Two wide details and two narrower details are cut out of the skin. Holes are made along the edges of the wide parts, then the wrong side of the narrow parts is smeared with a thin layer of glue and glued to the wrong side of the wide parts. Parts of the collar are assembled in front with a satin ribbon, pieces of a chain with a lock are attached to the edges of the collar.

All photos and patterns are found on the Internet, all copyright logos are saved. Photos and patterns without logos - I propose to consider folk. If you know the name of the author of a photo or pattern without a signature, write in the comments and in the near future I will definitely sign his work.
In contact with
13 fashionable collars that you can make by hand.
It all started with Miu Miu, who were the first to suggest wearing detachable or distinct collars. This trend has become incredibly popular lately. Perhaps the reason lies in the freshness of the idea or in the breadth of choice and self-expression, one thing is clear - this accessory, simple in its essence, is an exclusive and original decoration. Of course, you can look for a similar accessory in any of the branded boutiques or order it in an online store.

Or you can show your creative nature and take on the manufacture of your own collar. We will teach you how.
Easily

The easiest way is to rip off the collar of an unwanted shirt and sew on beads, chains, pretty braided threads and much more. At your discretion.

Even easier - rip off the collar and sew it on a shirt of a different color. The same can be done with cuffs.

Another no less simple way is to apply a beautiful appliqué on a ripped or cut off collar.


Very gentle and cute collar decoration option:

Here, as you understand, you will need a pastel-colored shirt (or one that goes well with pearls), imitation pearls (or white beads), threads, scissors.

Fine
Such a collar, as in the photo below, does not require much effort.

You will need a plain shirt, a brooch, thread with a needle and scissors.


It may seem that the next collar will require a lot of effort, time and patience...

...but it's really not that hard. You will need a collar, a ribbon with beads/sequins/pearls (these are usually sold in sewing stores) and a button to match the jewelry.

wardrobewanders.blogspot.com
To create the next collar, you do not need special knowledge in sewing. Just a little patience and a good eye. And also: a shirt, a feather (or something sharp for making holes) and decorative screw rivets.


To decorate the next collar, you will need a little more time and patience.

For the rest you will need: a button-down shirt. Doesn't have to be the same shade. Decorative metal rivets with spikes. Pliers.


An option for the brave. What do you think this is pasted on the collar?

In general, this is what is left of several optical discs.
What you will need: an unwanted shirt (more precisely, a collar from it), a couple of old disks (the amount depends on how much fabric you want to glue over with fragments), scissors and glue.
First, cut off the collar. Then cut the discs into the desired pieces, try to hold the discs so that there are no marks left on them. Paste the collar with the resulting pieces as you like.


Difficult
In order to create collars from the level marked "difficult", you, at a minimum, need to have titanic patience, diligence and some sewing skills. Or a bunch of source material on which you can train.
So, the first collar in this category is a luxurious, pearly golden one.

You need to do it from scratch, that is, the option of cutting off the collar from an unnecessary shirt will not work in this case. What you will need: fabric from which you will sew the collar, a hard surface, pearl beads, golden glass beads, a pattern (which can be downloaded from here).
What to do.
1. Print out the template.
2. Cut out two patterns on it. They are different sizes.

3. Iron the sides of your patterns that will be inside after you sew them together.
4. Fold both parts of the future collar with the outer sides to each other. Place the smaller part so that there is a small indent on each side. Secure everything with needles. For convenience, you can draw a dotted line on the reverse side of most of it. Sew both pieces together on a sewing machine. Leave a small opening so that the collar can be turned inside out.


5. Trim off the edges and turn the collar right side out. You can do this with a knitting needle.


6. Sew the hole by hand.

7. It's time to decorate the collar. First, sheathe its edges with pearl beads in 2 rows.
You can update your wardrobe in a variety of ways. This time, the reader will immediately be presented with 15 amazing ideas on how you can do it for mere pennies.
1. Bright clutch

A bright and stylish clutch that can be made from a piece of PVC, most often used to make table napkins, good glue and a thin black belt.
2. Children's cape

A stylish children's cape that can be easily made by hand from two small pieces of fleece and a satin ribbon. You just need to put two pieces of fabric together, make holes in them and put a tape through them. The edges of the fabric can be processed on a sewing machine or, in the absence of skills, using fabric adhesive tape.
3. Decorative scarf-snood

An unnecessary knitted T-shirt or skirt can be turned into a stylish and still relevant this season snood scarf, which will be a wonderful addition to the autumn look.
4. Skirt

Anyone who knows how to sew on buttons is able to make such a skirt in such a way that no special skills are required to create it. To implement this idea, you will need a dense fabric, scissors and a large button.
5. Jacket with a slit

If you have a jacket in your closet that has been gathering dust for several seasons, you can try to do a similar trick with it. Armed with a ruler and a textile marker, draw a triangle on the back of the pullover so that its top coincides with the collar. Cut out, fasten the edges with fabric adhesive tape, and sew Velcro or a hook on the collar. Trendy sweater with a slit on the back is ready!
6. Sheepskin vest

All you need to create this stylish vest is a rectangular piece of dubbing and accessories. With the help of scissors, make neat cuts for the hands, sew the purchased fittings on the back and enjoy a cozy and unique little thing made by your own hands.
7. Sweater with patches

You can update an old boring sweater with two curly patches on the elbows. Just buy a small piece of knit or fabric with sequins, cut out two identical patches from it and sew them to the sweater with a thread and a needle.
8. Sweater with lace

A small piece of lace will help transform a far from new sweater. Carefully sew on the inside of the openwork along the bottom seam of the item, and a dull sweater will turn into a charming and romantic piece.
9. Stylish denim jacket

A wide lace insert will turn an ordinary denim jacket into a stylish and feminine piece of autumn wardrobe.
10. Wool decoration

From the remnants of woolen yarn and accessories, you can make a charming necklace. Such an ornament can be sewn to the collar of a knitted sweater or worn with any other outfit as an independent accessory.
11. Sweater with an original collar

Small curly cuts will help to update and add charm to an old knitted sweater. The main thing in this business is accuracy and the presence of imagination.
12. Petals

Petals cut out of dense fabric of different colors and sewn onto a plain sweater will help turn an absolutely inconspicuous thing into a designer item.
13. Cardigan with pearls

Beads that look like pearls, which you can buy in needlework stores, are an excellent material for decorating clothes. These beads can decorate the collar, shoulders or the whole cardigan, so that the product acquires a truly luxurious and stylish look.
14. Jeans with leopard inserts

You can update your old, but no less favorite jeans with the help of leopard print inserts. Pieces of fabric, with this autumn's animal print, will help give jeans a new stylish look and mask various traces of wear, such as scuffs, holes and stains.
15. Charming collar

To update and improve the look of shirts and blouses, a simple collar decor will help. Office blouses can be embroidered with beads or beads, and everyday shirt collars can be decorated with spikes, rivets or chains.
In continuation of the topic, I would like to introduce more with my own hands.
A collar is a functional and decorative element of clothing that borders the bottom of the neckline of shoulder garments. Its usual design is just a strip of fabric. Varieties consist of upper and lower parts, which are usually compacted from the inside. In addition to fabric, knitted, felt and leather, models are lace and knitted.
Before you sew a collar, you need to decide on the cut and style.
Collar types
- One-piece.
- Set-in.
- Removable.
modostr.ru
Basic styles of collars
- Rack.
- Shirt.
- Flat turndown.
- Raised turn-down.
- Shalevy.
- Jabot.
- Collar.
- Designer.
The most common are standard shirt collars on a one-piece or cut-off stand. Such a detail can become part of the patterns of both women's and men's shirts.
Collar tailoring

vladivostoktimes.ru
Depending on the model and shape of the neckline, the pattern can be one, two or four parts. It is necessary to connect a part that has a fold with other parts of the cut so that its edges meet in the cut. The slit usually accompanies the clasp of the garment. Two parts are sewn from the inside out on three sides, and then turned inside out.
Before transferring the pattern to the fabric, it is recommended to measure the neck. This value should be equal to the length of the paper collar configuration (it is measured by the stitching cut), or exceed it by 0.5-1 cm. If necessary, the patterns are lengthened.
If a collar with a partial stand is sewn, the upper part is made slightly larger than the lower one in length and width - then the part will lie better.
Collar reinforcement

blogspot.com
Almost all fabric models of collars are reinforced from the inside with a special cushioning material. This gives strength to the edges of the collar and hides seam allowances that are sometimes noticeable. Gaskets are made of adhesive seal (for example, non-woven tape), rigid or lightweight materials, fabrics of intermediate density. The cut of the sealing layer must take into account the direction of the lobar thread of the model.
Features of working with a collar
- The reinforcing material is attached to the wrong side of the upper part if we are sewing a turn-down model. A sewn-in hard seal is attached to the necks of products made of light, thin fabrics using a slightly heated iron. Previously, the gasket must be swept to the wrong side of the upper part of the structure.
- If a turn-down collar is used, the seal is placed from the inside of the upper part - where the fold passes.
- The stand-up style is reinforced from the outside. In this case, the seal is cut out for the whole part and attached from the inside, along the fold. Adhesive pads in these models are used only to give density to the upper part, up to the fold line.
- The pattern of the seal usually corresponds to the configuration of the collar details. Gaskets from medium and low density material, as well as adhesive seals, are cut taking into account allowances. They are cut off after applying the line as close as possible to it. On dense pads, excess material is cut off immediately before stitching.

A simple version of the sewn-in collar is the "stand-up". The model on the bar with a lapel is called a collar collar. The bar is attached directly to the seam line of the cutout, around the entire circumference of the product. The sharp corners of the bar on which the incision is usually made can be rounded off.
A pattern of a model from a single piece with a fold is a rectangular canvas.
Processing technology
- Cut out the part and seal.
- Turn inside out the seam allowance of the neck of the inner part along the line along which the product will be sewn. Cut off excess, cutting to 6 mm.
- Fold the product along the fold line inward facing. Make the spare edges of the outer part wider.
- Cut the corners along the folding line diagonally.
- Smooth out the seams at the ends of the plank. Wrap the seam edges, guiding them towards the inside of the model. Treat with an iron.
- Sew the finished collar with the outer part to the neck.
Two-piece stand-up collar
The pattern of a model on a standing bar is made up of external and internal fragments. The ends can be connected in front or behind. In this case, the seal is cut according to the contours of the outer part. To avoid excessive density, excess corners are cut diagonally from the upper edge of the seal.
Bend the neck seam allowance inward along the bottom edge of the product diagonally. Trim excess material to 6 mm.
Align the top cuts of the workpiece and its ends face inward. Sew along the top edges.
Cut the seam, taking into account the stock of material for one more on the outer part.
In places where V-shaped bends are formed, incisions are made. Corners are removed diagonally.
Lay spare material inside the part. Machine stitch along the entire top.
Turn product right side out. Slightly move the top seam inward. Iron and sew to clothes.

opalona.com
- The classic model of the collar is a turn-down shirt on the stand. A pattern from a standard fabric for a shirt consists of two main parts and two parts of the supporting base. The stock in both cases is left in the amount of 0.8-1 cm.
- The collar is not recommended to be raised above 1-1.5 cm above the bar. Its length in this case is equal to the length of the neck of the product itself.
- An adhesive pad is used as a sealant. Seal patterns are one support part and one turn-down without stock.
- If the drawings of the rack and base are combined into one configuration, the sewing process will be greatly simplified.
Processing technology
- Align existing collar pieces with right sides facing inward.
- Fold the fabric with pins in the corners so that the top part is a couple of millimeters larger than the bottom. This is necessary for a more accurate processing of the outer seam.
- Go through machine stitch. The stitch size when approaching the corners should be 1.5 mm. After the line reaches the corner, put one stitch across - so the corner will become sharper.
- In order for the outer seam to be made with high quality, the line is made not along the very border of the lining fabric, but at a distance of 1-1.5 mm from it.
- Cut the corner stocks of material one above the other (cascade), stepping back 1 mm from the line.
- Turn the model inside out by hand, without using any tools that can break through the corners. It is important to observe the symmetry of the ends.
- Place machine stitches of equal size at the same distance from the edge.
- Sew the bar, bending the allowance.
- Pin the front side of the outer stand to the face of the bottom main piece. The line should go along the very border between the gasket and the supporting part.
- In order for the curve of the model to take the shape of the neck, the fold is fixed and connected to the collar along the entire length.
- On the inside, mark the border of the future plank. The length of this line should be equal to the length of the neck.
- Attach the right side of the support piece to the wrong side of the shirt. Spare edges should lie on the face of the product. Connect the inner and outer parts of the bar.
- Form a kink and steam the part.

catalog2b.ru
The flat turn-down collar lies completely on the shoulders of the product, without rising above them. An example of such a style is the sailor suit.
The model, which implies a front fastener, is one single piece. The back closure version consists of two pieces with excess material and two sealing pieces (no stock as standard).
Processing technology
- Fasten the seal to the two upper parts of the base.
- Connect all parts of the model, put a machine seam on the outer edges.
- Trim allowances. At the place of bends around the entire perimeter of the pattern, make V-shaped cuts. Bevel spare edges and cut corners.
- Smooth out the spare material to the bottom of the product.
- Lay a line along the previously applied seam of the face of the lower part, grabbing the allowances.
- Turn the collar and its corners to the front side.
- You can manually roll the seam towards the bottom part. The model is processed with an iron.
- Sew on the collar, inserting it between the garment and the inner lining.
Raised turn-down collar
Raised turn-down collar on a partial rack - a model, the lower part of which imitates a supporting part, and the upper part is folded back. At the back, the bar can be slightly raised. It is used when modeling coats, raincoats, jackets, jackets.
The stand of a raised turn-down collar is sewn to the collar, and not vice versa. The pattern consists of two parts of the upper collar and two parts of the lower supporting base. The lower collar and the upper strap are cut out in one copy.
Processing technology
- Connect the bottom bar to the bottom of the base. Begin to lay the line from the center of the rack to the edges. In the process of sewing, the main material is pulled off with a free hand.
- The second edge of the support also begins to be sewn from the center. Connect the bottom bar to the top of the model.
- Cut out stocks. Reduce the size of the lower collar. To do this, connect the seams along which the rack was previously attached. Form the product so that it repeats the bend of the neck.
- Cut off the excess on the edge of the lower collar (3-5 mm).
- Place the pieces facing each other. The top part should be larger than the bottom.
- Start sewing the model from the centers of the parts to the edges. Having brought the line to the corner, lift it with your free hand so that the stitches merge into an arc. Make sure that the corners are bent towards the lower collar part.
- Transfer the seam to the lower part by 1-3 mm. The size of the roll increases along with an increase in the density of the fabric.
- Sew the edges of the product. Connect the seams to the strips.
- Form a collar and sew it into the product.
Collar in 5 minutes

A false collar is an independent detail of an outfit and an accessory. Sometimes it is a kind of jewelry. The model is not sewn into the product, its manufacture does not require special skills, and sometimes it does not need stitching (holes are made with an awl). It can be done even in 5 minutes.
It is made by cutting off the collar of an old shirt. A fastener in the form of a button or ribbon is attached to the part, in front or behind. Decorated with rhinestones and beads.
They are made according to the measurements of the neck from various types of fabric, as well as from felt or leather. The pattern of a turn-down product for a fastener to the top or to the bottom can be lengthened, making the collar dimensionless.
These decorations are again present in the haute couture collections presented at Fashion Weeks in Paris, London, Milan, New York, Berlin, Moscow, Barcelona ... The only update of the trend, perhaps, is the emphasis on stand-up collars or stand-up collars . But Russian women, with less sharp and more pretty features, no doubt, should not refuse turn-down collars, chokers and collars in the form of frills or a collar with a frill. In addition, they are crocheted, weaved from beads, pearls and chains.
One of the reasons for the popularity of these decorations is that they are quite easy to make with your own hands at home, and in addition, they provide unlimited scope for creative imagination. But the main thing is that you make an original decoration that becomes the highlight of your chosen image.
Collars-necklaces can be of very different shapes, they are also decorated in a variety of ways.
You will need:
- sequins
- Swarovski crystals
- beads
- large beads
- raw semi-precious stones
- pearls
- chains
- lightning
- blocks
- rivets
- buttons
- ribbons
- braid
- lace
- brooches
- coins
- decorative fabrics.
Our website already has a detailed step-by-step, as by all rules sew a separate collar with a stand from a regular shirt.
In this master class, the edges of the collar are trimmed with serrated braid, this is just one of the many options for starting the decor. Other braids and ribbons are also suitable for finishing the edges, for example, ready-made and hand-made ribbons with rhinestones sewn or glued on them, beads, beads, or narrow lace, or ... in general, call on your imagination to help.
Next, we decorate the surface of the collar or sew on a decorative brooch, button, rhinestone, etc. instead of a regular button on the collar stand.
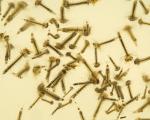
The surface of the collar - in addition to the methods described above and below, can be decorated with decorative buttons: for this, you need to bite off the legs of the buttons, level the bottom surface and glue the buttons with a heat gun.
If you have unnecessary stud earrings, then you simply pierce the surface of the collar with them, and on the back of it, bend the ends of the rods with pliers so that they do not scratch your neck.
Volumetric metal blocks are the hit of the season, especially with spikes. An ideal youth decoration for those who wish to demonstrate their desire to isolate themselves from the harsh reality.
The combination of delicate lace and pearls looks very gentle and romantic - perfect for a naive and young look.
Decor from pieces of fur is also in fashion hits, even in summer. Of course, you can’t wear such a necklace on a hot summer day, but on a cool evening it can effectively complement the outfit.

Turn-down collar based on felt
Step 1

According to the template for a round turn-down collar (take a pattern from any Burda model that suits you or directly copy from and adjust to your size), cut out four parts from felt (see fig.), On which, using a heat gun, glue a variety of decorations. The felt will give the necklace the necessary stiffness.
Step 2

Next, you will need a strong chain, which must be glued along the inner edge of the collars, releasing the ends of the chain at the back of the desired length to fasten the necklace around the neck.
Step 3

Now glue the top details of the collars on top. In conclusion, it remains only to beautifully arrange the decor you have at home on the surface of the collar and glue it with a heat gun.
Lace collar necklace with chain, rhinestones and bow

You will need:
- four identical chain fragments with large links
- small split rings, quantity = number of links of one chain or two, depending on the size of the chain links
- decorative clasp for chains
- finished ribbon with Swarovski crystals glued to it
- lace braid
- satin ribbon for a bow.
Description of work

Connect 2 fragments of the chain with rings, passing them through each or through every second link in the chain. Pass a ribbon with rhinestones through the rings.

On one side of the chains connected by a ribbon, sew on lace in a mirror image so that you get a collar. Attach the chains to the front with a satin ribbon bow.

At the back, connect the chains with a beautiful clasp.