Summary of the lesson on the application “Maslenitsa. “Maslenitsa” or Pancake Day: application on the theme Make a craft dedicated to Maslenitsa
Even in Ancient Rus', people cheerfully celebrated the farewell of winter and the welcome of spring. Regardless of their age, people were looking forward to this holiday - Maslenitsa! The entire Maslenitsa week was accompanied by daily merry festivities, gift-giving, various games and dances, and sleigh rides. At the end of all these events, people gathered in the square and burned an effigy, which symbolized the final farewell to winter.
One of the ways to attract children to participate in Maslenitsa is to hold all kinds of competitions and exhibitions of themed crafts. This allows them to further develop their imagination and motor skills, find a new hobby for themselves, and also please their loved ones with handmade gifts.
Our article will help you create unique crafts for Maslenitsa that will delight both the child himself and the person to whom they will ultimately be presented. Here are 10 unique master classes - how to make crafts for Maslenitsa with your own hands with step-by-step photographs and videos.
01. Postcard for Maslenitsa made of plasticine with the image of the sun
If you find it difficult to come up with a motive for a children’s card dedicated to Maslenitsa, we recommend this detailed photo tutorial. At the end of February, winter gives up its positions, goes to the center of the hall for the last time, gets angry and does not want to give up its powers. Judging by the bright and already slightly warming sun, the birds flying in from the south, and the streams running around, it is clear that winter does not have long to play the main role. And the perfect object to copy when it comes to crafts for Maslenitsa is the sun - warm, bright and so desirable.
On a postcard dedicated to the very first spring and very last winter holiday, we will depict the sun, as is often done in Rus'. It will smile at us and give us its affection. Do not skimp on ornaments and fancy elements to make it.

Get started by selecting materials. You will need:
- paper;
- bright plasticine;
- a thin tool in the form of a toothpick.
Paper is the basis of the entire composition. We always imagine a greeting card as standard, paper, bright, decorated with some kind of thematic pattern. Simple plasticine attaches perfectly to colored cardboard. A soft mass, like glue, remains on the surface.
But if you are still afraid that over time the beautiful sun and the inscription will disappear, then after work, simply laminate your gift or pack it in transparent cellophane using a stapler. In this lesson, we chose blue cardboard - this is a real spring sky, in which the hot luminary flaunts and smiles at us all.

The rays of the sun can be made multi-colored and different in length, so that the whole craft looks even more interesting. Knead red and yellow plasticine in your palms. Then tear off pieces of plasticine of different sizes from each piece individually. Roll out thin sausages with your fingers on a hard surface. Or you can make 1 long sausage, then cut it into segments of different lengths in a stack.
Glue the resulting sausages into the center of the card, alternating by color. Create thick and hot rays of the future sun. We will draw the very appearance of the luminary on an orange cake. Make it in size with the circle created by the rays.

Place an orange cake in the center. Stick a yellow cake on top there, but smaller in size.

Now come up with facial features. These could be eyes; make them expressive with white eyelids and eyelashes. Add a red smile and nose. Now we have before us a gentle and kind sun - it has already approached the earth, giving off its warmth to people.

Make spirals for decoration from thin white threads. Form enough parts of the same size and shape to stick them all around the circumference. Now decorate your sunshine.

And the last little detail is the word “Happy Maslenitsa”. You can add it to the top or bottom of the card

An interesting, warm and festive spring souvenir is ready. It definitely needs to be given as a gift to someone.
02. Straw effigy with bagels for Maslenitsa
There are many beliefs, legends, and traditions associated with this holiday, which lasts a whole week. One of them is burning a homemade straw effigy; such a ritual is necessary to attract a rich harvest. To make a craft for the Maslenitsa holiday, you can depict a scarecrow. No one can say exactly what it should be, but most often such a figure is made from straw.

To make a postcard dedicated to Maslenitsa, prepare:
- suitable colored cardboard;
- plasticine;
- toothpick
Choose a suitable color of cardboard. Now you have to get creative and draw the main Maslenitsa object on it - a scarecrow, using plasticine. All plasticine parts will be flat, but the picture as a whole will be three-dimensional.

Now you need to make the straw effigy itself. The option we offer here is quite long. You will have almost a jewelry job - modeling individual straws from plasticine.
The most suitable colors for the widest body are yellow and orange (or brown if the first two are not available). Use your fingers to tear off small pieces of plasticine from the bars, warm them in your hands, then immediately roll into small pellets. Make 2 portions of orange and yellow oblong pellets.

Now start creating the body of the center piece. It will be a straw woman, wide, with a skirt, everything needs to be made of straw. Start at the bottom center by attaching the prepared pieces of orange and yellow colors, alternating them with each other.
Also gradually press down each piece with a toothpick on top. Apply a wide enough row for the hem of the skirt. If all your parts are different in length, then the edge will turn out uneven, as if torn - this is the effect you need to achieve.

Next, continue gluing small parts on top, alternating by color. Make a second and third row, gradually reducing the number of parts in them. This will create an A-line skirt. Don't forget to press down each new branch with a toothpick.

Usually some old clothes are put on the stuffed animal. Here you can make a white oval cake and glue it as the central part of the figure. For added authenticity, add a few dark patches.

Continue moving up and forming the rest of the figure. Start spreading your arms, also made of straw, to the sides. Glue a round dark cake on top - the head.

Glue 2 arms. Glue eyes, rosy cheeks and a smile onto the round head.

Also make a wreath of straw branches on your head - a kind of rainbow edging. Now we have a cheerful stuffed animal - it sees off the harsh winter and attracts spring.
Now glue brown bagels and bagels - native Russian treats - to the top of the picture. Maslenitsa seems to juggle them.

Write Maslenitsa in plasticine letters and add small bright decorations.

Our card is ready!

This handmade craft will become a souvenir, a symbol of the awakening of nature after a long and harsh season. You definitely need to make the product sunny and cheerful. A suitable option is to portray a warm and gentle luminary. We will make such a gift from paper in 2 counts.
To show the sun, you need to make a circle - a face, rays, put everything together, like a construction set. And so that the sun rises high into the sky, let’s place it on the clouds. There is interesting work ahead for the children, which they will take on with pleasure. Even if it’s still cold outside, get to work, because spring-themed crafts are always relevant.

To make a postcard, prepare:
- the traditional four tools for working with paper: pencil, ruler, scissors, glue;
- a set of colored paper and cardboard;
- colored pens.
You need to create a canvas for a postcard. And it won’t just be paper on which all the parts are attached. This is, first of all, a background that must necessarily match the theme of the drawing. Since the central figure is the sun in the clouds, the background color should be heavenly - soft blue. Select the appropriate option.
Also, the card should be thick, so the stiffness of the paper also matters. Cut out a suitable sized rectangle from paper of the chosen color.

Draw the outline of a cloud on blue cardboard. You need to draw a wavy line around the circle. Cut out the cloud. Also make a blank for the inscription. Soft two-color paper is more suitable for this. Cut out a rectangle, pulling the corners out to the sides. Write in the center “Happy Maslenitsa!” handles.
Then grease the ends with glue and curl the tubes along the sides. The result will be an interesting three-dimensional inscription. Do not press the paper so that the tubes remain voluminous.

Glue the blue cloud onto the paper, but not in the center. Add the finished inscription on top. The sun needs to show its face and many rays.
Cut out a circle from yellow paper, and also prepare thin straws from thick orange cardboard. The length of the straw does not have to be identical; in the future you will still have to trim and select the size of the rays.

Start gluing the rays to the picture. Apply glue only to the base. First, decorate one part of the sun, densely arranging the orange parts around the circumference. Next, glue the yellow circle. The head of the sun needs to be placed on the ends of the rays.
On the other side also add orange protrusions. But there will be few of them, since the face of the star will be covered from above by small white clouds. On the face draw eyes, mouth, blush. Make sure that a positive face looks at us from the postcard.

Gather all the paper parts. Wait for the glue to dry. If you wish, add sparkles. A cheerful children's card is ready. A unique greeting card for the Russian national holiday will definitely find its owner, lift his spirits, and make him laugh.


You can make such an unusual gift for Maslenitsa with your own hands.

The meeting of winter and spring is a traditional Russian holiday that children and old people look forward to. How I want to wait until the end of the long winter, greet the red spring with honors and gifts, dance around the fire, and participate in fun festivities. Maslenitsa must be celebrated with a rich table, a cheerful mood, and exciting handicrafts. We offer an option for children's creativity - a creative craft for Maslenitsa in the form of a postcard.
For a colorful card, prepare:
- colored cardboard;
- plasticine, among which there should be brown color;
- stack.
DIY postcard for Maslenitsa
Take some paper to work with. If you have ready-made sheets of cardboard in the size of a regular small postcard, then use them. If you have A4 canvases, then cut out blanks of the required size from them or even use the entire sheet to make a large and noticeable masterpiece for an exhibition. We chose green color - it symbolizes the awakening of nature. Against such a background, the bright, blinding sun, the scarecrow of Maslenitsa itself, will look great.

Our background will not just be green and boring, but bright and sunlit. Use a piece of soft yellow wax clay to imitate sun rays. First, prepare a piece for work; if it is dense, knead it thoroughly in your hands.

Now take an easy step - use your fingers to spread the soft yellow plasticine over the surface of the cardboard in a very thin layer. Make a blurry sun in the center, as if spring is just around the corner, the rays are shining brighter and warmer, but it’s hard for us to look at them with the naked eye.
Now that the background has been completely created, let's move on to modeling our central figure - the Maslenitsa costume. This is a straw effigy or figurine made of branches.

The figurine does not have to be brown and nondescript. You can add a lot of bright details, because people are looking forward to a red spring. Make blanks for the head from red and beige plasticine - a flat cake and a ball. Immediately cut the flatbread along the edge.

Glue a red cake onto the canvas, sharpen all the segments obtained after cutting. Glue a beige ball into the center and press it on top until it forms a round cake. This will be the head of the scarecrow. Below, start attaching the torso and arms outstretched to the sides from the brown mass.

The skirt can be made pink, decorated with intricate patterns. Glue the trapezoidal part.

Make a smiling face - blue-eyed and ruddy. At the top, put the plasticine inscription “Happy Maslenitsa!”

If you think that the design is not bright enough, then add colorful ribbons. Fashion threads from plasticine, glue to the head, hands and other places as desired. An interesting postcard for welcoming spring is ready.

05. Maslenitsa craft for the little ones - paper sun
Sunshine is a bright and kind craft that is intended for the youngest children. It won’t be difficult to make a smiling, radiant face from corrugated paper, the soft texture of which is pleasant to the touch. Children can even cut the sheets themselves with plastic scissors or tear them apart with their fingers, and then twist thin rays and glue them to the base.
Thus, you and your children will invite a small copy of the warm sun home, it will warm the whole family and become a good talisman. It will be interesting to make this craft on a rainy day, when there is not enough light, or in winter, when it is not possible to walk outside for a long time.

What you will need to complete Maslenitsa crafts for kindergarten:
- Cardboard circle;
- Scissors;
- Yellow corrugated paper;
- Glue stick;
- White and black paper for the face;
- Gel glitter.
Yellow crepe paper is a material that will allow you to reproduce the bright and soft surface of the craft. This color can only be replaced with orange and no other if you plan to make the sun. Thin rays will be attached to the cardboard using glue.
The top surface of the base will be completely covered with yellow pieces, so any color will do. Such a rather meager list will allow you to get an interesting craft.

Cut out a circle from cardboard. Here we used yellow cardboard, the same color as the entire craft, so its surface does not have to be covered with a thick layer of parts to disguise it. Also cut corrugated paper in two ways - squares and long rectangles.

Rectangles will be needed to form thin rays. Take each piece and twist it along its entire length with your fingers, starting from one edge. But on the opposite side, leave a small wide tail, which will allow you to attach the ray to the cardboard.
When rolling, make sure your hands are dry and clean, otherwise the soft paper will become limp or dirty, because it is light. As you form each ray, immediately attach it to the cardboard at the very edge of the circle. Apply glue without pressing too hard to prevent the paper from tearing.

Fill the entire circumference of the cardboard with rays. If necessary, smooth out all the growths with your fingers so that they are evenly spaced around. The more rays, the warmer the sun, so make a lot of details.

Also mask the inside of the circle with soft yellow squares. Glue them randomly, overlapping each other, until you fill the entire space without gaps. The paper sun is ready. Every child recognizes its outlines.

Now all that remains is to draw the face. This can be done with gel pens or felt-tip pens, but we use white and red paper. Cut out the eyes and mouth. Glue them to the central part. Draw the pupils and also cover with a thin layer of glitter on top.

This is such a radiant and smiling sun. An interesting little copy - just an innocent child's craft, it will not burn anyone, and will only smile.


06. Interesting craft for Maslenitsa - damn, Russian beauty and well done
Maslenitsa is the most beloved holiday for everyone who loves to eat delicious food, taste popular dishes of Russian folk cuisine, and have fun in a large company of people. There are many beliefs and legends associated with this holiday. And folk festivities turn into real fun with jokes, jokes, competitions and smiles on faces.
To make some kind of craft for Maslenitsa, you need to know what this holiday is associated with and how it is celebrated. We offer a paper craft option on a suitable theme. “Who will pull the pancake?” Of course, in the center of the craft there will be a pancake - fragrant, fatty and so desirable.
What to create this part from? You need to make sure that the pancake seems not just a circle of paper, but itself - appetizing and rosy. Choose paper that matches the color and texture, use a piece from an old roll of wallpaper. Or take orange paper and draw dots on the surface with pens or markers.
You can also take a thin layer cut from a washcloth and stick it on cardboard. Who will pull the pancake over themselves and compete? This is a Russian beauty and a fellow who will definitely succumb to her.

To create an interesting craft for Maslenitsa, prepare:
- paper with a rough texture, yellowish or beige;
- a set of plain colored paper or cardboard;
- scissors;
- glue;
- pens.
Paper that is suitable in color and texture, similar to the fried, rosy surface of a pancake, is already half the success. Use any method to make such a circle or use ready-made paper. If you have thick cardboard, just cut a circle out of it. If the sheet is soft, then first glue it onto thick paper, then cut out a circle with scissors when the glue dries.

2 people will hold the pancake and pull it towards themselves. Show first the top part of the garment, which peeks out from under the central part. For a girl, make a round blank with protruding lantern-shaped shoulders from blue cardboard; for a man, make a round blank from a brown sheet. Glue the blue and brown parts opposite each other from the bottom of the main craft. Leave only small parts protruding.

For the Russian beauty, cut out a red scarf, a round beige face, and a piece for blonde bangs.

Glue the scarf on the side of the craft where the blue fur coat peeks out. Glue a round face into the center of the red part and add bangs on top. Draw the eyes, mouth and rosy cheeks closed from embarrassment. On the opposite side, stick the man's head. Let the face be oval, draw eyes, nose, mouth and a beard with a mustache. Put a red hat with a fur trim on your head.

Glue mittens at the joints of the blue and brown parts. Everyone celebrates Maslenitsa at the end of February, when it is still frosty and windy outside, sometimes there is even snow, so people dress warmly.

An interesting thematic craft is ready. You can rotate the resulting figure around the circle at your discretion. This is a fantasy that echoes the flavor of the Russian holiday.


07. Housewife with plasticine pancakes
Every housewife considers it her duty to bake delicious pancakes at least once during the holiday week. Some even organize a competition. Who bakes more pancakes, will they taste better? Each has its own secrets. A figurine of a Russian beauty with pancakes is an excellent craft on the theme of Maslenitsa. To repeat it with your children, study the master class below.

We will dress the girl in a long dress and an apron, and put a high kokoshnik on her head. And the hostess will also have a brown braid down to her waist. This is exactly how the Russian beauty is portrayed in all folk tales.
To sculpt the figure, prepare:
- a piece of any cardboard, scissors and a stapler;
- plasticine;
- stack;
- match;
- If desired, you can use small beads and pebbles.
If you also want to make a similar craft, then you need a whole set of plasticine, since there are many shades to choose from: for open parts of the human body, for clothes, for hair, for pancakes. Choose any colors.

The initial detail is the skirt of the dress. Everyone understands that plasticine itself will not hold its shape; a piece of cardboard will do that. Since we need to make a long skirt, it can be made on the basis of a cardboard cone. Twist the prepared piece of cardboard into the desired shape, then secure it with a stapler. You can use a round or other shaped workpiece.
It’s easy to trim off any excess with scissors. In any case, in the future the surface of the cardboard skirt will be covered with plasticine. Apply the mixture onto the paper and stretch it over the entire surface with your fingers. Place a thin stripe at the bottom, adding some kind of ornament for decoration.

An apron should be glued to the same part. Make a cake of a suitable shape; you can decorate it with peas, stripes or flowers.

Glue a cylinder of some bright plasticine onto the sharp part of the cone. Smooth the surface with your fingers to highlight the upper torso. Highlight the waist, pull up more of the clay to show off the chest. Glue an apron on the front of the skirt, camouflage the joining place under a sausage of white plasticine.

Insert a match at the top. Make sleeves - these are elongated narrow gramophones. Add hands from beige plasticine to the lower (wider) part, and also make an oval head.

Glue the sleeves to the craft. The lower part is assembled. The head should also be decorated - glue on the eyes, nose and mouth.

Also glue on brown hair, ears, and a tall kokoshnik. Model a long braid (these will be 3 thin threads intertwined).

Fasten the head to the neck (there will be a thin match instead). The Russian hostess is ready.

And the last, but most important attribute is pancakes. Use orange plasticine to sculpt them and select a plate from the doll set.

Place the dish in your hands.

The housewife is ready with delicious plasticine pancakes.


08. Postcard for Maslenitsa with pancakes and a cat
In this master class I will show you how to make a fairly simple souvenir for the little ones. This will be a postcard that depicts only 2 objects: delicious pancakes and a cat who enjoyed them secretly from the owners. All the details are quite simple, although small, so we can recommend this work for kids.
In Russian houses, they always prepare a whole stack of pancakes, eat them with sour cream or caviar, with mushrooms or meat, even with fish, or use other sweet fillings. But it’s not always possible to protect the main table decoration from a furry thief. If the cat sees the treasured treat, he will definitely find a moment to taste at least one pancake.

For the postcard, prepare:
- cardboard base;
- plasticine;
- stack-shaped spatula from the set.
Postcard for Maslenitsa step by step:
From the prepared plasticine set, you should select all the necessary interesting shades that will be used to create a postcard.

Choose a color for the background. It should be juicy and bright, symbolizing the awakening of nature, the dawn of lush flowering. For example, smear some eye-catching greenery onto cardboard; this color will work great.

Now proceed to the main decoration of the butter table - pancakes. To make them you need 3 colors of plasticine. The first one is any, it will be needed for the dish on which the pancakes are placed. Take a piece of plasticine and make a round cake, then press it with two fingers from the top and bottom on both sides to get a flatter dish.
We will look at our delicious wealth from the side, rather than from above, so this is the shape that suits us. The second color is for pancakes. Orange, beige or any other plasticine will do. Fashion an oblong turret, the width of which will fit on the platter.

Glue the turret onto the plate. Carefully draw the texture - elongated grooves, separating one pancake from the other. Also at this stage we will need a third shade of plasticine, since sour cream should be poured on top of the stack of pancakes. The main table decoration is ready.

Now let’s portray someone who strives to enjoy pancakes with sour cream. It will be a ginger cat. Glue 2 cakes on the side in this shape to show the head and torso.

Glue additional orange fragments that will completely allow you to assemble the pet figurine: triangular ears, round cheeks, sausage legs and sausage tail.

Carefully stack it to show that the cat is fluffy, this will make the figure more interesting. The cat licks one paw, he is happy that he has eaten delicious pancakes. Show off squinty eyes to complete the effect.

You can add an inscription to the picture, and also glue a wooden spoon at the bottom. Housewives used to use such unusual wooden utensils. A plasticine postcard dedicated to Maslenitsa is ready. The souvenir turned out to be bright, juicy and suitable for a children's exhibition.

Making crafts for Maslenitsa with children
Of course, nowadays Maslenitsa is celebrated a little more modestly than in those distant times. But what has not changed this holiday is the availability of delicious and golden brown pancakes. They are happily eaten by both adults and children. In addition, all children and some adults actively take part in various contests, games and competitions held on the occasion of Maslenitsa celebrations.
Since Maslenitsa is celebrated in honor of the arrival of spring and, therefore, sunny days, the main symbol of this holiday is a round pancake. This treat was an indispensable dish throughout the holiday, both with the family and when inviting guests.
As mentioned above, since ancient times Maslenitsa has been associated exclusively with the onset of spring, sunny and warm days, fun and mischief. For children, of course, these factors especially cause joy; they love to eat delicious pancakes and receive gifts. And if they independently create gifts for themselves and their loved ones, then the joy from this will be doubly greater! This may turn out to be a very favorite activity for your child, which will make him smile and contribute to his creative development.
The end of this holiday was the burning of an effigy of winter in the main square. In our modern times, this tradition still exists regardless of whether Maslenitsa is celebrated in the city or in the village. But you don’t have to go to the square to watch how an effigy is burned and, thereby, say goodbye to winter.
You can create this indispensable attribute for Maslenitsa at home, using available materials, such as:
- dried grass stems or hay;
- paper;
- threads;
- an outdated doll that you wouldn’t mind burning;
- pieces of fabric.
This doll will need to be dressed in a sundress, brightly painted and hung on a wooden stick. In the process of creating a stuffed animal, be sure to tell your child the history of this holiday and its meaning. The base can be made of paper, which is perfect for newspaper or colored paper. And for a fabric doll - scraps of fabric.
Another association of Maslenitsa is the sun. This bright symbol can be created using knitting threads, colored paper, tinsel and other materials. In addition, you can take thick cardboard, make a hole in the center of it and wrap it with bright yellow or orange threads. Arrange the remaining threads in the form of “rays” of the same size and tie them with satin ribbons.
A fairly simple option for creating a sun would be to prepare pieces of yellow paper and glue them onto cardboard with glue. Don't forget about plasticine. Children love to make all kinds of figures out of it, so why not use it to create the following holiday symbols:
- bright “warm” sun;
- pancakes;
- stuffed animals characteristic of Maslenitsa;
- cheerful children around him.
An indispensable element of Maslenitsa is the presence of a variety of sweets on the table.
In addition to delicious edible candies, you can make similar decorative elements yourself to create a more festive atmosphere.
They will certainly “revive” your home environment and will have a positive effect on your mood and those around you. A unique caramel decor can be easily made from wire. Chenille wire, which is sold in specialized craft stores, is perfect for this.
Greetings everyone! Maslenitsa week is approaching and, as everyone knows, there will soon be a performance dedicated to seeing off winter. And how can we spend the winter without the main character, and I mean the scarecrow of Maslenitsa.
Every year she appears in the winter spaces, she is made from different materials, but in most cases from straw, and then she is wrapped in a bright painted beautiful fabric, the result is such a big funny girl that looks like a doll or a grandmother.
Usually on this day there is a fair, where, of course, according to tradition, the most important dish is exhibited, so tasty and lacy that you just lick your fingers, because in the cold it is always more fun, and even with company. You can also see all kinds of exhibitions with different ones that are made with your own hands.
At the very end of the holiday, it is burned at the stake and at the same time they welcome spring, which means the sun will burn brighter and the birds will sing loudly.
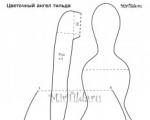
Everyone knows that in Rus' such toys were made from simple material like straw; this is the most common type, and in our time too). Using this simple diagram with a description, you can easily decorate the upcoming celebration, which can even take place at school or kindergarten.

This Maslenitsa effigy turns out to be very large, it looks like a girl or a symbol of a female image.

Of course, they burned big huge stuffed animals on bonfires, sang songs, but the children could make small creations themselves, also from straw.

They are such beauties).

Often straw was hidden under any activity or unnecessary things, or work was generally done without it.

In my opinion, it looks more like a scarecrow).
Therefore, of course, make from what you have at hand, choose your favorite option.

Moreover, when there is somewhere to look and see all the step-by-step steps of making the work:

The result turns out beautiful and you will agree that such a craft is not difficult to do. Any scarecrow made of straw can be hidden with any openwork or multi-colored material.

Or do you still prefer the usual option, then at least decorate it with a satin ribbon.

Here's another step-by-step instruction from the bast.

It turned out quite modern and very impressive.

Making a craft from a broom
The next option is so funny because it is made from an ordinary broom or broom. Yes, you yourself have probably already guessed how to make such a stuffed animal and what is taken as a basis.

In general, create and make everyone happy).

I have no doubt you will succeed.

Making a Maslenitsa doll for a holiday at school for an exhibition
In one of my articles, I have already shared with you a master class of such a craft from an ordinary plastic bottle and cotton pads, I hope you really liked that doll, if you want to make the same one, go ahead

Or make such a miracle worker for meeting spring from a tree branch, which will look like a slingshot, approximately 26 cm long.


Or this one, which one did you like best?


Schoolchildren and preschoolers can come up with anything, this is an idea for an exhibition, do you like it?

Or else, children usually make drawings and pictures with symbols of the upcoming holiday.
This can be done using pencils.

Or markers, or, of course, paints.


Schools also decorate the hall for this event.

Posters and stand newspapers are made.

Master class paper stuffed animals at home
I suggest you watch this video, which I liked, I think that you will also make such an interesting souvenir, and from paper.
On one site I came across this paper idea, it looks fun.

It's just like girlfriends)).

You can use newspaper or magazine paper, even colored paper.

A small souvenir made of fabric and thread
I suggest all craftswomen do the following: take ordinary fabric and threads and build a doll that will symbolize Maslenitsa. Often, such dolls were made and they were a kind of amulets for children.

Don't forget to tie a scarf on your head, it will look so cute.


As you can see, satin ribbons are also used for garters.

But even without them you can make a stunning masterpiece.

Yes, not one yet, look.

Such dolls, of course, will become a decoration for the holiday, and the main thing is that you can also make the most important symbol of this celebration, bake real ones or knit them))).

So, choose any model and create, and then share your feedback and suggestions.

Well, the easiest and most uncomplicated option is to build a product from threads.

Or use this video tip.
With that, I say goodbye to you, I'll see you here soon. Patience and great success at work and everywhere! Bye bye!
Sincerely, Ekaterina Mantsurova
Lyubov Mikhailovna Balabanova
Lesson summary on the Maslenitsa application
CLASS
BY APPLICATIONS IN THE SENIOR GROUP
« CARNIVAL» .
circle leader "Samodelkin"
Balabanova L. M.
MDOU DSKV No. 12 "Fidgets"
town of Taldom, Moscow region.
Target:
Introduce children to Russian folk traditions, customs, and holidays « Carnival» .
Tasks:
1. Strengthen the ability to work with scissors.
2. Strengthen the skills of cutting paper along the intended lines.
3. Strengthen the ability to work carefully with glue.
4. Strengthen the ability to compose a whole object from parts.
5. Develop the ability to complement the image with details.
6. Development of fine motor skills in children.
Handouts:
1. CD – disks.
2. Cut out circles of yellow paper (2 for each child).
3. Lined sheets of yellow, red, orange paper.
5. Brushes.
6. Stands for brushes.
7. Scissors.
8. Substrates for work.
9. Cloth napkins.
10. Eyes of the sun.
11. Markers.
Progress of the lesson.
The evil blizzard has passed away. The night became shorter than the day.
A warm wind blows from the south, the drops fall and ring.
The sun, heating the earth, drives ice off our hill.
The snow woman melts and tears flow in streams.
Tell me, please, what is said in the poem that I just read to you?
About the end of winter.
Spring has come.
How did you guess?
The snow is melting.
Streams are running.
Dripping from the roof.
It became warm outside.
That's right, well done! Winter ends, and people say goodbye to it with a noisy, cheerful holiday. What is the name of this holiday?
- Carnival.
Who can say how this holiday is celebrated?
Sing songs for Maslenitsa.
They dance.
They play games.
They dance around Maslenitsa.
Pancakes are being baked.
They sing songs.
Well done!
Carnival. (A. Usachev)
Hello, Carnival!
Give us butter!
We'll bake ourselves some hot pancakes -
We don't care about snowstorms and frosts!
If you have a frying pan,
We are not afraid of the cold,
Because damn it's hot-
This is the best food!
Like this Carnival
Dala butter for us!
Even two appeared in the sky damn:
This is the damn sun, and next to it is the damn moon.
One damn hot one
The other one is cold.
Climb to the sky-
If anyone is hungry!
Carnival– one of the most joyful and bright holidays. Carnival- This is a long-loved holiday in Rus'. Lasts Maslenitsa all week, and all this time the housewives bake pancakes and pancakes that are so reminiscent of the sun, invite guests and treat them. In the old days in Rus' Maslenitsa They glorified the pagan sun god Yarila, and this holiday marked the arrival of spring and warmth.
According to legend, Maslenitsa was born in the north, her father was Frost. One day, in severe frosts, a man noticed her hiding behind huge snowdrifts. He called her to help people, cheer them up, warm them and feed them. Maslenitsa has arrived. But she turned out not to be the fragile girl they saw her at first, but a healthy woman, with rosy cheeks, laughing loudly.
Carnival had a different name - farewell to winter. And seeing off winter and welcoming spring is always a holiday. People forgot about the cold, winter frosts, about melancholy and sadness, and had fun from the heart. With the arrival Maslenitsa Indeed, the weather has become milder and the frosts have become warmer. It was then that the people decided to organize a holiday in honor of Maslenitsa: the whole world is spending Winter and preparing to welcome Spring - red.
The holiday was the noisiest and most fun Maslenitsa! For a whole week people have fun, visit each other, come up with various fun and games in the fresh air and, of course, bake pancakes.
Guess the riddle:
Well, which one of you will answer?:
It’s not fire, but it burns painfully,
Not a lantern, but shining brightly,
And not a baker, but a baker? (Sun)
Right! You probably know that when the sun is shining, you all have more fun, your mood improves, you want to rejoice and laugh.
As we have already said, all Maslenitsa The housewives baked pancakes for a week. Dear guests were invited to pancakes and treats; the more guests, the more happy days a year.
And who can tell me why Pancakes were baked during Maslenitsa?
Because they look like the sun.
You already know that today you and I will also go outside and have fun. And now we will prepare for the holiday. Everyone will make their own sun. Please look at your jobs.
You have 2 yellow circles.
CD - disk.
Lined sheets of yellow, orange, red paper.
We will make the sun itself from circles, and we will cut rays from colored paper.
Why do you think we chose these colors for the sun?
Children's answers.
Because these are the colors of the sun!
Before we get started, we need to remember the rules for working with scissors. Maybe you can help me? Who knows how to handle scissors?
Children's answers.
Scissors should lie with the blades closed.
The scissors should be passed to each other with the rings facing forward.
You can't swing it.
You can't play with scissors.
Well done, guys!
Don't joke with scissors
Don't twist them in your hands in vain
And, holding the sharp edge,
Give them to a friend.
The work is just finished...
Scissors need care:
Don't forget to close them
And put it in a box.
Physical education minute.
We are a nice family of little goats
We love to jump and gallop. (bouncing in place)
We love to run and play
We love to butt heads (stand in pairs and show “horns” with the index fingers of both hands)
Let's make our suns.
Execution sequence.
1. Cut colored sheets of paper along the marked lines - these are the rays of the sun.
2. Fold the strips in half, but do not smooth the fold of the strip.
3. Glue the rays on the back side of the first circle
4. Apply glue to the SD disk, apply and glue the first circle, covering the tips of the rays.
5. Glue a loop of thick woolen thread to the CD disk.
6. Glue the second yellow circle to the other side of the disk.
7. Using felt-tip pens, draw the eyes of the sun and glue them on.
Our Sunshine is ready, you can safely go with him to the holiday Carnival!
Analysis of works.
At the end of the work, the children share their impressions, talk about their suns, and evaluate the work of their comrades. The results are summed up. A poem is read out.
Goodbye, goodbye
Our Carnival.
Goodbye, goodbye
Ours is wide.
You came with goodness
With pancakes, pies,
Yes with pancakes.
We're rolling down the mountain
From dawn to dawn.
And today, Sunday,
Our fun is over.
Goodbye, goodbye
Our Carnival!
Publications on the topic:
Lesson summary “Red Maslenitsa” Theme of complex thematic planning “Maslenitsa” Tasks: Consolidating methods of drawing a stylized human figure - Maslenitsa.
All! All! All for the holiday. We welcome spring and bid farewell to winter. The beginning of the holiday. Everyone got ready. We offer a competition. Who is strong, who.
Lesson notes on the “Bear” applique"Bear" Summary of a lesson on GCD (application) in the middle group Conducted by Afoshina N.K. Topic: “Teddy Bear” Goal: create an application “Teddy Bear” Tasks:.
 theme: “Maslenitsa is our dear guest.” Goal: To acquaint children with the traditions and customs of the Russian people, to form children’s knowledge about Russian.
The arrival of spring is completely impossible without everyone’s favorite Maslenitsa! Even the ancient Slavs introduced the tradition of celebrating the arrival of spring and farewell to winter from year to year! In those days, large dolls were made, which were called Maslenitsa, and after the festivities, Maslenitsa was burned at the stake amid everyone's laughter!
The celebration of the birth of the Sun took place in songs, jokes, round dances, and its symbol was a pancake associated with the Sun! Therefore, at home, all walkers were greeted with ruddy-cheeked pancakes with all kinds of fillings!
We won’t bake pancakes, but we’ll make a talisman, like Maslenitsa! And the house feels good - protection has appeared, and the child is happy - a new bright toy!
Our craft for Maslenitsa will be something like this and it can be easily done even for school:

To create such a craft with your own hands for the holiday, prepare:
- Acrylic yarn of bright red color – 1-1.5 m;
- Bright “Iris” threads of various shades (to suit your taste);
- Sharp scissors;
- Cardboard with sides 10 cm.
The size of our dolls will closely depend on the width of the cardboard, since with its help we will form the body of the dolls.
1. Lay out the “Iris” threads in front of you and determine the sequence of layers of threads. We lay out the threads in the desired sequence.
2. We begin to tightly wind the first layer of thread onto the cardboard. The threads must lie tightly, one on top of the other, so that our thread doll has the required volume. Having wound the first layer along the entire length, we move on to the second, then to the third, and so on...

3. Now you need to carefully remove all the threads from the cardboard, then carefully tie all the threads on one side and cut them with scissors on the other side.

4. Before proceeding to the next stage of work, you need to thoroughly align the color layers and trim the sections with scissors:

5. Let's take care of the future hairstyle of our thread lady! To do this, you need to use the same threads, only one tone, to weave a regular braid! But the length of the braid should be twice the size of the doll. We fasten (twist, tie) the braid on the base of the doll and form any hairstyle you like.
6. We tie the neck tightly with thread, the head should be round and small!
7. The next task facing us is to make hands for the doll. To do this, we again return to our cardboard and wind threads on it, but in any sequence and alternately with each color:

The arms should not be the same thickness as the body, therefore, it will be enough to wind three times less thread.


10. We put handles between the halves of the body and firmly attach them there. We tie the doll's waist:

11. Now, to add elements of amulets, you need to tie the torso crosswise with a red acrylic thread, wrapping it around the neck on one side and around the waist on the other. You can wrap it around your waist several times and tie such a belt with tassels on yourself. Then carefully straighten the skirt of our thread beauty, the first doll is ready:

12. So that the young lady does not get bored from threads, I propose to make a boyfriend for her. The first stages are absolutely identical, only we will do the hairstyle a little differently!
13. To do a guy’s hair, we do this:
We make a small bunch of threads of the same color as the “luxurious hair” of the thread guy should be. We tie a knot in the center of the bun and tie it all to the future doll’s head:

14. The head is formed identically to the first doll, only we arrange the hairstyle differently and secure it with red thread.
15. Body and arms – we repeat everything as for a thread lady!
16. The final stage – legs! We distribute the bundle of threads coming from the body into two equal parts and rewind them tightly at the very bottom, so to speak, separating the feet. If you wish, you can make a shirt for the guy by cutting the first three thread layers going down from the waist to the desired length. Here's what a “good fellow” we got:


18. If your Maslenitsa craft is given to a young couple who wants to have children, then you can add children to this composition to clarify your wishes:

Children must be very young. The size is 4-5 cm. The manufacturing technology is identical to the “parent” one until the “swaddling” stage - just wrap the body almost to the very bottom and the thread “baby” is ready!


That's all the “complicated” work of making amulets for the celebration of Merry Maslenitsa!