Beautiful satin ribbon bows for. How to make beautiful satin ribbon bows
Satin ribbon bows have become for many one of the most versatile and indispensable decorations. Such bows perfectly complement gifts, bandage bouquets of flowers, in principle, they can decorate any thing that needs to add a cheerful festive mood. And, of course, we must not forget that satin bows can act as a wonderful independent accessory as a bracelet, brooch or hair clip.
Technique

There are quite a few ways to tie bows from satin ribbons, it all depends on the technique of execution. The simplest way that everyone can do is a classic bow, which can be done by knotting two or more loops. It is not much more difficult to make a strict or tiered bow. Interestingly enough, such bows look if you combine two or more materials of different colors and textures in them.
A more difficult option is to tie a fan bow, flower bow or terry bow.
It is also easy enough to tie a bow on a fork: 

Since childhood, many people have been familiar with the variant of the accordion bow, in which the ribbon is pulled together on a thread along the edge, forming a lush bud.
Satin ribbons laid in the shape of the letter “Zh”, in the shape of a star or twisted in the form of a blossoming rose look quite original.
In addition to the options listed, the Japanese kanzashi needlework technique will help you learn how to create wonderful bows. It is characterized by the formation of an elegant hair product from many independent small parts made of satin ribbons in the form of petals.
Making hair bows
Necessary materials:
- satin ribbons;
- cardboard for the template;
- scissors;
- needle and thread;
- rubber;
- glue gun.
Draw a star with seven equal rays on cardboard and cut it out. Make a small hole in the center of the star. The size of your bow will depend on the size of this stencil. The diameter of our stencil is 17 cm, and on its basis a fairly large bow is obtained.
For convenience, in order not to get confused in the number of turns, it is better to number the rays.
Take a satin ribbon about 6 meters long and 2.5 cm wide. If you have a ribbon on a reel, then do not cut it off in advance, but form a bow directly from the reel so as not to make a mistake with the length. If you suddenly want to make a smaller bow, then it is better to take a narrower ribbon.
Take the end of the ribbon and fold it in half lengthwise. It is better to fold a one-sided satin ribbon with the front side inward, then later, at the stage of straightening the bow, it lays down beautifully. 
We stretch the edge of the tape folded in half through the hole in the center of the base so that the fold line of the tape is on top when wrapping the beam.
Having wrapped the first beam, we direct the tape again to the center of the star and from the wrong side through the hole we fix it with a needle, thus we get the first loop. 
Next, we successively wrap the tape around all the rays of the stencil according to the following scheme: 1, 5, 2, 6, 3, 7, 4. This is one circle of winding. Repeat this action 5 more times to get 5 loops on each beam. The more magnificent you want to get a bow, the more loops you need to make. In this case, it turned out 35 pieces. 
Then leave a piece about one loop long on the tape and cut off the edge of the tape.
Align all the layers of the tape at the center of the star, aligning all the rows as much as possible, and fix them with a pin. Then sew this place with one stitch back and forth. But be extremely careful, otherwise if some tape is not fixed, then after removing the cardboard base, the loops may unravel.

Now you can take out the needle that fixed the first loop and remove all the loops from the base.
In order for the loops to be located not one above the other, but more chaotically, you need to slightly shift all the layers of the bow relative to each other. It was for this that the center of the product was not thoroughly stitched, but only slightly fixed with one stitch.

Now that all the loops are in the desired position, you can securely sew the center of the bow.

Bend the remaining edge of the tape in the form of another loop and glue the tip to the center of the product to cover the thread stitches.

To fix such a bow on the hair, on the reverse side, glue an elastic band, hairpin or headband to it.
Bows are perhaps the most popular and affordable type of jewelry. They suit small and adult women of fashion, whose hairstyles become more elegant with the help of lush ribbon “bouquets”.
Now the stores sell ready-made "things" of this type for all occasions. But, firstly, "consumer goods" is far from perfect: it can never be ruled out that the purchased jewelry will be fragile and "fail" at the most inopportune moment.
And secondly, a thing made by oneself is not only cheaper, but also “more exclusive”. But how to make a bow with your own hands?
There are many ways to make various decorative gizmos, and neither special skills nor any special tools are required to master them. First of all, the ribbons themselves are needed, as well as scissors, needles, coils, and sometimes glue for fastening parts.
Classic buns, ponytails and braids intercepted with an elastic band or hairpin are very comfortable, but too simple types of hairstyles. They quickly “get bored”, and the girl / girl, as one old song says, “I want something like that ...” A bow will help to add a festive hairstyle.
It’s not difficult to tie ordinary bows on your hair - even elementary schoolgirls can do it. But in order to decorate the girl's head in a more original way on a particularly solemn holiday - a birthday, September 1 or a New Year's party, you will have to try a little.
Let's try to make ribbon bows with our own hands. Here are the options for such a "crown".
"White Diamond"
For one such miracle you will need:
- White ribbons:
- 1 m - from kapron, 8 cm wide;
- 0.6 m - from satin, 5 cm wide;
- 1.5-2 m narrow (no more than 3 mm) satin ribbon;
- Hair band.
 In addition, to make a bow from a satin ribbon with your own hands, you will need: a lighter, scissors, a needle and a spool. You can use both ordinary cotton sewing threads and cotton-coated polyester threads - they are just as thin and easy to sew, but much stronger.
To begin with, let's make blanks. Wide stripes - both nylon and satin - are ironed and cut into 2 equal parts. The cut edges should be burned immediately with a lighter.
 Let's start making our jewelry.
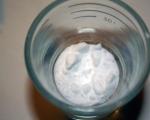
The first half-meter nylon segment must be gathered onto a thread, passing it in the middle, then pulled off, gathered in the form of a rose - it will be at the top.
We fold the second piece of nylon in half lengthwise and also assemble it on a thread, stepping back about 0.2 cm from the fold. We tighten, we get a flower with petals. In the middle we leave a small hole - this will make the diameter more voluminous.
We fold a thin ribbon into loops and put it on the petals, arranging them in such a way that they protrude slightly beyond the edges. We fasten each loop with two or three stitches. Part number two is ready.
 Now let's take a wide satin ribbon. We take it by the ends and fold them to the middle, so that they overlap each other a little (no more than 1 cm).
If the fabric has both front and back sides, you need to make sure that the wrong side is inside. We sew, trying to make the seam lie exactly in the middle. We tighten and wrap the middle with a thread 2-3 times, it turns out a "butterfly".
According to the same scheme, we make another same butterfly, put it crosswise on top of each other, and sew it in the center. This will be the foundation.
 We go to the finish line and connect all three parts: first the satin, then the “chamomile” with thin loops and, finally, the white rose. Details can be glued or sewn - as it seems to someone better and more reliable.
An elastic band is sewn to the satin backing, with the help of which the whole structure will be attached to the head of the little princess. The lush "royal crown" - about 12 cm in diameter - is ready, you can go to the ball!
"Sweet couple"
With these lush, but small balls, you can decorate small pigtails or “tails” for every day. Need:

Nylon is prepared in the same way as in the first case: ironing, splitting in half, firing the edge. The half is folded in half (in length) and stitched with small stitches at a distance of 0.3-0.1 cm from the fold - the closer, the better. Then it must be "collected".
It is better not to wait for the end of the nylon strip, but to do it gradually, stitching and gathering small areas. At the end, the bow must be tightly, but carefully pulled off, trying not to break the thread.
Otherwise, unpleasant consequences are inevitable: from the need to repeat the operation to wrinkling and holes from the needle on the fabric.
The tightened workpiece is twisted in a spiral and stitched along the edge, assembled into an accordion. Stitches should be strong but loose, not tight to the point. The result should be something like a slightly shaggy nylon ball.
 We make a mount. A bead is strung on the hat elastic, which will help to fix the bow on the pigtail more tightly. Then the rubber band is tied into a ring with a diameter of 5 cm. The ends of the knot (no more than half a centimeter) are melted with a lighter. The elastic is sewn with a knot to the bow, a couple of stitches on one and the other side of the knot. Try not to grab the folds, working only with the assembly area.
We take a prepared leather or felt circle and make a longitudinal cut in the center, approximately 1 mm less than the diameter of the bead. The ball is threaded through a circle, which is stretched over an elastic band and fixed with silicone glue at the junction with the base of the product.
Finally, we will try to arrange the folds so that it looks like a small fluffy ball. A pair to it is made in a similar way.
Flower on a hairpin
Such an ornament is quite suitable for a young girl - both from the age category of teenagers and those who are older. Attaching it to your hair is not difficult.
For the manufacture, in addition to the previously listed (several types of satin ribbons of different widths and colors, needle and thread scissors, etc.), you will need: 
- ordinary school line;
- a strip of white cardboard;
- button "with a leg";
- hairpin clip.
Consider step by step how to make a bow on a hairpin with your own hands. Let's start by making two rectangles out of cardboard: 8 and 6 cm wide (the length is not important in this case). Using a ruler, find and mark the middle of each.
 Take the widest strip of fabric and wrap it around the 8cm strip of cardboard, crossing the ends so that the cross hairs line up exactly with the marked midline.
We mark the place on the tape with a pencil and carefully remove the fabric from the cardboard strip, holding it with our fingers.
Then we sew along the pencil mark “needle forward”, carefully pull it together and pass the needle through the center several times in order to fasten it, and set it aside.
 Taking a part of a different color and smaller width, we wrap a 6-centimeter cardboard template with it three times.
The coils should lie close to each other, but not overlap. Again we make a pencil mark in the center, remove and sew, just like the first part.
The narrow strip should be brighter than the first two in order to contrast with them, and about 8-10 times narrower than the widest one.
We wrap it around a large cardboard blank and, having removed it, we tie the resulting bundle in the middle with a thread. We attach it to the first part, straightening and fluffing the loops. After that we sew both.
 We take a new segment of a narrow ribbon and string a button on it, which should cover the middle.
We tie the product with this piece, trying to ensure that the button falls exactly on the center, covering all the fastening parts. Turning the decoration over, tightly tie with two knots and melt the ends.
We attach the finished decoration to the clip with a sealant, and then, after letting it dry, we additionally sew it on, passing the threads through the holes in the hairpin.
Little tricks
So you learned about various manufacturing technologies, and from now on you can make any beautiful ribbon bow with your own hands. And now - a few tips that will help you quickly and accurately deal with all of the above arts.
It is better to iron with a slightly warm dry iron (without steaming). At high temperatures, the fabric, especially nylon, can be damaged, and moisture sometimes leads to the formation of spots on its surface.
You need to sew and collect the bow on a double thread - this will help to avoid breaking when tightening.
To gently melt the edges, it is better not to hold the fabric in your hands, but to lay it in a thick book, slightly sticking out the edge. In addition, all kinds of beads, brooches, silver threads and other inexpensive jewelry will help to decorate the ribbon socket.
And another version of a beautiful bow-hair clip - in the next video.
The range of satin ribbons is striking in its diversity. Ribbons have different widths, colors, patterns, finishes. This material is affordable and easy to use, while you can make very beautiful products from satin ribbons with your own hands. In this article, we offer several master classes on creating simple bows for every day, as well as elegant, festive bows.
Consider, first, the simplest ways to tie a bow. Although, at first glance, it seems that tying a regular bow is very easy, there are still some tricks in this process. We will consider a method that will allow you to get an even, symmetrical bow with a beautiful center. To do this, you only need a satin ribbon and scissors.
1. We take a piece of tape of the desired length.
2. Fold the tape as shown in the figure.

3. In the resulting loop below, we skip one of the ears and tighten the knot.
4. This is what should happen.

This simple bow is perfect for decorating hair for every day. For example, to diversify a regular ponytail or spikelet with a bright ribbon.
Satin ribbon bow flower. How to do it yourself?
And now consider the festive options for satin bows. Making them will be a little more difficult, but the result is noticeably more spectacular. Lush bows for hairstyles from satin ribbons can be easily made by yourself. At the same time, the cost of the product is several times less than the price of a store bow. The diameter of the finished product will be 14 cm, if you want to get products of a larger or smaller diameter, then proportionally change the size of the tape segments.

So, to make such a satin bow with your own hands, you need:
Six cuts:
- satin ribbon 5 cm wide, 14 cm long;
- ribbons 2.5 cm wide, 10.5 cm long;
- a silver ribbon 0.3 cm wide, 15 cm long;
- a silver ribbon 0.3 cm wide, 8 cm long;
A circle of felt with a diameter of 5.5-6 cm;
Decoration for the middle of the bow;
Threads in tone, needle, scissors;
Lighter or soldering iron, glue gun or moment-crystal glue;
Elastic band, hairpin or clip for the base.
Before assembling the bow, be sure to process the edges of the cut pieces with a lighter so that they do not crumble during work. Fold 6 five-centimeter pieces in half and collect them on a double thread, pull the thread so that you get a flower and fasten.

In the same way, make a second flower from pieces of ribbon 2.5 cm wide. Then make ears from pieces of silver ribbon, as shown in the figure. Glue the ends with glue or a glue gun.

On the large flower, glue large silver ears, one per petal, so that they peek out nicely from under the top flower.

Glue the second flower on top and, on it, smaller ears according to the same principle. Close the core with the prepared decoration. A bead, a button, a medallion will do.
On the reverse side, glue a felt circle to the bow, and attach an elastic band to it, for example. If you will use a clip or hairpin, then pre-paste them with rep tape to match.

Your bow is ready. It took less than an hour to make an elegant satin bow with your own hands.
Lush satin ribbon bow decorated with rhinestones
We will teach you how to make this wonderful decoration with your own hands in a master class. This version of an elegant bow, which you can make yourself, will delight any first grader. An elegant unusual bow is made very simply, but it will take more time to complete it, since it consists of a large number of details. Please note that you need to carefully complete each blank, since the overall appearance of the bow depends on how well each element is made. If you do not have the skill to work with satin ribbons, prepare materials for 5-7 extra blanks.

Materials for work:
Tape 2.5 cm wide and 6 meters long;
Rhinestones or beads with a diameter of half a hundred meters;
Lighter or soldering iron, scissors, moment-crystal glue, ruler, pencil;
A circle of felt with a diameter of 5 cm, fastening - an elastic band or a hairpin.
We cut about 50 pieces of tape eleven centimeters long, process the edges of the pieces with a lighter. Fold each piece in half, satin side inward, drip a small drop of glue on the satin side at a distance of 2-3 centimeters from the fold in the middle and press with your fingers. When the tape sticks well, turn it inside out with the satin side out. It turns out here is such a detail.

Then we fold this part in the form of a bow, so that the glued area is in the center, and the edges of the tape are bent to it from the back side.

We decorate the blank with a rhinestone or a bead. We make at least fifty such details. This is the most important stage of work, if a neat workpiece did not work out right away, we advise you to practice a little before performing the “finishing” parts.
When the details are ready, we collect the bow. On a felt circle, we begin to glue blanks in a circle with a slight overlap. Should fit 11-14 pieces in the first circle.
We glue the second and subsequent circles in a similar way, slowly moving towards the center of the felt circle, the number of elements in a row will decrease as it approaches the center. So you should get several circles, gradually decreasing in diameter.
The more elements, the more magnificent the bow will be. After all the blanks are glued, we attach an elastic band or a hairpin with glue or a glue gun, you can add ribbons for tying. A bright lush bow is ready.
These bows are sure to please your little princesses. You can decorate your hair with them both on weekdays and on holidays; with these accessories, novice fashionistas will look elegant and neat. And you will save on the purchase of hair accessories. You can, for example, please a first grader with such a necessary and beautiful gift for the first of September, or make a birthday present.
Gathered for a visit, chose a gift, now you don’t know how to pack it? Then you are at the right place. In this article, we will look at how to make a ribbon bow for decorating gifts, and also tell you how you can make an exclusive present for every taste from a regular ribbon.
How to create a festive mood?
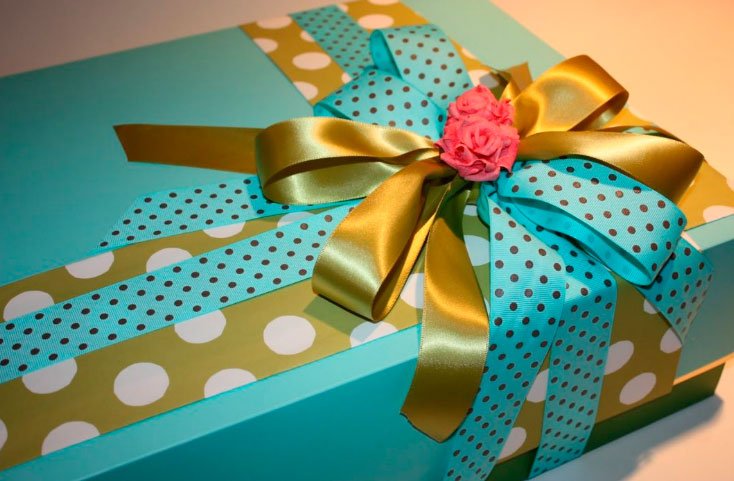
A beautifully packaged gift with an original decoration always creates a festive mood, whether you give it or gave it to you. It is a beautiful bow, which can be called a classic decoration technique, that “warms up” the fantasy, making you tremble in anticipation of a surprise. The originality of this decoration lies in its versatility, since a ribbon bow can be made in different shapes or sizes, and today's market offers the widest selection of colors, from plain to complex patterns. Such decorations can give the souvenir more solemnity. Initially, you need to pack a surprise in gift paper, how to do it, read the article: well, we will teach you how to make a bow from a ribbon, most importantly, be patient and not quit work after the first failure, because a wonderful grateful smile of the hero of the occasion, to which you gathered in guests deserves a little effort.
How to make a voluminous ribbon bow to decorate a gift?

To get a really voluminous bow, you need to give preference to cuts made of hard material. Having picked up the ribbon, we do the following:
- Having decided on the size of the bow (the longer the loops, the larger the bow will be), you need to make loops from the tape in 5–9 additions, laying them one on top of the other.
- Smooth out the resulting loops and carefully trim the edges, as indicated in the photo below. You should get almost triangles around the edges.
- Take the loops in the middle and part them on the sides so that the cut parts are in the center.
- Fasten the narrowest central part. You can do this:
- the same ribbon
- sew with threads;
- fasten with a stapler;
- twist with wire.
- Straighten the resulting half-loops, give them volume and a beautiful bow is ready!

How to make a fluffy ribbon bow? Video lesson
How to make a simple ribbon bow to decorate a gift?

You can make a strict version for a “male” present. It will look great both on the packaging and on the bottle of an expensive strong drink. And you can read more about souvenirs for the men's holiday in the article:. Let's get to work:
- Cut off a piece of wide ribbon of the desired size, fold, glue the edges with glue. Should be a ring.
- Flatten the resulting ring.
- Hide the joint under the same, but thinner cut.
- Gently glue the edges and a strict decoration is ready.

How to make a bow from a ribbon - a classic version
The classic version of the decoration is very simple in execution, while creating an excellent frame for any present.

With such a bow, both a book, a box of chocolates or a service, as well as ordinary wild flowers, will look great. Such a classic is performed according to the following steps:
- Take a long ribbon and fold it into two loops, as in the photo below. In each hand, there should be one addition.
- The loop that is on the left to start at the back, crossing two additions. It turns out a circle at the bottom.
- Pull the right loop through the formed circle, pull it off. The center should be in the middle.
- Straighten the loops - a beautiful bow is ready! If necessary, you can cut the lower ends to the desired shape (oblique, triangle, etc.).

Video tutorial: how to tie a classic-style ribbon bow to decorate a gift?
How to make a Dior bow from ribbon for decorating souvenirs?
The Dior bow is used not only in decorating gifts. With it, unforgettable decors for parties, weddings and other celebrations are created. By the way, take note of the rules of conduct at the table at such festivities. They are described in the article:.

To make such a bow, you need to follow these steps:
- Prepare four cuts, of different lengths.
- Roll each of them into a circle and fix with threads or glue.
- Fold the circles in ascending order one on top of the other.
- Tie the resulting design of ribbons in the center by inserting the strapping tape into the upper (smallest) circle, as in the photo below.
- Attach the structure.

How to make a ribbon bow on a fork?
Do you believe that you can tie a beautiful bow on a fork? No? Then let's learn, we offer to try out two options for the execution of such an ornament.

Option No1
Let's try to solve the following equation: Ribbon + Fork = Original bow. To resolve, you need to do the following:
- Cut a narrow ribbon of the desired size. For convenience of work, it should be at least 18 cm.
- Conditionally divide it into a long and a short side. The short side will not be used.
- Pass the long part between 2-3 cloves of the fork used.
- And its end, bring up between the same teeth.
- After these steps, you should get a small loop. Don't tighten it just yet.
- Pass the rest of the long end through the loop inward again.
- Pull this end out and tighten the knot.
- Trim the long ends to the desired length, singe them with matches or a lighter.

OptionNo2
To get a beautiful bow in the form of a lush flower, you need to use two different ribbons:
- thin;
- wide nylon.
Execution steps:
- Insert a narrow ribbon crosswise into the center of the fork. It will be needed almost at the end of the work.
- Braid the fork teeth with a wide nylon cut, as shown in the photo below.
- Pull off the bindings with a thin ribbon, tie.
- Remove the workpiece, straighten.
- Scorch the edges with fire.

The decoration is delicate. It will ideally complement any souvenir intended for the beautiful half of humanity.
Video tutorial: how to make a ribbon bow on a fork
Photo ideas for decorating gifts with bows


Beautiful packaging is an integral part of a gift. A frequent attribute of gift wrapping is a bow. This decorative element can be anything: strict and frivolous, classic or fantasy, tiny or huge. In the photo you can see a variety of options for bows decorating gift boxes. If desired, you can learn how to do this decor with your own hands.
Consider how to make a ribbon bow for a gift. To make this decorative element beautiful, you will need an eye, a certain dexterity and a little patience. You should not take on a complex option right away, it is better to first practice on simpler bows.
What tapes to use?
What kind of ribbon can be used to make a beautiful gift bow? The most varied! However, it is desirable to select a material that holds its shape well. Satin ribbons are often used for decoration, but satin, velvet, and nylon ribbons can also be used. Materials such as organza, tulle or polyester have proven themselves well.
To decorate a bow, you can use a variety of decorative elements: self-adhesive rhinestones, beads, beads, beautiful buttons, pieces of lace, feathers, etc.
You can also use a combination of materials to create a bow, for example, combine nylon and satin or silk and velvet in one element.
Classics of the genre
Formal gifts and presents intended for men should be decorated with simple classic-shaped bows. If you want to make a decorative element more elegant, you can decorate it with beads, sequins, rhinestones.
Everyone probably knows how to make a classic ribbon bow, but just in case, let's recall the sequence of actions:
- the tape, without twisting, is folded four times, so that two loops form at the top, and one at the bottom;
- fold the upper right loop crosswise with the upper left loop;
- tie a regular knot;
- stretch and straighten the upper loops, as well as the middle of the bow;
- free edges can be shortened or cut into them (on the end part) recesses in the form of triangles.

There is another version of the classic bow. To do this, you need to use two pieces of tape, one of which is significantly shorter:
- we fold a long piece of tape in half and fasten the free ends with threads, we have a ring;
- fold the ring in half so that the attachment point is in the bottom row in the center;
- now we take a short piece of tape and, folding it several times, we form a false bow knot. To do this, simply wrap the structure from a long piece of tape at the attachment point. It remains to fasten a short segment with threads, giving it the shape of a magnificent knot.
Tiered and multicolor bow
Using the technology described above, more complex bows can be made. For example, it is easy to make a multi-tiered bow from a non-shrinking material. This will take several years (the number depends on the number of tiers, optimally three), which differ in width. We cut the ribbon so that the widest is the longest (the length of the segment is equal to the length of the bow), and the narrowest is the shortest. We fold the ribbons with a “sandwich”: at the bottom is the widest, then the middle and narrowest, in the center we tie this design with another ribbon (the width of this segment is to your taste). It remains only to trim the ends, giving them a curly shape.
Similarly, you can make a multi-tiered and multi-color bow, for this you need to take ribbons that differ not only in width, but also in color.
Bow fan
This option for decorating a gift is also called a Dior bow. For its manufacture, it is recommended to use a rigid, well-kept tape.
To make a "fan" you will need to make several rings from the tape so that they differ in length. To tie a magnificent bow, you will need at least five of these rings.
Then you need to fold the rings in half so that the attachment point is at the bottom, and stack them one above the other from largest to smallest. Now we take another piece of tape, draw it under the bottom of our structure and through the top (the smallest ring, no more than 2 cm in diameter). We fix the segment and straighten the resulting "fan".
Bow flower
A beautiful large bow in the form of a flower can be made from satin or silk ribbon. You need to take the end of the ribbon and fold a ring out of it, holding it with your index finger and thumb. Then you need to make at least a dozen more such rings (the splendor of the bow will depend on the number of rings). The resulting rings should be tied in the middle with a thin ribbon and carefully, alternately straighten each loop, forming the “petals” of the flower.
One version of the flower bow can be done like this:
- take two types of tape, the first should be twice as wide as the second (for example, 5 and 2.5 cm);
- the color of the ribbons can match or just blend beautifully with each other;
- cut from a wide ribbon five pieces 10 cm long (for a medium-sized bow), and five pieces from a narrow ribbon 7 cm long;
- we begin to form a bow: we fold the first segment of a wide ribbon in half and sew along the edge with “forward needle” stitches, making an assembly;
- “string” all five petals on one thread, then cut the thread, leaving a long tail;
- then we pull out part of the thread from the side of the knot and tie both free ends, having previously straightened the petals of our flower bow. We got a semblance of a five-petal chamomile;
- we make a similar chamomile from a narrow ribbon;
- we impose a smaller flower on a larger one so that the central parts coincide;
- in the center of the flower we sew a beautiful button or bead, you can stick a large rhinestone.
Terry bow
To make this bow, you need a material that holds its shape perfectly, for example, polyester.
Sequencing:
- we fold the ribbon, forming several rings nested one inside the other, the size of the future bow will depend on the diameter of the rings;
- fold the rings in half, smooth and cut off the corners on both sides so that the integrity of the ring is preserved;
- turn the rings over so that the cut out place is in the center;
- if at this stage several cuts are made on the ribbon, then the finished bow will resemble a chrysanthemum flower in appearance;
- we tie in the center with a narrow ribbon, and then carefully straighten the flower petals.
Bow on a fork
To decorate a small gift box, you need to make tiny bows. It is convenient to tie them on the most ordinary table fork with four prongs. To make jewelry, you will need a piece of thin ribbon or braid about 15 cm long.
Procedure:
- put the ribbon on the center of the toothed part of the fork, leaving a small (non-working) tip of the ribbon. Hold it with your thumb;
- we take the second (working) end of the ribbon, wrap the fork and skip the end between the second and third prongs below the loop formed;