DIY Easter card templates for children. Easter cards made from corrugated paper or simple napkins
DIY Easter cards for schoolchildren
Postcards " Easter miracles»made from paper with your own hands. Master class with step by step photos
Suslova Natalya Viktorovna teacher primary classes Municipal educational institution secondary school No. 7 named after. Admiral F.F. Ushakov, Tutaev, Yaroslavl region.Description: This master class is intended for children over 10 years old, primary school teachers, and parents.
Purpose: gift, work for an exhibition, competition, interior decoration.
Target: creating postcards using the quilling technique.
Tasks:
introduce the production of basic elements using the quilling technique using technological maps;
develop practical skills in working with paper;
consolidate skills in handling tools - scissors, paper:
develop artistic taste, Creative skills, fantasy, imagination;
develop fine motor skills hand, eye, spatial imagination;
to form a work culture: teach accuracy, the ability to use materials carefully and economically, and keep them in order workplace;
cultivate independence, patience, perseverance, a sense of satisfaction from the habit of finishing things;
instill an interest in art, arts and crafts.
Dear colleagues, I present to you a master class on making “Easter Miracles” postcards from paper with your own hands using the quilling technique using technological cards.
Easter(Resurrection of Christ) - the oldest Christian holiday, main holiday liturgical year. Established in honor of the resurrection of Jesus Christ crucified on the cross. Its date in any given year is calculated according to the lunisolar calendar, which makes Easter a moving holiday.
Easter eggs are an attribute religious holiday Christian.
According to ancient church tradition, the first Easter egg was presented by Holy Equal-to-the-Apostles Mary Magdalene to the Roman Emperor Tiberius. Soon after the ascension of Christ the Savior into heaven, Mary Magdalene appeared for the Gospel sermon in Rome. In those days, it was customary to bring gifts to the emperor when visiting the emperor. The wealthy brought jewelry, and the poor brought what they could. Therefore, Mary Magdalene, who had nothing but faith in Jesus, handed the Emperor Tiberius egg with the exclamation: “Christ is Risen!” The emperor, doubting what was said, noted that no one can rise from the dead and this is as difficult to believe as the fact that a white egg can turn red. Tiberius did not have time to finish these words, and the egg began to turn from white to bright red.
Tradition contributed to the fact that this custom took root.
Since ancient times, the egg has been a traditional symbol of fertility and rebirth, bringing with it life, joy, warmth, light, the rebirth of nature, a symbol of the spring sun.

Eggs must be on Easter table, it is also customary to exchange them with each other and christen, congratulating them on the bright holiday. Perfect for this decorative eggs, made from various materials using different types decor pre-painted or not. You can, of course, decorate boiled Easter eggs with your own hands, but in this case they will be stored much less quickly and you cannot use glue when working with them.

Painted Easter eggs become modern world a piece of art that can delight us long years As an interior decoration, they are perfect as a gift for loved ones.
Materials: colored cardboard, quilling paper, stencil ruler, toothpicks, tweezers, PVA glue, Moment glue, scissors, curly scissors.

Step by step description works:
The basis. To make the base of any of these postcards, we will use a template (circle or print on colored cardboard).
Cut the base with curly scissors.

To decorate the base, glue horizontally 3 parallel strips 3-5 mm wide (quilling paper is good)

2 vertical stripes contrasting color. The base is ready!

Postcard in Gzhel style.

The idea for this postcard design was Gzhel painting.
Gzhel painting is an ancient, traditionally Russian art, the origins of which originated in the Russian outback more than 670 years ago. "Gentle blue miracle - fabulous Gzhel“- this is how people in Rus' affectionately called everyone’s favorite, amazingly decorated ceramics made of snow-white clay. Gzhel motifs can be seen not only on porcelain, but also on paintings, embroidered and painted, and on clothes, bed linen. These unique original works of art have been highly valued all over the world since time immemorial and to this day.

It's hard to believe: is it really
Just two colors? Miracles!..
This is how artists from Gzhel
The skies are putting snow on it!
Manufacturing sequence:
With help technological map No. 1 make eye and drop roll parts of different sizes and color combinations.
To make a multi-colored roll, glue the colored strips together one by one.


2. The tight roll is ready.
3. Unroll the roll according to a special stencil to the desired size.
4. Glue the edge with glue.
5. Make loose rolls.
6. Press the loose rolls on both sides to form the desired shape.
The rolls are ready!

According to technological map No. 2 make daisy flowers.

Let's start making chamomile from the middle.
1. Fold the paper in two layers horizontally by 1 cm and cut it off.
2. Cut the free edges into small noodles.
3. Using a toothpick, twist the roll with fringe, periodically fastening it with PVA glue for strength.
4. The center of the flower is ready!
Making chamomile petals.
5. Fold the paper in two layers horizontally by 3 cm (according to the size of the flower), cut it off.
6. Cut the free edges into noodles.
7-8. Screw the continuation of the flower onto the finished center with a tight roll, periodically fastening it with glue.
9. The roll is ready, glue the edge.
10-11. Place the roll vertically and fill it with PVA glue. Dry completely.
12. Bend the edges with scissors, twisting slightly. The daisies are ready!
Assembling a postcard V free form- according to desire, mood, creative imagination and approach.
Glue daisies onto the base of the card using Moment glue.
Glue drop rolls under the daisies.
Arrange, glue small leaves (roll-eye)

Complete the design with decorative branches and leaves.
The postcard is ready!

Postcard “Beautiful Flower”.
For this postcard, make a figured base in the shape of an egg and decorate it with stylistic stripes.
Taking advantage technological map №1
, make roller parts Drop, Eye, Arrow of the desired colors and appropriate sizes.
Using technological map No. 2– make the middle of the flower.
To make a curl sheet we will use technological map No. 3

1. To make, prepare strips of colored paper.
2. Glue the strips in the corner.
3. Using a toothpick, twist the corner.
4-5 glue the ends of the sheet, moving along the length (according to photo)
6. The curl sheet is ready!
Make a sufficient number of curl sheets.

To make a flower bud we will use technological map. No. 4

1. Using a toothpick, use ready-made strips of quilling paper to twist into a tight roll.
2. The tight roll is ready.
3. Gently squeeze out the center of the roll to create a sepal.
4. Fill with PVA glue for strength.
5. Insert Roll Sheet. Dry.
6. You can make and use 2 buds.
Assembling a postcard– free, according to your wishes, according to the presented sample.
Summary:Easter cards. How to make Easter cards with your own hands, photo. Master class DIY Easter cards.
Easter is not only a church holiday, but also a family holiday. Every family has its own Easter traditions. And it’s good if children accept Active participation in preparation for this happy holiday. A few weeks before Easter, before you are still in the carousel of pre-holiday worries, start making Easter crafts with your children. What kind of crafts can be made with children of preschool and primary school age for Easter? In our previous articles we have already talked about some types of children's crafts for Easter:
In this section we will talk about another common Easter souvenir that you can make with your children. It's about about making Easter cards with your own hands.
The symbol of Easter is the Easter egg. It is he who is most often depicted on Easter cards. We offer you several options for making Easter cards with easter egg.
Option 1.
To make this simple and at the same time effective Easter craft with children, you will need scrapbooking paper, colored or white cardboard, glue, a paper knife, as well as scraps of ribbon and braid.
Option 2.
You can embroider an Easter egg on cardboard with colored threads. First make holes in the cardboard with an awl. This craft for Easter looks very original.

Option 3.
You can make a bright and festive Easter card with your own hands from thick colored cardboard and multi-colored braid. Even a child can cope with this craft for Easter before school age with a little help from an adult.

These two Easter cards were made in the same way as the previous one, but instead of ribbon they used multi-colored strips of paper.


Option 4.
Easter egg made using paper weaving technique.

Make something so original with your child Easter craft with your own hands and decorate your card with it. Paper weaving is a form of creativity accessible to young children that develops fine motor skills and spatial thinking at the same time. Detailed instructions for making this children's craft for Easter, see the link >>>>


Option 5.
DIY Easter card, decorated with an applique in the shape of a three-dimensional Easter egg.

Even a preschooler can make such an Easter egg out of paper. To do this you need paper different colors cut out egg silhouettes of the same size.


Bend each paper egg in half and stack them, nesting them inside each other. Secure in the middle with a paper clip.


To make grass, fold a strip of green paper into a mound. Draw and cut out jagged “teeth” on the folded paper, then unfold the paper and glue it onto your Easter card.


Option 6.
A few more voluminous cards for Easter with an image of an Easter egg.

Download Easter card template >>>>
Download assembly instructions >>>>

Option 7.
These bright, colorful Easter cards are decorated with plain macaron stars. To create cards for Easter, you can use both dyed pasta and natural-colored star pasta. These Easter cards are easy to make; a child of senior preschool age can easily make them.

The Easter egg in the photo below is also decorated with macaroni different shapes, painted with paints of different colors.

Original postcard For Easter you can make it with your children using the quilling technique. Quilling is the art of making flat or three-dimensional compositions from long and narrow stripes paper.


Very easy to do with kids beautiful jewelry for Easter using paper weaving technique.

You can make a beautiful Easter card for the holiday using the scratchboard technique. The word “grattage” comes from the French gratter - to scrape, scratch, so another name for the technique is the scratching technique. To make this Easter card you will need wax crayons (pencils) and any sharp object. For example, a toothpick or a knitting needle (gypsy needle).


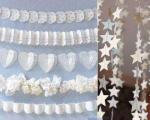
You can make beautiful Easter eggs with your own hands using lace paper napkins. Even preschoolers can handle this Easter craft with a little help from adults. It is appropriate to decorate a DIY Easter card with these Easter eggs.


DIY Easter card
With a little help from an adult, even a 3-4 year old child can make such a card for Easter. We bend a sheet of A4 paper in half so that there is a four centimeter edge at the bottom, which we then bend in the opposite direction. We cut out the “grass” on it with scissors. Let's decorate it. We leave fingerprints with our fingers yellow paint and, after it dries, we draw on beaks, paws, eyes and wings with felt-tip pens. Link


DIY Easter cards
This original Easter card is made using the so-called. "brads". Brads are something like nails or buttons with a decorative cap and a flat stem consisting of two teeth. The teeth are made of soft metal, which makes it easy to attach the brads to paper.
Using these rivets, you can make cardboard toys with movable joints - you make holes in the parts with an awl, insert the rivet, bend the edges and you have a clock with moving hands, a puppet doll or a car with spinning wheels.

Here is another interesting Easter card, decorated with an applique in the form of a chicken hatching from an egg. Try to figure out for yourself how to make this Easter card with your own hands.


A very easy to make Easter card that can easily be made with a group of children. Link >>>>

DIY Easter cards. DIY Easter cards
We invite you to make an original three-dimensional card with a chicken for Easter. To make it you will need: colored paper and cardboard, curly scissors, paper envelope, glue, felt-tip pen orange color. For a detailed master class, see the photo. Special attention we want to pay attention to how the chicken's beak is made. To do it, you need to paper envelope cut off a corner and color it on both sides with an orange marker. After this, glue the beak onto the card.


DIY Easter souvenir
Another of the traditional attributes of the Easter holiday is the Easter basket, in which they put painted eggs, small size Easter cakes, sweets. We bring to your attention several options for making Easter cards with your own hands, decorated with applications in the form of Easter baskets.
Option 1.
Even a child can make this version of an Easter card. An adult assistant will draw Easter basket, and the child will make colorful Easter eggs using fingerprints. Making this Easter card is fun, quick and easy, and it turns out beautifully.

Option 2.
This Easter card is decorated with a basket made using paper weaving technique. See link >>>>


Option 3.
Pistachio shells, when painted, make cute Easter eggs. Stick them on a postcard Easter basket cut out of paper. Your DIY Easter craft is ready!

Option 4.
Here is an example of another Easter card with a basket.

Option 5.
With older children you can make more complex ones Easter souvenirs- DIY voluminous Easter cards.
Template and instructions for a three-dimensional postcard with an Easter bunny in a basket ( black and white version) can be found at http://www.matthewreinhart.com

Easter is one of the brightest and have wonderful holidays. First of all, this is the Great religious holiday, however, in our time it has become beautiful family holiday, in the afternoon, when the whole family gathers at the table, friends come to visit. On this wonderful day, it wouldn’t hurt to show attention to your family and friends in the form of a handmade Easter card.
In this article we tried to collect the most interesting postcard options, in our opinion. self made that can be given as a gift for Easter. We have selected master classes, diagrams, templates, photo and video tutorials for you that will help you learn how to make your own Easter card and please your loved ones with it.
1. Rabbit with a pink nose

A charming and very cute Easter card that you can quickly and easily make with your own hands. This card is sure to bring smiles to both children and adults. So let's start creating yours easter bunny.
You will need:
- Colored cardboard in the following colors: lavender, yellow, blue, pink and white A4 format
- Double-sided tape
- 20cm. wire
- A piece of foam for the nose (ideally foam tape for sealing windows)
- Pink chalk
- Thin black felt-tip pen
Instructions:
- Take a sheet of lavender-colored A4 cardboard as the base of the card, carefully fold it in half - this will be the base of our Easter card.
- Cut out a rectangle measuring 21x13cm from yellow cardboard and carefully glue it onto our base using double-sided tape or glue, then cut out a blue rectangle slightly smaller than the yellow one and stick it on top of the yellow one.
- Print the Easter Bunny template onto white cardstock and cut it out. Rub it and, using the resulting powder, lightly apply it to our rabbit’s ears with a piece of foam rubber. Glue the bunny onto the blue rectangle.
- Cut the wire into 6 parts, wrap each one around a pencil to create a “curly mustache” and attach the mustache with double-sided tape. Glue the Easter Bunny's nose cut out of foam rubber on top and complete the composition with a piece of the nose cut out of pink cardboard, which should be glued to the foam rubber.
That's all! Very simple and funny card handmade ready for Easter!
2. Postcards with an egg inside
Very simple cards that, again, can be made together with your child. In postcards made according to this principle, you can show a lot of imagination and decorate it at your discretion. Below we will give examples of how you can make such cards using decorative paper or ribbons for scrapbooking
Decorative paper

- Prepare an egg template, it is best if it is made of dense material.
- Take colored cardboard, which will be the base of the card, and bend it in half.
- Attach the egg template to one side of the card and carefully trace the outline with a paper cutter.
- On the other side, glue a small rectangular piece of decorative paper (you can gift paper or scrapbooking paper) so that it can be seen in the hole cut out in advance according to the template.
- Glue decorative paper to the inside of the card around the entire perimeter.
- The egg that you cut out of pink cardboard (at the first stage) can be glued inside the postcard and written on it Easter greetings to your friends.
Scrapbooking ribbons

- Take a rectangular piece of colored cardboard or special craft paper, put an egg template on top of it, trace it along the contour with a simple pencil. Cut out the egg using small scissors.
- Fold the second piece of colored cardboard in half and bend it. On top of the front side we begin to glue in a row, one after another, multi-colored strips of scrapbooking tape.
- On top, carefully glue the piece of paper with the cut out egg that we made in the first step.
3. 3D postcard with a rabbit

This is a very cute and very easy to make card that will leave few people indifferent.
- The base of the postcard is made from colored cardboard or special kraft paper. We take one of its sheets and fold it in half. For an even bend, a tool such as a folding belt is used.
- On a white thick sheet, draw the silhouette of a rabbit and carefully cut it along the contour with small scissors.
- Glue it to the front of the postcard small piece sponge or thick double-sided tape (it should be smaller than a rabbit). We carefully glue a rabbit figurine to it, so we get a postcard with voluminous applique. To make the rabbit look more beautiful, you can glue a colored bow to its neck.
4. Postcard with an embroidered rabbit

Another one is very cute and simple card, which is perfect as a children's craft for kindergarten or school.
- First, fold a sheet of cardboard of the chosen color in half.
- On a second piece of thick paper of a different color, draw a rabbit and carefully use a paper cutter or small scissors to cut it out along the outline. So we made a template.
- Attach the rabbit template to front side holiday card and trace it with a simple pencil. Then we take a bright multi-colored thread and sew with large stitches along the outline of the rabbit. The result is a beautiful Easter card with an embroidered bunny.
5. Postcard with the Easter Bunny

- From a sheet of thick red or pink cardboard and cut out a heart (it will become the nose of our hare)
- Fold a white sheet of cardboard or thick paper in half
- On the front side at the bottom of the sheet, draw the outline of a cut out heart. Then, a little higher, approximately in the middle of the sheet, draw a winding line, which will become the fur of our hare
- Carefully cut out the heart you drew and then use scissors to cut off the excess paper along the line of the hare's fur that you drew earlier. Our front side is relatively ready. Let's move on to the inside.

- On the inside of the card, cut out two ears in the top half of the paper to decorate them - glue decorative paper into the middle of each ear.
- At the bottom of the sheet, stick our heart from thick cardboard so that it coincides with the cut out outline on the front side.
- On the front of the card, attach two buttons to make eyes and draw a face.
6. Another beautiful card with Easter eggs

- Cut out three eggs from white cardboard. Then decorate them using decorative paper, tape, scrapbooking paper, etc. Glue pieces of different adhesive tape in a random order so that they overlap one another, creating a beautiful pattern.
- Sheet decorative cardboard fold in half to create a card. Glue a turquoise square to the front side, and attach three previously decorated eggs on top.

- To create such a 3D postcard, you will need 4 special frames made of paper for scarpbooking. We give the turning element in this template the shape of an Easter egg.
- Next we glue the base frames together.
- Now we add a little imagination and decorate our eggs in the middle of each frame (you can use the decoration option from the previous card).
8. Easter card using quilling technique

- Cut out an egg from colored cardboard that will become the base of our card. If you use curly scissors, your egg will have a wavy edge.
- Stick it on the egg colorful ribbons, and on the right attach a bow to the egg
- Next we move on to decor using the quilling technique. To do this, you will need special paper and a quilling tool, as well as some experience in creating quilling elements. Detailed wizard a class on making such a postcard can be viewed at the link
- Then we glue the decor to the egg-shaped base and your card is ready!
The good thing about the quilling technique is that you can connect basic elements in a completely random order, creating real masterpieces.
We hope that you will like the options for postcards that we have selected specifically for the Easter holiday and will delight your friends and family.
Hello my dear guests. Today I will tell you how to make Easter cards with your own hands.
After all, it will come very soon Great Easter. This year we celebrate it on April 28th. We will traditionally prepare for this holiday with the whole family - bake and, .
And children will be interested in making something with their own hands. And of course, we adults will help them with the idea and choice of crafts.
I have already told you how to make decorative ones with your own hands. But you can also make other crafts for this holiday.
You can give a homemade Easter card to your mother, grandmother, or friends. I offer you some interesting and not complicated ideas.
Even the little ones can make such a card, they just need a little help.
Take two sheets of colored cardboard. On one sheet of paper, draw an egg shape with a pencil and cut it out.
Cut several colored stripes 1 cm wide. For the stripes, you can take plain colored paper, or cut them out of magazines, it will be even more beautiful.
Glue the stripes in a row on the second sheet. Then glue both sheets together and we have it ready-made postcard with colored egg.

Postcard with Easter bunny
It is made according to the same principle as above.

We cut out the shape of a rabbit on the front side, and glue colored stripes onto a separate colored sheet and glue them with inside to the top half of the postcard.

Congratulations-drawing using fingers
Here let the adult help the baby a little. He will make an Easter inscription on top and draw a basket, and the child will use his fingers to draw colored eggs.

The process of making this craft is quick and fun.
DIY Easter tree step by step
Cut out branches from colored paper. And the vase can be cut from old wallpaper or scrapbooking paper.

Glue the branches onto a piece of cardboard. Attach the vase with bulk tape. If you don’t have tape, glue a piece of sponge or foam rubber to it and stick it on the cardboard.

Cut out Easter eggs from colored paper, or old wallpaper, or colored fabric and stick them on the twigs. We will have an Easter tree like this.

Volumetric 3D postcard made of colored paper
And here's another good idea — voluminous postcard with Easter egg. Watch this video, nothing will be difficult for the child.
I would also write, for example, “Happy Easter” on the outside of the card.
Application made of shell and plasticine
Here's another one interesting option- make an Easter card from cardboard, crushed shells, glue and plasticine.

First wash and dry the shell. To stick it on cardboard, dip the glue with a brush and brush it with reverse side every piece of shell.
To make grass, first make balls of plasticine, and then smear it towards the top.
Easter cards made of paper and cotton pads
Fold a piece of white cardstock in half and cut it into an egg shape.

Now cut out a smaller egg from construction paper to stick on the outside of the card.

Dye the cotton pads yellow. Cut one disk into a circle shape slightly smaller than the other.

Glue a congratulation inside on one side, you can write it by hand. Glue the disks on the second side - a small one on top, a small one on the bottom, slightly overlapping the top one, glue the big one.

Draw in the wings, scallop and beak with a felt-tip pen.

On the outside of the postcard you can write “XB” and draw willow branches.

Master class for the little ones
Fold the sheet of paper so that on one side the edge is 4 cm larger. Then bend this edge towards the top and cut out the grass. draw some chickens, please finger paints make yellow circles, and then draw in beaks, legs, and wings with felt-tip pens. Color the grass green.

This is what the finished card looks like.

Easter applique made of colored paper
1. Prepare a white cardboard sheet, colored paper, glue, scissors.

2. Cut out the grass using green paper as in the picture, twist the ends using the handles of the scissors.
3. Cut out several eggs from white or colored paper (different colors). If you cut it out of white paper, then paint it in different colors.
4. Cut out the same number of eggs from white paper and use scissors to make a design. Then glue them onto colored blanks. (this is not necessary, you can just leave blanks made of colored paper).
5. Glue the grass onto the base in three rows. Hide the eggs between the stems and the card is ready.

I hope that the ideas I offer will be useful to you. I'm really looking forward to your comments.
Have fun crafting with your angels. Come visit again, I will definitely find a lot more interesting things for you.
Good day everyone! I hope you have already stocked up on recipes, stocked up on food, molds and decorations.
But we forgot about the most important thing, because we need to convey from pure heart something important that can be easily transferred to beautiful leaf paper - a postcard, it will contain wishes to all humanity.
I suggest moving on to this task right now and making Easter cards to all your friends and relatives, and if you still have inspiration for something else, then you can come visit with cool , and .
In my note, as always, I tried to collect all the best and unusual things so that you will definitely like it. There is very little time left, so let's start creating and conjuring!
Well, let's do something original and easy first. Who is behind this idea? All you need is cardboard and colored paper, you can take napkins.
Cut out an oval from cardboard that will resemble an egg, glue some grass and build a baby chicken out of torn pieces napkins using the cutting method using a pencil and glue. If you are not familiar, write below and I will tell you the technology.

Further in the article you will see diagrams and templates of all Easter symbols, the most popular of course is the egg. Do you know why? You can design this type of craft like this. It will turn out even slightly voluminous, the main thing is beautiful.

You can also make a wreath, but it will look in this theme.
Important! And on the reverse side write your wishes and congratulations.

Of course, you can lay out a postcard from all sorts of materials, for example from cereals and add more here cotton pads. Look how wonderful this creation looks, the willows turned out just cool. Bravo to the author, they also added rabbits))).


You can also use rhinestones and sequins, and draw all sorts of patterns with a marker. It turned out to be a very easy thing to do, you can suggest students make it primary school, yes and in kindergarten in senior and preparatory group You can also easily turn this idea into reality.

Well, it’s already a tradition and children’s hands are right there, look what a delight it has come out of, and the main thing is that together with everyone, you can also involve your parents here. It will turn out to be a great big creative work.

Or you can use the plasticine kingdom, and you can make any symbol, even an Easter egg.

We make cards from paper and cardboard for children of different ages
If you are new to this business, then you might like this cute idea; you can definitely easily make such beauty yourself. The main thing is don’t be lazy and you will succeed.

In the store you can now buy stickers in this theme and use them to build such a masterpiece with a chicken, as you see in this picture. You can also print images from the Internet.

And if you are looking for something that you have never done, then you can take this magnificent postcard as a basis. All stages of work are in front of you, you just have to repeat all the steps.

You will need to take an A4 sheet of paper, scissors and markers or colored pencils. It's cool, isn't it? And most importantly, it looks sunny and bright.

Or watch God's temple, which many do year after year, but obviously not in this way.
Everyone knows, especially in Germany, that one of the symbols of Easter is the rabbit, let's cut it out here too.

Or are you for our traditions?

We can’t do without quilling, but of course, if you are familiar with this paper folding technique.

And if you are not familiar, here is a master class for you, all stages of the work are shown here.

Here is another work using the trimming technique.

And you can make a creation from everything you have, even from satin ribbons.

Or you could go the other way, design the craft in the shape of an egg, but decorate it with flowers.

For collective activity Such a product is suitable, you can put it on a booth at school, or in kindergarten. It doesn't seem to be anything special, but it looks great.

Here is another rabbit or bunny).

And here’s a whole series of funny little animals, pee-pee!

Here is another temple and radiant sun with a naughty girl.

And, if you have old postcards lying around at home, then please make a souvenir out of them, take a look.


And this work was made from paper and fabric, plus they also tied a decorative ribbon.

There is no easier place to make a paper product like this.

But here you will have to work a little, because the cockerel needs to be assembled and glued together. You can use this illustration to cut out the necessary parts and glue everything together yourself.

Look, I found such a brilliant rabbit on one English-language site. It's a funny little animal, it looks funny and healthy, so if you like it, make it.

You can also make a triple postcard, for this here is a diagram, divide a sheet of paper into three parts, and draw an oval in the very central one.


Children can make an applique during craft lessons, plus draw something else with pencils.

Interesting! You can be extraordinary and do the work on a stick, and sign congratulations on the reverse side.
Then insert such cute crafts into a flower pot or bouquet. Do you agree that this would be a great gift option!?

Here's a similar invention.

Such a funny chick, use buttons and threads to decorate it.

Step-by-step master class of postcards for beginners
Our further activities will not be difficult at all; I propose to do the following.
1. Take a sheet of paper and draw an oval, then fold it in half and cut it into strips as shown.

2. Make stripes from a different color of paper, or better yet, take several colors. And then start weaving, in childhood everyone was fond of this type of thing, I think they often made bookmarks or braids.

3. Subsequently cut off all excess with scissors, and secure the ends with glue.


If it's not clear, take a look here.


It can also be done in mosaic style.

From the usual eggshells You can also make a postcard using plasticine or modeling dough.

Well, this working technique has also become popular, take a look and you will understand everything yourself.

Or draw a bunny, literally from circles and ears, then trace the template on a piece of paper.

Use watercolors to paint the entire background, use absolutely all colors to make it look bright and beautiful.

Or you can do it differently, paint the bunny himself in this way.

Doesn't it look cute? There are not enough eyes, and, in fact, little faces, I think you can handle this yourself.

Or do the second option.

In my opinion, this idea turned out to be simple and easy. Looks funny doesn't it? Write your feedback and wishes at the bottom of this article, I will be glad to read it.

And look what a snow-white weirdo). Who does he remind you of?

Well, they obviously guessed what the craft was made of, and cotton pads.

Let's make an Easter card quickly and easily

Or take this template and print it out, and then do it yourself using a cutter or stationery knife cut out the image along the line.

Then take any colorful paper, it could even be wallpaper or scrap paper. Attach a sheet of white paper and glue.

This is such a spring, or even a whole series of plots can turn out.


You can even use cotton wool for this task.

Or do without it, but buy real toy eyes at a craft store, and do the rest yourself.

If you have in your house openwork napkins, and they definitely exist, because the holiday is coming, then don’t forget about this masterpiece.

Or about this one, at the beginning the notes already talked about it.

Well, don’t forget that the little ones also want to create, so let them take plasticine and do the same with you.

Another job that will give someone another creative idea.

A tree immediately came to mind.

Well, or will you still stick to the classic options?

In general, choose, as they say, according to taste and color, everyone has their own felt boots. Haha).

I can also offer coloring books, don’t forget about them.

Print out the blanks and make small masterpieces.

After all, it is from these that something fantastically beautiful and delightful comes out.

This is true, so try it.

I have provided you with coloring options, maybe you can search and look for them yourself if you are interested in this particular type of activity.

New ideas with templates and diagrams for Easter in different techniques
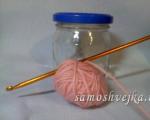
If you want to build something incredibly cool and cool, then here’s a thought for you from knitted threads, I dug it out from Maam’s website. Make a chain of loops, take a hook for this, and then, step by step, assemble this sweetest composition. Children can also be involved in this activity. And even make such a beauty for an exhibition.

After you have tied the chains, take glue and a pigtail, draw any image, in in this case chicken or rooster. Give the children the task of gluing this chain onto a circle in a spiral. And cut out the shell from paper.

Of course it is creative work, and requires patience and endurance.

But I think you can handle it, especially since there is nothing difficult about it. This will make a great Easter story.

The postcard will look completely unusual and marvelous if you decorate it in the form of embroidery. After all, no one manual labor didn't cancel.


You can be original and make a postcard in the form of an envelope, and put any gift there.

You can even build a clock and sign wishes under each number, although instead of them there are eggs, maybe you can come up with something else.

Here’s another idea, it looks more like a craft, but still, I want to show it here.

After all, on the reverse side it will be possible to write ХВ or something similar.

Look at this, it’s a real family, but they’ve used the same cotton pads.

And here there is even ordinary ribbon and corrugated paper.

Sequins, rhinestones, in general, take whatever you have and make all kinds of decorations.

Here, someone even made a duckling with snowdrops, because after all, it’s spring and you want flowers.

Here's another template that, if you use your imagination, will give you an idea to do something interesting.

Who needs a masterpiece in kirigimi technique? I love this beauty. If anyone needs a diagram, write to me and I will send it to you.


You can take this bunny as a basis.

You can use these templates to make any card of your choice.

The main thing is to want it, and everything will certainly work out.


I am sending you samples, choose and print on your printer.


This is roughly what can happen, isn’t it cool? And most importantly, it’s very easy and simple.