What can you do with a child out of paper? Paper crafts - “Hyacinth”
You can make many interesting and beautiful things from paper. Among these interesting crafts are even paper houses that can be used to decorate a New Year tree or simply be used as interesting toys. And most importantly, they can be made with your own hands by any adult and child, of course, those who are older.
How to make a paper cracker
For a festive fireworks display, it is not necessary to shoot firecrackers loaded with confetti and cover the entire apartment with small pieces of paper. A paper cracker that does not contain any explosive substances can also clap loudly enough. It will add fun to the atmosphere of the general holiday: someone will jump in surprise, and the rest will laugh merrily.
div > .uk-article")">
It is not at all as difficult as it might seem at first - to make a paper butterfly with your own hands. This task is within the capabilities of an adult and a child; this is not exactly a toddler. A butterfly can be hung on a string, it will float in the air in your room, it can be hung from a branch of a Christmas tree, this is also very beautiful.
From a simple sheet of paper, after a little work, you get a cute paper frog, which also knows how to jump. It can decorate your desktop or become a fun children's toy. Children can even start fun competitions to determine the distance of a jump or the speed of a jumping frog.
div > .uk-article")">
Send a letter - modern youth associate this action only with email. But sometimes you have to send paper letters, but they require an envelope. In the era of electronics, you won’t find such a small thing in every home, so you have to think about how to make an envelope out of paper with your own hands. It seems like there is little wisdom, but without skill one cannot cope with such a task.
Paper airplanes are easy to make, and most importantly, they actually fly. This process is so interesting that any adult will be happy to make light paper structures and, to the delight of children, send them flying. Well, older children will be able to take up aircraft design themselves.
div > .uk-article")">
You can make many beautiful things from paper, but the simplest and yet surprisingly beautiful are snowflakes. You don't even need to paint them: they must be white. It is enough to fold a sheet of paper in a special way and work a little with scissors to get a real patterned miracle.
It’s easy to make a toy boat from a simple sheet of paper and set it sailing along the stream and across the watery expanses of the bathtub. You just need to remember simple instructions on how to make a boat out of paper, how to fold it to get a structure that is stable on the water. This is a simple, but very exciting task.
Crafts for children 3-4 years old, made from paper with their own hands, can be completely different. These are various applications, souvenirs, educational toys. Children, with the help of their parents, are able to create real works of art.
Original apple tree
Any child can make an unusual tree. To work, you will need a minimum list of materials and a little patience. As a result, the child will spend time usefully and will be able to make an apple tree on his own. Such a tree will become a real decoration in the room and will remind you of an interesting master class.
Materials for work:
- scissors;
- toilet paper roll;
- green paper;
- paints;
- brush;
- glue.
- The toilet paper roll will act as the trunk of the future tree. First of all, it needs to be prepared. We cut the roll on top into several parts, thereby forming tree branches.
- We draw small circles on the sheet of paper with paints, these will be apples.
- We carefully crumple the sheet and glue it on top of the trunk.
- The apple tree is ready, you can look for a prominent place in the house for it. If you wish, you can make several trees and make a real apple orchard.
Do you make paper crafts?
Vote
Christmas tree from a puzzle
Every child will have pieces from an old puzzle. Of course, you can throw them away, but the best thing is to give the item a new life. Using your imagination, you can create a paper craft for 3-4 year old children from unnecessary parts. It is advisable to involve children in the work too. They will be delighted with the creative process.

Materials for work:
- puzzle pieces;
- green, brown paint;
- glitter;
- rhinestones;
- fishing line;
- beads;
- glue.
Execution sequence:

- We paint the puzzle pieces with green paint and sprinkle them with sparkles.
- We glue the parts together in the shape of a Christmas tree.
- Let's make a trunk. To do this, paint the parts with brown paint. We attach the trunk at the base of the tree.
- Once the tree is assembled, we begin decorating it. To do this, we use various decorative elements.
- We make a loop from fishing line and decorate it with beads. We attach the fishing line to the finished product.
- You can hang this craft on the Christmas tree and enjoy the work done.
Funny mouse on a plate
Paper crafts are very popular. They are of particular interest to young children. Kids happily participate in the creative process and enjoy the work. Making a mouse on a plate is quite simple. It is enough to prepare the necessary tools and be patient. Such a toy will take pride of place in the house and even become a decoration in the room.

Materials for work:
- paper;
- markers;
- disposable plate;
- scissors;
- glue;
- threads
Execution sequence:

- Cut out a circle from paper and decorate it with felt-tip pens.
- We wrap the resulting figure into a cone and glue it together.
- Cut out ears and eyes from paper. We decorate them with other colors. Glue the parts to the cone.
- Attach a thread to the mouse. This will be her tail.
- We fix the resulting product on a disposable plate.
Suitcase with a secret
Handmade paper crafts are of particular interest to children aged 3-4 years. Kids enjoy cutting, gluing, and decorating paper products. To make the master class interesting, parents should also get involved.

Materials for work:
- matchboxes;
- glue;
- markers;
- colored paper.
Technique:
- To work you need at least 4 boxes. It is best to prepare more of them; 10 pieces will be enough.
- We glue the boxes.
- We wrap the stationary part with colored paper and carefully glue it.
- We decorate the resulting product at our discretion. Drawings made with felt-tip pens look original. You can add decorative elements.
Funny bunnies
Children 3-4 years old already know how to cut with scissors. This means that they will be able to create funny bunnies on their own. Funny toys will be a wonderful decoration at home and will remind children of an interesting pastime.

Materials for work:
- colored paper;
- scissors;
- glue;
- ruler;
- markers.
Technique:
- Draw the outlines of the stripes on colored paper and carefully cut them out. The stripes must be the same width.
- We collect the hare. Glue the strip together with a ring - this will be the head.
- We cut out the ears and attach them to the head.
- To make the paws, take wide strips and make cuts at the bottom. Attach the paws to the body.
- Draw eyes with a felt-tip pen.

You can supplement the work with the help of grass. To do this, just cut it out of green paper and plant it in the hare’s grass.
Application on the theme of fishing
To please your child with colorful characters, you can make paper fish. This won't take much time. It is enough to take the necessary materials and interest the baby. The child will be happy to do all the work on his own.

Materials for work:
- cardboard;
- colored paper;
- plate;
- ruler;
- scissors;
- pencil;
- confetti;
- glue.
Execution sequence:
- Draw a circle on paper. To make the figure even, you should use a plate. Just put it on a sheet of paper and trace it with a pencil.
- We mark the sector. It should be approximately 1/6 of the entire circle.
- We cut out the marked sector. This will be the body of the fish.
- Cut out a heart from paper and attach it to the bottom of the body. This will create a tail.
- We decorate the fish at our discretion. You can smear it with glue and sprinkle it with colorful confetti.
Paper frog
Master classes for children 3-4 years old allow you to make paper crafts with your own hands. A toy in the shape of a frog will bring great joy to a child. With its help, you can organize a theatrical performance and gather all household members in the family circle.

The frog has rightfully deserved to be called the simplest origami model. Just a few bending lines and the product will be ready.
Materials for work:
- sheets of green and red paper;
- glue;
- markers.
Execution sequence:

- We take a green leaf and place it on the table in a vertical position.
- Visually divide the sheet into 3 parts, making imaginary bending lines.
- Fold the rectangle in half. It should be positioned with the fold line facing up.
- We bend the bottom edge up and turn the figure over. We repeat the action until we get a kind of accordion.
- We cut out a tongue from red paper and glue it to the product.
- Draw eyes with a black felt-tip pen.
Crumpled paper chicken
Making a craft is not difficult. Even small children who have never participated in the creative process can make it. Kids will happily begin to crumple the paper. This is an interesting and exciting activity for them. It would seem that what can be done with crumpled sheets, how not to throw them away. But needlewomen came up with a more interesting way; they used paper to make toys.

Materials for work:
- double-sided colored paper;
- glue;
- moving eyes.
Execution sequence:
- Take a sheet of paper. Since we are making chicken, it should be yellow. You should not choose thick sheets; the child will not be able to work with them on his own.
- We crumple the paper, turn it over to the other side, and crumple it again. Roll the paper into a ball.
- We do the same with the green sheets, but at the end we give them the shape of a clearing. Next we will place a chicken on it.
- Cut out a triangle from red paper and glue it to the body.
- We attach eyes to the product.
- We cut out 2 wings from flat sheets and glue them on the sides.

The chicken is ready, you can come up with an entertaining game with its participation.
Paper lanterns
Handmade paper crafts are very popular. Many master classes have been developed for children aged 3-4 years. Parents can easily choose an entertaining lesson and make an original toy together with their child.
Paper lanterns have been known to everyone since childhood. Bright rings, fastened together, acted as an excellent decoration for the home. They could be met at a New Year's party or children's celebration. Flashlights do not lose their relevance today. The kids are excited to get to work and make fun decorations.

Materials for work:
- colored paper of two shades;
- thin tape;
- glue;
- pencil;
- cup;
- scissors.
Execution sequence:
- Draw circles on colored paper. To do this, just place a cup on a sheet of paper and trace it with a pencil.
- Carefully cut out circles.
- Fold the resulting figures in half.
- Let's start assembling the product. Unroll the circle and apply glue on one side. We attach 2 bent circles to it and coat it with glue again. This is how we make a garland.
- We place a ribbon in the center and glue the unfolded circle. Next, we re-glue 2 bent pieces each.
- We straighten the petals.

- To make lanterns, you will have to be patient. It is best to involve the whole family in the process. This will allow you to finish the work much faster, and the result will be a real New Year's garland.
- To prevent the lanterns from rolling off during use, you can string pasta onto a string. This will help make the structure stronger and extend its service life.
- Paper crafts for children 3-4 years old can be completely different. Doing them yourself is not difficult. It is enough to prepare the necessary materials and you can start working.
If you involve the whole family in the creative process, you will be able to make much more original products. As a result, you will be able to spend time usefully, decorate the house with interesting crafts and allow the baby to show his abilities. The child will take part in the work with great pleasure and offer a lot of his own ideas for creating toys.
Paper crafts are the largest section in the category of children's creativity. Despite the fact that paper is the most accessible material for needlework, works made from it can be very different: from simple applications to three-dimensional models.
And in order to diversify the standard program of manual labor classes, we suggest that you familiarize yourself with the crafts of preschoolers in our section, where you will certainly find something interesting and original as an idea for creativity.
Contained in sections:
Includes sections:
- Paper plastics. Mastering paper plastic art techniques with children
Showing publications 1-10 of 3797.
All sections | Origami
 Today I will tell you how to make a hairpin with a rose from corrugated paper. But first I want to tell you a little about this paper. Corrugated paper obtained through corrugation (from the word gaufrer from French - to press a pattern, folds, to imprint an image, then...
 Master class from corrugated papers on the topic
: "Poppies." We do it ourselves. In today's master class I will show you how to make realistic poppies from corrugated DIY paper. For we will need crafts
: 1) Corrugated paper red and green 2) Scissors 3)...
Master class from corrugated papers on the topic
: "Poppies." We do it ourselves. In today's master class I will show you how to make realistic poppies from corrugated DIY paper. For we will need crafts
: 1) Corrugated paper red and green 2) Scissors 3)...
Paper crafts - “Hyacinth”. Paper flower master class
Publication “Hyacinth”. Master class on paper...”  The closer Mother's Day gets, the more children and teachers start thinking about it. What does it mean to come up with something interesting for a gift? After all, it needs to be interesting, beautiful and accessible for children! And all this at the same time! I'm not an exception! I found a lot of interesting ideas, but to choose an idea...
 Image library "MAAM-pictures"
Summary of the OOD "Kitty" on paper construction with children of a general developmental group aged 5–6 years Topic: “Kitty” Goal: developing the ability to design using the origami technique Objectives: Educational: Exercise children in repeated folding of paper, improve bending skills. Develop the ability to follow the teacher’s verbal instructions. Continue to strengthen your skills...
 A wonderful flower for your beloved mom! Think carefully before throwing your toilet paper roll into the trash. After all, this “waste material” in creative hands can become an excellent material for creativity, for creating original, elegant crafts, decorative...
Summary of GCD for constructing a “Basket” made of paper and cardboard Program content: Strengthen in children the ability to work according to a pattern (make a square box. Develop the ability to carefully make cuts according to a pattern and glue the sides. Foster independence, initiative. Form an attentive attitude towards friends. Educational...
Paper crafts - Work program for additional education “Paper fantasies”
Department of Education of the Administration of the Municipal Formation Leningradsky District Municipal budgetary organization of additional education "Children and Youth Center" of the village of Leningradskaya municipal formation Leningradsky District Adopted at the meeting Approved...
 Good afternoon I bring to your attention a master class on making a postcard for dad using the Scrapbooking technique. For work we will need material: First, let's prepare small blanks for our postcard. From soft wire we twist small hangers on which...
 Tasks: - create conditions for working with paper, creating a three-dimensional appliqué from colored paper; - strengthen the ability to use glue; - cultivate neatness. Materials: white cardboard, scissors, glue, colored paper, napkin on the table. We make a cylinder out of cardboard. Colored...
Master class “Craft paper Cockerel” Craft for children: paper cockerel I present to your attention a master class on making paper crafts - a cockerel for preschool and primary school children with step-by-step descriptions and photographs. The finished craft can be either a toy for the Christmas tree or a toy...
Probably every mother has a paper craft from her beloved child in her folder or on her desk. Every March 8th or May 9th, a child brings a beautiful paper flower or a postcard with fireworks from kindergarten. In general, paper crafts are popular in preschools.
The site, for example, presents a wonderful idea for making a garland of cute doves. And making flowers from rings will not only create a warm and spring mood in the group, but will also develop fine motor skills, a sense of shape and the ability to combine. The combination of several materials is especially interesting. When they are put together, the pictures turn out to be original, voluminous and very interesting.
The goal of a competent teacher is not only to interest and attract the child to making paper crafts, he must provide support in the implementation of any paper idea. The child himself may not be able to cope with a task that is difficult for him, although he will gladly take on it.
What to do on a rainy or windy evening with your baby? Of course, creativity! We share ideas for quick crafts for autumn evenings.
Even if you are the busiest mother in the world, do not forget that it is very important for your child to spend time together and engage in interesting joint activities.
Nothing brings people together like solving problems and spending time together. A win-win option - hand-made. By making small crafts, you can analyze your child’s behavioral patterns, evaluate abilities and give the most important thing for any person on the planet - communication.
We have made a selection of the most simple crafts and quick crafts that you can do together with your baby. Even if you hated labor lessons at school, here you will definitely find something to your liking.
1. Multi-colored pebbles
If in the summer you collected not only shells, but also pebbles from the sea, it’s time to decorate them.
What you need: acrylic paints, pebbles, water and a brush, a sippy cup.
 2. Bottle with sand
Making another beautiful piece of furniture together is very simple.
What you need: colored sand (you can take colored crayons, rub them on sandpaper and mix with fine sea salt), transparent dishes.
N.B. In order for the bulk mixture to fall directly into the narrow neck of the bottle, you need to make a small cone with a hole out of paper.
 3. P
anno
"We're cooking"
jam"
.
3. P
anno
"We're cooking"
jam"
.
What you need: A4 paper or cardboard, scissors, apples and pears, gouache, brushes.
Cut out the shape of a jar from cardboard. Cut apples and pears in half. Using a brush, apply gouache to the cut halves and press them down to leave imprints on the cardboard. We complete the bones, leaves and tails after making the prints.
You can also make such an applique using leaves. Apply to one side of a leaf or flower with a brush and gently press onto colored paper for an imprint.
 4. Craft “Kapitoshka”
(or Christmas tree toy
)
4. Craft “Kapitoshka”
(or Christmas tree toy
)
What you need: colored cardboard, an inflatable ball, PVA glue, a small container in the form of a bowl, thread.
Inflate the balloon and tie it. Pour PVA glue into a small bowl, coat the entire length of the thread in glue and wind it in a chaotic manner around the ball. Let it dry and burst the ball, decorate it with different details - nose, eyes, hairs.

5. Developmental toy for hand motor skills
What you need: Flour, watering can, balloon, marker, multi-colored thread.
Using a watering can, pour flour into the ball and compact it. We tie the filled ball, add eyes, and tie a thread in the shape of hair.

6. Butterfly — pin
What you need: A4 paper or multi-colored cardboard, pencils, clothespin.
We cut out “wings” from paper in the form of two figure eights: one larger, the second smaller, and clamp them closer to the base of the clothespin.
7. Underwater world
What you need: Paints (acrylic or gouache), colored cardboard, scissors, disposable plates, imagination :)


8. Mouse on a plate
What you need: Paper, markers or paints, disposable plate, scissors, thread.
First you need to cut a circle out of A4 paper, paint it one color, roll it into a cone and glue it together. Cut out, paint and glue the ears. Cut out eyes from cardboard. Glue the thread like a tail.
9. Crafts from disposable cups
What you need: Disposable cups, colored paper and cardboard, glue, scissors (additional needle and thread) .

 10. 3
D
aquarium
10. 3
D
aquarium
What you need: An old box, threads, shells, scissors, colored paper, regular tape, double-sided tape, PVA glue, felt-tip pens, paints (gouache or acrylic), you can additionally take cling film to “close” the aquarium.
At the “bottom” of the box, using felt-tip pens or paints, we draw the “background” of the underwater world. Cut out fish, seahorses, and seaweed from colored paper or cardboard. We hang fish from the “ceiling” of the aquarium on strings. We glue “algae” to the opposite edge. We glue shells to the bottom with double-sided tape. Wrap the aquarium in cling film.
11. Lamb from napkins And cotton wool
What you need: Cotton wool or napkins, divided into small pieces, one sheet of cardboard, colored paper, PVA glue or glue stick, felt-tip pens.


12. Handmade jewelry -made
What you need: Threads, a set of large beads (can be found in Montpasier stores), cardboard and scissors.
 13.
Feeder
13.
Feeder
What you need: Plastic bottle, two tablespoons, thread and knife
We all know that with the onset of cold weather, birds have nothing to eat. With older children, you can make such a feeder at home and hang it in the park near your house.
 14. Bookmarks
What you need: Floss threads, colorful cardboard, stickers, rhinestones, felt, colored paper, scissors and glue.
You can make bookmarks like these for your favorite books and teach your child discipline from childhood.
 15.
Mask
15.
Mask
What you need: colored cardboard, scissors, glue stick or double-sided tape, needle or hole punch, rubber band.
You don't need a reason to make masks. A mask can be a great excuse to have a masquerade!
16. Angel
What you need: Napkins for glasses, wooden beads, scissors, wool threads, floss threads, PVA glue
We cut out the napkin in the shape of a “candy”, as shown in the picture, make small cuts in the form of unfinished triangles and a hole in the center of the circle. We bend it in half and get the body of an angel. We take 6-8 pieces of thread, tie them together in the middle with floss threads, which we throw to one side, string a bead on them and thread them through the hole in the center of the circle. We tie a knot. We stretch another thread through the bead so that you can hang the toy.

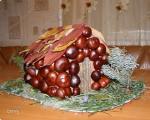
17. Christmas tree made of wine corks
What you need: wine corks, paint, glue, paper.
To make a Christmas tree from wine corks, you need to prepare a cone shape, drape it with colored paper and stick wine corks on top, which will act as “needles”.

18. Button applique
What you need: A lot of multi-colored buttons, double-sided tape, PVA glue, threads, cardboard, colored paper, glue stick.


 19. Chest of drawers with a secret
What you need: matchboxes, PVA glue, markers, colored paper.
We glue together 4, 6 or 8 matchboxes (9 or 10 are possible, the main thing is to get a rectangular shape), wrap the fixed part and glue colored paper onto it. We draw decor with a felt-tip pen - handles, coils, flowers, etc.

20. Hedgehog
What you need: plasticine, sunflower seeds
We sculpt a small oval and press it on one side to form a “muzzle”. Using the sharp end, we insert the seeds in rows into the hedgehog’s body. Don't forget about the eyes and nose.
Depending on the time of year, you can also consider certain types of activities. In the fall - collect and dry a herbarium together, cut out or paint a pumpkin for Halloween. In winter, cut out snowflakes or garlands, decorate Christmas balls, and sculpt a snowman. In the spring, decorate Easter eggs, plant seedlings or just small flowers. And in the summer...Imagine what you can do together in the summer.
Of all the materials for creative work, plain paper occupies a special place: it is used for many crafts. Adults and children love to work with this material. Easy origami crafts made from paper are available for children from 3-4 years old. Any creative activities contribute to the intellectual development of children.
Origami (folding paper figures) has long been a real art: its history goes back several centuries. If previously it was available only to monks and members of the nobility, then with the spread and availability of paper sheets, this type of creativity has gained popularity in many countries around the world.
Small children do not like to sit in one place: children are attracted by the novelty of the world around them. But from the age of 3, it is necessary to prepare the baby for school. The main requirements for the behavior of fidgets are perseverance, the ability to remember and assimilate new knowledge. Various types of creative work done with your own hands can help develop these and other character traits.
Crafts develop fine motor skills, teach accuracy and perseverance. First of all, origami classes are:

- development of spatial thinking, logic and memory;
- acquaintance with the basics of mathematics, geometric figures, development of the child’s mathematical abilities;
- ability to read diagrams and drawings;
- development and training of fine motor skills;
- fostering perseverance, dedication, scrupulousness and accuracy;
- knowledge of beauty and harmony.
What to do with a child at home, how to make the baby sit quietly for at least some time - these questions often worry parents. Folding paper figures will not only calm the restlessness, but will also develop many useful qualities in the little man.
The availability of this type of pastime is also determined by the availability of material. The stores offer ready-made sets of colored, corrugated, velvet, and metallized paper. But for simple and easy crafts, you can use old newspapers.

It is believed that children over 3-4 years old can create paper figures using the origami technique. However, there are several simple models of figures that a two-year-old toddler can make. Children begin to be introduced to simple paper origami in preschool institutions.
At home, mommy can organize lessons for the baby herself, creating light and beautiful figures from paper.
There are many simple paper origami for beginners available on the Internet - diagrams with step-by-step instructions for assembling paper models.
The first models for children from 3 years old
Currently, in addition to classic origami, there are other types of it, but for beginning craftsmen and young children, it is best to start getting acquainted with the world of origami with the simplest classical patterns. Classic origami is the folding of models from square sheets of paper, without using any glue or scissors when creating figures.
The simplest crafts for beginners include: an airplane, a boat, a tulip, a dog or a cat. Let's look at how to make these figures step by step.

Tulip
A simple model of this flower can be assembled by a very small child with the help of his mother. The older the child, the more complex patterns for creating a tulip are available to him: they turn out already voluminous, with open buds. A simple diagram for a child over 2 years old will allow him to make a beautiful craft and give his mother a reason to be proud.
Stage one
Take a red square piece of paper. Help your baby fold it diagonally. Unfold the sheet and fold it in half along the second diagonal.
Stage two
Bend the corners of the resulting triangle from the center line. Bend the lower sharp tip of the bud. You have a tulip bud.
Stage three
Take a square green piece of paper. Bend the corners, directing them towards the diagonal of the square.
Stage four
Fold the resulting figure in half. You will get a green triangle. Bend the bottom corner of the figure - you have a tulip stem.
Stage five
Connect the flower and stem on a thick paper base. The result is a tulip applique using the origami technique. The craft looks very beautiful. The baby can give this card to his mother or grandmother.
This is a simple pattern with no complicated folds. The baby can master this craft under the guidance of his mother.
Familiarity with the technique of creating a dog will help you create an animal.

Dog
Stage one
Fold the paper square diagonally. There should be a triangle in front of you, in which the right angle is directed downwards.
Stage two
Fold the top two corners down to form ears.
Stage three
Bend the bottom corner of the craft upwards to create the face of a dog.
Stage four
Let the child draw the doggie's eyes and nose. He will color his craft the way he likes.
Panda
White paper required. Prepare a black pencil, felt-tip pen or paints. For pandas, white and black colors are relevant.
Stage one
It is necessary to outline the fold lines. To do this, fold the square sheet diagonally twice, and bend the corners on the left and right sides forward.
Stage two
Bend the resulting upper corner in the opposite direction.
Stage three
Make the resulting panda face smaller at the edges.
Stage four
Bend the bottom corner forward. For the spout, fold the corner of the top edge down.

Stage five
Let's draw a face.
Light figures include cars and tanks. More complex models are images of birds and insects. Children 8-9 years old can already make human origami on their own. Creating such a figurine requires an understanding of the classic folds and developed motor skills of the child’s fingers.
To create a New Year's mood, there are many light models of Christmas trees and voluminous snowflakes made using the classic origami technique. Paper rings are very popular among girls. However, such models are quite complex for novice craftsmen. To learn the technique of creating a paper ring, you can take a look at special master classes.
DIY toys
The first light toys include finger puppets. With their help you can organize theatrical performances for children. You can make paper fingertips for animal figures. You can create beautiful outfits and furniture for dollhouses for dolls.
Older children make more complex models that they play with.
Let's look at easy paper origami patterns for creating a frog and an airplane.
The most popular type of craft. You can do it in a few minutes. Any sheet of paper is suitable for creation.
Stage one
Take a rectangular piece of landscape paper. Fold it in half lengthwise. Unbend.
Stage two
From the side where the nose of the plane will be, bend the corners 2 times, directing them towards the center line: first at a right angle, the second time at an acute angle.

Stage three
Bend the pointed tip of the spout in half, pointing it toward the center of the airplane's diverging wings.
Stage four
Bend the resulting airplane blank in the middle.
Stage five
Bend the resulting model in the middle, clearly forming the wings.
Such an airplane can be made from an ordinary notebook sheet or a newspaper page, and you can arrange a competition with your child to see which airplane flies further. This type of easy craft is one of the simplest and most beloved among children and many adults. Sometimes landscape sheets are used to create airplanes. The craft becomes heavier, but more resistant to wind.
jumping frog
A paper frog that can jump is a favorite among children of all ages. Schemes on how to easily make a jumping frog can be found in different versions. Let's consider the classic scheme.

Stage one
It is necessary to fold the square sheet twice diagonally. In front of you is a rectangle with two squares.
Stage two
Fold the top square along two diagonals as well. Expand. Gently pull the opposite triangles on the left and right with your fingers towards the center. Fold the square at the bottom in half.
Stage three
Point opposite sides toward the center. Fold the bottom part in half again.
Stage five
Bend the two upper corners of the bottom down. Pull the resulting pieces along the fold, straightening them. If you bend the resulting corners, the lower legs of the frog will come out. For the upper legs, fold the upper triangles to the sides.
Stage six
The lower part of the resulting torso is bent in half. Then bend it down a little. Turn over - the jumping frog is ready. You can draw eyes on her.
These easy crafts will captivate your child into the world of origami for a long time.