Metal puzzle with rings solution.
Instruction
Metal puzzles are quite complex in their compositional design. As a rule, they consist of two parts: the main and removable. At first glance, solving metal puzzles seems hardly possible. And yet, each of them has its own way of solving. This is considered solved if you were able to separate its parts, and then bring them to their original position.
Getting to the solution, you should take care of good lighting of the room. When solving any puzzle, you should never rush and make sudden movements. Strength won't help you either. The main thing is to find the starting point of the solution. You can understand how you can assemble metal puzzles using the example of two samples: "Star" and "Ring".
When solving the Star puzzle, first of all, it is necessary to smoothly release the metal loop from the ring, which is located in the center of the structure. To do this, turn the loop counterclockwise with your right hand, and gently hold the ring with your left.
Then you need to release the metal loop from the other two rings located below. String two small rings on the bottom of the loop, then move it a little towards the inner small rectangle, and then bring it out of there. When the loop has left the central part of the star, all that remains is to free it from small rings. Puzzle solved.
The principle of assembly of the "Ring" is based on the collection of several parts together. When disassembled, this puzzle consists of 4 rings linked together. If you look closely at the puzzle, you will be able to distinguish between two types of rings. Assembling the puzzle should begin based on this factor.
First, connect the same type of rings together (with “checkmarks”, with “monograms”). Then put a second pair of rings (with gaps or deeper depressions) over them so that they are firmly connected to the first group. Thus, the puzzle will be solved. The correctness of its assembly will be evidenced by the uniformity and clarity of the pattern of the assembled composition.
Related videos
Sources:
- metal puzzles
Puzzles train thinking, are an excellent means of creative and mental development of children, they can be used in a variety of educational and developmental activities, and assembling and disassembling puzzles is a good anti-stress. In this article, you will learn how to solve and disassemble an ingenious African puzzle consisting of a wooden block with three holes through which a cord is threaded. In the central hole, the cord is fixed with a grasping knot, and two wooden or plastic rings hang on its left side. To solve the puzzle, you need to move the rings to the right side of the cord, which at first glance seems impossible.
Instruction
Fold the cord in half and insert it into the hole at the fold, and then pull the remaining ends into the resulting loop.
Take the knot that grabs the cords and pull it out, and then pull the ring along the cord so that it passes through the knot.
Tighten the knot again inside the resulting small hole, then move the ring to the right. You easily transferred one of the rings from the left sector of the puzzle to the right, and now yours is to do the same with the second one, which remains in the left sector.
Just as in the previous case, pull the ring to the center loop and repeat all the steps with pulling the loops and pulling the ring through the cord loops to the right side of the puzzle.
In the 15th century, the ring puzzle was very popular in Europe. However, such a thing was not entertainment, but served as a symbol of the union of married couples. The ring fell apart quite easily, and putting it back together was not an easy task. Currently, such rings act exactly as puzzles, the victory over which adds confidence to its owner.

Instruction
Puzzle of 4 metal rings. Disassemble the ring into links: throw it on the table, and it will fall apart by itself. The peculiarity of this structure is that all 4 links are connected. Examine the rings, select among them 2 rings with a more pronounced bend and 2 sinusoid rings (the bend of the ring resembles a sinusoid or a cosine wave, as it suits you).
Take 2 rings with a clear bend. One ring has narrow cavities, the other has wider ones. Lay the narrow pitted ring on top of the wide pitted ring. Connect so that the front parts of the rings are tightly closed, and the back parts form a hole for the other two sinusoid rings.
Choose a dimpled sine ring and lay it on top of the two assembled rings. The rest is more difficult to put into place when assembling the puzzle. Ensure that it enters the hole formed by the rings. It must be threaded into the existing hole. As soon as the ring hit the desired cavity and completed the integrity of the ring, the problem is solved.
note
All other ring puzzles differ only in the number of links. There can be 6, and 8, and even 12 of them. Having understood the general assembly mechanism, you can easily collect all the other broken rings.
However, an important aspect in solving such puzzles should be understood. No matter how many links there are in the ring, always connect rings with obvious depressions first - they are the basis for further assembly of the structure. Then connect the loose rings together so that two groups of rings are formed. In each of these groups of rings, select the most similar to each other in terms of the thickness of the pattern (bend). Next, lay a group of dimpled rings on top of the connected two rings. At the end - lay the last group of rings.
Helpful advice
Puzzle ring will be a nice gift to a friend, work colleague, relatives. You can work on the solution from several hours to several days.
Puzzles have always been the best way to develop logic and out-of-the-box thinking. There are many different types in the world, but today one of the most popular are metal puzzles. They have different levels of difficulty, so you can pick up both puzzles for children and adults. Depending on the level, they take different times to disassemble and assemble, but as a result, you can not only please yourself, but also surprise your friends and family. To quickly disassemble and assemble puzzles, you need to know just a few simple secrets.

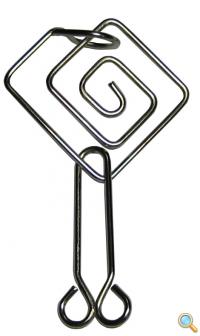
Puzzle metal solution always have a simple, most importantly, figure out exactly how they need to be disassembled or assembled. They are small "squiggles" interconnected and consisting of several separate parts, most often, the "key" to this design is as follows: you need to separate the elements, and then reconnect them. The easiest options include only two elements, so it is the number of elements that determines the level of difficulty.
Entertaining wire puzzles are easy to solve, but you don’t need to use force in this case, since you need to find the so-called logical path. You need to find how to correctly position the elements relative to each other, after which they can be separated with ease.
Such a legend is popular, connected with the king of Phrygia, Gordius, who tied such a knot that no one could untie. At that moment, a prediction was born, according to which, whoever finds a way to untie it, will become the ruler of Asia. Only a little differently this task was interpreted by Alexander the Great, who simply cut the knot with a sword, thus becoming the ruler of Asia. As a matter of fact, such a legend vividly describes the essence of solving all puzzles. Most often, you need to look at the task from a completely different angle, and find a non-standard approach in order to untie this “knot”.
Iron puzzles, solution which will captivate both children and adults, are sold in souvenir shops and in specialized stores. Sometimes such structures are made of wood and plastic, but the most durable and popular ones are made of metal. In one design, you need to remove the ring, and in the other, add T-shaped parts into one picture.
Force, as we have already said, cannot be used: therefore, if you need to separate the elements, do not count on pulling them with force and finding the correct answer, most likely you will simply ruin the educational game.
When solving them, you will surely come across a moment when obvious actions do not bring results, and this is not the case, otherwise they would not be puzzles. In this case, you can make a major mistake, and in the end it will lead to the fact that you lose interest in this entertainment as a whole: you start repeating the same manipulation over and over again, thinking that this is the only right way.
As soon as you tried the first option: for example, you need to put a certain part through the ring, and your option did not lead to the correct solution, you must immediately start looking for new, and then again new ways, until you complete the indicated task. Puzzle solving is to look for non-standard approaches.
They take up little space, so you can always take them with you on the road, and captivate the child while waiting at the airport or train station.
Our simple tips will always help you find the solution to the puzzle, even if you decide to learn the most difficult ones, but you should always start with simple structures in order to simply understand the principle.
Wire puzzles.
On the Internet, I found several variants of puzzles.
It's not hard to make them!
But first, a few words about what it is better to make them from. Wire puzzles are usually made from steel wire medium hardness with a diameter of 2.5-3 mm.
Copper or aluminum wire is not suitable: it is too soft and does not spring well.
The wire intended for puzzles must first be straightened. Hold it firmly with your hands and pull it several times along a wooden cylindrical rod vertically clamped in a vise. Then sand it to a shine with sandpaper.
Now determine the lengths of the individual pieces of the selected puzzle and cut off the corresponding segments with wire cutters. It is more convenient to bend the wire with the help of a simple device - a piece of a thick board, into which thick nails are hammered at the bends of the wire.
Bend small rings and ears with round-nosed pliers. For the manufacture of large rings, several wooden cylinders of different diameters should be prepared in advance.
The finished parts of wire puzzles should be covered with 2-3 layers of colorless varnish. The parts (rings or staples) to be removed are blackened in the drawings.
They should be filmed completely freely, you just need to guess how to do it. Under the main picture of each puzzle there is an additional one, suggesting the course of the solution.
Star with a ring.
The diameter of the circle describing the five-pointed star is 100 mm. Ring diameter 1 - 30 mm. It is 10 mm smaller than the diameter of the ring of the curly earring 2. The elongated part of the earring should freely enter the ring 1 and the eye of the sprocket 3. (Fig. 1)
Anchor.
Anchor height 120mm and width 100mm. Ring diameter 3 is 30 mm and ring diameter 1 is 40 mm. Item 2 should move freely at the base of the anchor. (Fig. 2)
Figured links.
The dimensions of each link formed by parts 2, 4 and 5 are chosen such that ring 1 can only pass freely in the position indicated in the lower figure. The diameter of ring 1 is approximately 30 mm, and ring 3 is 40 mm. (Fig. 3)
Zigzag staples.
The dimensions of these brackets should be made as follows: brackets 2 and 3 - 40X50 mm, and the middle bracket 4 - .25X X50 mm. Ring 1 diameter — no more than 35 mm. (Fig. 4)

The wire intended for puzzles must first be straightened. Hold it firmly with your hands and pull it several times along a wooden cylindrical rod vertically clamped in a vise (see Fig. A). If straightening the wire in this way fails; straighten it with a wooden mallet on a thick board, then clean it with sandpaper to a mirror finish.
Now you need to determine the length of the individual pieces of the selected puzzle. To do this, each of them must be drawn on whatman paper in full size. Applying a thin soft wire to the drawing, repeat the contours of the part. Then straighten the wire - you get the exact length of the desired part in expanded form. Use it to cut off the corresponding pieces of steel wire with wire cutters.

It is more convenient to bend the wire with the help of a simple device - a piece of a thick board, into which thick nails are hammered into the places where the wire is bent (according to the given dimensions) (see Fig. B). Bend small rings and ears with round-nosed pliers. For the manufacture of large rings, several wooden cylinders of different diameters should be prepared in advance. On them, as in the manufacture of the spring, wind a few turns (see Fig. B). Then clamp in a vice and carefully cut along the axis with a hacksaw - you will get rings. They must be carefully straightened, and the joints combined so that the connector planes are almost invisible.
Cover the finished parts of wire puzzles with 2 - 3 layers of colorless varnish - this will protect them from rust.
Parts (rings or staples) to be removed are blackened in the figures. They must be removed completely freely, without the use of force. You just have to figure out how to do it. Under the main picture of each puzzle there is an additional one, suggesting the course of the solution.
Please note that the description of the first two puzzles is given in more detail. Having mastered their manufacture, it will not be difficult to perform others.

1. STAR WITH A RING. Draw two circles with a diameter of 40 and 95 mm on the front surface of a thick board with a compass. Using a protractor, divide the circles into ten equal parts - on each get centers, where you hammer nails with a diameter of 3-4 mm so that they form a five-pointed star pattern.
Bite off the head of the nails with wire cutters, and remove the burrs with a file. Go around the contour with a soft wire - this is how the required length of the workpiece is determined. True, add to it another allowance for the manufacture of two ears with a diameter of 20 and 10 mm. Now straighten the wire - get the length for the original workpiece.
Cut off a piece from the steel wire, make ears at the ends and go around the contour again. It turned out an asterisk 3 - the main part of this wire puzzle. Earring 2 and ring 1 are made of the same wire. Ring diameter - 25 mm, earrings -30 mm. The elongated part of the earring should fit freely into the ring and into the large eye of the star.
2. ANCHOR. The manufacturing technology of this puzzle should be divided into two parts. In the first part, it differs from the one used in the previous puzzle. Determining the length of the workpiece will be quite difficult.
Therefore, you do not need soft wire. Cut a piece 300 mm long from the prepared steel wire.
On a cylindrical blank with a diameter of 20 mm, bend the ring strictly in the middle of the piece - an Anchor bracket has formed. Without removing it from the blank, twist the wire into two turns.
Using round nose pliers, bend the ends to form the "shoulders" of the anchor spindle. Using an additional piece of the same steel wire as a mandrel, bend a pair of rod loops on it. The horns and paws of the anchor can then be made using a board and nails, as in the Star and Ring puzzle.
In the figure, the width of the anchor can be taken 85 - 90 mm, and the height 95 - 100 mm. Take the diameter of ring 3 in the range of 25 - 30 mm, and the diameter of ring 1 is 5 mm larger. Rod 2 should not be tightly fixed in the anchor spindle - it should move with little resistance.
3. LOCK. Take the diameter of circle 2 within 110 - 120 mm. The diameter of its large ear is 15 - 18 mm, the small one is 10 - 12 mm. Key diameter 1 is about 20 mm. His beard should fit freely into the eye of the circle.
4. BRACKET ON BOOM. Arrow length 3 - 140 mm. At its ends, there is a tip in the form of a rhombus with a transverse diagonal of 30 mm, and a shank in the form of a ring with a diameter of 10 mm. U-shaped bracket 2 has the following dimensions: shelf - 35 mm, sidewalls - 30 mm. At the ends of the bracket there are loops with a diameter of 10 mm - they are connected to rings 4 with a diameter of 10 mm, worn on the arrow. Ring diameter 1 -25 mm.
5. TRIANGULAR SPIRAL. The contours of spiral 2 are inscribed in a parallelogram measuring 140X80 mm. The diameter of his ears is 20 mm. Earring 1 should pass freely through the eyelet.
6. FIGURED LINKS. Ring diameter 1 - 30 mm. The diameter of the ring is 3 by 5 mm larger. Sizes, parts 2, 4 and 5, select as you wish. The only condition: in the position shown in the figure, parts 4 and 5 must skip ring 1.
7. SNAKE. And this figure is "homework" for the reader: think over and make it yourself, using the techniques for previous puzzles, and also find how to put the ring on the snake and remove it from the other end.
Each puzzle is assembled from two to four pieces made of steel wire. Among them are triangles, trapezoids, spirals, stars, rings, pins, even animal figurines.
Today we offer you eight wire puzzles from Davydov's collection. Let's see how they are made.
For puzzles, you need a steel, not very rigid wire with a diameter of 2-3 mm. Downloaded, draw each detail in full size (we show the most important dimensions in the figure). Then, with a thin soft wire - copper or aluminum - measure the length of the part. From it you will find out the size of the workpiece for it.
It is most convenient to bend parts in a fixture. This is a not very thick board into which steel pins or nails are driven in where the wire puzzle figure has a radius of curvature. Small rings and ears are bent with round-nosed pliers. Rings of large diameter are best bent on cylinders: wooden, plastic or any other.
Cover the finished wire parts with a colorless varnish - then they will not rust.
Two triangles (Fig. A). The dimensions of the main figure 2 are 80x130 mm. The inner size of the rhombic lug is 20 mm. Earring 1 must not pass through the eyelet.
Curved axle (Fig. B). Axle length 3 - 130 mm, bracket dimensions 2 - 30x35 mm, ring diameter 1 - 20 mm. This ring must not pass through the right ring of part 3.
Triangular spiral (Fig. B). Spiral dimensions 2 - 80x140 mm, inner eye size - 20 mm. Earring 1 should go through the eyelet.
Triangles (Fig. D). The length of each side of an equilateral triangle is 2 - 40 mm. The dimensions of the legs of the right triangle formed by parts 3 and 4 are 40x110 mm, the diameter of ring 1 is 35 mm.
Square spiral (Fig. D). Spiral dimensions 2 - 70x80 mm. The stem of pin 1 does not need to be soldered to the ring - it should spring.
Semicircle and bracket (Fig. E). The diameter of the semicircle is 2 - 70 mm. Staple dimensions 3 - 40x35 mm. Pin 1 should pass freely through the eye of the bracket 3, and its ring should be put on the curved protrusion of the base 2.
Asterisk (Fig. G). The distance between opposite ends of the sprocket is 3 - 70 mm. Ring diameter 1 - 30 mm. The height of triangle 2 is chosen so that it passes through ring 1.
Two staples (Fig. 3). Ring diameter 1 - 50 mm, staple sizes 2 and 3 - 60x120 mm, lugs diameter about 12 mm.


Puzzle "Elephant"
The meaning of the elephant puzzle, like many similar ones, is to remove the moving part from the main figure without bending or separating the parts of the puzzle. And tangled nails must be learned to unravel, and then tangle again.
So, to create a wire puzzle " Elephant" you will need (see Fig. 1):
- Wire. Steel is ideal, but it is difficult to bend, so we used aluminum for simplicity and speed. To do this, bought in the household. store an aluminum wire with a cross section of 4 mm and stripped it of insulation. Just one elephant, for example, will need 90 cm of wire.
- Wooden board.
- Small carnations for stuffing the outline of the puzzle (about 30 pieces).
- An iron ingot about 12 mm in diameter (a thick rod, for example) for making even rings.
- Printable puzzle template.
- Pliers, cutters
Progress:
I want to say right away that if you are going to make just one elephant, then you will not need any boards with nails yourself. The wire can simply be bent according to the drawn pattern. But if you need several such puzzles, then it makes sense to simplify this process.
Here are printable templates from two puzzles "Elephant" and "Snail".
We stick a puzzle template on the board (Fig. 2).
We stuff nails along the contour. The main thing is that they be at all turns of the contour (Fig. 3).
We lay the wire along the contour of the puzzle (Fig. 4).
We fix the ends. The elephant is ready (Fig. 5).
Now let's move on to the removable part. To do this, cut off two pieces of wire 14 and 15.5 cm.
At the ends of both pieces around the iron blank, we bend the rings (Fig. 6).
We bend the longer part in the form of the letter "P" (Fig. 7).
We insert one part into another (Fig. 8).
And now the task of the puzzle is to put on (and if already put on, then take off) the resulting part on the elephant (Fig. 9, 10).
After that, we persuaded Vitya to make a few more puzzles from this site. Katya can’t do it, but when you show her the principle of solving, she will happily assemble and disassemble the toy again and again :)
And here are the purchased wire puzzles next to the elephant and homemade nails.
By this principle, you can make many similar puzzles.
Another type of wire puzzle is " tangled nails ".
To create it you will need (see fig.1):
- Two nails 10 cm long.
- A steel rod of the same diameter as the nails (we used confirmation).
- Vice, pliers


