How to properly apply gel polish at home. How to apply gel polish to your nails correctly at home How to apply gel polish
A beautiful manicure is one of the main components of a woman’s image, therefore, how to properly paint your nails with gel polish is a pressing question for the fair half. This innovative product has only recently appeared among nail art masters, but has already become the most popular, gradually pushing false, acrylic, gel nails and coating with ordinary enamels and varnishes, which only last for a day or two, into the past. In fact, it is a hybrid of a gel (modeling material) and a decorative varnish coating, taking the best qualities from these products. Nails coated with gel polish are a spectacular, stylish and attractive decoration for women’s hands.
Every girl dreams of an exquisite manicure and beautiful nails, but the modern rhythm of life does not always allow time to visit salons. Gel polish is exactly the right solution that strengthens your nails and gives you an elegant manicure without leaving home; you just need to consider the features of how to properly paint your nails with gel polish.
How to properly paint your nails with gel polish at home
To begin, prepare all the necessary materials, because... The procedure requires, in addition to the usual manicure accessories:
- UV or LED lamp (this is necessary, because gel polish does not dry by air, but undergoes polymerization);
- acid-free primer (it is necessary to ensure strong adhesion of the coating to the nail plate);
- gel polish (basic and color);
- top (finish coating);
- a special liquid that removes the sticky layer;
- cuticle cleaner and orange sticks;
- cosmetic discs.
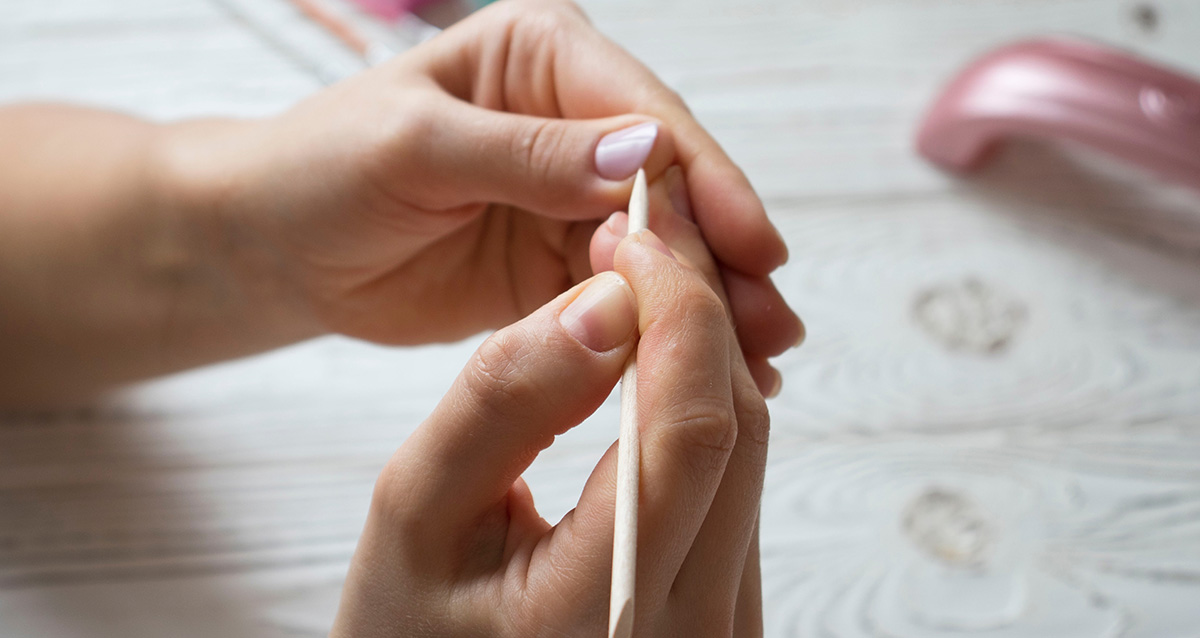
Before you paint your nails with gel polish, you need to properly prepare the nail plate. To do this, give your nails the desired length and shape, push back the cuticle on each finger with an orange stick, lightly sand the nail surfaces with a soft file (so that the top smooth layer is removed and the surface becomes slightly rough).

The nail plate, without touching the cuticle, must be coated with an acid-free primer, after which the surface of the nails must not be touched (otherwise strong adhesion will not be ensured and the gel will quickly peel off). Literally after 10 seconds you can apply a thin layer of base coat, the polymerization of which is carried out under a lamp for one minute.

Next, a colored coating is applied, optimally in two thin layers, each of which must undergo polymerization under a lamp for two minutes. The finishing touch is to apply a topcoat, which is dried under a lamp for one minute.
The stickiness of the top layer can be removed using a cosmetic disc moistened with a special liquid. Finally, the cuticle should be coated with a special oil (it is better to rub it in lightly).
Now you know how to paint your nails with gel polish if you choose a plain classic design. If you want to apply an interesting design (highlight a French manicure, do a French or lunar manicure, drops, ombre, etc.) or simply decorate with decor, you need to do this after polymerizing the main color layer before applying the top coat.

If the described technique is fully followed, then the result will certainly please you, and the gel polish will last 3 weeks.
Hands are a woman’s calling card, according to Coco Chanel. It’s hard to disagree with this, since everything from age to social status is reflected on the hands, which is why it is so important to pay attention to hand skin care and manicure. But the only thing worse than a complete lack of nail coverage is an untidy manicure. This will never happen to those women who know how to properly apply nail polish.
The advent of gel polishes has made a real revolution in manicure, making it possible with minimal time to obtain a durable coating for two to three weeks, which will be almost completely unaffected by external factors.
The advantages of this nail coating have prompted many women to already learn the new technology at home, and for those who are still thinking about it, it will be useful to know what tools and materials are needed for a gel polish manicure, and what are the stages of applying the coating.
New nail coloring technology requires the use of not only new materials, but also new tools.
A basic set for covering nails with gel polish includes:
- lamp for coating polymerization;
- buff, also known as a polishing file;
- degreaser;
- base coat;
- gel polish, selected shade;
- finishing coating;
- sticky layer remover.
Let's take a brief look at each of the points to understand their purpose. Gel polish will not dry in the usual way; this requires a special lamp. There are three types of such lamps: ultraviolet (UF), light-emitting diode (LED) and combined (CCFL).
For beginners, a 36 W UV lamp will be sufficient for home use. The radiation from an LED lamp is absolutely harmless to the human body, and a device that has reached its end of life does not require special disposal. In addition, although these lamps shine more dimly and look compact, they dry the varnish four times faster. A 9W LED lamp is equivalent to a 36W UV lamp. Combination lamps are intended for professional use.
Before applying varnish, the nail must be prepared: lightly sanded and remove dust and natural deposits of fat. For this purpose, a sanding file with an abrasiveness of 900 grit and a degreaser-disinfector are used. Sometimes it is replaced with a 70% alcohol solution.
A transparent base varnish (coating) makes the surface of the nail as even and smooth as possible, and also prevents pigment from getting into the keratin layer of the nail plate. The purpose of colored gel polish is the same as regular gel polish – to paint the nail in the chosen color.
The final coating not only protects the manicure from external negative factors, but also gives the varnish either a glossy shine or a matte roughness. Not all particles of the gel coating polymerize in the lamp; they make the surface of the nail sticky. To remove it, use means to remove the sticky layer. Recently, finishing varnishes without a sticky layer have begun to be produced.
Read more on Attuale.ru: Short men's hairstyles: 20 options for fashionable and stylish styling for men with photos
Additionally, for manicure with gel polish you can use:
- a primer that will strengthen the adhesion of the layers of varnish to the nail;
- lint-free wipes, which, unlike ordinary cotton pads, do not leave small lint on the nail during degreasing or removing the sticky layer;
- cuticle oils, you can purchase special mixtures or buy apricot, grape or almond oil at the pharmacy.
Having given your nails the desired shape with a nail file and tidied up the cuticles, you can proceed to a manicure with gel polish.
Application technology and stages:
- Preparing the nail plate. At this stage, you should lightly walk the buff over the nails, but without strong pressure, without filing it down. After soaking a cotton pad or lint-free cloth in a degreaser, wipe the nail, not forgetting to pay attention to the side ridges and the end of the tip of the nail. At the same stage, you can apply primer to your nails.
- Application of gel coating. A gel polish manicure involves applying 3-4 layers of coating, each of which should be polymerized for 2 minutes in a UV lamp and 30 seconds - 1 minute in an LED lamp, depending on the power. The layers are applied in the following sequence: base, colored gel polish in 1-2 layers, topcoat.
- Removing the dispersion layer and caring for the cuticle. Using a cotton pad or a special napkin, remove the sticky layer from the nail plates using an appropriate product. This will not only extend the life of the manicure, but will also protect the body from allergenic particles that may be present in the varnish. Applying oil to the cuticle is not only a pleasant caring procedure, but also provides additional nutrition to the nail plate.
How to properly remove gel polish from overgrown nails
Due to the durability of gel, it cannot be removed from nails as easily as regular polish.
To avoid damaging the nail, all actions should be performed in accordance with the following technology:
- First, the surface of the coating on the regrown nail should be lightly treated with a buff. This will help remove the polish faster.
- Soak a cotton pad generously in gel polish remover. Then apply it to your nail and wrap it tightly with a small piece of foil. Leave your nails in this position for 10-15 minutes.
- Next, remove the foil and cotton pad, and remove the coating using an orange stick or a plastic pusher. You should not try to remove the polish with a metal tool, so as not to damage the nail plate. If necessary, lightly polish the nail with a polishing file, removing small particles of the coating.
How to make drawings?
You can make a monochromatic coating more interesting and add individuality to your manicure with the help of drawings. Nowadays there are a sufficient number of techniques that allow you to apply unique patterns on your nails at home, even without artistic talent.
Read more on Attuale.ru: Nail design - 30 beautiful options with photos, new items for summer 2018
Let's look at some of them:
- Stamping. To make drawings using this technique you will need a stamp, a scraper, stencils with a design and stamping paint with a high pigment content. A small amount of paint is applied with a brush to the stencil with the design you like, the excess is removed with a scraper, then the design is applied to the stamp with a rolling motion, and then applied to the nail with the same movement.
- Stickers for nails. There are ready-made drawings on sale - transfer stickers for every taste. To apply such a design on a nail, you need to cut off the design or fragment you like, hold it in water for a while, separate it from the paper backing and transfer it to a varnished nail, dry it and cover it with a finish.
Interesting nail designs can be created using special foil, rhinestones and mirror rubbing.
Despite all the advantages of gel coating, regular varnish, perhaps a little less than before, is also in demand, since coating with it is easier and cheaper than gel polish, and existing durable varnishes allow you to keep the coating in its original form for up to seven days.
Preparation
Before applying regular polish to your nails, they also need to be prepared. To do this, they are first given a neat shape using a nail file.
Then the cuticle is softened by holding it in a warm soapy bath or applying a special oil to it. The softened cuticle is pushed back with an orange stick, or carefully cut with scissors (for trim manicure).
The preparation of the nails is completed by degreasing them. Nails washed with soap should be dried, wiped with an alcohol solution and dried again. On such nails, regular polish will last longer.
Applying base coat
Primer, base, substrate, basis - this is another name for the base coat for varnish. There are different types of bases, including medicinal ones, restoring thin and fragile nails, with a whitening effect and leveling ones. The latter, thanks to microparticles of talc and silk, make the surface of the nail smoother, after which regular varnish lays down in a more even layer.
The main function of the base coat is to provide a tighter adhesion between the nail and the varnish, as well as protect against pigment penetration deep into the nail plate and subsequent yellow color. Typically the base coat is clear or white. It must be applied in one thin layer. Allow at least 10 minutes for the base to dry thoroughly.
Correct coloring
Once the base coat has completely dried on oil-free nails, you can begin applying the polish. If you are right-handed, you should start painting your nails with the little finger on your right hand; if you are left-handed, do the opposite. Before applying regular varnish, the bottle with it should be shaken thoroughly in your hands to achieve a more uniform consistency and even layers.
Read more on Attuale.ru: Haircuts for medium hair that add volume
Dipping the brush into the varnish, wipe it on the neck on one side, and cover the nail with the varnish remaining on the outer edge, progressively moving from the tip of the nail to the cuticle. This will prevent the varnish from bleeding. Cover all nails in this way and let them dry thoroughly. Then cover with a second layer of varnish.
Using a fixative
In order for the manicure to last for five to seven days, you need to firmly glue all the layers on the nail plate. For this purpose, special fixatives are used - “smart enamels”. Such products will not only extend the life of your manicure, but can also make the coating more even and give a beautiful glossy shine without changing color.
The fixative is applied in the same way as regular varnish, but you can apply it every day. Drying remains an important condition; each layer of coating for any manicure must dry thoroughly.
How to speed up drying?
Regular varnish takes a very long time to dry.
It takes 10 to 20 minutes for one coat to dry thoroughly, but there are several ways to speed up the process:
- Special drying agents. They come in the form of a spray or liquid in a bottle, which is applied with a brush. The effect after using this product is a completely dry coating in a minute.
- Bath with cold water. If you dip nails coated with regular polish into a container with cold water and ice cubes, the solvent will quickly wash out, which will dry out the polish and make the manicure more durable.
- Vegetable oil. One drop of olive or other vegetable oil applied to the nail two minutes after painting will make it dry much faster (in 5-7 minutes).
- Using special drying devices or a hair dryer in cold air mode. In the latter case, it is important not to bring the hair dryer too close to the nails at first, so as not to spoil the coating with “ripples”.
Useful lifehacks
In order not to drag a cotton pad over your nail when removing regular nail polish, you can twist and place a foam sponge into a small glass jar in a spiral and fill it with nail polish remover. Now you need to briefly dip your finger into the foam “depths”, and then wipe off the varnish in one motion.
When applying designs to nails using stamps and stencils, the skin around the nail often gets dirty. To protect it, latex varnish is used, which creates a film on the skin that is easy to remove later. If such a product is not available, it can be replaced with ordinary PVA glue.
The perfect white stripe in a French manicure without stencils can be drawn using an eraser fixed in the desired position. And if you do end up with unevenness, you can disguise them by brushing along the joint with a brush dipped in a colorless varnish with glitter.
To protect the delicate skin of your hands from the aggressive effects of gel polish remover, it should be lubricated with a greasy cream or Vaseline.
Hands are a woman’s calling card, according to Coco Chanel. It’s hard to disagree with this, since everything from age to social status is reflected on the hands, which is why it is so important to pay attention to hand skin care and manicure. But the only thing worse than a complete lack of nail coverage is an untidy manicure. This will never happen to those women who know how to properly apply nail polish.
The advent of gel polishes has made a real revolution in manicure, making it possible with minimal time to obtain a durable coating for two to three weeks, which will be almost completely unaffected by external factors.
The advantages of this nail coating have prompted many women to already learn the new technology at home, and for those who are still thinking about it, it will be useful to know what tools and materials are needed for a gel polish manicure, and what are the stages of applying the coating.
Required Tools
New nail coloring technology requires the use of not only new materials, but also new tools.

A basic set for covering nails with gel polish includes:
- lamp for coating polymerization;
- buff, also known as a polishing file;
- degreaser;
- base coat;
- gel polish, selected shade;
- finishing coating;
- sticky layer remover.
Let's take a brief look at each of the points to understand their purpose. Gel polish will not dry in the usual way; this requires a special lamp. There are three types of such lamps: ultraviolet (UF), light-emitting diode (LED) and combined (CCFL).
For beginners, a 36 W UV lamp will be sufficient for home use. The radiation from an LED lamp is absolutely harmless to the human body, and a device that has reached its end of life does not require special disposal. In addition, although these lamps shine more dimly and look compact, they dry the varnish four times faster. A 9W LED lamp is equivalent to a 36W UV lamp. Combination lamps are intended for professional use.
Before applying varnish, the nail must be prepared: lightly sanded and remove dust and natural deposits of fat. For this purpose, a sanding file with an abrasiveness of 900 grit and a degreaser-disinfector are used. Sometimes it is replaced with a 70% alcohol solution.
A transparent base varnish (coating) makes the surface of the nail as even and smooth as possible, and also prevents pigment from getting into the keratin layer of the nail plate. The purpose of colored gel polish is the same as regular gel polish – to paint the nail in the chosen color.
The final coating not only protects the manicure from external negative factors, but also gives the varnish either a glossy shine or a matte roughness. Not all particles of the gel coating polymerize in the lamp; they make the surface of the nail sticky. To remove it, use means to remove the sticky layer. Recently, finishing varnishes without a sticky layer have begun to be produced.
Additionally, for manicure with gel polish you can use:
- a primer that will strengthen the adhesion of the layers of varnish to the nail;
- lint-free wipes, which, unlike ordinary cotton pads, do not leave small lint on the nail during degreasing or removing the sticky layer;
- cuticle oils, you can purchase special mixtures or buy apricot, grape or almond oil at the pharmacy.
Manicure with gel polish: stages
Having given your nails the desired shape with a nail file and tidied up the cuticles, you can proceed to a manicure with gel polish.

Application technology and stages:
- Preparing the nail plate. At this stage, you should lightly walk the buff over the nails, but without strong pressure, without filing it down. After soaking a cotton pad or lint-free cloth in a degreaser, wipe the nail, not forgetting to pay attention to the side ridges and the end of the tip of the nail. At the same stage, you can apply primer to your nails.
- Application of gel coating. A manicure with gel polish involves applying 3-4 layers of coating, each of which should be polymerized for 2 minutes in a UV lamp and 30 seconds - 1 minute in an LED lamp, depending on the power. The layers are applied in the following sequence: base, colored gel polish in 1-2 layers, topcoat.
- Removing the dispersion layer and caring for the cuticle. Using a cotton pad or a special napkin, remove the sticky layer from the nail plates using an appropriate product. This will not only extend the life of the manicure, but will also protect the body from allergenic particles that may be present in the varnish. Applying oil to the cuticle is not only a pleasant caring procedure, but also provides additional nutrition to the nail plate.
How to properly remove gel polish from overgrown nails
Due to the durability of gel, it cannot be removed from nails as easily as regular polish.

To avoid damaging the nail, all actions should be performed in accordance with the following technology:
- First, the surface of the coating on the regrown nail should be lightly treated with a buff. This will help remove the polish faster.
- Soak a cotton pad generously in gel polish remover. Then apply it to your nail and wrap it tightly with a small piece of foil. Leave your nails in this position for 10-15 minutes.
- Next, remove the foil and cotton pad, and remove the coating using an orange stick or a plastic pusher. You should not try to remove the polish with a metal tool, so as not to damage the nail plate. If necessary, lightly polish the nail with a polishing file, removing small particles of the coating.
How to make drawings?
You can make a monochromatic coating more interesting and add individuality to your manicure with the help of drawings. Nowadays there are a sufficient number of techniques that allow you to apply unique patterns on your nails at home, even without artistic talent.

Let's look at some of them:
- Stamping. To make drawings using this technique you will need a stamp, a scraper, stencils with a design and stamping paint with a high pigment content. A small amount of paint is applied with a brush to the stencil with the design you like, the excess is removed with a scraper, then the design is applied to the stamp with a rolling motion, and then applied to the nail with the same movement.
- Stickers for nails. There are ready-made drawings on sale - transfer stickers for every taste. To apply such a design on a nail, you need to cut off the design or fragment you like, hold it in water for a while, separate it from the paper backing and transfer it to a varnished nail, dry it and cover it with a finish.
Interesting nail designs can be created using special foil, rhinestones and mirror rubbing.
How to paint your nails with regular polish?
Despite all the advantages of gel coating, regular varnish, perhaps a little less than before, is also in demand, since coating with it is easier and cheaper than gel polish, and existing durable varnishes allow you to keep the coating in its original form for up to seven days.
Preparation
Before applying regular polish to your nails, they also need to be prepared. To do this, they are first given a neat shape using a nail file.

Then the cuticle is softened by holding it in a warm soapy bath or applying a special oil to it. The softened cuticle is pushed back with an orange stick, or carefully cut with scissors (for trim manicure).
The preparation of the nails is completed by degreasing them. Nails washed with soap should be dried, wiped with an alcohol solution and dried again. On such nails, regular polish will last longer.
Applying base coat
Primer, base, substrate, basis - this is another name for the base coat for varnish. There are different types of bases, including medicinal ones, restoring thin and fragile nails, with a whitening effect and leveling ones. The latter, thanks to microparticles of talc and silk, make the surface of the nail smoother, after which regular varnish lays down in a more even layer.

The main function of the base coat is to provide a tighter adhesion between the nail and the varnish, as well as protect against pigment penetration deep into the nail plate and subsequent yellow color. Typically the base coat is clear or white. It must be applied in one thin layer. Allow at least 10 minutes for the base to dry thoroughly.
Correct coloring
Once the base coat has completely dried on oil-free nails, you can begin applying the polish. If you are right-handed, you should start painting your nails with the little finger on your right hand; if you are left-handed, do the opposite. Before applying regular varnish, the bottle with it should be shaken thoroughly in your hands to achieve a more uniform consistency and even layers.

Dipping the brush into the varnish, wipe it on the neck on one side, and cover the nail with the varnish remaining on the outer edge, progressively moving from the tip of the nail to the cuticle. This will prevent the varnish from bleeding. Cover all nails in this way and let them dry thoroughly. Then cover with a second layer of varnish.
Using a fixative
In order for the manicure to last for five to seven days, you need to firmly glue all the layers on the nail plate. For this purpose, special fixatives are used - “smart enamels”. Such products will not only extend the life of your manicure, but can also make the coating more even and give a beautiful glossy shine without changing color.

The fixative is applied in the same way as regular varnish, but you can apply it every day. Drying remains an important condition; each layer of coating for any manicure must dry thoroughly.
How to speed up drying?
Regular varnish takes a very long time to dry.

It takes 10 to 20 minutes for one coat to dry thoroughly, but there are several ways to speed up the process:
- Special drying agents. They come in the form of a spray or liquid in a bottle, which is applied with a brush. The effect after using this product is a completely dry coating in a minute.
- Bath with cold water. If you dip nails coated with regular polish into a container with cold water and ice cubes, the solvent will quickly wash out, which will dry out the polish and make the manicure more durable.
- Vegetable oil. One drop of olive or other vegetable oil applied to the nail two minutes after painting will make it dry much faster (in 5-7 minutes).
- Using special drying devices or a hair dryer in cold air mode. In the latter case, it is important not to bring the hair dryer too close to the nails at first, so as not to spoil the coating with “ripples”.
When applying designs to nails using stamps and stencils, the skin around the nail often gets dirty. To protect it, latex varnish is used, which creates a film on the skin that is easy to remove later. If such a product is not available, it can be replaced with ordinary PVA glue.
The perfect white stripe in a French manicure without stencils can be drawn using an eraser fixed in the desired position. And if you do end up with unevenness, you can disguise them by brushing along the joint with a brush dipped in a colorless varnish with glitter.
To protect the delicate skin of your hands from the aggressive effects of gel polish remover, it should be lubricated with a greasy cream or Vaseline.
Treatment and strengthening of nail plates with special gel polish began relatively recently. But, despite this, this procedure has already taken its rightful place in the world of manicure.
Even a beginner who wants to create a unique manicure on his own can perform the technology, because the substance in question can be used to treat both natural and extended nails.
Gel polish coating at home is not difficult to do step by step. It is only important to adhere to the technology and follow the rules for applying the coating.
Thanks to modern tools and a variety of accessories, it is possible to independently draw unique masterpieces on your nails, because The varnish lasts quite a long time - about 3 weeks.
The nail decoration scheme includes some steps. First, we will look at the procedure using a simple photo instruction. And then we’ll look at all the stages in more detail.
Simple photo instructions for manicure with gel polish step by step

First stage: Preparation
Performing a manicure always begins with preparing the nail plates. The first step is to file them down into shape: if they are thin, the nail should be short.

Then a fine-grained buff is taken and the gloss is removed. The edges should be well cleaned and free from cracks.
Degreasing the nails with a bond and then with a primer will allow you to “wear” your nails for a longer time, applying gel polish at home in stages
Applying base coat
The procedure is not at all difficult to perform. The most important thing is to stick to technology. The nail plate should be covered with a transparent base and leave in a special ultraviolet lamp for a few seconds.

During this time, it is forbidden to touch them, as the surface may become dirty.
The next step is to apply a layer of the chosen color material and place the nails in the lamp for a few minutes. If the color is not saturated, then the steps are repeated several times.
Application of topcoat
In the case when the manicure involves the use various decorations, pebbles or stickers, they should be placed under the top coat. The polymerization procedure lasts no longer than 3 minutes. When it is finished, the plate is wiped with a cloth soaked in a degreaser, which will remove the sticky layer from them. 
Final stage
Moisturize the cuticle with nourishing oils.
Gel polish at home for beginners step by step: what you need to know
Attention! To create a manicure on your own, you will have to buy all the necessary products and various accessories. Although this pleasure is not cheap, it fully pays off. In addition, it is quite possible that the procedure may be so attractive that it will provide additional income.
 Experts recommend purchasing the following set of tools in advance:
- buff and various files;
- sponge;
- softening oil;
- UV lamp with or without timer;
- transparent and colored material.
In addition, you will need to buy a base and several types of fixatives.
 Gel polish coating at home step by step
The time it takes to apply gel polish at home in stages ranges from 30 minutes to 1 hour.
If the specialist has a lot of experience, then he can finish everything in 20 minutes. Much depends on the initial type of plates: whether they are in order or whether additional manicure is required. 
This is how standard nail strengthening is carried out with one-color varnish:
- The cuticle is pulled back and the nail is given the desired shape.
- Degreasing and polishing with buffs is carried out.
- Next comes the primer, which dries under the lamp for about 2 minutes.
- Very carefully, nails are varnished and dried in ultraviolet light.
- Step No. 4 is performed again, after which the nails are treated with a finishing layer and a fixative is applied.
- Final drying and moisturizing of the cuticle.
If you approach the process with all responsibility, then it becomes clear that there is nothing false in it. The main thing is to remember the order of doing the work and take your time.
How to cover extended nails with gel polish
Today you can find a large number of articles, pictures or videos that can help you learn how to cover your nails. For artificial nails, the procedure is almost identical to the procedure for natural nails. 
It is like this:
- First thing nails are polished using a buff. This must be done carefully, because the substance should be applied only to an even nail.
- Next comes degreasing. But primer is not applied to gel or acrylic nails.
- After this, the nail plate coated with a base and polymerized.
- Then put colored varnish and polymerize again.
- If necessary, step No. 4 can be repeated, after which cover the nail with top coat and dry well in ultraviolet light.
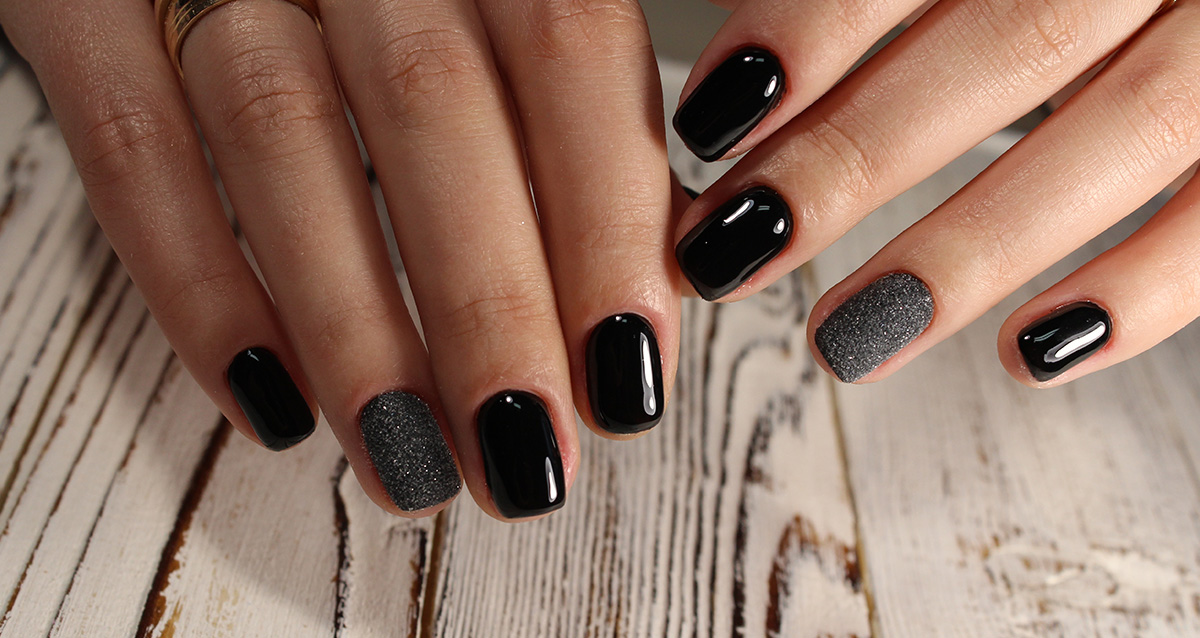
The classic version of Rose gel polish is made from white and red shades.
Here It is worth controlling the thickness of the varnish layers - it should be as thin as possible. This solution makes it possible to create an excellent manicure and give it more naturalness.
Simple gel polish designs on nails step by step
Interesting fact! If you need to make an ordinary drawing, you will have to have varnishes, a needle, cotton pads, acetone and tape on hand. Stencils are made from stationery tape, glued to a plate and painted with varnish.
 Step-by-step drawing:
- paint their nails with stripes of different varnishes;
- when the varnish has dried, stick tape cut into thin strips onto it;
- the entire nail plate is covered with black varnish;
- wait until it dries and remove the strips of tape;
- a fixative is applied.
In this way you can beautifully decorate your nails and boast a stylish manicure.
Flowers with gel polish on nails step by step
Floral designs are made using a dots or toothpick (needle).
Once all the required materials have been prepared, you should proceed with the following steps:
- Apply varnish base to the plate and wait until it dries. Then cover it with one colored varnish.
- Prepare dots and 2 bottles of varnish of different colors.
- Using dots, draw 4 circles – petals. In the middle there is a point – the core.
- After the “flower” has dried, it is recommended to apply a sealer.

 Each layer of the product must be polymerized in a lamp, otherwise the pattern will blur and mix with the main shade.
Rose gel polish: step by step guide
To create a rose, you need to choose gel polish of 2 colors: the classic version of the flower will be made from white and red shades, but you can experiment and choose original and bright combinations - black and red, orange and white, yellow and purple. Besides, you will need a needle. 

First you need to cover your nails with the base color and dry all layers thoroughly. Then, using a needle, make several dots with the selected colors of varnish alternately, mix the 2 colors so that a rose emerges. To complete the picture, it is recommended to paint the flower petals using green varnish.
Butterfly gel polish step by step
Initially, you should put the nail plates in order: remove the cuticle, file, sand and degrease the nails.

Read the popular article in the category:
- Cover the plate with base. You can choose any shade you like. But experts advise giving preference to pastel colors, because this is when the drawing will become more expressive. Dry under ultraviolet light.
- Take a brush and dip both edges in different varnishes. After the varnishes are mixed on the palette, draw butterfly wings and place your hands under the lamp.
- Using a thin brush, draw the body and antennae. Here it is worth using black or brown shades. The drawing is fixed and dried.
How to rub in gel polish: step by step guide
It is important to know! The rub gives the nails a mirror shine, so the manicure in question would be appropriate at a party. For an everyday look, it is recommended to use the rub on one or two fingers.
The technology for using mirror rubbing is as follows:
- The nails are covered with a base, drying in a lamp.
- Applying gel polish, and the color can be any: from black to colored, drying.
- Further - Dipping the brush into the prepared glitter and applying them from top to bottom of the nail until the varnish is no longer visible, you should not skimp on glitter, otherwise you will not be able to achieve the desired effect.
- Now it follows t Rub the glitter into the coating thoroughly using your fingers, and remove their excess.
- Apply top coat in two layers alternating them with drying under ultraviolet light.

Eventually The result should be a perfectly smooth, shiny surface without any flaws or bulges. If the base is black, the rub will turn out silver; if a colored base is chosen, the rub will have corresponding shimmers.
French gel polish: step-by-step guide
French manicure is a classic of the genre. It is always relevant, makes nails neat and well-groomed.
The technology for creating a French look using gel polish includes the following steps:
- Applying a varnish base, drying in a UV lamp.
- Apply the selected color and dry.
- Drawing a smile line with a white tint using stickers and thin brushes. Drying. Repeat the procedure again.
- Covering nails with top coat, drying, removing the sticky layer.
- Moisturizing the cuticle and periungual tissue with special oils.

There can be many options here. A smile can also be colored: red, yellow, orange, gold or silver look beautiful. The base color of the marigolds can be transparent or colored: the classic combination is a red plate and a golden smile.
Ombre gel polish step by step at home
But the colored material is applied as follows:
- On the prepared foil, mix 2 different varnishes a little with a needle.
- Blot the resulting transitions with a sponge.
- Apply color to nails.
- Next, without waiting for the previous coating to dry, apply the sealer.
Note! If your fingers get dirty, wipe them with a cotton pad or stick soaked in nail polish remover. This action must be carried out immediately, and not after a while, because gel polish hardens quickly.

For these purposes, a special product is also suitable that protects the skin and is easily removed in the form of a film.
Gel polish: design for short nails (step by step)
To perform the perfect manicure, you should strictly consider several basic rules:
- Initially, you should give your nails a beautiful shape. For short nails, an oval or circle shape is suitable.
- Then the cuticle is removed and a colored coating is applied, leaving the edges of the plate slightly unpainted.
- Draw a vertical pattern that will visually make the nail longer. Experts recommend making the drawing three-dimensional. It is worth making sure that it is not too bulky and does not cover the entire plate.
- The top of the nails is painted with a fixative and dried for the last time.
 If there is a desire, then You can add various stones, rhinestones and sparkles to the design. But you don’t need to clutter your nails too much with decorations, otherwise it will look tasteless.
Applying gel polish to your nails and creating a stylish design yourself is quite doable. The most important thing is to prepare the materials and various accessories that you will need for work, practice a lot and everything will definitely work out.
Gel polish designs on nails: step by step photos


French gel polish: photo step by step


Monograms on nails: step-by-step photos with gel polish


Gel polish coating step by step: video
Nail design lessons with gel polish: step-by-step video
Gel polish coating at home step by step, necessary tools:
Applying gel polish step by step:
Today it is impossible to imagine an attractive woman without well-groomed hands and a stylish manicure. Increasingly, modern fashionistas are looking for masters with the obligatory item “coating nails with gel polish” - and the search is not particularly difficult. The secret of the crazy popularity of gel polishes is explained simply - they provide a shiny, pleasing to the eye, smooth coating that will last for several weeks. And the application process itself is quite quick and simple. Do you want to know everything about gel polish coating? Tips, life hacks, benefits - everything is in this article.
What is gel polish?
Gel polish is a special plastic gel that is applied to the nail plates like ordinary varnish, but by drying for 2-4 minutes under an ultraviolet lamp it turns into an ultra-durable coating that is not subject to abrasion and various damages. Coatings of different brands differ in the degree of viscosity, polymerization time, and the amount of color pigment. But all gel polishes are united by application technology and record durability - more than 2 weeks, on average 21 days.
Pros of using gel polish
- ease of application;
- the possibility of carrying out the procedure at home (if special equipment is available);
- rapid hardening in a UV lamp;
- durability;
- durability without the need for additional touch-up or manicure correction;
- durable texture;
- intensity of color and shine;
- gel polish helps strengthen the nail plate;
- hypoallergenic;
- the coating does not penetrate into the pores of the nail;
- safe for pregnant and lactating women;
- natural and well-groomed appearance.
Cons of gel polish
The disadvantages of using gel polish seem completely insignificant after the long list of its advantages. But still there are disadvantages:
- complex procedure for removing the coating;
- the relative high cost of such a manicure.
Contraindications
- fresh wounds, damage to the nail plate;
- fungal diseases of the nails and skin around them;
- cuticle damage;
- allergies and individual intolerance to the products and materials used;
- diseases of the heart and blood vessels;
- professionals do not recommend applying gel polish while undergoing chemotherapy or taking hormonal medications.

Features of gel coating
It happens that a few days after the session the coating begins to flake off or chip. Most often this happens due to non-compliance with the basic rules of wearing gel polish:
- No need to file or trim your nails.
- It is necessary to ensure that there is no direct mechanical impact on the coating.
- When applying regular varnish over a decorative coating, it can only be removed using a liquid that does not contain acetone.
- During the first 24 hours after the session, you should try to prevent the coating from coming into contact with water. Refuse wet cleaning, washing dishes, and also postpone relaxing in a hot bath.

If you follow the application technology, your manicure will be flawless within 3-4 weeks!
Required materials and tools
To carry out the procedure at home, you will need:
- a set of colored gel polishes;
- degreaser or special nail polish remover;
- grinder for smoothing the nail plate;
- an ultraviolet lamp with a power of at least 36 W, so that the coating is securely fixed, the color is rich, and the manicure is neat;
- bond - for drying nails;
- polishing buffer and nail file;
- orange stick;
- primer - it will provide better adhesion of the coating to the nail plate;
- base coat;
- a fixative that gives a glossy shine;
- acetone-free liquid to remove stickiness;
- lint-free wipes.

Everything you need for a manicure with gel polish can be purchased at a specialized store. It is better to purchase branded devices and not skimp on materials, since a low-quality product with constant use will most likely damage your nails.
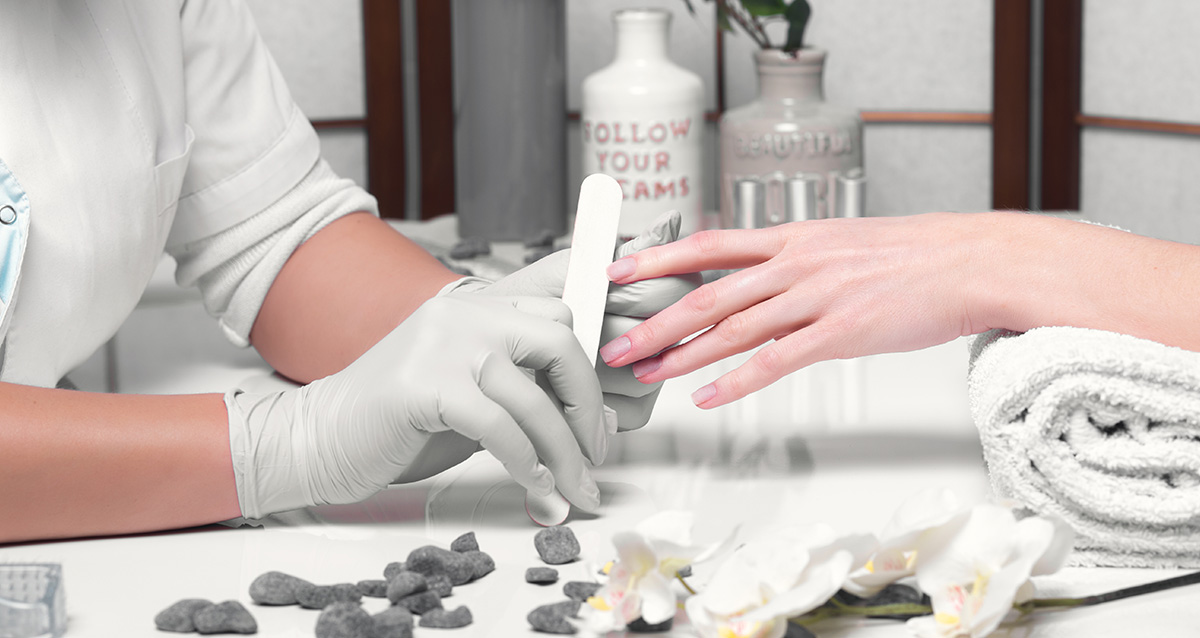
Manicure technique. Preparatory stage
Covering nails with gel polish begins with preparation.
- First, the master assesses the condition of the nail plates - if they are thin and brittle, it is necessary to first apply a primer to the entire surface.
- Then the specialist forms a free edge that is perfectly clean and smooth.
- When the nail plate is peeling, the master first uses a nail file.
- The surface of the plates is degreased and dried for about 10 minutes.
- Then you need to push back the cuticles to avoid peeling of the coating.
- To save your nails from chipping in the future, you need to make the surface matte. To do this, using a buff, the top keratin layer and various exfoliations are removed.
- Using a brush, you need to brush off the resulting dust.
- Remaining moisture must again be removed with a dehydrator or degreaser.
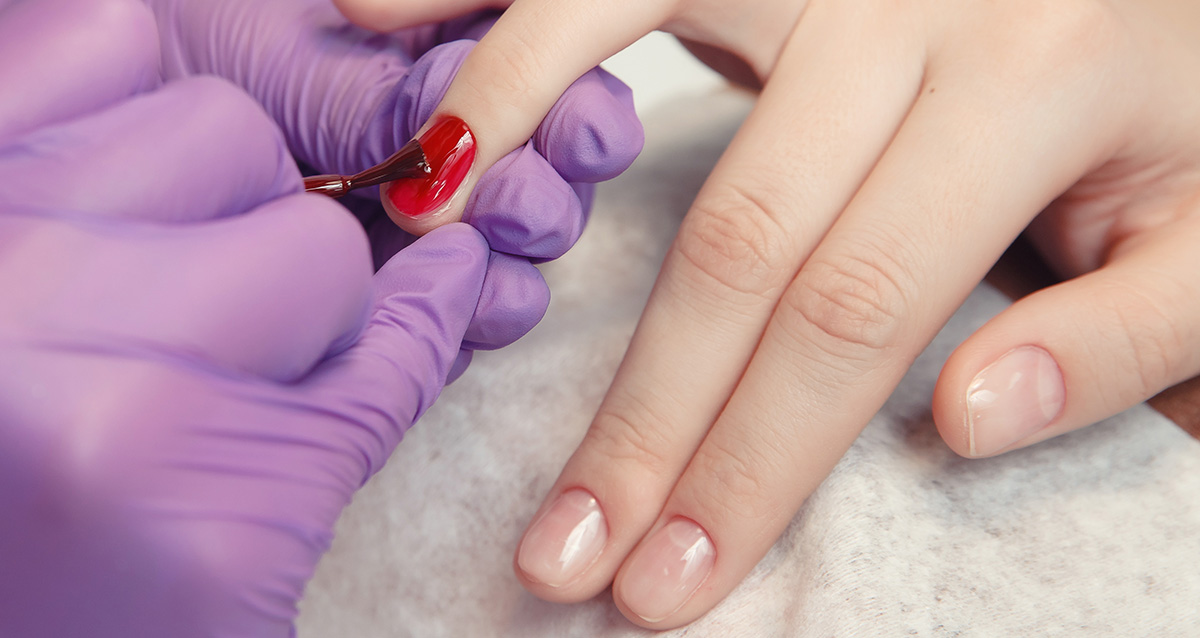
Main stage
- The nails are carefully covered from the free edge to the cuticle with a base colorless product.
- Then the fingers are placed in an ultraviolet lamp for 50-60 seconds - this is necessary for the base layer to polymerize.
- Now you need to take a little gel onto the brush and apply it to the plate.
- Place your nails in the lamp for a minute.
- For a more saturated color, you can repeat the last 2 steps two or three times. However, it must be remembered that the varnish should not be applied thickly to avoid peeling and bumps.
- If desired, you can now apply a variety of nail decorations and designs.
- Now you should cover your nails with a thicker layer of the finishing transparent gel.
- Place your nails in a UV lamp for 2-3 minutes.
- To remove the top sticky layer, soak a lint-free cloth in degreaser and wipe your nails.
- At the end, the cuticle should be moistened with nourishing oil.
That's all. But with colored gel polish you need to take into account several nuances:
- Remember that pastel and bright shades of gel polish are applied in two layers, each of which must be polymerized in an ultraviolet lamp for 2 minutes.
- When applying dark shades, you need not even two, but three very thin layers.
- The product of any tone must be applied as evenly as possible, painting the ends.
How to remove gel polish?
It only takes half an hour to remove the permanent coating from the surface of your nails. To carry out the procedure you will need:
- foil;
- cotton pads;
- orange stick;
- a special gel polish remover or a regular acetone-based product.
Gel coating removal technique
- First, wash your hands thoroughly.
- A cotton pad is soaked in solvent and then applied to the nail plate.
- Now the finger with the cotton pad needs to be wrapped in foil to prevent the liquid from evaporating. It will take 10-15 minutes for the gel polish to soften.
- You should massage the nail and then remove the foil and cotton pad along with the coating.
- The remaining material is removed using a soft orange stick. If necessary, repeat the procedure.

Pedicure with gel polish
The process of applying gel polish to toenails is almost the same as the procedure on hands:
- First you need to remove the cuticle.
- The nails are thoroughly polished for better adhesion of the product to the surface of the plate.
- To prevent peeling of the future coating, dust is removed from the surface of the nails and degreasing is carried out.
- Bondex is applied to the nails with a separate brush so that the product goes on as evenly as possible.
- Now a thin base coat is carefully applied. If the product gets on the skin, you must carefully remove it with an orange stick.
- The nails are placed in an ultraviolet lamp to dry.
- Then a colored layer of varnish and the necessary nail design (glitter or acrylic design) are applied to the surface of the nail.
- Each layer of colored gel polish is dried in a UV lamp.
- The final coating is applied in a denser layer and dried again in a lamp.
- Each nail is treated with acetone-free nail polish remover or degreaser.