Models of knitted men's hats. Men's hat crocheted and knitted: diagram and description
A hand-knitted headdress is not a factory stamp, but an exclusive item, long-term and painstaking work of a master. How to knit a super fashionable hat yourself, determine the size, accurately cast on stitches for the initial row, learn to read the description and diagrams of the selected model, and many other nuances for beginners and professionals, you will learn by reading the article.
To knit a hat, you need yarn, knitting needles, knowledge of simple patterns and the ability to determine the size of the headdress. We choose the material for knitting hats depending on the time of year - wool, cotton and synthetic threads. For children we select yarn that does not cause an allergic reaction
Every needlewoman strives to use natural yarn for knitted items, but this is not always justified. The hat is made of 100% wool thread, without the addition of synthetics, and when washed it “runs down” (loses its shape). It is better if the composition is the golden mean - 50% natural, 50% synthetic fiber - blended yarn.
For work, it is important to choose the right knitting needles, the diameter of which must correspond to the thickness of the thread. Knitting needles are made of plastic, wood and metal.

When working - knitting in the round, take five stocking needles or knitting needles with fishing line. You can work on two knitting needles, the result is a fabric that will have to be sewn together at the end of the work, the hat will have a seam.
Knitted hat: diagram and description of patterns for beginners
Beginners mastering the wisdom of needlework need to learn three basic patterns: purl stitch, knit stitch, and simple rib stitch.
Pattern: Purl stitch (garter stitch)
The classic pattern is available for debutants, easy to make, always looks modern, and is one of the main patterns for knitting hats.

- 1 row: all there
- 2nd row: all inside out
Pattern: Stockinette stitch (stocking stitch)
This knitting can be called a classic of the genre; often masters in their works turn to a textbook, simple pattern.

- 1st row: all persons P
- 2nd row: all out. P
Pattern: Elastic
The most common knitting, most often we start working on products with this pattern:

- 1 row: 2p. persons and 2p. purl
- 2nd row: as we see in the picture
Pattern: English rib
A popular knitting pattern for scarves, hats, and sweaters, it looks great with bulky yarn and large knitting needles.

- 1st row: persons p, out. P
- 2nd row: persons p, yarn over, purl. p, remove without knitting
- 3rd row: knit like the first row
Simple patterns for knitting hats with knitting needles, diagrams and descriptions of work - help for those who study and understand the basics of needlework.
Knitted hat sizes: table

In order for the hat to be the right size, we will learn how to determine it correctly. To do this, measure the circumference of the head, stepping back 1 cm from the upper edge of the auricle and eyebrows. We compare the result obtained with the data in the table and determine the depth of the header.
Table of head size and depth of knitting hats

How to correctly cast on the loops so that the hat is the right size?
The thickness of the yarn does not always coincide with that recommended in the description of the models: either the size indicated is larger or smaller than required, it is necessary to “fit” the headdress correctly. To do this, we knit a control sample, approximately 10 cm in length. Close the loops and measure its width.

Let's say we are knitting a hat with a head circumference of 50 cm, do we need to know how many stitches are required to start working? We measure the width of the control sample: it turned out to be 10 cm, and we scored (hypothetically) 25 loops.
Determining the number of loops for a hat: pproportion x = 50 x 25: 10 = 125 loops
Conclusion : for a size 50 hat, you need to cast on 125 loops and knit 17-18 cm in length, as indicated in the table above.
How to knit a hat for a woman?
Those who skillfully use knitting needles will not have any difficulty knitting a collection of hats of different styles for their wardrobe. A women's knitted hat can compete with other types of knitted products in terms of the number of styles and colors.
How to knit a hat with braids using knitting needles?
The popular braid pattern can be easy to perform - for a beginner, and difficult - for professionals who are masters of knitting needles.
Harnesses and braids, knitting is very popular, used for various models of hats.
Let’s get acquainted with this season’s fashionable “braid with shadow” hat style, made with yarn that creates a visual graduation effect.

To create such a hat you will need pink and purple yarn in two threads:


Knitting with pink thread and then purple creates an unusual effect - a smooth transformation of one color into another, without delineating boundaries.
Step-by-step work:
- We cast on 80 loops with pink yarn, taking into account its thickness (the thicker, the shorter the length in the skein).
- We knit a 5-6 cm pattern with a simple elastic band (1x1).
- Next, we make the main braid pattern (diagram below) with 5 cm pink yarn.
- We knit the next 10 cm with purple thread, after 5 cm we begin to decrease the loops. The hat can be made longer if we knit the main pattern 10-15 cm more than indicated in the work pattern.
Braid pattern of 12 loops

How to decrease stitches on a hat with knitting needles?
At 15 cm from the rim we make a gradual decrease in loops:
- Row 1: knit stitch, count 8 stitches, knit two stitches, etc.
- 2.4 row: purl
- Row 3: knit stitch, count 6 stitches, knit two stitches each
- Row 5: knit, count 4 stitches, knit two stitches together
- We collect the loops remaining on the knitting needle with a needle with a large eye.
- We decorate the top with a pompom or a piece of natural fur.

Video: Knitting a hat with knitting needles in the “Braids” pattern
This headdress is the best option for the cold season.
How to knit a turban hat with knitting needles?
Beauty is a great force that influences modern fashion and style, as was clearly demonstrated by the charming singer Kylie Minogue. She complemented her look in a fur coat (for which it is difficult to choose a headdress) with a turban hat (turban) - a forgotten, without foundation, model from the distant seventies of the last century. Knitting masters hastened to add newfangled headwear to their collection.

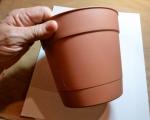
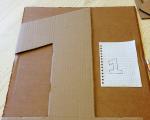
Hat - turban without knitting, from a scarf
- Take the scarf, fold it and sew it together as indicated in the photo and drawing.


- Fold B,A(fold)
- Seam(seam 8 cm)
- Graff(depth)
Turban hat made of knitted fabric

- We knit the fabric with a simple elastic band or knit stitches
- The length and width are determined by the circumference of the head
- When the fabric is ready, we twist it around the head in an original way and sew it together, as shown in the diagram above.
- Edith-Piaf turban hats


A turban hat is an elegant headdress; the shape and pattern of such a product depend on the knitter’s imagination. A turban will perfectly complement the image of a woman in a fur coat or demi-season coat.
How to knit a voluminous hat with knitting needles?
A very fashionable and stylish voluminous hat is a popular model for young people, both boys and girls.
Little tricks for knitting a voluminous hat:
- We choose thick and fluffy yarn or combine it into two or three threads, use large diameter knitting needles
- We knit the elastic band or headband with knitting needles of a smaller diameter (let’s say No. 4) than the main knitting (knitting needles No. 6)
- We choose textured, volumetric, relief patterns:
- English gum
- lumps
- all kinds of braids, plaits
- diagonal stripes
- astrakhan knitting
- various leaf patterns
Volumetric patterns

Relief patterns with cloque effect

How to knit a hat with a lapel?
A model of a headdress with a turned-up edge - a lapel - can be of any style, pattern, male, female, children's version.

How to make a lapel on hats of different styles:
- If you start knitting a hat with an elastic band, make it wide, not the standard length (7-8 cm), but much longer (15-25 cm), it is easily adjustable. We wear the model in two ways, with and without a lapel, like a voluminous hat.
- The hat is completely knitted with one of the elastic patterns; if we plan to wear it with a lapel, we knit it 5-20 cm longer. Such a headdress can transform, change shape: we make a lapel, it becomes smaller in size, and if we unfold it, we get a stocking hat.
- It must be remembered that the lapel should look the same on both sides, so you need to choose an appropriate pattern that is identical from the front and back.
Video: How to knit a voluminous mohair hat with a double lapel?
How to knit a men's hat with knitting needles?
A knitted hat is a sought-after and popular headdress among the stronger half. Women who own knitting needles can knit a fashionable, warm hat for their beloved man, which can compete with branded models.
The line between a woman's headdress and a man's is leveled, there is only a difference in the choice of color, less often the use of openwork patterns, and a minimum of decoration.
How to knit a winter hat for men?
A warm hat requires careful selection of yarn. It should be soft, skin-friendly and warm. Different types of wool yarn are chosen as the main material for hats.:
- mohair
- thread with the addition of goat, arctic fox, rabbit fluff
- sheep wool
- camel hair
- cashmere
- angora
- alpaca (llama)
When choosing a headdress based on shape, preference is given to a small beanie hat. It fits in your pocket, universal for all seasons. For winter, you can knit a wonderful version of a double hat or insulate it with a special lining.
How to knit a double hat with knitting needles?

- The picture shows a hat in an elongated form, one is inserted into the other and a small lapel is made.

- Double hat knitting pattern

To work you will need:
- Yarn in two colors, dark brown and gray. Composition: wool with a small amount of synthetics (acrylic, polyester)
- Knitting needles with 3.5 mm fishing line
Description of knitting a double hat:
We start knitting from the middle of the product, in the figure the place is indicated with a red line. To be able to knit in one direction or the other, we make a Turkish set of loops (the video below describes this in detail):
- Divide 56 cm (hat length) into two parts, each half 28 cm
- We cast on loops taking into account the length of the head circumference and the control sample
- We knit the first hat, without a pattern, 20 cm in stockinette stitch
- We start the second hat again from the middle in the opposite direction, picking up the thread on the remaining open loops
- We will knit 12 cm of knits. using satin stitch and (8 cm) we knit an ornament
How to close a hat with knitting needles?
- Smoothly decrease through one row of 8 loops in the front rows until 10 stitches remain on the knitting needles
- We collect 10 sts with a needle and thread and tie them together
Video: Turkish loop set
How to knit a simple hat with knitting needles?
For beginning needlewomen, the best option to test your strength is a simple hat.
Description of knitting a simple warm men's hat:
- size 58
- pattern simple elastic band 2×2
To work you need to take:
- thick threads, wool 30% + acrylic 70%
- stocking needles (5 pcs) No. 7, No. 8
Anyone who knitted a sock on 4 knitting needles will find it much easier to complete the job.

We do the work:
- Using knitting needles No. 7, cast on 72 stitches and distribute evenly, 18 for each
- Knit like a sock with 1x1 rib
- After 6 cm we change the knitting needles to number 8, shift the pattern by exactly two loops, i.e. we knit purl stitches in place of the knit stitches and vice versa
- After 15 cm we decrease the loops
How to finish a hat with knitting needles?
The elastic pattern of the hat is simple and convenient for decreasing stitches, it looks smooth and neat:
- We start decreasing with purl stitches
- We knit the next two rows according to the pattern, so that the decrease is not sharp
- We connect all the front loops of the elastic band together with the front one, and we knit the purl ones without changing
- We knit the next two rows, as we see, according to the drawing
- We connect the remaining knit and purl stitches on the knitting needles in pairs with a purl stitch.
- Fastening row purl knitting
- We connect the remaining loops by pulling a needle and thread through them
The men's sports hat is ready, you need to wet it, steam it and you can put it on.
Video: Knitting a simple hat with knitting needles
How to knit a baby hat with knitting needles?

We knit children's hats for newborns, small children (from one to 5 years old) and large children (school age).
Hat for newborns
If a mother or grandmother knows how to knit, even before the birth of the child they prepare a dowry - knitted baby clothes, including hats.
For kids we choose high-quality and delicate yarn:
- baby alpaca
- microfiber
- bamboo
- cotton
- merino wool
- viscose

A knitted hat for a baby is joyful and practical. Everything that surrounds a child should be cheerful, bright, make him happy, and make him smile.
Knitted hat for a boy: diagram
A DIY hat for your baby is an interesting and useful idea. It is better for the child to choose the style of the model; he will be happy to wear it. You can embroider your favorite cartoon character, the emblem of a famous sports club, a car, or your favorite animal on a hat - this will make it fun and funny.
Hat for a child from 3 months to a year
You can complete your baby's wardrobe with a cute hat with attached ears and an embroidered cat's face.

To work you need to take:
- knitting needles No. 3.5 with fishing line
- acrylic yarn with the addition of gray wool
- small skein of black yarn
- needle with a large eye
Description of work:
- The set of loops must correspond to the age of the baby from 42 to 47 loops
- We knit in a circle with stockinette stitch 16-18 cm (much depends on the thickness of the yarn)
- Close the loops and sew
- We sew each corner obliquely with black or contrasting threads, as a result we get ears
- We embroider the muzzle with black thread according to the proposed pattern.
- We crochet a chain or weave a braid from threads folded in several rows and sew
Embroidery pattern

It is better for an inexperienced knitter to choose a hat for a boy that is not difficult to make. Despite the simplicity of knitting, such models look cute, and most importantly, they will keep the baby warm and comfortable, an excellent option for cold and inclement weather
To ensure that the hat fits tightly to the child’s head, covers the ears and does not fly off the head, we tie the ears to it.
How to knit ears for a hat:
- We knit the ears separately, sew or crochet them to the finished product
- We carefully knit the already knitted ears as we cast on the stitches of the initial row.
- Having collected loops from the headband of the hat, we begin to knit ears of different lengths, shapes and patterns
We decorate the product with a pompom, tie airy crocheted chains or long braids from yarn folded into several threads.
How to knit a hat-helmet for a boy?
Warm helmet An excellent option for frosty and inclement weather, because it performs a double function: it covers the baby’s head and protects the neck. The entire hat is knitted with one pattern - English elastic.

 Knitted hat for girls
The most grateful connoisseurs of knitters’ creativity are children. They sincerely rejoice at beautiful things knitted by the caring hands of loved ones.
How to knit a hat for a girl? Craftsmen have created many styles of beautiful and warm hats for girls.
Decorate the hats:
- original openwork patterns
- appliqués
- pom-poms
- embroidery
The threads used are multi-colored and bright. It’s good if the decision in choosing a style and color is made by a little fashionista, because she is the one who wears the headdress.

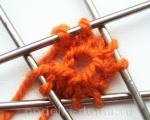
A charming hat for girls aged 2 to 5 years old, easy to knit, using a crocheted flower as decoration. This headdress is recommended for ages 3 to 5 years.
Material for work
- thick yarn 100% acrylic
- circular knitting needles with fishing line 5#
Progress
- We knit 4 cm with an elastic band (2x2), cast on the number of loops based on the control sample
- The next 3 rows are knit stitch and 3 rows are purl stitch.
- Repeat the pattern until the length of the hat from the start of work is 17 cm
- We make a gradual decrease in every second row, knit two loops together
- Sew on a flower, bow or other decoration, it all depends on your imagination
Beautiful and warm knitted items, knitted with your own hands, will always be fashionable and popular, because they keep the warmth of caring hands.
Video: Knitting baby hats
Knitted men's hats have long been established in the world of men's fashion. Of course, there are brave men who, even in the cold, flaunt without hats. Most men don't like to be cold. We have collected the most fashionable branded models and will knit them with our own hands.


Knitting a men's hat is a short and interesting process. Our models are all with diagrams and descriptions. Try knitting a hat using our master class and you will appreciate our work and conscientiousness. All hats are youth, branded. Let's start knitting with the simplest model - a beanie hat.
A beanie hat is the simplest and most democratic hat, knitted with the most ordinary knitting - stockinette stitch, without pompoms, ruffles, or ties. It is also called a stocking hat or a beanbag hat. This hat fits tightly to the head and comes in different lengths. It can be of regular length (26-28 cm), or it can be like a cap (30-32 cm). We will make a hat 28 cm long.
To work you need:
- Yarn (wool or wool with mohair), 100 grams, thread in 2 folds.
- Knitting needles number 2.5 mm.
- Centimeter

When choosing threads, give preference to those whose 100 grams of weight contain 250 meters of length. We don't need thick threads. Let the threads be thinner, then the hat will look neater. The knitting should be tight, without gaps. Determine the knitting density.
Knitting density is the number of loops and rows needed to knit a fabric measuring 10/10 cm.
It is very important to correctly calculate the density so as not to re-bandage. Knit a control sample and see how many loops you have in 1 cm. Measure the circumference of your head and multiply by the resulting figure. This is how many stitches you will cast on your knitting needles. We will knit on two needles, then we will sew the fabric. For size 57 I take 142 loops (2.5 loops in 1cm * 57 cm) = 142. Add 2 edge loops. We cast on 142 stitches on 2 knitting needles and started knitting with an elastic band.
Row 1: knit 2 - purl 2, knit 2, purl 2. and so on.
Row 2: how the knitting looks.
3rd row: same as 1st.
We knit with an elastic band up to the 7th row. From the 7th row we begin to knit with facial stitches. We knit in stockinette stitch 17 cm. Next we begin decreasing. Decrease 2 stitches together in every third row. We collect the rest of the loops and pull them together tighter. Leave the end of the loop, thread it through a needle and carefully sew up the side seam.
In the video: a fashionable men's hat with knitting needles, detailed MK.

Fashionable men's branded hat. We knit with an elastic band, k1, p1. Hat with a lapel. The lapel is double elastic. It may also be blue, with red and white stripes. We knit on 4 needles.
To work you need:
- Yarn (wool or 50% wool, 50% acrylic) 150 grams, in 2 threads. A little red and blue.
- Knitting needles 3 mm.
- Centimeter.
Knit the sample with knit 2/2 stitches and count how many stitches are in 1 cm of the sample. For example, we need to knit a size 56 hat; there are 2 loops in 1 cm. This means you need to cast on 56 * 2 = 112 loops. We cast on 112 loops on 4 knitting needles with red thread and knit 2 rows with a 2/2 elastic band:
Row 1: knit 2, purl 2, knit 2, etc.
2 p.: how the mating looks.
3 rows, white yarn: knit 2, purl 2, knit 2, etc.
4 p.: how the mating looks.
5 rows: blue yarn: knit 2, purl 2, etc.
Row 1: k1, p1. K1, p1. etc.
We knit 15 cm with a 1/1 elastic band and begin decreasing. We begin to decrease: we divide the fabric into 6 parts, we begin to make decreases in every 3 rows. We knit 2 loops together throughout the entire row. After 9 cm, we tighten the remaining loops with thread.

Sew the pompom to the hat. If it is difficult for you to knit on 4 needles, you can knit on 2 and sew.
The hat is fashionable, branded, original, 28 cm high. We knit it from gray or dark blue yarn.


To work you need:
- Yarn (70% wool 30% pan) gray or dark blue.
- Knitting needles 2.5 mm.
- Centimeter.
- Needle.
Knit a 2/2 cm elastic band sample. See how many loops there are in 1 cm. Measure the volume of your head with a centimeter. For example, you got 2.5 loops in 1 cm. Therefore, in 56 centimeters there will be 56 * 2.5 = 140 loops. We knit a hat size 56.
The pattern is called “Celtic braid”:


Celtic pattern on 18 loops.
Pattern Description:
- Rows 1, 5, 9, 13 and 17 are knitted with knit stitches.
- Row 2 and all even rows are knitted purl.
- 3rd row - cross 6 loops with a slant to the left.
- Row 7 - knit 3, cross 6 stitches with a slant to the right, cross 6 stitches with a slant to the right, knit 3.
Explanations for the pattern:
- Cross 6 loops to the right (slip 3 loops onto an auxiliary needle and leave them before work, 3 knit stitches, then knit 3 knit loops from an auxiliary needle).
- Cross 6 loops to the left (slip 3 loops onto the auxiliary needle and leave them at work, 3 knit stitches, then knit 3 knit loops from the auxiliary needle).
We will knit on 2 needles, as the pattern is complex. We found it with difficulty. Cast on 138 stitches on knitting needles. We knit 12 rows with an elastic band, knit 2 - purl 2. (2/2).
- Row 1: knit the entire row with knit stitches.
- Row 2: Purl the entire row.
- Row 3: p1, k3, p1, 6 loops cross with a slant to the left (see Explanations for the pattern), cross 6 loops with a slant to the left, 6 loops cross with a slant to the left, p1, k3, p1, 6 loops cross to the left, 6 sts cross to the left, cross 6 loops, p1, k3, p1, cross 6 sts, cross 6 sts, cross 6 loops, and repeat from the beginning of the row. The result should be 138 loops.
- Row 4: purl all over.
- Row 5: knit all.
- Row 6: purl all over.
- Row 7: p1, k3, p4, 6 loops crossed with a slant to the right (see explanation), 6 loops crossed to the right, p4, k3, p4, 6 loops crossed with a slant to the right, 6 loops crossed to the right, p4 , k3, p4, 6 stitches crossed to the right, 6 stitches crossed to the right, p3, and repeat from the beginning of the row
- Row 8: purl all over.
- 9 row as 1st.
After you knit 20 cm from the beginning of the hat, start decreasing. Only the front surface. Divide the knitting into 4 parts, marking these places with a bright thread. Decrease by knitting 2 together, in the end the hat should be 27-28 cm.

for men
men's hat
Hat size - 57. Stocking needles No. 3.5.
Cast on 104 stitches (Italian stitch set), distribute onto 4 knitting needles, 26 stitches on one knitting needle. Knit a 5 cm lapel with a 2x2 elastic band, in the last row add 1 loop = 105 loops. Then switch to a pattern, basically the same elastic band.
1p: k2, p1, k3, p1.
2р: according to the drawing
3р: 1 person per auxiliary. We leave the knitting needle behind the fabric, knit 1, 1 with auxiliary. knitting needles, p1, k3, p1.
4p: according to the drawing.
5p: according to the drawing
6 r: according to the drawing
7p: repeat row 3.
This is how you need to tie the depth of the cap. Then make decreases.
Decreases should be made so that you get 5 wedges, between the wedges there will be paths of braids, and on each side of the braid there will be one purl. loop. = 20 loops.
105-20 = 85 loops remain, divide into 5 wedges = 17 loops in each wedge.
Now we knit like this: *2 braid loops, 1 purl, 2 loops knit together with a tilt to the left, 13 loops we knit according to the pattern, 2 loops knit together with a tilt to the right, 1 purl*. We repeat from * to *. We make such decreases in every second row until 3 loops remain from 17 loops.
Now we knit like this: 2 braid loops, purl 1, knit 3 loops together, next row according to the pattern.
Then like this: 2 braid loops, purl 3 together, in the next row we knit 2 stitches together, knit 1, purl 1. We break the thread and tighten the remaining loops.
Men's hat with a jacquard pattern: diagram from a Japanese magazine


Description from the magazine:
gray cap
Size: 56-60.
You will need:
- yarn of the Lana Gold variety, Alize brand (50% wool, 50% acrylic, 230 m/100 g) - 100 g of sulfur;
- circular knitting needles with short fishing line No. 3 and 3.5;
- thick needle
Tulya
Using knitting needles No. 3, cast on 128 sts, close in a ring and knit 3 cm with a 2/2 elastic band, starting and ending with a p. 1 purl. P.
Then switch to needles No. 3.5 and continue knitting according to pattern 1, completing 8 repeats. Rows 15 and 16: repeat row 14 of pattern 1. At the same time, the 16th row. knit until 8 stitches remain (these stitches go into the next row)
Then follow scheme 1 from the 1st to the 14th row. Rows 32-34: repeat row 14 of pattern 1. At the same time, the 34th row. knit until 7 sts remain (these sts go into the next row!).
crown
Form the crown by continuing knitting according to pattern 2.
Shutdown
Cut the working thread, leaving an end of 6-8 cm, insert it into a thick needle and pull it through the remaining 8 stitches, pull it tightly, bring it to the wrong side and secure it carefully. Also, use a needle to hide the end of the beginning of the work. Wash and dry the cap.
..


You will need:
330 m of medium thickness yarn
Circular knitting needles No. 3.5, 40 cm long.
Circular knitting needles No. 4, 40 cm long.
Double needles No. 4
Yarn needle
6 stitch markers
extra braiding needle
Knitting density:
5.5 pet. 2.5 cm in stockinette stitch, knitting needles No. 4
An approximate match of the density is sufficient, because The hat fits very well on the head or stretches due to the elastic pattern used.
Size: Again, thanks to the elasticated pattern, the hat fits almost any head size from teenager to adult. If you need to change the size, you can knit the product on knitting needles of a smaller or larger size.
Description.
Cast on 120 stitches on smaller circular needles. Carefully close the circle, avoiding twisting the loops, place a marker to mark the beginning of the row.
Elastic band: 2×2.
K1, repeat until 3 stitches remain until the end of the row, p2, k1. Knit 2x2 rib for 5 rows or other desired length.
Lattice pattern:
Row 1: K1, purl 2, repeat [slip 1 st. knitting needle before work, knit 1, knit 1. with additional knitting needles; 2 p.] up to 1 p. to the end of the row,
remove the last loop on extra. knitting needle before work, remove the marker, knit knitting. next stitch, add marker, k1. with additional knitting needles
Row 2: K1, which was just knitted with extra. knitting needles at the end of the 1st row, then repeat up to 3 stitches until the end of the row, p2, k1, re-mark
Row 3: repeat [slip 1 st. knitting needle before work, purl 1, knit 1. with additional knitting needles; remove 1 p. for extra. knitting needle at work, knit 1, purl 1. with additional knitting needles] to the end of the row, remove the marker
Row 4: P1, repeat up to 3 sts to end of row, k2, p1,
reshoot the marker
Row 5: Purl 1, repeat [slip 1 stitch on additional stitch. knitting needle at work, knit 1, knit 1. with additional knitting needles; 2 p.] up to 3 sts to the end of the row, remove 1 st for extra. knitting needle at work, knit 1, knit 1. with additional knitting needles; Purl 1, re-shoot marker
Row 6: P1, repeat up to 3 sts to end of row, k2, p1, re-mark
Row 7: repeat [slip 1 st. knitting needle at work, knit 1, purl 1. with additional knitting needles; remove 1 p. for extra. knitting needle before work, purl 1, knit 1. with additional knitting needles] to the end of the row, remove the marker
Row 8: K1, repeat up to 3 sts to end of row, p2, k1,
reshoot the marker
Row 9-11: repeat rows 1-3
Row 12: Purl 1, repeat up to 3 sts to end of row, k2, SK NEXT. LOOP ON THE RIGHT SPOKE, REMOVE MARKER, PLACE THE LOOP BACK ON THE LEFT SPOKE, PLACE MARKER
(now the beginning of the row is shifted by one loop).
Row 13: knit with larger needles, repeat,
re-shoot the marker. I got 90 stitches on the needles.
The basic pattern is a simple 2×1 rib.
repeat until the length of the hat reaches 12.5-14 cm or other desired length.
Reductions to complete the cap.
All loops are divided into 6 parts, in which decreases are made using markers. However, this is not necessary if you can navigate well without them. Place 5 markers every 15 stitches, starting with the marker marking the beginning of the row (6 markers total). Knitting continues according to the pattern: where in the previous row there was a purl, knit a purl where there are knits. - persons crossed. Decrements are made by knitting the last 2 stitches before the next marker together.
Opening row: *repeat 5 times (this is 15 stitches),
place marker* - repeat 5 more times from * to * The following instructions apply to each part of the stitches between the markers. Repeat each instruction 5 more times until you reach the end of the row. This applies to rows in which decreases are described. The skipped rows are knitted according to the pattern as described above.
Switch to double needles as needed.
Row 1: main pattern 13 stitches, k2tog, re-mark marker
Row 4: main pattern 12 stitches, k2tog, re-mark marker
Row 7: main pattern 11 stitches, k2tog, re-mark marker
Row 9: main pattern 10 stitches, k2tog, re-slip marker
Row 11: main pattern 9 stitches, k2tog, re-slip marker
Row 13: main pattern 8 stitches, k2tog, re-mark marker
Row 15: main pattern 7 stitches, k2tog, re-mark marker
Row 17: main pattern 6 stitches, k2tog, re-slip marker
Row 19: main pattern 5 stitches, k2tog, re-slip marker
Row 20: main pattern 4 stitches, k2tog, re-slip marker
Row 21: main pattern 3 stitches, k2tog, re-slip marker
Row 22: P2tog, k2tog, re-marker
Row 23: K2tog, remove markers.
Cut the yarn, leaving the end of the required length. Pull it through the remaining 6 stitches, tighten and fasten, hide the ends of the threads.

MEN'S HAT
100gr. 100% cashmere of which 25g. carrot color, 25g. blue, 50g. gray; knitting needles 3mm.
Patterns:
Tubular (hollow) elastic: Row 1: * K1, slip 1 p. purl, thread before work *, repeat from * to; repeat this row all the time.
Elastic band 2/2: k2, p2
Facial surface.
Purl stitch.
Basic pattern: according to the pattern. Knit even rows according to the pattern. Having knitted 40 rows of the pattern, repeat from the 39th row.
Knitting density: 31p.-10cm.
The circumference of the cap is 40 cm and the height is 19.5 cm.
Front part: using 3 knitting needles and contrasting thread, cast on 62 sts. and knit 1 knit row (remove the thread at the end of the work); with the main thread of carrot color, knit 1 purl row and 4 rows of tubular cut, continue with blue thread cut. 2/2, starting and ending with a row of 2 knits. At a height of 2.5 cm, continue with gray thread with the main pattern, starting and ending each row with a 1 crochet loop. At a height of 7 cm. Decrease 1 stitch on the sides.
At a height of 16cm. perform 14 decreases next. way: 1 crm. p., * 2 knit., 2 together p. *, repeat from * to * and finish 2 knit. and 1cr. Continue knitting the loops in the pattern.
At high 17cm, next front row, we begin to decrease (at the beginning of the row, perform 1 stitch, at the end - 2 stitches together) on the sides, inside the first and last 2 p., 1 p. in each 2nd row 6 times. At the same time, with the first side decreases, perform 13 decreases between 38 center stitches. For each decrease, we knit together the front 2 loops of each of the 13 central strips of the front loops. At high. 19.5 cm. bind off the remaining 21 sts.
Rear: same as front.
Assembly: sew two parts.
Designations for the diagram:
-1 person
-P1
-3p. cross to the left A: remove 2p. before work, knit 1, knit. removed loops.
-3p. cross to the right A: remove 1 p. at work, k2, knit a slip stitch
-3p. cross to the left B: remove 2p. before work, purl 1, knit knit. removed loops.
-3p. cross to the right B: remove 1 p. at work, k2, knit a slip stitch
-4p. cross to the left A: remove 2p. before work, knit 2, knit. removed loops.
-4p. cross to the right A: remove 2p. at work, knit 2, knit knit stitches removed
-4 stitches cross to the left B: remove 3 stitches before work, purl 1, knit. removed loops.
-4p. cross to the right B: remove 1 p. at work, knit 3, purl the slipped stitch
-5p. cross to the left: remove 3p. before work, knit 2, knit knit. removed loops.
-6 p. cross to the left: remove 3 p. before work, knit 3, knit knit. removed loops.
-6p. cross to the right: remove 3 p. at work, knit 3, knit knit stitches.
-8p. cross to the right: remove 5 p. for ra
With the cold weather approaching, everyone wants to protect themselves from adverse weather conditions. A warm, reliable, knitted hat can serve as a good assistant for this. Men love to wear products made by caring female hands. A men's hat is knitted from various threads according to different patterns. In this case, various knitting techniques can be used. Schemes and descriptions of patterns for men's hats when knitting are worth considering in more detail.
Preparing for work
Many people wonder where they can find instructions explaining how to make men's hats with knitting needles with diagrams and descriptions. If you are going to start knitting a men's hat, you need to stock up on all the necessary tools and materials in advance. Careful preparation for work will allow you not to be interrupted due to a lack of yarn or incorrectly selected knitting needles.
Selection of tools
Before you begin the process of knitting a hat, you need to stock up on knitting tools. Both straight stocking needles and circular knitting needles can be used. The number of knitting needles is usually selected depending on the thickness of the thread used. For an elastic and soft fabric that is pleasant to the touch, you should choose knitting needles with a diameter larger than the slightly twisted yarn from which the product will be made. If you need to make a hat from dense, windproof fabric, then you should use knitting needles of a smaller diameter.
Necessary materials
In order to select the necessary yarn to knit a men's hat, you should study the variety of market materials offered. Today there is a wide range to choose from, both natural, and synthetic threads for knitting. Speaking about natural materials, we should mention:
- wool (alpaca, angora, merino, as well as mohair, cashmere);
- cotton;
- hemp;
- silk;
- bamboo, etc.
Synthetic fibers include:
- microfiber;
- metallic;
- nylon;
- acrylic, etc.
It should be noted, what for knitting original products Mixtures of fibers can also be used, the most common of which are:
- wool mixture;
- mix fibers (chenille, pile yarn, etc.).
When buying yarn to knit a product, you need to decide how many threads you will need to make a hat. It is better to buy a little more yarn in advance than is recommended for the selected headdress model. Remains of yarn can be used if necessary to decorate or repair the product. Usually for a man's hat it is consumed, depending on head size and style, 100−200 grams of yarn.
If you liked the model of a knitted hat that you saw on someone or in a fashion magazine, this does not mean that it is ideal for your man. The choice of product model often depends on the shape and type of face of the owner of the headdress, as well as on the style of his clothing and preferred color scheme.
Depending on your face shape
 Often, with the help of one or another style of knitted hat, you can both emphasize the advantages of your face and hide its shortcomings. So, for round-shaped faces, asymmetrical models are best suited, as well as hats with a pompom or earflaps, which visually hide the roundness of the face. For rectangular faces with a high forehead, beanie hats, stocking-shaped hats that can be lowered closer to the eyebrows, are great. A beanie hat is also perfect for those with an ideal head shape, as it can be worn on the very top of the head, exposing the ears, which is dictated by modern fashion.
Owners of such a feature of appearance as a long nose are recommended to choose knitted hats with a visor or lapel, which help smooth out the proportions of the face . Helmets also fit well with this type of appearance.
Influence of clothing style
For men who prefer a classic style of clothing, knitted hats with a similar style are suitable. In combination with a scarf, such hats will well complement the image of their owners.
For those who prefer a casual style, knitted hats are perfect, allowing you to create volume and asymmetry. . These include:
- hats and socks;
- bean bags;
- beanie hats.
 For men who use a sporty style even in everyday life, tight-fitting hats with a simple style are well suited. In addition, the sporty style implies the absence of knitted hanging elements and elaborate patterns.
Large knitted hats, as well as models of non-standard styles (with folds, pom-poms, lapels and ears), are very popular among informals. Non-standard images allow you to create the ears of various animals.
Suitable color
The color scheme when choosing a headdress may depend on the color of outerwear, accessories, hair and eye color, etc. So , black suits brunettes better and dark shades of the hat. And hats in bright colors will also look contrasting. Blondes will suit pastel-colored hats that match the color of their skin and eyes. For owners of red hair, knitted hats are suitable, emphasizing their fiery temperament and cheerful disposition.
It’s good to have hats of different colors in your arsenal, which will allow you to select the right ones depending on the type of activity, recreation or events you attend. In addition, a brightly colored hat can always lift the mood not only of its owner, but also of those around him.
Step-by-step instructions for production
After choosing a style headdress, yarn and knitting needles of the required size, you can start making the product with your own hands.
Stocking hat
The knitting pattern for a men's hat with a description is quite simple. This knitted hat model is suitable for both children and adults. It is good because, thanks to its loose fit, it creates a feeling of comfort. The knitting pattern for a stocking cap is as follows:

The product is ready. But before using it, you should wash the head unit and lightly steam it.
Helmet with ears
This pattern is knitted using a garter stitch pattern, knitting all rows with knit stitches. The manufacturing stages are as follows:

The finished product must be washed, placed wet on an inverted three-liter bottle (to give it shape) and allowed to dry.
Beanie with chess pattern
This model of headdress fits well to the head. It is knitted on straight needles, so at the end of the work you will need to sew the edges of the hat from the top to the bottom of the product. So, the manufacturing steps are as follows:

To make the product warmer, you need to choose double fabric patterns. And you can decorate the finished headdress with a badge, embroidery of initials using the satin stitch technique, or a pompom - at your discretion. The main thing is to remember that making a knitted hat for a man with your own hands will not take much time, but he will feel the warmth of the hands and the care of a loving craftswoman.
Attention, TODAY only!
Haven't decided what to give your men? Are dad, son, husband, brother at risk of being left without a nice gift? Nowadays you won’t surprise anyone with universal gifts (a souvenir from a supermarket or numerous gift cards).
The warmest thing would be for each of these men to receive a gift created with their own hands.
A knitted hat can be a creative gift, because they have successfully gained a foothold in the world of fashion for men. There are also those brave people who show off without hats in the cold.
It's nice to know that most men don't like to be cold. Especially if they have a fashionable knitted hat on hand.
 All The best models of hats for men with descriptions and diagrams can be found in the article.
Selection of knitting needles and yarn
The yarn for a men's hat needs to be warm. That's the point of a hat - to keep you warm. The exception is demi-season products; they should not be so warm. Also in order to so that the hat is not very thin - it should be made from double thread or thicker fiber. Various emblems and applications on the finished product are welcome.
 The knitting needles that are suitable for the hat are the corresponding number of tools. As for the open knitting needle model, you can knit hats on both circular and stocking needles, and even on regular straight knitting needles.
  It all depends on the model of the hat itself (photo): double, with a lapel, for little men - with a pompom.
Important! If the hat is knitted on straight knitting needles, then you will need to add several stitches to the total number of stitches for the side seam.
How to determine the size of a hat?
Determining the size of the head is very important. A comfortable hat is already half the battle. The first thing to do is determine the size of your head circumference. A measuring tape will help. This line runs parallel to the floor along the line of the forehead and occipital protuberances. It is necessary to subtract 2-3 cm from the finished measurement, since any knitted items stretch.

The second measurement will be the depth (height) of the headdress. A measuring tape is passed along the top of the head from the lobe of one ear to the lobe of the other. The resulting number must be divided by 2 and the corresponding increment models made:
- for classic and shallow 2-3 cm;
- for the model of stockings, beanies and other elongated ones, you need to add more than 3 cm, everything depends on the length and can be more than 5 cm.
It also happens that it is simply not possible to determine the size; in this case, you can use the table of parameters for men’s hats.

A simple set of stitches on 2 knitting needles, folded together:

Measure and compare the loops and cm. For example, there are 20 loops in 10 cm (you can knit only with knit stitches or purl stitches, with an elastic band, etc.).

Head circumference, for example, 60 cm. It’s easy to translate: divide 60 by 10 and then multiply by 20 loops. The result was 120 loops. For a hat with such a pattern density, 120 loops will be required in a circle. Don’t forget to subtract a couple of centimeters so that the hat fits your head more tightly, but not tightly.
Step-by-step instructions for knitting a men's hat
The preparatory procedures have been completed and you can start knitting. For those who have not yet decided on a model, here is a great selection of trending ideas with descriptions and diagrams. A fairly simple product can be so comfortable and beautiful that the male half will appreciate the new thing.
You can use an elastic band to decorate the beginning (middle of the hat) or knit the entire hat with an elastic band; for beginners it will be easier and faster:

 Numerous models of hats have the same principle (or components). Elastic band, body and crown. More often, hats are knitted with knitting needles using elastic bands.
Winter double men's hat
A wonderful, one might say classic, model - this is a double-sided hat. The model is designed for a head circumference of 58 cm. A very dynamic pattern is jacquard. Both an expert and a beginner can make such a model with their own hands.

To work you need:
- yarn 200 g (100% wool);
- circular knitting needles No. 3.
You can complicate the work by decorating a man’s hat with an ornament. For example, a hat is gray (blue), then the ornament can be made with black yarn so that it stands out against the background of the hat.

Description
They start knitting this model almost from the middle. But initially it’s worth knitting a small sample from stockinette stitch - counting the number of loops. Transfer everything into loops and estimate how many stitches you need to accurately cast on with knitting needles.
Important! If for some reason the calculation is no longer satisfactory. The hat is visually either too small or too big - urgently undo it and knit it again.
For the above model, a sample with density was used: 10 * 10 cm = 25 loops for 39 rows. Based on the results of the translation, make a traditional set of loops.

Make a set of loops of 112 loops and knit 37 cm in circular knitting. At one end of the hat you should use a jacquard. The decreases for the hat are very simple and can be memorized like a poem: through a row of 8 loops.
Important! Make decreases symmetrically so that the hat does not come out sideways, in the literal sense of this expression.
The double hat is ready, but which side you put it on is your choice. Interesting options are obtained if you use 2 different colors of yarn, like 2 different hats. For example, knit half of the hat with blue yarn, and the other half with gray yarn.
Hat with ear flaps
A trend for several seasons is a knitted hat with earflaps. The excellent model of this hat will completely cover the neck and a man will definitely not freeze in it, even in a strong wind.

To work you need:
- 100% wool yarn - approximately 200 g;
- knitting needles number 2;
- hook number 2.
The size used for the model is 60 cm around the head circumference. The set of loops, taking into account all increases and decreases, will be 110 loops. Using an elastic band 1*1 you need to tie 2 cm.
 Then switch to stockinette stitch and jacquard with deer. The jacquard ends and the transition to 2*2 elastic band. You will need to knit approximately 5 cm with an elastic band and begin decreasing.
Decrease pattern: through each row, decrease by 8 stitches and strictly on top of each other. There will be 10 loops left and you just need to pull them all together and secure the yarn.
 The most interesting thing is the ears. They are crocheted in this model. You need to make marks on the back of the hat. Since there should be 20 loops between the ears at the back. One eye takes up the width of 14 loops. Therefore, knit 14 double crochets from the edge of the hat. You need to make 7 rows. In the last three, decrease 2 loops (one from each edge). The earflap hat is ready and can be beautifully packaged and given to the owner.
Hat with lapel
The model is designed for 58 cm head circumference. Not everyone suits thin hats. Many men look better in voluminous hats or with a lapel. And it will definitely be warmer this way.
Attractive model with a lapel and charming small braids. Individuality and a spectacular model - two in one.
- To work you will need:
- gray yarn with a wool content of 75%;
- knitting needles number 3;
 additional knitting needles (for making braids).
Important! Knitting this hat begins with the lapel. Cast on 106 stitches on knitting needles. The thickness of the yarn may vary and therefore it is better to play it safe and make a separate sample and use it to calculate the number of loops for a cast-on of a certain size. Only 7 cm is allotted for the lapel and these centimeters need to be tied with a 2*2 elastic band.
In hats with a lapel, for a good bend, you need to knit one row simply with facial loops.
After the lapel and elastic, you need to proceed to the main pattern of this model - small braids.
Pattern: *2 k/p (designed for braids), 1 p/p, 3 k/p, 1 p/p* - these are 1-3 rows.
 Row 4: Knit 2 with a cross and use an additional knitting needle for transfer, with an additional knitting needle in front of the fabric (closer to the knitter).
Repeat the pattern of the canvas until the desired depth of the product. Decreases deserve special attention. It's always difficult to make decreases in fabric patterns. You can make the reductions for such a product as invisible as possible with this approach. First, decreases are made between the braids, tilting to the left. Further, when only the loops of the braids remain, there is no longer any need to cross them and knit everything with knit stitches. When about 10 loops remain, connect all the loops into one and pull tightly. Fasten the thread.
Creative and simplest hat
To work you need:
- A model that was created in less than an hour is worth attention. Moreover, it is so simple and so good.
- gray yarn 150 g;

knitting needles number 3.

This model can be knitted in two threads, so it will only become more beautiful and voluminous and, accordingly, warmer.
- A simple hat also has simple instructions:
- determined the head circumference and compared it with the sample (by the way, garter stitch was chosen for the hat);
- cast on the number of loops on the knitting needles with an increase of 4 cm to the depth of the hat;
- we knit in garter stitch until the size of the head circumference is reached (for example, with a circumference of 60 cm, you need to knit 60 cm in height);
closed the rows and made a gather along the top of the hat and made a side seam.
The hat is ready. Moreover, you can create not only beanie hats this way.


These are the kind of hats you can give to your men. Therefore, we must be patient before the holidays, buy yarn, start crafting, and enjoy the satisfied faces of our loved ones. Your loved ones will be delighted with such a warm product.