Beading orchid step by step. Beaded orchid: mosaic, brick and French weaving techniques
In order to master the art of weaving from beads, you need to get acquainted with some of the subtleties of this process, techniques that allow you to achieve one or another visual effect. The combination of different sizes and colors of beads allows you to get interesting images, you can even make flowers from beads that are little different from real ones.
It is most convenient to master beading with video tutorials. The master will tell you step by step and clearly show all the actions that you need to do in order to get an amazingly beautiful flower. You just need to carefully repeat everything after the instructor. If desired, each word and action can be listened to several times until you master the technique properly.
purple orchid
To get a beaded orchid, you will need several types of multi-colored beads, 8 mm glass beads and a wire on which all this will be strung. Three pairs of arcs are created from purple beads, from which a flower petal is formed.
The edging of the petal is done with white beads. In total, for an orchid, you will need 14 of these petals and 21 petals of a simpler type. The inner petals are made in the same way, but from beige beads. The middle of the flower is obtained from a bead, to which prepared petals are attached in a certain sequence.
Video lesson:
pink orchid
Materials to weave an orchid, you will need the following:
- beads mixed with chopped green, yellow, red and pink;
- adhesive plaster;
- floral tape;
- green wire for leaves, half-millimeter hard wire;
- triple cable for flower base;
- tools - scissors and pliers.
Any orchid flower consists of five petals, for each of which a detailed story is given about the technique of their creation. There may be five or nine flowers in total, any odd number. The core of the flower is made of large yellow beads No. 6.
Video lesson:
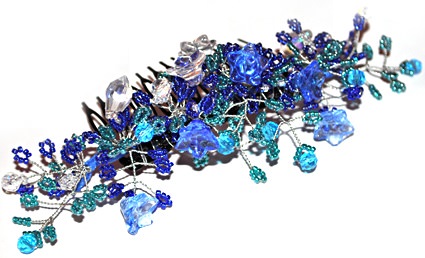
blue orchid
To make a blue orchid, we need blue beads of dark and light shades, green, orange and yellow, green, gold and silver wire, thick wire for the stems, threads, glue and plasticine. Weaving is done in the French style.
The instructor talks in detail about all the stages of work: by repeating the movements, you can hone them to automatism. The five blue flower petals are different and each requires a different number of beads. The stamen is made of yellow beads, a yellow bead is strengthened in the center. All parts of the flower are interconnected.
Video lesson:
Orchid Cymbidium
In order for you to get a beautiful beaded orchid with your own hands, you need to prepare beads of four colors - yellow, white, light red and dark red, wire 0.3 and 0.4 mm, wire cutters and pliers. First of all, the red petals of the orchid are formed, the whole procedure is shown to the smallest detail.
The petals are different, and each requires a certain amount of beads. One of the petals, the largest one, is motley, it uses yellow, white, and red beads. Separately, the core of the flower with stamens is made, which are then attached to the petals. In addition to flowers, you can also make buds.
Video lesson:
homemade orchid
The video shows in detail how you can create a beautiful beaded orchid with your own hands. We start knitting with green long leaves. Each of them is formed from several wires, on which green beads are put on. Flower petals are formed from pink beads.
Three petals are twisted together, after which the two upper petals and the middle are attached to them, the basis of which is a larger yellow bead. Flower buds also curl from rose petals. The wire where the flowers are attached can be wrapped with green teip tape. Buds and blooming flowers look natural.
Video lesson:
royal orchid
Materials used to create a composition of orchid flowers:
- two-tone beads - white and pink;
- white half-centimeter beads;
- green beads on leaves;
- adhesive tape and floral tape;
- durable electrical wire for attaching flowers;
- millimeter-thick wire for making leaves;
- when weaving, a wire 0.4 mm thick was used.
The flower has five white petals and a pink center. All steps for creating petals are shown in detail in the video and commented in detail. French weaving technique used.
Video lesson:
Golden white orchid.
Orchid petals have different sizes, so for each flower you will need to weave three oblong petals and two rounded petals. Oblong ones are made around an axis with 12 white beads, around which six arcs are formed. In the center of the round petals there are three beads around which you need to make seven turns.
The middle part of the orchid is knitted from golden beads and consists of three small petals. These petals are twisted together and attached to the lower, white petals. Finished flowers are attached to a wire that plays the role of a stem.
Video lesson:
blue orchid
You are offered a master class on creating beaded flowers. Each of the orchid flowers includes petals of several types. The main ones are made 4.5 cm long with blue and transparent beads. Four turns are made around the base. There are three petals in total. Two larger leaves have five arcs around the middle.
Their length is the same - 4.5 cm, but the shape is more rounded. The largest petal is made of beads of two colors - blue and white, which is located around the base in seven rows. The core of the flower is a large white bead and a petal of four arcs of white beads.
Video lesson:
Mosaic orchid part 1
A beaded orchid made with mosaic weaving looks amazingly beautiful. Each flower petal and its center are made separately, after which they are sewn together. All petals are made of white beads, and only when they are sewn together can their edges be finished with a golden fringe of golden-colored beads. You can make flowers in other colors, for example, in pink with a red border.
Beads for edging are taken on a number less than the one from which the petal itself is knitted: this way the flower will take on an elegant look. The consumption of the main bead per flower is 10 grams, and the edging bead is 5 grams.
Video lesson:
Mosaic orchid part 2
In this lesson, it is analyzed in detail how to make a beaded orchid with mosaic weaving, with a golden edging of the petals. If you carefully listen to the instructions of the instructor and repeat all his actions after him, you can master the difficult mosaic weaving, which is more difficult, but also more beautiful than the usual formation of petals with arcs of beads.
It is told how to get a beaded canvas of a petal interspersed with beads of a different color, for example, gold on a white background or red on pink. The finished petal is folded in half and sewn together, which allows you to get the central part of the flower.
Video lesson:
The orchid rightfully takes the place of a favorite of almost all flower growers. This is not surprising: with minimal care in the form of properly selected light and regular watering, the plant pleases as much as possible with extraordinary exotic bright colors and flowering duration. Unfortunately, no matter what positive characteristics this representative of the flora possesses, he does not have the opportunity to maintain his appearance throughout the year. And I would like to admire them all the time! An alternative solution to this issue would be a beaded orchid.
You can buy a ready-made beauty in gift shops, but it is much more pleasant to make it yourself. There are many different ways to make this flower. We offer to consider the most popular weaving patterns.
Weaving a flower for teapots
For experienced beadworkers, it will not be difficult to bring to life almost any idea that only fantasy can suggest. Beginners have a harder time - they still do not have much experience and practice. At the same time, there is a desire to surprise others with their creations.
The master class below is an accessible and simple explanation of the process of weaving an orchid from beads. Thanks to him, even inexperienced needlewomen will be able to make a beautiful flower with their own hands without outside help.
For work you will need:
- Beads of pistachio, bottle, milky and straw colors;
- Large pearl beads;
- Green yarn;
- Wire;
- Fishing line;
- pliers;
- Gypsum;
- Salt and starch dough to strengthen the product in a cache-pot;
- Cotton wool.
A flower arrangement can be made up of a different number of opened flowers and buds. It depends on individual desires and ideas.
The buds of an opened orchid flower are made using the French beading technique. For beginners, it will not be difficult to master it, it is so simple in its execution.

First, the extreme pointed petals are made. To do this, a frame is made from two pieces of wire. A short piece of wire is the base. Rows of beads will form around it. Beads are strung on it in the same order as shown in the image.

For one bud, you need to weave three such petals.


We observe the alternation of colors of beads as in the picture.

It is necessary to weave two such leaves.
We make a figured petal for the core. Weaving begins in the same way as in the previous two examples. Starting from the fifth row, we form an additional arc on the sides.


All the details for the bud are ready. We turn to the manufacture of orchid leaves. They come in two sizes - short and long.
For long ones on the axis, it is necessary to collect twice as many beads as were collected for the petals. The blanks are made in the same way as the petals, as can be seen from the photo.


Finally, an unopened orchid bud is made from a rounded petal. To do this, fold it in half and roll it into a tube. We give a realistic shape to the bud. We make several of these parts.

After all the components are ready, we begin to assemble the product.

First, we make bends on all the details, giving them a resemblance to a real flower.

After that, from two round petals we make the basis for the opened bud. To do this, we fasten them together with threads. We attach the core to them in the same way.

To make it look like a natural original, we make out the middle of the flower from beads.
It is better to take matte beads of a milky shade, which differ slightly in diameter. They will look more natural than the same mother-of-pearl jewelry.


After that, pointed petals are fixed on the craft. The whole structure is reinforced with threads and thin wire.


The beaded orchid, charming in its tenderness, is ready. It remains only with the help of gypsum and salt dough to fix it in a beautiful planter. This craft will take its rightful place in any interior.
For those needlewomen who have been beading for a long time, it will not be difficult to make more complex versions of this beauty.

Video on the topic of the article
You can experiment not only with the color of the buds, but also with the shape of the flower petals. And the variety of types of beads will allow you to make unusual textured crafts with an iridescent effect. How to do this, what materials are better to choose and many ideas for inspiration will be prompted by a selection of videos.
Exotic, beautiful orchids are pleasing to the eye with their very appearance. But these unusual flowers are very finicky to care for. It is not enough just to water them, they need a special soil, a special pot, a special place. But if your orchid is woven from beads, then you won’t have to worry about its “health”, and it will bring you aesthetic pleasure no less than a real one. If you want to admire the flowering of an orchid at any time of the year, then we will show you how it is woven from beads.
There are several techniques for weaving orchids:
Mosaic
The photo below shows an image of an orchid woven using this technique:

Weaving pattern:


brick weaving


French (circular) technique
It is in this technique that our flower will be woven.
Materials:
- Beads (orange, brown, yellow, green) No. 10;
- Beads (yellow) No. 6;
- Copper wire (0.3mm + 0.5mm or 0.6+1mm);
- Round yellow beads (6 mm) - by the number of flowers;
- Green wire;
- Gypsum;
- Pot;
- Paints;
- Earth;
- Brown thread;
- Water.
At the end of the work, we should get such an orchid:

Orchid from beads: step-by-step instructions for weaving
For a beaded orchid flower, the petal weaving pattern is simple, and is a French technique:

A wire (0.3 mm) about 50 cm long is cut off. A loop is made at one end and 4 beads are typed, then a large loop is made at the other end:

We string beads on the remaining long end of the wire (it is necessary that they are in close contact with the first row, without gaps). Three arcs are made on both sides. As a result, 7 arcs should come out:

After the petal is woven, you need to wrap the end of the wire around the loop

Thus, 5 petals are woven. In addition, you need to weave one stamen with a large yellow bead, a stamen with two small yellow beads, central small petals (brown beads) for one flower. Small petals are woven in the same way as the large one, but 8 beads are used for the central row and one arc on each side. For weaving the central small petal. You need to take 6 beads for the central row and make two arcs on each side.

After all parts of the future flower are woven, it is assembled: first, all parts of the middle of the orchids are twisted, then its large petals. Everything is wound with additional wire - this is how the stem of the flower is formed. You need to make 5 such flowers.
Weave buds
Small and round buds are woven with the same French weaving, but with some nuance: the wire is twisted, three beads are typed, 1 arc is made on both sides, and then all the following arcs are woven one bead shorter, while you need to remember to keep them tight tighten. Thus, the petal will turn out not in the shape of a bowl, but convex and semicircular. By combining two such "half-buds" we get one whole. Each half is woven from 6 arcs + the central row. A large (in size) bead is inserted into the bud. There are 4 buds in total.

Weaving green leaves
A thicker wire is taken (0.5 or 0.6 mm) - it will be better to keep the shape of the sheet, which will be large enough. The length of the wire is about 1 m. It is better to make leaves of different sizes.
For the first leaflet, it is necessary to string the beads on 9 cm of wire - this will be the central row. And on each side weave three arcs. The leaf will be about 11 cm long. Add 1-2 cm to the next.
The leaves need to be fastened with green wire (it will be more inconspicuous).

We collect an orchid
On a thick wire, with the help of an additional one, we attach buds and orchid flowers. We wrap the trunk with a brown floss thread - this will help disguise the wire.


Put a crumpled newspaper on the bottom of the pot - this will help to avoid cracks. Gypsum is diluted to the consistency of sour cream and poured into a pot. While the gypsum hardens, you need to stick a flower and leaves into it. It takes about 15 minutes to fully cure. Then you can start decorating the flower. With the help of paints (watercolors or brown acrylic), gypsum is painted over. Gypsum in a pot is covered with earth, and everything is ready. The orchid becomes a wonderful decoration for your home.


To better understand the principle of work, we suggest you watch a video master class on beaded orchids.
Happy creativity!
Video on the topic of the article
Peach Beauty:
Option from Hope:
DIY beaded orchid in a master class (photo)
DIY beaded orchid in a master class (photo)
It is difficult to imagine a flower more delicate and beautiful than an exotic orchid. A variety of varieties and colors provide extensive scope for creative delights.
The orchid is a rather capricious and difficult flower to grow. And then, a real flower will not be able to please you with lush flowering all year round. A handmade flower has a number of advantages:
- color, texture, number of flowers can be any, as your soul pleases;
- a beaded orchid does not require special care, it can stand anywhere, regardless of drafts and lighting;
- in beauty, such a flower is in no way inferior to the original, and its naturalness can only be envied.
True, to create such beauty, you will need to make every effort and effort. But it's worth it! 


Master class on weaving orchids from beads
For the first lesson on creating an orchid charmer, we offer a delicate, peach beauty. A fabulously beautiful flower that requires the exact implementation of instructions, ultimately looks very harmonious and natural. Moreover, for your first beaded creations, use the lessons with step-by-step photos and video tutorials. The photo captures only the key moments and the beginner beading craftswoman has as much time as she likes to consider all the details and small elements. The video makes it possible to use only a freeze frame, on which it is not always possible to consider in detail all the subtleties of the weaving stage. In addition to everything, the video quality is often lame. Choose the most convenient weaving option for you and get creative. 
Beaded orchid is made of five open flowers and four buds. The petals are French braided and look very similar to real petals, so follow the instructions exactly for a great result. The small leaves are woven from dark green beads, as shown in the photo. Use this detailed tutorial to weave your very first flower in a pot. Next time for a beading lesson, you can try to make a beaded orchid according to your own patterns.
To create such a masterpiece in this master class, you will need:
- beads of five colors: orange, brown, two types of yellow and dark green;
- yellow beads;
- thin wire for flowers and leaves;
- thick wire for the stem;
- brown threads for winding the barrel;
- low goshok;
- gypsum.
Now we begin the phased creation of a flower. The first stage will be the most painstaking and difficult.
Weaving the petals and assembling the flower On a piece of wire about a meter long, you need to make a small loop from the edge and string four beads, and twist a larger loop from the other edge, as indicated in the following photos. 
We continue to weave our petal. Now it is necessary to string a certain number of beads, so that they are in close contact with the first row and there is no unnecessary gap between them. Next, perform 3 arcs on each side. In total, together with the central row, we will have to get seven arcs. View a photo of the finished petal, on which you can easily calculate the number of rows. 
After we have finished weaving the petal, the tip of the wire will need to be wrapped a couple of times around the loop. Now you need to close the wire. First, you need to unwind a small loop and straighten the wire, and twist the large loop so that a leg is formed. Next, we turn the seamy side of the petal towards us, bend the top wire and set it in the row of the petal that is in the center. Cut off the tip. As a result, we get a beautiful petal, as in the photo: 
In order to make one flower, you need to continue weaving four more of the same petals according to the same pattern. It is also necessary to prepare one stamen from a large yellow bead, one stamen with smaller yellow beads, as well as small petals, which will be located in the center of brown beads. Two side petals should consist of two pairs of arcs with a central base of eight beads. The petal, which will be in the center, includes four arcs on both sides with a central row of 6 beads. 
We proceed to the process of assembling a flower according to the following scheme:
- we twist brown petals with each other (this will be the middle of our orchid flower);
- twist with each other 5 orange petals;
- in the center we insert blanks from two types of stamens;
- we tightly wrap all parts with another piece of wire, thus forming the stem of the flower.
In total, we prepare 5 flowers for an orchid according to the same principle.
We make buds for an orchid from beads To make a bud, we will use orange beads, one round yellow bead and wire. On the bud we also make according to the scheme using the French weaving technique, like our petals, but with a slight difference, which is that on the wire, we will have to collect three beads and make one pair of arcs on each side.
Now, in order for us not to get a flat-shaped petal, it will need to be shaped into a cup. This is done as follows: the following pairs of arcs need to be made one less bead and tightly tightened. It turns out that the beads will bend by themselves, thus forming a recess of the convex shape we need, as in the photo: 
The first half of the bud should consist of 6 pairs of arcs and one central row. Next, we continue weaving the second similar half. The resulting blanks must be twisted with each other and inserted into the inside of a yellow bead. We sew the edges of the bud with wire.
For a branch of an orchid, we make four such buds.
Let's weave the leaves Let's do the greens. Weaving is carried out using green beads and wire. The leaves for this orchid have a similar weaving pattern, as do all the details. We take a thicker wire, since we will need more beads here than for the petals, respectively, their weight will be greater. The piece of wire should be about one meter.
Weave three leaves about 11, 13 and 15 cm long, respectively. The central rows will have a base in the first version - 9 cm, in the second - 11 cm and in the third - 13 cm. All our leaflets consist of six pairs of arcs, i.e. three arcs on each side and one central row. At your discretion, you can make the leaves a little larger so that the orchid does not look "naked". 
If you refer to the photo, you will notice that the leaves are stitched with green wire in some places. This is done so that our leaves do not fall apart. The seams pass in several places, and the firmware itself is barely noticeable, thanks to the wire matched to the tone of the beads. The ends of the wire must be hidden in the nearby beads, and the excess ends should be cut off.
Formation and decoration of a flower We make a stem from two segments of different lengths of thick wire.
We tightly rewind the thick wire with a thin one, bend the ends in the form of legs. The length of the legs depends on the diameter of the pot or planter. In which the orchid will be fixed.
Fasten the flowers and buds evenly on the trunk with wire, the buds should be on top. 


At the very bottom of the stem, leaves are attached, as seen in the photo. It is important to distribute the sheets around the perimeter of the stem so that the rosette looks neat.
Now use brown threads to decorate the stem of our orchid. Wrap the stem so tightly that the wire is not visible.
In order to tightly fix the flower in a pot, you need gypsum. At the bottom of the pot, you can put pebbles and fragments of old clay pots. The gypsum mixture is poured into the pot almost to the top so that the finished composition is stable. The flower itself must be wrapped so as not to stain with plaster. 


The master class is almost completed and it remains to make the final touches. Paint the surface of the dried plaster, spread the leaves and petals, and set this handmade pattern of impeccable beadwork in the most visible place. Such a chic flower will not leave anyone indifferent. If all the elements are done correctly, the material is of good quality, then the result will be stunning.
Scheme of mosaic weaving of an orchid
You can also make an orchid from beads using the technique of mosaic weaving. To do this, it is best to use the following schemes: 
Scheme No. 1 
Scheme No. 2 
Scheme No. 3 
According to scheme No. 1, it is necessary to weave 3 narrow petals, first stringing ten beads. Next, go through the center and braid additional beads (diagram No. 2), now you need to go back and pull it off. As a result, our leaf will turn out to be embossed.
At the next stage, you need to sew the petals, connecting the edges, as in mosaic weaving.
We start weaving wider petals, by analogy with narrow ones. The only difference will be that at the beginning you need to string 14 beads, according to scheme No. 2. Walk through the center and add additional beads. We go back and tighten.
One of the petals needs to be folded and sewn over the edge.
Weave the edges of wider leaves according to scheme No. 3. It remains to connect the petals by alternating wide and narrow blanks. You can attach a clasp and use such a wonderful orchid in the form of a brooch.
Video: Beading a delicate orchid
Comments
related posts:
 DIY beaded diadem in a master class (photo)
Here we will make such a beautiful orchid
And so for work we need
.beads Czech white No. 10 - 50 gr,
.Czech raspberry beads No. 10 - 20 gr,
copper wire 0.3 mm,
3 beads
let's get started, for starters, let's see how an orchid flower looks disassembled
and so for weaving an orchid flower we will need to weave
3 pointed petals, with a central Axis of 8 beads and 8 arcs,
2 semicircular large petals, with a central Axis of 3 beads and 12 arcs,
the central tongue consists of 2 small petals with Axis 4 beads and 4 arcs, and a triangular petal with antennae, with Axis 3 beads and 8 arcs.
this is what it looks like
now everything is in order, let's figure out what it is axis and arcs
take a piece of wire 50 cm and make just such a basic loop for weaving a petal
I marked in the photo Axis, this piece of wire will be in the very center of our petal and from the amount of beads strung on Axis depends on what size the petal will be. In our case Axis 8 beads, string the beads, and at the end we make a loop
now what is arc, in the photo on the right is a piece of wire, it is longer than Axis, and it is on this segment that we will string the rest of the beads. Arc-this is a segment with beads to the intersection with a half axes
the photo shows one arc, now we need to fix it on axes, for this we make a loop around axes
since we have a pointed petal, the wire needs to be bent downwards
fasten the second arc in the same way from below axes, but in the direction to the side, since the bottom of the petal is round.
For a pointed leaf, the wire is lowered towards the bottom, and for a round leaf, to the side.
now doing 8 arcs, four on each side
see to Axis always been straight, otherwise the petal will be crooked
this is the wrong side of the petal, the rest axes cut and fold from the wrong side
we also make 2 such petals.
Now you need to make 2 semicircular large petals, for this we collect for Axes 3 beads and make 12 arcs, 6 on each side. Remember to follow the direction of the wire when attaching to the Axis.
wrong side
now we need to weave 2 small pointed petals from the central Axis of 4 beads and 4 arcs
Then we make the last central petal, with the central Axis of 3 beads and 8 arcs.
There are two features in the weaving of this petal, since we have it slightly triangular, we do it as usual, but after each attachment to the Axis we insert one bead
after weaving 6 arcs, 3 on each side, we will make the petal triangular, for this we string 9 beads and pass the wire through the 8 bead in the opposite direction
after that we string the remaining beads and fasten at the intersection with axis, Then we do the same in the downward direction, that is, you collect 17 beads, pass the wire through one bead, get the required number of beads and attach to the Axis.
now the final touch, we will attach the antennae, for this from above axes from the inside we fasten a piece of wire bent in half
we string 16 beads on each segment and fasten them by threading the wire into the beads in a downward direction
twirl our whiskers
Now let's start assembling our orchid
take our smallest petals and attach them to the central petal
take the two largest petals and twist them together
then we take the central assembled petal and fasten it to the large petals
well, drum roll))) we take 3 pointed petals, first we fasten the two lower ones, and then the 2 upper ones
we take a bead, thread a wire into it and install it between small petals
So my master class has come to an end, I hope it was useful to you.
To publish my Master class, please make a link to the original.
Here is such a "dendrobium-phalaenopsis" blooming for me, I saw this color of beads - and could not resist not to buy, then I found a photo of the inspirer's flower and, looking at the work of the girls and a living flower for a long time, - I wove it .... I wove the middle a photo of a living flower, of course, you can’t convey all the transitions of shades with beads .... But I tried !!! Thank you all for your attention and inspiration!!!
flower making
1. The flower consists of three elongated petals, two wide petals and a "lip".
For elongated petals, we string twelve beads - this is the central frame (Fig. 8, 9). Around we weave twelve rows in a circular technique - this is the top and bottom of the petal. For one flower, you need to make three such petals.
2. For wide petals we string three beads - the central frame, around fourteen rows, the top is rounded, the bottom is pointed (Fig. 8, 9). For one flower, you need to make two such petals.
For all five petals, from the base to the middle, make specks of dark red beads, symmetrically alternating three white beads and one dark red.
3. "Lip" consists of five parts: three petals and two tubules.
3.1. Two petals are the same, made of pink beads. The central row is four beads, around eight rows. The top and bottom are rounded. In the upper part, before the penultimate and last rows, string one bead on the central wire.
3.2. The lower petal of the "Lips" is also made of pink beads. Central row - six beads, around ten rows. To stretch the petal, add two beads to the central wire in front of the penultimate and last rows, as in the previous paragraph. We make the central row and six subsequent ones in a speck, alternating two pink and one dark red bead.
3.3. For the lower tube, we string twelve dark red beads, perform four rows around, connect the lower and upper wires, twist.
3.4. We perform the upper tube with parallel weaving: seven rows of seven beads each, we connect into a tube.
We connect in the following sequence: three elongated petals, two wide petals, three pink "lip" petals, two tubules. We twist all the wires and wrap them with light green threads for six to seven centimeters.
leaf making
Since the leaves are large and very heavy, it is better to weave them using parallel weaving (Fig. 10a, b).
In total, you need to make five or six leaves. Each sheet consists of two parts, a strip of two dark green beads runs through the center. The first row is made of five beads. In each next row, add two beads until there are twenty beads. Twenty beads - the middle. From the middle, we begin to decrease in the same order that we added. Using the diagram in Figure 106, we weave the second symmetrical first half of the sheet. We connect the leg of the sheet with the rod and wrap it with green threads for six to seven centimeters.
Assembly of the orchid as a whole
There may be three to seven flowers on the peduncle. Attach the flowers, with their stems already wrapped, to the rod at a distance of three to four centimeters from each other.
Wrap the rod with attached flowers with dark green threads.
In a flower pot or vase, place gypsum soaked to the state of plasticine. Stick in the center - a peduncle, arrange the leaves around. Let the plaster dry. Tilt the stem of the peduncle slightly at the top, straighten the petals and leaves. Give your orchid a natural look.
The source of the article is the magazine "Wonderful Moments" http://www.ch-mgnovenia.com
Step-by-step master class "Orchid Bead" orchid from beads.
I love orchids very much, this is one of the most important reasons why I decided to have this cute flower in my home.
To begin with, it was necessary to choose a color, type and variety from hundreds of varieties. And finally, I decided, I really liked a branch of a pink orchid with round petals, but I didn’t have such beads, but there was a lot of soft orange, and then I had to combine a pink and orange orchid to weave something alternative.
Detailed and visual description of the work
Necessary materials:
Beads orange №10
- brown beads №10
- yellow beads №10
- yellow beads No. 6
- copper wire 0.3 mm
We start to weave petal using the technique of French weaving flowers. Cut the wire about 50 cm long. Make a small loop from one end, pick up 4 beads and twist a large loop on the other side as shown in the photo.
Weave a petal, pick up so many beads so that they fit snugly against the first row and do not create extra space. Make three arcs on each side. Given the central row, you should get 7 arcs. See the photo below, on the petal you can clearly see how many rows and it is easy to count.
When the petal is ready, wind the end of the wire around the loop several times.
It's time to terminate the wire. First, unwind a small loop, straighten the wire (see photo below). Twist the bottom large loop to get a leg. Turn the petal towards you with the wrong side, bend the top wire and straighten it into the central row of the petal, and cut off the end. That's how you got a neat petal!
For one flower you need to weave 5 identical petals, 1 stamen with a large yellow bead, a stamen with 2 small yellow beads and central small petals of brown beads. Two sidewalls consist of two arcs and a central row of 8 beads, and a central petal of four arcs (2 on both sides), and a central row of 6 beads.
To collect a flower, first twist the middle of the flower together, then twist five petals together and insert the middle into the center and wrap these parts tightly with additional wire, forming one flower leg. Weave a total of 5 orchid flowers to create an arrangement.
2. Orchid flower bud
For this button you will need:
Orange beads №10
- round bead 6 mm yellow or similar to the color of the beads
- copper wire 0.3 mm
We weave a bud with the same French weave as the petals earlier, but with a little trick! We twist the wire, collect 3 beads, make one arc on each side.
Now the most important! In order for you to get a cup, and not a flat petal, you need to make subsequent arcs a bead shorter and tighten tightly. The beads will have nowhere to go and will bend, creating the necessary convex shape.
One half of the bud consists of 6 arcs and 1 central row. Weave the second one, twist their legs together, insert a bead and sew the bud with wire. I needed 4 of these buds.
To weave a sheet, you need to take:
Green beads #10 or #8
- wire 0.5 mm or 0.6 mm
- green wire 0.3 mm
For weaving long and rather large orchid leaves, I took a much thicker wire so that it could hold the shape of the leaf under the weight of the beads. I needed a piece of wire that was quite long, not less than a meter !!! I wove three sheets of length 11cm, 13cm and 15cm. The central row was 9cm for the first, 11cm for the second and 13cm for the third. Each sheet consists of 6 arcs, 3 on each side plus a central row.
To prevent the sheet from falling apart, it needs to be stitched. The photo above shows that the seam runs in two places, it is almost invisible because I used green wire. I hid the ends in the nearest beads, and cut off the excess.
4. Assembling and planting an orchid
Necessary materials:
Wire 1mm in diameter
- brown thread
- gypsum
- water
- pot
- newspaper
- watercolor paints
- some land
We take a thick wire and attach buds and orchid flowers to it with additional wire. To hide the wire, wrap the trunk with brown floss thread, the same with the second branch of the orchid.
Now line the sides of the pot with crumpled newspaper to avoid cracks. Dilute gypsum with water, achieve the consistency of sour cream and pour it into a pot. While the plaster has not set, stick the flower and leaves in, hold them for a while until the plaster hardens. If you did everything correctly, then after 15 minutes it will be possible to decorate the surface of the plaster. I took dark brown watercolor paints and painted white plaster. Sprinkle a little earth on top.
Since orchid flowers are quite heavy, you can prop them up with a stick or make a thick wire support.
Finally everything! Your orchid is ready to decorate your home and delight the eyes of everyone around you. I wish you pleasant needlework and your own ideas!


