DIY goat, goat or kid mask. Carnival goat mask DIY goat mask
It’s very simple to make a mask of a fairy-tale goat or a funny baby goat with your own hands. This craft may be needed quite often. Every year, kindergartens and schools host masquerades and Christmas tree parties, where children must perform in a play or simply be dressed up and fabulous guests at the Christmas tree. In children's preschool clubs, creative associations and art schools, performances can be staged at any time of the year, where one of the main characters is a goat with kids or a goat. Perhaps your child is participating in a craft competition or simply wants to do something creative.
Homemade costume options
 Sometimes parents simply rent a costume for their child; even less often, they buy it in a store or secondhand. Most often they try to make it themselves. After all, this is not only saving the family budget, but also a pleasant time spent with the child. You can make a goat mask in different ways: you can glue and cut from paper, you can sew from fabric or felt, can be made from scrap materials, make it from foam rubber or use the papier-mâché technique.
Execution technique depends depending on the availability of time and desire. There are models that will take no more than ten minutes to complete. There are masks that even a preschooler can handle. Sewing or design made from foam rubber will be somewhat more difficult, but the result will be no worse than a store-bought suit.
Paper goat mask
This is the easiest and fastest option manufacturing. But it can also be implemented in several ways.
Here are the minimum required materials for manufacturing such masks, which are in every home:
- a sheet of thick white paper or Whatman paper;
- paints, pencils or markers;
- scissors;
- glue stick or any other glue;
- linen elastic;
- threads;
- needle.
 You can use a paper mask draw on white paper and color with paints or pencils. The child himself can color the mask; even a toddler can be trusted with this process. On the sides of the future mask you need to make a small supply of paper in the form of an ear. It is best to first mark on a piece of paper where the eyes will be located and at what height and distance relative to the top of the mask.
Now you need to cut the mask along the contour, not forgetting about the ears on the sides for attaching the elastic. After the mask is cut out, you need to make a puncture in the center of the side ears with sharp scissors and cut a small hole for the elastic band. In the places where the eyes are drawn, you need to make a puncture with scissors and carefully cut out small holes. If you want to make the mask more durable, the resulting blank can be glued to cardboard. For gluing, it is best to use pencil glue rather than PVA. Using PVA glue may wrinkle the top layer of paper.
 After the mask has dried and stuck together, measure the required length of the elastic band. Determining its length is not difficult: to do this, you need to pass a piece of elastic around the circumference of the head, placing it above the ears. After stretching a little, cut off the required length. The ends of the elastic are passed through the slots on the side ears of the mask. A small fold is made and the elastic is stitched with a thread and a needle several times. The mask for a game, carol, performance or masquerade is ready.
If you doubt your artistic abilities, you can use a ready-made template by first printing it on a printer. You can print a goat head mask on a black and white printer, if the template later needs to be colored. If the template is color, then the best option would be to contact any color printing photo center.
There are many beautiful templates of fairy-tale characters, cartoon faces of little goats, or realistic goat heads on the Internet. There are ready-made templates, already colored, and there are templates that, after printing, you need to color yourself. All that remains is to cut out the mask, making cutouts for the eyes and elastic bands, insert the elastic band and sew it on, or simply tie it in knots.
Masquerade mask made from scrap materials
The key here is the presence of imagination and a creative approach. You can make a simple goat face mask using a round base. It can be either a disposable plastic or paper plate or a vinyl record.
 Slots are made in the circle for the eyes and on the sides for the elastic to pass through. Using a marker on a white background, draw the nose, mouth, and outline the eyes of the future goat. You can cut out parts from colored cardboard and stick them to the base using a glue stick. Horns are also cut out of colored cardboard and glued to the animal's head. If you are making a mask from a vinyl record, then instead of a marker you need to use a white corrector-shade. After the muzzle is ready, you need to secure the elastic band as in the previous paper version.
Here you can entrust the work to your child. Even a three-year-old child will be happy to make an applique out of paper. The creative process can go further than making a mask. By preparing details such as legs and a tail in advance, you can make a whole goat from a vinyl record.
Goat legs made of paper
On cardboard you need to draw four identical leg blanks and a small tail. The parts should be cut out and painted, and then glued together with the child to a round blank. By gluing a loop to the back of a round figurine of a goat, with legs sticking out in different directions, we got a funny toy that can be hung on the wall like a funny panel.
We use fabric or felt
To make a masquerade attribute from fabric or soft-touch felt you will need:
- pieces of fabric (felt);
- two ribbons that serve as ties;
- scissors;
- needle and thread or glue gun;
- newspaper;
- felt-tip pen or pen;
- a piece of soap or chalk.
On newspaper or plain paper, draw the face of a goat, baby goat, or billy goat. We trace the resulting part on the fabric with chalk or soap. Using scissors, we cut all the parts from the paper face along the contour.
 The resulting details should be transferred to the fabric. Having attached the paper templates to the material, you need to circle the edges with chalk or a piece of soap. Using sharp scissors, cut out the parts.
In the next stage of making the mask, you need to either glue it with a glue gun or simply sew the details of the fabric appliqué to the base of the mask. All that remains is to make slits for the eyes and sew two ribbons along the edges of the product and you can go to the masquerade.
Foam toys and masks
Using foam rubber, you can also create wonderful products. This is a more complex technique that a child cannot handle. The child can be asked to color the goat’s face and take part in assembling the finished parts.
To make an original volumetric mask you will need:
- foam rubber 2 cm thick;
- scissors;
- ruler;
- pencil;
- glue "Moment";
- acrylic paints.
If the mask is intended for a child, it is better not to make the structure closed, as it will be very difficult to breathe through the dense material. Therefore, it is better to make it in the form of a hat.
 To do this, cut a rectangle from the foam rubber. The length of the rectangle is equal to the circumference of the head. Draw identical triangles along the long side of the rectangle and cut them out. This creates a rectangle with teeth on one side. The scissors must be held strictly perpendicular to the foam rubber so that the craft is neat after gluing. Glue the ends of the rectangular blank and the edges of the foam teeth together. It turns out to be a hat.
Let's make the baby goat's face. To do this, cut out ¼ of a circle from foam rubber, the radius of which is equal to the desired length of the nose. We glue the edges together, resulting in a cone.
To make a lower lip from foam rubber, cut out a semicircle whose radius is equal to the length of the lip. We glue the finished part to the cap, bending it in the shape of a boat.
To make horns from foam rubber, narrow triangles are cut out. Their edges are glued together to form two parts in the form of cones. To give the horns a realistic bend in the middle part of the horn, you need to make several darts and glue them together with glue. The ends of the horns are generously smeared with glue and glued to a foam cap.
The ears are made from isosceles triangles cut from foam rubber. The triangles are slightly rounded and glued to the cap just like horns.
All that remains is to decorate the foam mask. The eyes can be drawn on or glued on as a fabric applique. Eyelashes can be drawn on with a marker or false eyelashes made of fabric or wire can be glued on. Using acrylic, watercolor or gouache paints, the nose is drawn, and the horns are painted in a dark color.
Papier-mâché goat's head
The papier-mâché technique allows you to make both a flat and voluminous face of a goat. To make a mask, you need to make a cast from plasticine and let it harden for several hours in the refrigerator. Then the plasticine base is moistened with water and 4-5 layers of finely torn paper or newspaper are gradually applied to it.
After the first layer of paper has dried a little, the workpiece is generously greased with PVA glue diluted 1 to 1 with water. The next layer of paper is pasted. The craft is dried, then smeared with glue and covered with paper again. After 4-5 such layers of rough paper, the same process is done, but using white writing paper. After 3-4 such layers, the craft is left to dry completely overnight.
After the workpiece has dried, you need to remove the plasticine. This can be done with a stationery knife. All that remains is to color the craft at your discretion and glue the ties.
Making a fancy dress costume for a child for kindergarten or school with your own hands is not at all difficult. The simplest and fastest option is a goat head mask made of paper, which can be printed on a printer. A hand-drawn and self-painted model will require a little more time. All you have to do is choose clothes to match the color - and the suit is ready.
Attention, TODAY only!
Merry New Year's carnival, how can you do without a costume and mask? Paper masks are the best option to complement a New Year's costume. The queen of the New Year 2027 will be a goat, a paper mask made using the papier-mâché technique, made with your own hands, will make your child unique, and, of course, will save money in your wallet.
How to make a carnival goat mask from paper
Papier-mâché is a technique for working with paper. With its help you can make toys, dummies, and various figures. Let's try to make a mask from papier-mâché. It's very simple. True, it will take time, patience and perseverance. You can involve children in creativity. They will be happy to help you.
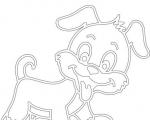
To make this goat mask (Fig0) you will need:
- plasticine;
- newsprint and white plain paper;
- PVA glue or paste;
- brush;
- water;
- paints.
So let's get started.
First, draw a sketch of your mask. Based on the finished sketch, you need to sculpt it from plasticine. If it is too hard, soak it in warm water for a few minutes and it will become soft and pliable.
Now our “blank” is ready, onto which we will glue pieces of torn paper. 
You can use PVA as glue, but for working with children, it will be safer to make a paste. To do this, thoroughly stir 2 tablespoons of flour in half a glass of cold water. Bring water (1 cup) to a boil and pour the resulting mass into it, being sure to stir. In a minute the paste is ready.
 While the glue cools, prepare the paper. Tear newspaper and plain paper into pieces approximately 1.5 x 1.5 cm

Now we make the first layer of white paper, but glue it with water. This is necessary so that the mask can easily come away from the plasticine. 
Second layer. We glue the newsprint with glue, like all subsequent layers.

The third layer is again white, the fourth is newspaper, that is, we alternate layers so as not to get confused. You need to make 9 layers.
Now you need to let the mask dry. You'll have to wait a couple of days. Then carefully remove the plasticine.

We trim the edges of the mask with scissors and protect the surface with sandpaper.

All that remains is to decorate the mask and it is ready!
Merry New Year's carnival, how can you do without a costume and mask? Paper masks are the best option to complement a New Year's costume. The queen of the New Year 2015 will be a goat, a paper mask made using the papier-mâché technique, made with your own hands, will make your child unique, and, of course, will save money in your wallet.
How to make a carnival goat mask from paper
Papier-mâché is a technique for working with paper. With its help you can make toys, dummies, and various figures. Let's try to make a mask from papier-mâché. It's very simple. True, it will take time, patience and perseverance. You can involve children in creativity. They will be happy to help you.
To make this goat mask (Fig0) you will need:
- plasticine;
- newsprint and white plain paper;
- PVA glue or paste;
- brush;
- water;
- paints.
So let's get started.
First, draw a sketch of your mask. Based on the finished sketch, you need to sculpt it from plasticine. If it is too hard, soak it in warm water for a few minutes and it will become soft and pliable.
Now our “blank” is ready, onto which we will glue pieces of torn paper. 
You can use PVA as glue, but for working with children, it will be safer to make a paste. To do this, thoroughly stir 2 tablespoons of flour in half a glass of cold water. Bring water (1 cup) to a boil and pour the resulting mass into it, being sure to stir. In a minute the paste is ready.
 While the glue cools, prepare the paper. Tear newspaper and plain paper into pieces approximately 1.5 x 1.5 cm

Now we make the first layer of white paper, but glue it with water. This is necessary so that the mask can easily come away from the plasticine. 
Second layer. We glue the newsprint with glue, like all subsequent layers.

The third layer is again white, the fourth is newspaper, that is, we alternate layers so as not to get confused. You need to make 9 layers.
Now you need to let the mask dry. You'll have to wait a couple of days. Then carefully remove the plasticine.

We trim the edges of the mask with scissors and protect the surface with sandpaper.

All that remains is to decorate the mask and it is ready!
New Year, masquerade or themed holiday - almost none of the events listed above takes place without a child wearing a carnival costume.
Quite often, children dress up as various funny animals. And an integral attribute of the carnival image is a mask. It is also needed for caroling with children. You can either make it yourself or purchase it in a store. However, a product made at home with the mother will be much more interesting for the child than a purchased one.
Papier-mâché is one of the simplest ways to make a three-dimensional mask for a carnival. Creating such a thing for Christmas or caroling is a creative process that broadens a child’s horizons and develops his imagination. Translated from French, the phrase “papier-mâché” means “crumpled paper.”


Papier-mâché goat face
This master class will show you how to make a papier-mâché goat mask for your head.

Materials for creating our mask
- newspapers or paper scraps;
- plasticine;
- thin, white paper (writing);
- paints - gouache or acrylic;
- brush;
- water;
- rubber;
- PVA glue.
Master class
- A papier-mâché goat mask can be made in different variations; there is no single pattern for it. Therefore, as a basis for a muzzle made of paper using the papier-mâché technique, it is necessary to sculpt a mold from plasticine, taking into account the size of the face of the person for whom the mask is being made.

- The base for the future must be placed in the refrigerator for 3-4 hours so that it becomes harder. When the base has hardened, remove it from the refrigerator.
- Pour water into the bowl. After this, pre-prepared newspapers or paper scraps should be torn into small pieces.

- Wet the surface of the plasticine base with water from a bowl. It is important that its entire surface is wet. After this, attach all the pre-torn paper pieces to the base so that it is completely covered with them. The entire goat mask should be covered with paper in 1 layer.
- Allow the first layer to dry a little, but do not allow it to dry completely. After this, dilute PVA glue with water in a ratio of 1 to 1. Dip a brush into the resulting mixture and generously lubricate the entire future face of the goat with it. At the same time, it is worth covering the surface of the muzzle with pre-made scraps of paper, periodically coating with diluted glue. From newspapers or scraps of paper, you need to make 3-4 layers on the base in this way.
- After this, similarly tear the white writing paper into small pieces. It also needs to be glued to the base in 3-4 layers. Don't skimp on the glue; the paper pieces should be well saturated with it.
- The base should be left to dry for about a day. After the goat's head is dry, you can remove the plasticine. You can cut pieces of plasticine using a stationery knife. You also need to trim the edges of the product with a knife so that they are smoother.

- The papier mache goat mask is almost ready. Now there is a white base that now needs to be painted. You can paint the goat according to your taste and color. Surely the child will be interested in putting his hand to decorating the face.
- In order for the mask to stay on your head, you need to attach an elastic band to the sides. To do this, use a hole punch to punch 2 holes. And thread an elastic band through them. Its length is measured so that the mask is securely attached to the child’s head.

As you can see, the goat mask is made with minimal materials and time. The painted face will be an excellent addition to a fancy dress costume. The product can be used by both caroling children and adults.

But if you don’t have any extra time to create an animal’s face, then you can use ready-made templates.
Using this pattern, you can make a mask of a kid or a goat.
Paper goat face
Using the suggested templates you can make a New Year's face of a goat. You need to download the template you like, and then print it on a printer and cut it along the contour. In order for the mask for children to be stronger, it must be glued to a cardboard base. An elastic band is used as a fastener in the paper muzzle of the animal.
Which masks are the easiest to come up with? Most likely, the masks are of animals whose faces resemble the proportions of a human face. For example, a cat (unlike most other animals) has close eyes and a short nose. Accordingly, it’s easier to come up with. But coming up with a “style” for an ungulate mask is much more difficult. The hoofed eyes are set wide apart, the line of the nose continues the line of the forehead, the length of the muzzle is much greater than the width. In general, the shape of the ungulate skull is very different in shape from the shape of the human skull. So any mask of an ungulate animal very roughly resembles the real face of an ungulate animal.
Let’s take, for example, a sheep or goat mask (I highly recommend reading the article:), made like a visor. This mask looks convincing, but creates inconvenience for the actor by putting pressure on the nose. Therefore, it is necessary to build in the bend of the bridge of the nose. Let's try to make a sheep mask, because next year, 2015, will be the year of the sheep. The demand for masks gives rise to supply, and here is our offer dedicated to the New Year. Our mask looks real.
Sheep mask
Usually I make a mask, and, making sure that it turned out well, I take it apart and rightfully offer readers a pattern. Here the details of the goat-sheep mask pattern are shown in comparison with a standard sheet of A4 cardboard:

Sheep (goat) mask pattern
The eye holes should be cut larger, since when making (pinching with a stapler - read about this) folds on the bridge of the nose, the distance between the eyes increases, and the eyes themselves decrease. We make slits from the temples to the corners of the eyes and glue narrow triangular inserts into them: this is necessary so that the mask gains volume and its nose moves forward slightly. This way he won’t put pressure on the actor’s nose, but he won’t protrude too sharply. We wrap the nostrils cut out at the end of the muzzle inward and glue them together with a small triangular piece - the nose takes on a sheep-goat appearance.

The ears of goats and sheep stick out to the sides; so that they too become voluminous, cut the dart, slightly bring its edges one after the other and glue them together. Let's attach them to the mask approximately where a person would have temples, and make eyelids with eyelashes for the eyes. Cut out the crescents of the eyelids, cut along the lower edge and bend the fringe of the eyelashes upward. We will make shallow cuts on the upper edge of the eyelids, bend the resulting “flaps” and use them to glue the eyelids above the eyes. Here is a simple and easy-to-wear sheep mask that you can make with your own hands from paper or cardboard. It is best to attach it to your head using an elastic band threaded through the holes cut at the temples. This sheep can be easily converted into a goat mask. Let's just attach the long horns.