DIY roses from old jeans. Do-it-yourself denim rose (master class)
As often happens, a small accessory, seemingly insignificant at first glance, suddenly sets the tone for the entire look as a whole.
However, few fashionistas can boast of having hundreds of such bright details in their wardrobe that fit absolutely any outfit.
There is an exit. An original thing can be easily and simply created with your own hands.
This will require very little free time and a minimum of materials that are likely to be available in every household.
Today we offer to sew a rose from one of the most popular fabrics - jeans.
Any needlewoman can turn such a flower into an elegant hairpin, attach it to a hair hoop, use it instead of a brooch or as a decoration for a bag.
You will need:
- denim;
- scissors;
- thread and needle;
- ruler;
- compass;
- protractor;
- marker;
- template cardboard.
The first task is to make a template. It is a regular hexagon with a side of 12 cm.
A similar hexagon is carved inside it, but with a side of 6 cm.
To make the process easier, you can do this:
- draw a circle with a radius of 12 cm using a compass;
- in the center draw another circle with a radius of 6 cm;
- mark circles with a protractor, marking every 60 degrees;
- connect the marks with straight lines - you get hexagons;
- cut out the inner shape.
Using the template, mark on the fabric and cut out two blanks - a large and small hexagon.
Connect the blanks with the front parts to each other. From the edge of the large figure, form one fold so that its length decreases and coincides with the length of the edge of the small figure. Sew at a distance of 0.5 cm from the edge.
Do the same with five of the six faces. Please note that the folds must be bent strictly in one direction.
When only one non-stitched edge remains, turn the product inside out. Its shape will resemble a cone.
Form a crease on the last edge and carefully sew the outside with a blind seam. Straighten the corners well.
Grasp the top of the cone lightly with your fingers and, scrolling it in the opposite direction in relation to the folds, press the cone all the way down.
Fix the center with a thread, connecting the lower and upper part. Rose is ready.
Sew on a loop, elastic band or glue a clip to fix the flower.
You can also simply sew the finished accessory to some clothes or create another larger decoration based on it.
After reviewing many workshops on fabric roses, it turned out that most of them require a lot of time. Therefore, consider a simpler and more affordable way to make beautiful flowers in a minimum of time. One flower takes only 1 minute.
DIY fabric roses master class
To make roses we need:
1. Remains of jeans;
2. Scissors;
3. Threads with a needle (for fixing a ready-made rose);
4. Centimeter.

Cut each leg lengthwise into strips.

This is what it looks like cut up. From one half of the leg, 2 strips are obtained.

We cut off all the extra thick side seams from our strips so that they do not interfere with us in the future to twist the rose.

This is how we should be. A big plus is that there is no need to finish the edges of the fabric.

The width and length of the stripes can be completely different. The longer the strip, the wider it can be. If the strip of matter is ukaya, then the length also decreases. I got strips 44 cm long and 10 cm wide.

Now fold our strip in half lengthwise.

And proceed to the formation of the bud. To do this, we bend the edge of our denim tape. We have a corner.


Now let's bend the sharp part of our bag and make one more turn of our bud.

This is how it should look after the rotation. Our sharp corner has now flipped from the inside to the face and came up to the folded edge of the denim strip.

We take and turn the fabric starting from the bud back. Now we have the top edge of the tape become the bottom. We make one more turn of the button.

When turning, the flower should again be near the edge of the folded fabric. Now we are starting to get small.
We continue to alternate two movements:
1. Twist the free left side of the fabric back again.
2. We make a turn of the bud.


Each time you turn the bud is close to the curved edge.

After making a few turns, a flower is already obtained.


Cut off the rest of the material.

We turn to the processing of the wrong side of the flower. We remove the edge of the cut fabric under the crease of the bud. Since the fabric is dense, it holds its shape quite well.

Now it remains only to fix everything with a thread. The main thing is to flash the whole rose through, capturing both the edges and the middle. Having made several punctures, you will stop deformation and untwisting.

Here is such a rose. Twisting a rose takes less than a minute. Then they can decorate clothes or make an original bouquet by first attaching a wire stem to the flower.


Since time immemorial, women have been looking for ways to beautify their appearance. Over the centuries, shapes, colors, materials have changed, but one thing has remained unchanged: the presence of flowers in the female image. Since fresh flowers are short-lived and cannot decorate a lady's outfit or hairstyle for a long time, invariably fading, inventive craftswomen have come up with ways to recreate natural grace from improvised materials. Modern needlewomen, using the most affordable fabric - denim, have come up with simple ways to make a flower that can even decorate an evening outfit. You can refresh their appearance with the help of a simple decor - make beautiful and bright flowers with your own hands quickly and easily from denim.
Denim clothing today rightfully occupies one of the leading places in the wardrobe of every fashionista. And if not everyone has sundresses, overalls and dresses made of this fabric, then jeans and a denim jacket are sure to be found. You can refresh their appearance with the help of a simple decor - do-it-yourself flowers from ordinary denim. Let's take a look at the stages of this process step by step.
We make flowers from denim with our own hands
To create a denim masterpiece, you need very few materials.
- Denim;
- Scissors;
- Glue;
- Accessories.
To create, it is not necessary to buy denim, because in the wardrobe there will always be old jeans that have served their time, but it is a pity to throw them away. It's their time!

There are an endless number of ways to make a beautiful rose out of old pants.
We cut out a strip of jeans 5-8 cm wide and any length (depending on the desired volume of the flower), fold it in half lengthwise and twist it in the form of a rose. The base is sewn with threads. The simplest flower is ready and looks like it is shown in the photo.

The creation process is no more difficult than for the previous decoration, but the result is a lush airy flower. It is necessary to cut 5-6 flowers of the same shape, but of different sizes. For example, 5 pointed flowers with five petals in size from largest to smallest. Fold them on top of each other and fasten in the center with a button, decorative pebble or accessories. If you want to avoid unnecessary elements, then the flowers can be glued together.

Below are diagrams, by printing on cardboard you can easily make such beauty.
You can draw a template yourself.

As the name suggests, this decoration will take a little more time and patience to create as each petal will require individual attention. For this, it is not necessary to use schemes or templates. You can independently draw petals of different sizes on the fabric, cut them out and sew them together. The step by step process is as follows:
- We draw 10-15 petals on denim, depending on the desired splendor of the flower. Petals should be different sizes. 3-4 large, 4-5 medium, 3-4 smaller and a couple of small ones. To make the flower more lively and voluminous, the shape of the petal should resemble a drop: from above - wider, from top to bottom - narrowing;
- Cut out the resulting petals. Moreover, the edges can be either bent and hemmed, or left unprocessed, or gutted to make a fringe;
- Sew the flower, starting from the center. We take the smallest petal, twist it with a tube, sew the next largest petal to it at the base, then take a slightly larger petal and sew it to the resulting core. In this way, all the petals are sewn until a flower of the desired volume and size is obtained;
- You can work the edges of the flower with a hot knife, bending the petals outward to get the effect of a lively rose. Decorate the resulting product, if desired, with beads, rhinestones or accessories.
The result may be such a product.

In our MK, we showed only the main ways of making a flower from the most ordinary denim quickly and simply with our own hands, modifying which you can create your own unique works that no one else will have. Your imagination can suggest your own options for creating an accessory, and all of them will be correct, and the result will be original. Add mesh or chiffon fabric, beads, petals, chains with pendants - experiment. The most important thing is not to be afraid to create, because if you don’t like something as a result, you can always redo it.

Video on the topic of the article
For inspiration, a video selection of interesting master classes on creating interesting flowers is presented. Happy creativity!
Here is such an original brooch - a rosette offers us to make a craftswoman Joan from a denim ribbon. 
To make this flower, Joan needed the following materials and tools:
- hem from a denim sundress,
- sewing needle and strong thread
- brooch base,
- scissors,
- pliers (optional)
- small piece of leather (optional)

Step 1. Take a sleeve from a sundress or any other piece of clothing that has a tucked stitched seam on it. Cut the connecting seam from the sleeve and unfold the piece. 
Step 2. Cut off the tucked seam from the part and you will get a denim ribbon from which you will make a flower. 
Step 3. Roll the tape into a roll as shown in the photo. 
Step 4. In order to fix the result, sew the resulting core of the flower from the wrong side. 
Step 5. To create the petals, sew the ribbon around the core, slightly stretching it. To get more embossed flowers in some places, pull off the tape as shown in the photo. 
Step 6. Form a flower of the required size. 
Step 7. Bend the end of the flower and sew it to the bottom of the rose 
Step 8. Here is how the denim flower should look from the wrong side. 
Step 9. From the same fabric or similar in color, cut out the leaves. 
Step 10 Here are all the details for making the brooch. You can also cut out a circle of leather, which will serve as the basis for the brooch. 
Step 11. Sew or attach the base of the brooch to the leaves and flower. 
Here is such a beautiful brooch turned out by Joan. 
DIY denim flowers
The second master class was prepared by craftswoman Kara, here is what she writes in the preface to her lesson: “Once I went to the Google analytics website, I saw that many people were looking for a master class on creating a flower from denim. I came up with the idea that it would be nice to make a photo tutorial on making an original flower from old worn jeans. Here's what I got.»

To make this flower you will need:
- a pair of old jeans
- flowers of different sizes (templates),
- scissors,
- button,
- threads, needles.

Step 1. Cut out a small flower from paper and draw larger flowers on the basis of it, each time adding 0.3-0.5 cm to the outline of the flower.
Step 2 Attach the paper templates to the jeans and cut out the flowers from the fabric.

Step 3. Lay the flowers starting from the largest one on top of the other as in the photo and mark the core with a button. 
Step 4. Sew all parts of the flower together, you will need a thick needle because it is not easy to pierce a layer of denim. 
Step 5. In order to further decorate the flower, you can sew a crocheted flower into the center of the product. 
Step 6. The core of the flower can be different, my choice is a vintage button.
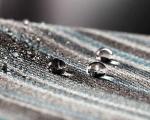
Step 7. To make the flower look more lively and natural, sprinkle it with just a little water.

Step 8. Crumple the moistened flower as shown in the photo and hold it for several minutes, if it seems to you that this is not enough, additionally pull the petals in different directions. After this procedure, you will get such a pretty "living" flower. 
Flowers should be different for all occasions. Not everyone has a special tool for making flowers. Or maybe a person needs a very unpretentious decoration - so that even in the rain you can take a walk in the snow. Yes, such flowers will be significantly different from living ones, resembling them only in shape. However, they can also become a desirable and beloved decoration.
Denim Rose
Denim is a very interesting material that is easy to work with even without much experience. The main thing is just to be able to thread a needle and make ordinary stitches.
- Rose pattern.

For those who are not familiar with the manufacture of flowers: you need to cut out the petals along the oblique thread of the fabric. This means that we lay the pattern on the fabric at an angle of 45 degrees, and not along the edge of the fabric or across. This is done so that the petals are deformed as best as possible.
Number of details:
No. 1 - 3 pcs;
No. 2 - 3-5 pieces (I have 3);
No. 3 - 5 pcs;
No. 4 - 1 pc.
Details for the leaves will be discussed below. Until you cut them out. - To create such a rose from fabric, it is necessary to carefully prepare its middle, namely the central cone.

Take the wire, it will simplify the assembly of the flower. I have summer. Who does not want to complicate his life, take a well-flexible wire in isolation.
We also need foil. As a rule, any hostess who periodically cooks food has it - foil for baking. It is very easy to form such a cone from foil, as you see in the photo above. What size should it be? Our task will be to wrap this cone with petals No. 1, which means that it should be slightly smaller than the petals themselves (fit inside them and not stick out). - After you have made the cone, pierce it with an awl or a thick needle, stepping back about 5 mm from its base. Pass the wire through the hole and fix it.

In this photo, you can best see what size the foil cone should be.
To make the rose more voluminous, fluff the edges of the jeans with an awl (the petal on the left has already been processed, but the rest have not yet). - We begin to form the middle of the rose. For this we need glue. I used glue that is heated in a special glue gun. You can use glue "Titan", "Moment" or any similar.

Glue one petal to the middle, leaving the left side of the part free. This is done so that under this not glued edge, we will bring the edge of the last petal and we will get something like an impeller in the middle of the flower, just like a real live rose.
All petals, and we have three of them, should be symmetrically located around the central part of the future flower.
Glue the second petal, it should tightly cover the cone.
Then glue the remaining petal by bringing its left edge under the remaining free edge of the first petal. The middle of the rose is ready.
- Petals No. 2 around the edges with an awl. Take strong threads in the color of the fabric and pull each petal from the bottom, stepping back from the bottom edge of 5-8 cm. The stitches should not be too small, and the thread should be folded in half, otherwise it will break when the petal is pulled together.

The resulting petals can be sewn into the base of the cone or, much faster, glued with a glue gun. Glue "Titan" also dries pretty quickly. Distribute the petals evenly in the corolla of the future rose. - Form petals #3 in the same way. They should not be distributed too evenly. First attach each petal, twist the assembly, try on, and he will tell you where his place is.

Glue or sew on all the petals. - In most roses, as you yourself noticed, the edges of the petals are twisted outward. This effect is easily achieved in classical floriculture, where we process the fabric with a special compound and use a heated tool.
In our soft rose, we can also get this effect.
In the place where you want to twist the petal, from the inside, apply a strip of glue along the petal (by 5-7 mm), twist the petal with a tube with your fingers onto the glue strip.
The red arrow shows how I twisted and glued the petal. You can also sew it on, but it takes longer. It is not necessary to twist each petal in this way. do this on only one side of a few petals - this trick will really spice up your denim rose.
- This is how your flower should look like.

- If you are very tired, then stop there and make a mount. And with the rest of the masters we will make two leaves for the rose. This, however, will take almost the same time as making a whisk. But this is a common occurrence in floriculture. Very often, additional elements of the composition require much more attention and time than its central part.

The fifth and sixth details are the leaves for the rose. They will have two layers. Due to the fact that denim is quite heavy, it is required to strengthen the leaves with a wire frame. This is much easier to do than you might think. As before, use either letons or insulated wire, as wire without insulation is difficult to glue.
There is a very important point. Our leaves are not quite symmetrical about their central axes. Therefore, when you cut them out, do not forget to turn the pattern over or make them symmetrical. Finish the edges of the parts with an awl. Glue the wire as shown in the photo: along the axis of the sheet and on both sides, repeating the contour of the edge. The wires should protrude beyond the lower limits of the leaves by about 5 mm for the convenience of further assembly. We will glue the wire to that part of the sheet that we have from the inside.
But on the front of the leaf, make neat stitches that emit veins. I'll reveal a secret here. Take special threads for stitching jeans !!! They are thick and voluminous, these are the threads that make jeans jeans.
Who is familiar with embroidery, make a line "back needle". I decided not to bother - I was too lazy.
Glue the resulting front parts of the leaves to the wrong ones (those that are reinforced with wire).
Not long left! We almost won. - It remains to make the mount.
Find the best place for the leaves, where they look best. Cut off the excess length of the wires (you can leave the tips of 5 mm each). Treat the base of the leaves with glue and glue on the bottom of the corolla.
Cut out the liner - this is part number 4. Under the gluing, fix the base for the brooch. It can be, like mine, two separate fasteners: a crocodile and a brooch pin.