How to be fashionable: dresses with a skewed cut. Skewed cut: how to properly sew things using it Tunic dress skewed cut fabric calculation
Hello, friends!
Many of my readers have noticed that I like to sew so-called. These are dresses that do not require much time and are easy to process.
Of course, secretly, I dream of sewing and wearing chic and undercut ones (sometimes I even sew them).
But, in everyday life, most often, I give preference
Today I will share my impressions of how I sewed a knitted dress with a “skewed” cut.
I’ll say right away that there are a lot of impressions!
And all of them are only positive.
Lately, a dress like this has become one of my favorites!
Firstly, the knitted dress has a “skewed” cut and is easy to cut;
Secondly, it is very easy to sew;
And thirdly, it’s just wonderful to wear!
What is a skewed cut?
In this case, the construction of the pattern is located not only in the vertical plane, but also horizontally, allowing you to achieve spectacular draperies.
It all started with this pattern that I saw on the Internet:

I liked the idea and became interested in a similar cut. And finally, I sewed a similar knitted dress with a lopsided cut.
Unfortunately, I was not able to film the cutting and sewing process; the dress was quick. But I think everything will be clear.
I admit, I cut the dress directly on the fabric, using my blouse with one-piece sleeves, doing approximately the following:

That is, by laying out the blouse on the fabric, I created an effect when lines are drawn and the pattern is moved apart to the required amount.
Moreover, in this case the pattern needs to be laid out in one layer, without folding along the middle line.
It turns out something like this:

It’s easy to sew a dress with a skewed cut:
Sew side and shoulder seams;
We process the neckline, sleeve cuts and bottom cut. All.
Let me note that such a dress with a skewed cut can only be made of elastic materials, otherwise you simply will not be able to wear it.
My drapery was not very large, but the “skewed” effect was achieved.


True, a comfortable dress. If there is something to hide, it hides it successfully.

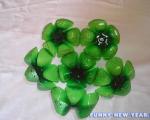
I also made a decoration for it from the remaining scraps, using elements.
Important: In order not to miss out, subscribe to blog updates, preferably through the subscription form on B (If you have a subscription, you do not need to re-subscribe. You will be the first to know the news!)
By the way, look at another version of the dress with an asymmetrical cut. Interesting too!
If the video doesn't appear, refresh the page. For correct display, click on the triangle in the center twice and wait until the video loads.
I’m wondering, do you, my dear readers, have experience in sewing a similar knitted dress with a lopsided cut?
With best wishes, Elena Krasovskaya
The “skewed cut” is becoming more and more popular among ladies, and for good reason. When laying out such a pattern on fabric, a very interesting visual drapery effect is achieved. Due to this, you can create varied and unique fashionable tunics and dresses. The material for a skewed cut should only be knitted, since it is this fabric that will allow you to move easily and will not cause discomfort while wearing, due to the unusual cut of the clothing.
Pattern design
This pattern is suitable for sizes from 40 to 50. We take 110 cm for hip circumference, 25 cm for wrist circumference. For sizes less than 40 and more than 50, it will be necessary to adjust some constant values used during construction. The front and back patterns of this tunic are exactly the same. They can be built directly on fabric 150 cm wide, folded in half, putting the graph paper and tracing paper aside.
(1). In the upper right corner we put t.A, put 115 cm down from it and put t.V. To the right of point B, set aside 75 cm and place point B1. We put 115 cm up from point B1 and put point A1, connect it to point A and get a rectangle. Line AB is the fold line of the fabric. 
(2). From t.B we put 93 cm up and put t.S. To the right of it we put aside a segment equal to ½ About and put t.C1. 
(3). From point B1 to the left we set aside 3 cm (the expected seam allowance) and place point B2. We put 70 cm up from it and put etc. 
(4). We connect points C1 and D with a smooth line - we get the neck of the tunic. 
(5). From t.D we put 40 cm down - the length of the sleeve to the cuff, put t.D1. To the right of it we set aside a segment equal to ½ Oz or 10 cm, set point D2. 
(6). From t.C1 we lower the line down to the intersection with segment BB2, put t.C2. We put 50 cm up on it and put t.C3. 
(7). From point C2 we put 3 cm to the left and place point B3. We connect points B3, C3, D2 with a smooth line - we get a side line. Point C3 can be lowered lower - it all depends on what degree of sleeve fit is preferred. 
(8). From point A to the right we set aside a segment equal to ½ Oz or 10 cm and place point A2. We connect it with a smooth line to point C1. 
(9). As a result of construction, a pattern is obtained; all that remains is to figure out where to make the seams. 
Today on store shelves you can find virtually every style and type of clothing. But what to do if you are the joyful owner of a non-standard figure or you simply don’t like everything that you have seen in the store. It is for you that we wrote this article.
And today we will get acquainted with one of the methods of cutting dresses and blouses from knitwear - skewed cut. Before everyone else, it’s worth saying that this type of making clothes with your own hands is perfect for those who like to do everything quickly and beautifully.
Here you don’t need a long and tedious calculation of everything down to the last dart. Similar models are sewn very primitively and quickly, the only problem that may arise is calculating the size.
But if even the most primitive mathematical services cause you horror, then you should look in the endless depths of the global information network for sites where, thanks to special services, you are allowed to mechanically calculate all the parameters of the upcoming pattern. To do this, you just need to enter all the necessary parameters of your figure into a special table.
Where to begin?
Practice shows that it is best to use knitwear for similar dresses, since such fabric can lie softly on your figure. And this fabric is extremely good for the body.
Attention! If you are new to sewing and believe that a ready-made pattern from a magazine will suit you, then it is in vain! Many people think: “What is there to count, if something goes wrong, the fabric will stretch a little and everything will be fine!” But not everything is so primitive!
Your appearance will depend on the correctness of the modeling. And if you and I love ourselves, then we should have all the best. So you shouldn’t believe that the peculiarity of the fabric will correct all your errors; try harder and adjust the pattern to suit yourself.
And one more thing: before you start modeling the pattern, be sure to carefully measure the volume of your hips. The problem here is that knitwear, as we have already said, has the ability to stretch. And if you make the bottom of the dress too tight or wide, then your appearance will leave you wanting better.
You need to measure in the following way: take a piece of knitted fabric and wrap it lightly around your hips. The fabric should not be stretched, but it is also impossible to allow the improvised skirt to slide down.
The main thing is that you feel comfortable. Well, of course, we shouldn’t forget that every woman should be beautiful, so no robes!
How to make a pattern: skewed cut
Before we start creating, let's figure out what the key specifics of this type of cut are. First of all, it is worth saying that with the usual cutting method, you will place the fabric for the pattern perpendicularly. But a skewed cut is a completely different matter.
Here you need to start cutting, placing the fabric horizontally on the pattern. By using such a pattern with a skewed cut, you will get an extremely authentic item with elements of drapery, which will allow you to hide some figure flaws, if any.
And today we will learn one of the options for dress patterns with a skewed cut. It is also worth noting that a recognized fan of dresses of this model is the famous designer and fashion designer Vivienne Westwood. And believe me, Vivienne Westwood's lopsided dress is a fashion standard in the world.
Dress with a skewed cut: step-by-step instructions
Now we will provide you with a pattern that you can use to sew a dress if your size falls between forty and fifty. If you are a little fuller or thinner, then you will need to recalculate all the designations, while considering your sizes.
Please note: both the front and back of our dress are certainly identical. This is why you can model the pattern directly on the fabric, which must be folded in half in advance. The width of the fabric should be 150 centimeters.
So let's get started:
- In the upper right corner of the fabric we put point A and put 115 centimeters down from it. Remember that all lines must be straight and perpendicular to each other. At the bottom we put point B. From this point we put another 75 centimeters to the right and get point B1. The distance from B1 to A1 is 115 centimeters, that is, equal to the distance between points A and B;
- From point B towards point A we measure 93 centimeters and get point C. From the resulting point C we measure a distance to the right that is equal to half of your hip volume and get point C1. Now from point B1 we measure 3 centimeters to the left and we get point B2. Up from point B2 you need to measure 70 centimeters. This way we will get point D. The distance from B1 to B2 is the seam allowance, so don’t forget about it; on the contrary, our dress will be a little tighter than planned. Now we need to combine points C1 and D with each other. But this should be done not evenly, like under a ruler, but in a smooth line. This is how we got the neck of our dress;
- Then we will determine the length of the sleeve. To do this, measure 40 centimeters from point D down. We now have point D2. From it to the right we measure another 3 centimeters and we get point D1. Now we draw a straight line from C1 perpendicular to segment BB1 and get point C2;
- In order for our sleeve to be complete, it is necessary to set aside a small segment to the left from point C2, the length of which should not be more than 3 centimeters. This is how we got point B3. You must place point C3 arbitrarily, since the degree of fit of the sleeve depends on its height. So think carefully! Now we need to connect points B3, C3 and D2 with a smooth line. Do this as shown in the picture. If you can’t draw a straight line, you can use special patterns for drawing.
We return to the top of the pattern. From point A, measure 10 centimeters to the right and place point A2. After that we connect it to C1. This line should also be smooth, but not as curved as when creating the sleeve pattern element. Here we have a pattern. But where, you ask, should you make the seams and folds? Now we will tell you!
Segment AB is a straight line of fabric fold; C1 D – neck; A2С1, DD2, D2В3С3 – seams; BB3 is the lower part of the dress, it only needs to be hemmed so that the thread does not fringe.
Looking at our pattern and the finished dress, we can notice that we missed a small detail, namely the cuffs. They are very easy to make: you only need to cut out two small rectangular pieces of fabric with sides of 25 and 20 centimeters. And our cuffs are ready!
And one more thing: remember that in such models the waist is slightly lowered, therefore, if you are principled in such matters and think that everything should be clearly in place, then you can neatly sew a thin elastic band on the inside of the dress. It will help hold the fabric on the hips without spoiling the overall picture.
As you can see, sewing dresses using a similar pattern is not difficult. And could you think that you could sew that beautiful dress in the first picture with your own hands? And most importantly, you can only change the color and density of the fabric - and you will have dresses that are fashionable in every season! Good luck!
Before we start designing, let’s figure out what the phrase “skewed cut”, which is so fashionable today, means. To prevent unnecessary deformation of the fabric when wearing, it is customary to cut along the grain of the warp, respectively, perpendicular to the weft. Sometimes, for flared styles, the pattern is laid out on the fabric at 45 degrees to the main line, i.e. obliquely.
« Skewed cut" is an exception to the rule, because the pattern is a construction not strictly vertically, but also horizontally. When laying out such a pattern on fabric, a very interesting visual effect of fabric draping is achieved. Due to this, you can create varied and unique fashionable tunics and dresses with a lopsided cut.
The material for products with a skewed cut should be stretchy, since the use of non-knitted fabrics with such an unusual cut can lead to discomfort during wear.
Initial data
| Measure | Designation | Meaning |
| Hip girth |
ABOUT | 110 |
| Wrist circumference | OZ | 25 |
Pattern design
This pattern is suitable for sizes from 40 to 50. For sizes less than 40 and more than 50, it will be necessary to adjust some of the constants applied during construction. The front and back patterns of this tunic are exactly the same. They can be built directly on fabric wide 150 cm, folded in half, putting the graph paper and tracing paper aside.
(1). In the upper right corner we put t.A, we put it down from it 115 cm and put T.V. Right from t.V postpone 75 cm and put t.B1. Up from t.B1 set aside 115 cm and place t.A1, connect it with t.A and we get a rectangle. Line AB- fabric fold line.

(2). From t.V set aside up 93 cm and put T.S. ½ About and put t.S1.

(3). From t.B1 set aside to the left 3 cm(estimated seam allowance) and put t.B2. We put it up from it 70 cm and put t.D.

(4). Connecting the dots C1 and D with a smooth line - we get the neck of the tunic.

(5). From t.D put down 40 cm- sleeve length to cuff, set t.D1. To the right of it we lay off a segment equal to ½ Oz or 10 cm, put t.D2.

(6). From t.S1 lower the line down until it intersects with the segment BB2, put t.S2. We put it up 50 cm and put t.S3.

(7). From t.S2 set aside to the left 3 cm and put t.B3. Connect the dots with a smooth line B3, C3, D2- we get a side line. Full stop C3 You can lower it lower - it all depends on what degree of sleeve fit you prefer.

(8). From t.A to the right we put a segment equal to ½ Oz or 10 cm and put t.A2. We connect it with a smooth line with t.S1.

(9). As a result of construction, a pattern is obtained; all that remains is to figure out where to make the seams.

- Line AB- fabric fold line.
- Line С1D- neck line.
- Lines A2С1, DD1, D2С3В3- seam lines.
- Lines AA2 and D2D1- cuff stitching lines.
- Line BB3- bottom line.
Cuff pattern
Now draw a rectangle with equal sides 24cm And 20cm- (measurement OZ)- the cuffs are ready.

Well done! Skewed dress pattern ready!
This chic knitted dress seems complicated only at first glance. In fact, you don’t even need to create a pattern for this model, and the whole secret is that this dress has a skewed cut. The skewed cut of the dress allows you to create unusual, spectacular folds, draperies and makes any dress visually “complex”, and at first glance curiosity arises - how is this made? The pattern of the skewed dress presented in this tutorial is very simple. If you decide to sew such a dress, you won’t have to create a pattern, because the contour lines of the parts can be applied directly to the fabric with chalk.
As mentioned above, you can cut out this dress without complex modeling, but you will need to take a few measurements. The presented pattern of a dress with a skewed cut consists of 2 panels: a top (back/front) and a skirt.
The front/back neckline of this model is asymmetrical, and to correctly measure its length, wrap the tape measure to the right of the point where the neck meets the shoulder (the starting point of the shoulder seam), and pass it along the armpit on the left. Divide the resulting distance in half. The resulting value is the measurement Length of the neckline, which must be set aside when constructing the pattern for the top (front/back) of the dress (see Fig. 1).
Measurements required to create a pattern for a dress with a skewed cut:
- Hip girth
- The length of the sleeve
- Shoulder length
- Left side seam length (measurement taken from armpit to waistline) + 5 cm increase
- Skirt length (about 50cm)
Construct the top part of the dress using the measurements; the front and back are cut out in one piece with a fold along the right side seam. The skirt panel can be cut out with side seams in two parts, or in one piece with a seam in the center of the back.

Rice. 1. Pattern for a dress with a skewed cut
How to cut a dress with a skewed cut
To sew a dress you will need 1.8 m of knitted fabric 140 cm wide, a rubber band 1 cm wide and about 0.7 m long, Madeira thread No. 120. Recommendations for the selection of materials: only highly elastic knitted fabrics.
From knitted fabric, cut out:
- Top part of the dress - 1 part with a fold
- Skirt panel - 1 piece with fold
When cutting, add seam allowances - 1 cm on all sides, 4 cm on the bottom of the skirt.
How to sew a dress with a skewed cut
Advice! We recommend sewing the presented dress model using an overlock stitch.
Overlock the sides of the top part of the dress with an overlock stitch. Sew the side seam of the dress seams. Fold the seam allowance along the neckline and stitch along the top at a distance of 1 cm from the edge, leaving an area for threading the elastic. Insert an elastic band into the resulting drawstring, adjust its length, stitch the elastic along the short sides, and stitch the open section of the drawstring.
Fold the allowances along the bottom of the sleeve and stitch with a double needle.
Sew the skirt panel using an overlock stitch. Gather the bottom edge of the top along the bottom edge. To do this, sew a line with a stitch width of 4 mm along the seam allowance and gather by pulling the bottom thread.
Match the skirt and top of the dress, matching the seams, and sew with an overlock stitch. Sew the hem of the bottom of the knitted dress with an overlock stitch, bend it 4 cm and stitch the bottom of the dress with a double needle.
IMPORTANT! The waistline of the dress is slightly lowered. And if you want to fix it, you can sew an elastic band along the waist seam. The elastic can be stitched using an overlocker or inserted into the drawstring by laying another line at a distance of 0.7 cm from the connecting seam.
You will find even more original patterns and interesting ideas for creativity on the website of Anastasia Korfiati’s Sewing School. Subscribe for free and be the first to receive new lessons!