How to make flowers from paper napkins. Crafts - flowers from napkins for beginners for topiary, applique, volumetric figures, on the table, in pots: ideas, templates, diagrams, photos
Paper napkins are an essential attribute of a beautiful table setting, but what if you make flowers from paper napkins with your own hands? This is a great way to beautifully decorate a table and more, and also make something very beautiful from simple and available materials.
General rules
You can make crafts from napkins of almost any color, size and quality, but keep in mind that not every napkin will produce beautiful voluminous flowers - for example, single-layer napkins hold their shape much worse, therefore, flowers from such napkins can only be made delicate, airy, without clear and strict lines.It is best to use plain, full-color napkins for making flowers. They can be white or colored, but pay special attention to ensure that the outer and inner parts are painted the same color - otherwise the flowers will not be very neat.
If you are limited in materials, then choose the master class that suits your materials - for example, simple white napkins will make gorgeous carnations (especially if you have red paint or a marker), and thick burgundy napkins will make roses well.
There are products with decorative perforations - they produce wonderful decorative flowers. You should not use scented napkins to make various flowers - ordinary aromatic and essential oils will help make your bouquet fragrant. You can also use special perfume compositions (they are used to scent handmade soap).
Learning to make your first flowers
How to make flowers from napkins? I will explain step by step for each type of inflorescence below. If you want to make a bouquet of identical flowers of different shades, then it is best to do them in one go - this way you can make the flowers more or less similar, in the same style.
Or a slightly different option, first cut out the folded curves with scissors, then straighten the napkin and fold it like an accordion (the more frequent the step of the accordion, the more voluminous the result will be). We tie it with thread and straighten the petals:

These pompoms can be used to decorate gift boxes in an original way; it looks very aesthetically pleasing and festive!

Flowers can be flat - for example, lotuses, and voluminous - for example, roses.
Making a lotus flower from napkins

This lotus can be used to decorate plates when setting the table for a gala lunch or gala dinner.
And in this video there is a slightly more complicated version: A flower napkin holder, which will not only decorate the festive table, but the napkins can also be used for their intended purpose, because... they come out easily.
Roses
Option 1:If you don’t understand a little from the photo how to twist such a rose, then look at the video, here it is shown in more detail:
Option 2:
Option 3: this is a very simple rose that everyone can handle:
poppies

Step-by-step guide on how to make voluminous poppy flowers from ordinary napkins:

Carnations
I’ll be honest, in my opinion, carnations are the most beautiful napkin flowers you can think of, and making them couldn’t be easier. They turn out beautiful and lush, they can be used to decorate the room, and a bouquet of such carnations is difficult to distinguish from real ones, especially since they are very easy to make. Here are my step-by-step instructions for making beautiful carnations with a colored border from ordinary white napkins.
To make flowers from napkins you will need:
- ordinary white napkins;
- pencil;
- invisible;
- wire for stems (a floral sleeve or special stems for flowers will do);
- corrugated paper for making leaves or ready-made leaves from fabric;
- felt-tip pens, markers, colored ink, watercolor or liquid acrylic - just a little.

Watch the video tutorial to see how this is done in more detail:
Carnations are good for beginners - they are simple and expressive flowers. They can be used to make flower garlands (especially if made from bright napkins), they will also look good in a pot, and a bouquet of such flowers can be placed on the table as decoration. Also, paper flowers can be used to make three-dimensional figures - for example, for decorating a hall.
Now you know how to make a flower from a napkin with your own hands. Don’t forget that a craftsman can make both a realistic bouquet and simple stylized flowers from napkins.
Do you want to learn how to make large or unusual flowers from napkins for decoration? Watch this video:
Are you interested in a detailed master class about flowers made from napkins? Look at simple diagrams and pictures, learn how to make unusual flowers and decorate any holiday with flowers made by yourself - it always looks solemn and incredible!
The most ordinary paper napkins in good hands can turn into intricate crafts and excellent holiday table decorations. You can use different shades of paper and make paper garlands.
These flowers will look good in a decorative pot. When decorating a room on the occasion of an anniversary, voluminous paper numbers are perfect.

Before you decide to make your own crafts, it is advisable to carefully watch master classes and numerous photos of flowers made from sanitary napkins.

This will help you unleash your natural creative potential and create masterpieces of floral art yourself.

General procedure for working with paper
You can create an endless variety of crafts with your own hands from napkins. It should be borne in mind that each part of the flower will require different starting material.


Thin single-layer napkins do not hold their shape well and can be used to make light, airy decorative elements.
Select napkins for work that are the same shade. The use of white and colored napkins is encouraged.

It is important that the front and back sides of the napkin do not differ in color. This color difference can create an unfinished look.

If there are limitations in the source materials, you can choose a craft with fewer requirements for a variety of shades.

Thick pink napkins will allow you to get luxurious roses. Plain white napkins, after finishing with a marker, will become carnation petals.

The most common aromatic oils or other perfume compositions that are used for homemade soap will help to give the finished flowers the appropriate smell.

The first flowers from napkins
You should start working independently after watching the video lesson in detail. The entire technological process is shown there in detail.

In order for the flowers from napkins for a bouquet to turn out identical, they must be made in one period of time. This way it will be possible to maintain the same style and external similarity of the flowers.

When considering another method, the first thing you need to do is fold the napkin. Then use scissors to make the rounded ends of the future petals. Now you need to straighten the napkin and fold it in the shape of the bellows of a keyboard musical instrument.

A small bending step will allow you to obtain a three-dimensional shape of the future flower. After tying with thread, carefully straighten the flower petals. These flowers can be used to decorate gift wrapping in an extravagant way.


We make volumetric figures with our own hands
When decorating halls intended for anniversary events, three-dimensional numbers made from ordinary paper will colorfully display the essence of the event. Decorative multi-colored lighting of the numbers will add expressiveness.
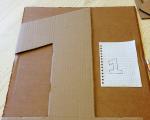
Let's take a step-by-step look at the technological map for the production of a volumetric figure - one. Required materials and tools:
- simple single-layer napkins of different shades in the amount of 250 pieces;
- PVA glue - two hundred milliliters;
- blank size 500x300x100 mm made of thick cardboard;
- household scissors, tape, stapler.

Using a felt-tip pen, draw a number on cardboard and carefully cut it out along the contour with scissors. Now we connect the cardboard blanks with tape. The result was a three-dimensional figure with the required dimensions.

Carefully cover the entire surface of the number with napkins. The next step is to make 230 flowers from napkins of different colors.

Using a stapler and glue, you need to secure the flowers to the surface of the number. Flower shades can be alternated evenly for greater expressiveness. Now you can mark the number in the planned place, step back and admire it.

Original DIY paper flowers
Paper napkins are a very affordable source material for home craftsmen. Leisure coordinators for children of the middle age group should organize children's handicraft clubs.

This will allow the child to discover and develop creative abilities at an early age. In the process of creation, the child develops qualities that will be useful in later life.

Let's take a detailed look at the process of making flowers from napkins with your own hands.

To make an open lotus flower we will need napkins:
- eight pieces green;
- twenty-four white pieces and one yellow napkin.

Take a green napkin and fold it to form a triangle. Now from the top of the triangle, bend the corners down. Bend the tails back up. Turn it inside out and fold it.

One part of the base is ready. We produce eight such parts. We make twenty-four petals in the same way from white napkins. Now we lay out three rows of petals from white napkins on the green base.


We twist the stamens from a yellow napkin and insert them inside the flower. If you have your kindness, you can, in the flow of creative inspiration, slightly modify the shape of the flower.

Shaggy flowers are very popular when decorating banquets. You can create the most fantastic composition if you master the skills of making large flowers with your own hands.

To make large flowers from napkins, we will need white napkins. In small steps, fold a white napkin in the shape of the bellows of a keyboard musical instrument. Now fold it in half and use scissors to cut out a triangle at the edges.

By cutting off the corners, we get a blank for the base of the flower in the form of cloves. Take a red napkin and perform the same steps. The ends should now be oval shaped.

Alternating the shades of the napkins, we apply the resulting parts in layers and fasten them with thread into a single element. Starting from the last layer, bend the petals to the top and carefully straighten them.

Now we assemble the desired composition from these lush flowers. You can smile a little.

Applications with children
It is recommended to do such crafts in the company of preschool children. A very useful activity. Children learn to think abstractly from the perspective of creation. Fundamental life-affirming principles are unobtrusively laid down.

When a child becomes an adult, many of the principles laid down in childhood will become the only way to overcome a life crisis. To complete the application we will need the following materials and tools:
- single-layer simple blue napkins;
- two sheets of white A4 cardboard;
- plain green paper, A4 size;
- pencil, brush, glue and scissors.

We cut blue napkins randomly into narrow strips. Roll it between your palms into neat paper balls. We randomly draw several bells on a sheet of white cardboard.

From a sheet of green paper, cut out a twig with leaves and paste it onto a sheet of yellow cardboard. Now we evenly glue blue balls onto the sepals. It turned out to be a very original New Year's decoration. We rejoice with the children.


We work with viscose napkins
First, let's prepare petals from cardboard that are three to five centimeters long. Take pink fabric and cut out seven large and seven medium petals. We use light pink viscose to make seven small petals.

Cover the base of the sheet with glue and roll it inward. We attach seven large petals to the base of the pink layer. Now we place exactly the next layer of middle petals. We will complete the row with blanks of a pale shade.

Take light pink viscose and cut out a strip two centimeters wide. We twist it between our palms and get the core of the flower. We choose the diameter of any size.

A bright pink border made from a 20 mm viscose strip will give greater expressiveness. We fix the mold in the middle of the petals with glue. It turned out beautifully.

Photos of flowers made from napkins with your own hands


To make your leisure time at home much more interesting and varied, every person, be it an adult or a child, strives to enrich it with numerous exciting activities. This could be drawing, singing, dancing, modeling from clay or plasticine, sewing, knitting, embroidering, or making beautiful crafts from various improvised means available to everyone, for example, paper napkins. This hobby brings great pleasure to the interested person and masterful skills in the field of handicraft art. With a lot of effort, such cheap material can make original gifts for family and friends in the form of unusual crafts for the New Year 2018, decorations for the festive table and the interior of the entire house as a whole. If you decide to build something yourself at home, then visit our article. She will provide you with 8 photos of ideas for easy and simple DIY napkin crafts made quickly and creatively. By the way, for those who have never done anything like this, we have prepared a video with master classes that contain step-by-step instructions for beginners. Don't forget to involve your children in this creativity. Even at the age of 3 - 4 years, 5 - 6 years old, they will like this whole thing. It will brighten up their drab everyday life, teach them skill, develop diligence and diligence, perseverance and accuracy. So, let's get started, dear friends!
Napkin flower
An unusual decoration for the holiday table will be a bright lotus made from red napkins, made with your own hands for Mother’s Day, for March 8th and for the birthday of your mother, grandmother, sister or friend. Such a flower can not only become a decorative element, but also a napkin holder. To make such a craft, you can watch the instructions with a step-by-step description, or a video with a master class.
You will need:
- green napkins - 4 pieces,
- red napkins - 40 pieces,
- thin wire - 10 cm.
Progress:
- First, we’ll make the blanks with our own hands. Take a green napkin and open it so that only one fold remains. Then we need to fold the resulting rectangle lengthwise and open it again.
- We have a rectangle with a fold in the middle. We bend the corners of all four sides towards the center.
- We also bend the sides towards the center, and again in half. The result was a narrow rectangle with corners on the sides.
- We do the same with the rest of the green paper materials in a similar way.
- Without opening it, fold the red napkin in half to form a triangle.
- We place the paper material at hand with the top facing away from us and fold the side corners with the sides facing the center. And we bend the corners protruding at the bottom on the reverse side. We perform the same actions with all the remaining red elements.
- We begin to form the base of the lotus with our own hands. We take the green material and put it next to each other. Now, to mark the middle, we fold the total mass of these blanks in half, but do not put too much pressure on the fold. We only need it as a guide.
- Now we secure the paper blanks in the center with wire and place them on the table with the long side of the corners facing up. These will be the leaves of our flower. Spread the leaves so that they lie evenly in a circle.
- Let's start collecting petals. Take a red napkin and fold it in half, with the corners turned inward. We need to insert the resulting triangle into the green leaves of the water lily with its corners, and straighten the upper part to form a three-dimensional petal and it will be easier to insert subsequent ones into it from above. The corners of the petal must be inserted so that one is in one sheet and the other in another. This way the composition will hold tighter and there will be no gaps. This is how we do the 1st row.
- We perform the next 4 rows in the same way. This way we will get a lush and beautiful lotus. This DIY napkin craft, made by an adult, will bring a lot of pleasure and positivity to women, girls and young girls.
Video: lotus made from paper material at home
Ballerina made of white napkins and wire

In order to make an excellent delicate decoration for the New Year holidays with your own hands, you need, of course, to use your imagination a little. But, as a rule, only everyone’s favorite snowflakes, garlands, lanterns, Christmas trees and the like come to mind. However, in order not to waste your precious time thinking, we suggest you, dear friends, to make a tendinous and fragile ballerina from a snow-white napkin. Such a craft can be perfectly placed anywhere, even on the ceiling, even on a window, or on a coniferous tree on New Year’s Eve. So, we offer you our interesting and useful master class with a step-by-step description of the course of action.
To work on you need:
- white napkins;
- wire;
- threads;
- scissors;
- three-layer bright napkins;
- wallpaper glue.
Manufacturing process:
- In order to make a neat craft with your own hands, you first need to prepare the wire of the required size. We place a bright three-layer napkin on the table and measure its diameter with a wire. This is the size of wire that will suit us. Fold it in half and cut it off.
- After this, we will need to twist a loop on the bent section of the wire for the future head of the ballerina, and leave two separate ends of the wire for the legs. We round their edges for the effect of beauty and believability, and wrap the main part with additional pieces of the same dense but flexible material. Here the volume of the legs has emerged for our craft.
- Now the hour has come to make the ballerina's hands. We take the same wire and, having measured the length of the future limbs, screw them to the body. Using an additional piece of the same material, we will need to add volume to the arms using the same technique as we previously did on the legs. Form the edges of the hands into a loop shape.
- When the wire frame of the ballerina is ready, we will need to wrap it in small pieces of snow-white napkin, which we prepared in advance. We wrap them one by one from edge to edge of the limbs and the entire body, including the head, and to secure it you need to use wallpaper glue.
- Upon completion of creating the entire ballerina with our own hands, we have to make her a fluffy skirt from a bright coating. We separate all three layers of paper material from each other; from the white part we need to create a petticoat. We fold our available material in half, then in half again. We have a square. So we need to fold it in half again so that a triangle appears, and then bend it again in the same way. We cut off the lower edge of the triangle evenly, and cut off the sharp upper corner a little so that our ballerina can fit into her outfit.
- We put the finished petticoat on the craft and, so that it does not fly off, we secure it with simple threads.
- The final part of our creativity will be making the main dress from a colorful napkin. With it we perform the same functions as with the petticoat, we create a triangle from folded halves of paper, align the bottom of the dress, cut off the edge of the top, and then, pay attention, we carefully twist the entire dress blank into a kind of rope to get the texture of the outfit, and then it unfold. A reaper has formed. We put it on the ballerina so that the white petticoat peeks out slightly, and secure it with thin threads.
- You can decorate a finished craft made from napkins with your own hands with rhinestones or bows, silk ribbons or beads. In general, everything is up to your taste!
Video: ballerina made of paper material at home
Sweet heart
You can make this craft with your own hands with a 3-4 year old child. This will allow your child to develop patience, imagination, perseverance and accuracy.

We will need:
- red cardboard,
- pink and white napkins,
- simple pencil,
- scissors,
- PVA glue,
- a hand pre-cut from plain paper.
Progress:
- In order to build our craft, you need to carefully cut out a heart from cardboard; you can use a template or draw it yourself. On the reverse side you need to trace a palm of paper. Now the base is ready and we can start working with napkins.
- Several of them need to be cut into 4 strips, and then each strip into 3 more parts. Thus, you should end up with small squares of white and pink, from which you need to make lumps with your own hands.
- Now let's start creating the composition itself. From the white lumps we make a palm, the inner area of which should be filled with them. For this purpose we use PVA glue. According to the same principle, we fill all the remaining space on our heart with pink lumps. Please note that the lumps should fit snugly against each other.
- Our product is ready, of course, if you have any other ideas, you can further decorate it. Let's say you write a wish or a poem on the back of your heart. If you want your craft to hang on the wall, take care of the loop. For this purpose, you can use a satin or silk ribbon.
Charming roses
You can make various flowers with your own hands from napkins, and in this master class with step-by-step instructions we want to tell you how to make a rose yourself. This craft can not only be a pleasant gift, but also complement the interior of any room. The color of the paper material at hand can be selected based on the color scheme of the room.

We will need:
- green corrugated paper,
- red napkins,
- pencil,
- scotch,
- skewers,
- scissors.
Progress:
- We take a napkin and cut off the sides so that we get separate squares.
- Place the square on the table and roll it into a tube using a pencil, but not all the way, leaving a part free - 2 cm.
- We collect the resulting roller on the pencil from the edges to the center and remove it from the pencil. This way we get a fixed petal with a corrugated roller. We do this for about 7 petals.
- Next, we begin to form a bud, rolling the petals into a spiral and placing several layers on top of each other.
- Insert a skewer into the bottom of the flower and secure with tape.
- From a roll of corrugated paper we cut off the top piece about 1 cm wide, we will get a ribbon. We wrap this ribbon around a skewer, covering the tape as well.
- We also secure the tip with tape. So we got a very beautiful and original rose with our own hands. This craft will be easy even for beginners. As a result of painstaking creativity, your table may end up with an excellent bouquet of flowers that will transform not only the kitchen, but also the living room in your home.
Video: making roses from paper napkins
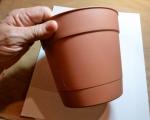
Topiary made from napkins
To decorate your interior, a craft in the form of a topiary made from napkins will be useful, which you can make together with a 5-6 year old child. The main advantage is that the variety of such trees is limited only by your imagination. Let's see how to make your own topiary with step-by-step instructions. 
We will need:
- napkins of various colors,
- newspaper,
- stapler,
- glue,
- scissors,
- flowerpot.
Progress:

Our delicate and original craft is ready. The flowerpot in which our bouquet is located can be decorated with ribbons or a bow, again, it all depends on your desire and imagination!
Original doll
Another interesting and unique craft made from napkins is a doll. It is very easy and quick to make with your own hands and your child will surely like it. In the description below you can see detailed instructions on how to make a doll yourself. 
We will need:
- regular napkins,
- bright serving napkin,
- white threads.
Progress:

Christmas tree made from napkins
For every New Year, you always want to decorate your home so that it is beautiful, cozy and original. A DIY Christmas tree made from napkins will look very beautiful and unusual. To complete such a craft, we made a complete description with detailed instructions in the prepared master class. 
You will need:
- A3 sheet of paper,
- scissors,
- ruler,
- stapler,
- pencil,
- glue.
Progress:
- To make the craft look correct and attractive, we make a cone from a sheet of paper. This will be the base of the tree.
- Next, we make our own napkin blanks. We take one paper element and fold it 4 times, then unfold it once and, at the resulting fold, cut it in half. Thus, we get two square blanks from one available material.
- We take the resulting square and fasten it in the center with a stapler.
- We cut the edges of the square into a circle.
- Now, starting from the top layer, you should crumple each one individually into a lump towards the center.
- When all the layers are crumpled with your own hands, straighten them to make a flower-shaped craft.
- We will need about 50 - 60 of these napkin flowers, preferably green.
- We begin to attach the flowers to the base from below using glue. We fix it so that there are no gaps left.
- You can attach some kind of toy on top, or you can cover the top with a flower. At your discretion, you can decorate the Christmas tree with New Year's beads or tinsel.
Video: DIY “Christmas tree” craft from napkins
Creative decoration “Chrysanthemum” from a napkin

Many people don’t know how to make flowers from napkins with their own hands for beginners, and we decided to reveal the secrets of this needlework to everyone. The Internet offers a wide variety of options using a variety of techniques - from decoupage to making three-dimensional flowers. The latter are good because they can be collected in a bouquet and used to decorate a festive interior or brighten up a simple office space. These are what we will create today.
How to make flowers from napkins: step-by-step guide
The material of paper napkins allows you to create a wide variety of flowers from it. Our master class shows a simple way to make a bouquet of flowers that are somewhat reminiscent of asters or dahlias.
Flowers from napkins
To make one flower you will need:
- two napkins of the desired color;
- one green napkin;
- scissors;
- PVA glue;
- thread, ruler, wooden skewer.
 Everything we need
 We unfold two colored napkins and cut out strips from them - 2 x 8 cm wide and 2 x 10 cm.
 Cut strips from napkins
 We fold each strip three times. This will be a blank for the flower petals.
 We fold
 Cut out this shape from napkins.
 Cutting out the shape
 Unfold the cut strip. The result is a paper blank like this.
 Unfolding the workpiece
 The tips of each petal on top need to be slightly curled with your fingers.
 Curl the ends of the petals
 We do this on each of the four blanks and get petals to create one paper flower.
 Preparing all the petals
 Take a wooden skewer, apply a little glue and begin to wind the first piece, 8 cm wide.
 Twist the petals onto a skewer
  Straighten the flower when winding
 The next one will be the same 8-centimeter strip, and then we wind two 10-centimeter blanks. Periodically we fasten them with glue, not forgetting to evenly distribute the petals around the circumference. At the end of the work, we fix everything with thread.
 Strengthen the flower with thread
 So we made the flower itself from a napkin.
 DIY napkin flower
 Now you need to make a stem for it. Cut two small strips (about 1.5 cm wide) from a green napkin.
 Preparing the wrapper for the stem
 We begin to wind from the bottom of the flower, having previously fixed it with a drop of glue.
 Decorating the flower stem
 As soon as the entire stem is wrapped in a green napkin, we also fix its tip with glue.
 Finished stem
 By analogy, we make flowers from napkins of any color you like.
 Paper flowers from napkins
 Various flowers from napkins
Another option for creating a flower from napkins for beginners, but using a different principle, can be seen in our master class, where we did. There, making flowers from napkins with your own hands is shown with step-by-step photos, and using this technique you can make a beautiful panel or wall decoration.
Carnation. This method is known to many and we will briefly recall the steps for creating a paper carnation. We put ordinary paper napkins in a pile and cut off the edges (the more napkins, the more magnificent the flower, but do not overdo it). Next, unfold the napkins and use a felt-tip pen to color their edges. then fold the napkin like an accordion. We pull the thread over the middle of the workpiece, after which we straighten and fluff the “petals”. This way you can make flowers of different colors.
Roses. This is a very easy way to make a rose from a napkin. Here you need to wrap the napkin around a pencil up to half its length, and then squeeze it into an accordion shape. This will be one rose petal. You need to wind up the required number of these. Then sequentially fold all the petals into one rose flower using a skewer or a piece of wire. Wrap a strip of green paper around the skewer and secure with glue. This process can be seen in more detail in the video.
Look what a beautiful topiary you can make from these roses. And such beauty is quite suitable as a gift for March 8, or just as a small present for a birthday or any other holiday.

Peony. In principle, a peony can be made in different ways, but for beginners we will show the simplest one. To do this, you just need to cut out flower petals from napkins using a template. then place them through the holes on a skewer or a piece of wire, strengthen them with glue and decorate with a strip of green paper. You can see everything in detail in the video from Olga Papsueva.
You can also make them just as easily, which look gorgeous in a bouquet. Such beautiful paper flowers will decorate the interior and make it bright and colorful in spring.

As you can see, making flowers from paper napkins is quite simple, and decorating with such decor will give your holiday table or interior a simply enchanting mood!
Well, that's all for today. If you think this information deserves attention, share it on networks by clicking on the buttons. Want more? Subscribe to our regular updates and you will probably know more than the people around you. 😉 See you later!