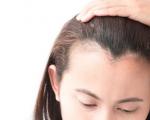
Evening hairstyles step by step. Hair styling in a combined way Making a smooth hairstyle
Cold hair styling has always been one of the most popular ways to create a beautiful and stylish hairstyle. It ensures that there is no negative impact on the curls of various electrical appliances, including hair dryers, curling irons, and curling irons. It is a known fact that with daily use, over time, hair becomes dry, brittle and dull. Even the use of special protective products cannot give a 100% guarantee that the hair will not be damaged. Therefore, more and more representatives of the fair sex, in the desire to create the perfect hairstyle, opt for this particular styling technology.
Cold hair styling has two main disadvantages., namely:
- A large amount of time will have to be spent on it. Since a hairdryer will not be used during styling, you must wait until the hair dries naturally.
- Low level of durability of this hairstyle. Of course, if you use strong fixing agents, it can be significantly increased, but it will still be less than with heat treatment.
Retro waves are one of the ways of cold hair styling
Cold wave hair styling is one of the most popular hairstyles., which can often be seen on the heads of world celebrities. Retro waves are suitable for special occasions, formal meetings and dates. This type of styling will look great on short hair that is above shoulder length. If the hair is long, then creating a hairstyle will require a lot of time and effort, and such styling risks quickly losing its appearance due to the weight of the hair.
Performing cold hair styling with waves parallel to the parting involves the use of special “duck” hairpins, which are long metal clips. In addition, you will need a flat comb with frequent teeth and a fixing agent.

Let's look at the step-by-step technology for creating a “cold wave” styling.
- Wet, washed hair must be thoroughly combed and divided into two parts using an offset parting.
- Treat strands with foam or mousse. In this case, you need to choose products that will provide elasticity to the hair, but will not stick it together.
- The formation of waves should be done from the parting and from the part of the head on which there is more hair left.
- Using your index finger, pinch a small part of the hair and lift it towards the parting. This movement creates a so-called raised crown. It must be secured with a clamp.
- Then the next crown is formed. In this case, special attention must be paid to the space of hair between them that remains not raised. It needs to be combed well and pulled slightly towards the forehead. In such a way that a small neat curl is created. In a word, you should get an S-shaped line.
- The next crown is also secured with a hairpin. Similar actions are performed until the entire length of the hair is completed.
- After completing the formation of all the crowns on both sides, you need to wait for the hair to dry, carefully remove the hairpins and treat the hairstyle with varnish for better fixation.
In order to secure your hair as best as possible and ensure its magnificent appearance, you can use small bobby pins that are attached under the crown and covered with hair.
It is worth noting that the size and number of waves can be very diverse. It all depends on the length of the hair and the size of the crowns.
Cold styling with curlers
Since retro waves are a rather complex and labor-intensive technique that takes a long time to master, you can use other hair styling methods without using thermal devices.

Cold curlers are best for this. Today there are a huge number of their types, sizes and shapes. Let's consider the main ones:
- Boomerang curlers consist of dense foam rubber inside which there is a wire. It essentially acts as a hair fixer on the foam rubber by twisting it in different directions. This option is suitable for owners of any hair length. As a result of using boomerangs, beautiful medium-sized curls are obtained.
- Velcro curlers. They come in different diameters and can be used both to create a full hairstyle and for its individual elements. The disadvantage of this type of curler is some painful cleansing associated with their removal.
- Spiral curlers are a great way to create beautiful vertical curls on long hair. They often have a plastic or wooden base.
- Wooden bobbins are small spiral-shaped curlers that can form small African curls.
To create any curled curls using the above curlers you need:
- Divide clean, damp hair into equal sections of the desired size.
- Apply foam or mousse to each of them one by one, distributing the product evenly using a fine-toothed comb.
- After processing the individual strand, you need to twist it around the curlers and fix it.
- When all the curls are fixed, leave the curlers for 4-5 hours, then carefully unwind them and treat them with varnish for better fixation.
Hair of any length needs to be given shape and additional volume. There are various methods of hair styling that every woman can do independently, without using the services of a professional hairdresser.
There are technologies that do not involve exposure to high temperatures. Various devices are used for them (hairpins, etc.). It is difficult to give the desired shape to a hard, thick “mow”, so in this case it is recommended to give preference to hot techniques.
On curlers
For a long mane, plastic products are suitable, which are secured with ordinary elastic bands. They are easy to use and do not require special skills:
- Apply styling product. It is best in this case to choose mousse or gel.
- Divide your hair into 4 sections.
- Twist a thin strand and secure it with an elastic band.
- Do this with the entire “mane”.
- Leave it like this overnight.
- In the morning, carefully remove the curlers.
Another option involves using large diameter Velcro. They are great for creating volume in the root area. It is enough to process only this part without touching the ends. Dry naturally. Carefully remove the Velcro.
Boomerangs have gained great popularity among women of different ages. They are simple and convenient. In addition, no additional elastic bands or any other devices are required.
Instead of classic horizontal curls, you can make vertical spirals. Separate the strand. It is important that it is square at the base. Twist first as in the classical procedure. Slowly, moving towards the base, move the boomerang or Velcro to a vertical position. Use your index finger and thumb to tighten them as much as possible so that they fit snugly. Then, in order not to feel discomfort from the large tension, slightly untwist the curl (make a slight movement in the direction of unwinding).
Side parted waves
First, comb your hair and apply styling product. Step back 3 cm from the roots and press with your hand. Place the comb over it so that the teeth are directed towards the head. Move it left or right at a 45 degree angle. Then move on to the next section. The best styling product to use is gel. Hold the comb in an offset position so that the gel has time to dry.
When making “curved” lines with a comb, make sure that they meet on the right and left sides. Give the same direction of bends from the forehead to the back of the head. Fix the result with varnish.
This effect can be done with a straight parting. The main thing is that the waviness is the same everywhere. To decorate and complete the look, wear a thin, elegant headband.
Curls with pins
To do this, use hairpins and a styling preparation with strong fixation. Form “flagella” by twisting them around your finger. Secure. Repeat the same with the rest of the “stack”. Wait until the hair dries. Spray with varnish before unwinding. Then remove all the pins and straighten your hair.
Some modern hair styling methods involve the use of tools such as a hair dryer, curling iron or flat iron. They are extremely popular because they allow you to create a beautiful, stylish look in a matter of minutes.
Curling iron or tongs
It is worth immediately clarifying that such a device requires certain skills. Therefore, you will have to practice creating a certain shape several times before you get the perfect result. In addition, like any methods involving thermal exposure, this one also requires the prior application of a thermal protective spray or cream. In any case, it is not recommended to use a curling iron too often.

Having placed the strand between the plates, wrap it around the device and leave in this position for several seconds. Keep it horizontal if you want classic curls. For spirals, place the device vertically. Holding it at an angle of 45 degrees, you will be able to form oblique curls that look original and stylish.
For curling, separate bundles up to 3 centimeters wide. Otherwise, they will not have time to warm up completely, which will not allow achieving the desired result.
For long-lasting results, do not straighten the curl after warming up. Lock it in this position. When the latter has cooled, carefully remove the clamps. Correct with your hands and spray with varnish.
Cheat "down"
This technology is also quite simple, but requires skill. To twist, you will need tongs or an iron. The roller should be pointing down and the chute at the top. Bring the device to the base of the strand. Pinch it and turn the device, making half a turn inward. Squeeze the handles of the styler and pull them back slightly, as if ironing them. At the same time, hold the ends with your other hand, pulling them slightly. This will give the curls a natural appearance. Repeat the grabs as you move downwards.
To ensure long-lasting results, it is better not to unravel the resulting curl after curling, but to secure it with a clip while it is still hot. As in the previous method, you can remove the clamps only after cooling.
Cheat "up"
This technique has several differences. The heated styler must be brought up with the roller. After the beam is sandwiched between the plates, turn the device so that the groove is located on the outside. Make one full turn, scrolling up. You don't have to start from the very roots. On the contrary, it is better not to touch this area.
Do not set the temperature too high. Optimal heating 180 degrees.
Hair dryer and brushing
Regardless of the haircut, this option will definitely suit you. The only exceptions are pixie or bob. You will need a round brush. Instead, you can purchase a brush with hard or soft bristles. First you need to apply a heat-protective spray or emulsion.

The process itself goes like this:
- Divide your hair into sections. Stab each one so they don’t bother you.
- Separate thin strands by twisting them.
- Direct the air flow from the outside.
- Create tension.
- Twist the lower part inward, blowing from top to bottom.
- After that, repeat the same thing, setting the cold mode.
You can use a regular fine-toothed comb and a hairdryer to create a beautiful wave effect. This method is similar to the one described above (with a side parting), but in this case it is possible to provide a long-lasting result and make the wave more pronounced. Place the comb so that the teeth are perpendicular. Step back 2-4 cm from the beginning of growth. Swipe the brush to the side, blowing warm air. Then move down, repeating similar steps. Pre-apply mousse to ensure a secure hold.
For clearly defined lines, dry and repeat the comb grip several times in the same place. Start processing from the parietal region.
Types of curls secured with clips:
Curls adjacent to the roots of the hair (directed to the right or direction to the left) are “flat curls”;
Vertical curls with a raised root part - “air curls”.
Required prior knowledge:
- The technique of creating curls using clips is not suitable for curling very curly and long hair.
It is better to place curls in checkerboard pattern, changing the direction of winding the strands.
The direction of the first row of curls depends on natural hair growth directions.
From curl diameter The size and elasticity of the curl and the width of the separated strand of hair depend.
The technique of forming an adjacent curl is suitable for hairstyles or individual elements of hairstyles without volume. The technique of forming “air curls” allows you to create voluminous hairstyles. These techniques can be combined with each other achieving the desired styling effect.
Preparatory work:
Wash your hair;
Apply styling product to hair;
Comb your hair thoroughly.
Technology for making an adjacent curl directed to the right:
Starting from the left temple, separate a strand of hair 2x3 cm (Figure 1);
Comb a strand of hair, slightly pulling it to the right and pressing it to the head;
Form a curl;
With your left hand, take the end of a strand of hair, and place the index finger of your right hand obliquely under the root part (Figure 2);
Wrap a strand of hair like a ribbon around the index finger of your right hand. Make sure that the hair is not pulled too tightly and the strand does not twist;
Bring the end of your finger to the base of a strand of hair;
Using the index finger and thumb of your left hand, remove the formed curl from your right index finger and secure it at the base with a clip. Try not to change the round shape of the curl.
Thus, perform a whole series of curls with the direction to the right. Move the strands of the next row to the floor of the curl so that they are staggered and wind them in the direction to the left.
Technology for creating vertical curls with a raised root part.
In the bangs area, separate a strand of hair measuring 2x4 cm;
Comb a strand of hair from the root part upward, perpendicular to the surface of the head;
Using your thumb and forefinger, form a ring at the end of the strand corresponding to the diameter of the future curl (Figure 3);
Pulling the strand, twist it to the roots of the hair;
Comb your hair again and form the first row of curls;
Place the next row of curls in a checkerboard pattern.
Dry your hair and style it into a hairstyle.
Methods and rules for styling hair using a hair dryer.
The most common methods of blow drying hair are:
Brasheng.
Bombing– method of styling hair using a hairdryer and a transelval brush (tunnel brush). Used on short hair. Allows you to create volume at the root part of the hair on a segment of 2 - 5 cm, which is the basis for the hairstyle.
Brasheng- method of styling hair using a hair dryer and brush. Allows you to create volume both at the roots of the hair and along the entire length of the strand; using this method you can create curls and “smooth” your hair.
The combination of brushing and bombing methods allows you to create many hair styling options.
Preparatory work:
Wash your hair, thoroughly rinsing the root part of the hair, without weighing it down with care products;
Cover the client's shoulders with wedge;
Apply styling product to hair.
Mistakes to avoid when blow drying your hair:
Do not style hair that is too wet; before starting styling, the hair should be slightly dried;
Do not overuse the hair styling product, as the hair loses its natural shine and sticks to the teeth of the comb;
You cannot process strands that are too thick, as the hair in the outer layers becomes overdried and the hair in the inner layers becomes underdried;
Care must be taken during styling to avoid burning your scalp. To do this, the hair dryer's air stream must be directed tangentially to the head;
When styling, the hair tension should not be weak, otherwise it will not acquire sufficient elasticity;
You cannot dry your hair with the cold air of a hairdryer, as it is impossible to achieve the desired result;
You cannot over-dry a strand of hair, as the hair loses its shine; if the strand is not completely dried, the styling will quickly fall off.
The final stage of blow drying your hair:
If desired, some strands can be slightly blunted at the root part and the blunting can be fixed with hairspray;
Using a comb or fork, give the ends of the hair the desired direction;
Select some strands using styling products;
Fix the finished style with hairspray.
Making waves using a hair dryer:
Wet hair with styling compound;
Insert the comb into the hair, stepping back 3 - 4 cm from the root of the strand, holding the comb so that its teeth are perpendicular to the strand;
Move the comb to the right by 1 - 1.5 cm. This movement will give the direction of the wave, a crown will be formed;
After this, turn the comb teeth towards yourself so that the wave line is on the comb teeth, move it towards you by 0.5 - 1 cm;
Direct a stream of hot air to the left, dry the bend of the wave and the first crown;
To make the wave look natural, repeat the comb grips several times;
Then perform a wave in the opposite direction, acting in the same way.

Any technological process of creating a hairstyle includes preparatory work, which is classified as auxiliary work. They include preparing the workplace, checking the serviceability of equipment, disinfecting tools, washing hands, covering the model with a negligee, and washing the model’s hair. They are the same for every hairstyle.
The technological sequence of performing a hairstyle consists of two stages: preparatory operations; the main stage of doing a hairstyle.
Preparatory operations for performing hairstyles of all models are presented in Table 9.
The main technological sequence for performing haircuts of models No. 1, 2, 3 is presented in tables 10-12.
Hair coloring for all models follows the same pattern. The technological sequence for performing staining can be seen in Table 13.
The technological sequence of installation of models No. 1, 2, 3 is presented in tables 14-16.
Table 9 – Technological sequence of preparatory work
| Stages | Technology | Time spent, min | Material used | |
| Preparation of the workplace | Lay out tools and equipment, linen and perfumes | –– | –– | |
| Checking the serviceability of the equipment | Turn on the equipment, check the cords and electrical outlets for damage | –– | –– | |
| Instrument disinfection | Performed before the start of technological work | Single-chamber ultraviolet sterilizer New Germix | –– | |
| Hand washing | Thoroughness | 0,30 | Sink | Liquid soap |
| Conversation with the client | We find out the client’s wishes regarding hair cutting and coloring, what dye the hair was previously dyed with | __ | __ | |
| External inspection | We identify features of the structure, hair growth, head shape, edge lines, etc. | Comb combination | __ | |
| Covering the model's shoulders with a peignoir | Fasten the clasp by adjusting the required size according to the volume of the neck | 0,30 | Peignoir | –– |
| Model washing hair | Distribute the shampoo evenly over the hair, starting from the roots. Lather with fingertips in a circular motion | Chair-wash | Shampoo |
Table 10 – Technological sequence for cutting model No. 1
| Stages | Execution schemes | Technology | Equipment, tools, accessories used |
| Dividing hair into zones | We separate the temporal lateral (LS) and occipital zones (ZZ) from the frontal parietal zone (FPZ) with a horseshoe-shaped parting from one frontal cavity to the other through the highest point of the head. We fix the hair of the frontal parietal zone with clips | ||
| We cut the VBZ and ZZ with a machine using attachments 6-3-1.5. From the marginal hair growth line (HLL), we reduce the hair to nothing. This way we achieve a smooth transition from the KRLV to the parting. We carry out shading with thinning scissors to achieve maximum softness of the transition. We perform the edging with a trimmer. Using a safety razor we achieve clarity according to KRLV | Wahl machine Attachments 6, 3, 1.5 mm Babyliss trimmer Thinning scissors Safety razor Comb comb Brush | ||
| Haircut FTZ | FTZ shear with a pull up at 90 degrees. The control strand is movable: we pull the hair on one side to the middle, then we pull the hair to each subsequent strand, thus obtaining an extension on one side reaching the shape of a triangle. Next, we comb all the hair over the face and create torn oblique bangs using the slicing method. We file all the hair with a razor to obtain the effect of torn light ends. | Straight scissors Combination comb Safety razor Thinning razor attachment |
Table 11 – Technological sequence for cutting model No. 2
| Stages | Execution schemes | Technology | Equipment, tools, accessories used |
| Dividing hair into zones | We separate the temporal lateral (LS) and occipital zones (ZZ) from the frontal parietal zone (FPZ) with a horseshoe-shaped parting from one frontal cavity to the other through the highest point of the head. We divide the hair of the frontal parietal zone into three sections: a parting from the frontal protrusion to the highest point of the head 7 cm long, a bang area 6 cm wide and the remaining part of the FTZ. Sections are pinned with clamps | Comb Comb Clips | |
| Carrying out haircuts of the VBZ and ZZ | We cut the VBZ and ZZ with a clipper using a 3mm nozzle. From the marginal hair growth line (HLL), we reduce the hair to nothing. This way we achieve a smooth transition in length. We perform the edging with a trimmer. Using a safety razor we achieve clarity according to KRLV | Wahl clipper 3 mm attachment Safety razor Comb combination Brush | |
| Performing a FTZ haircut |  | The part separated from the FTZ by a straight parting is cut onto the face at an angle of 30 degrees. We divide the bangs area with vertical partings and cut them with a pull on the face. We cut the rest of the FTZ hair with a pull up at an angle of 90 degrees. We dry the hair and cut the part separated from the FTZ by a straight parting and the bang area using the “free hand” technique with a pull on the face. We work on the ends using the pointing technique. Using the same method, we perform oblique bangs. | Straight scissors Combination comb Clips |
Table 12 – Technological sequence for cutting model No. 3
| Stages | Execution schemes | Technology | Equipment, tools, accessories used | ||||||||||||||||||||||||||||||||||||||||||||||||||||||||||
| Dividing hair into zones | We separate the temporal lateral (LS) and occipital zones (ZZ) from the frontal parietal zone (FPZ) with a horseshoe-shaped parting from one frontal cavity to the other through the highest point of the head. We pin the hair of the frontal parietal zone with clips | Comb Comb Clips | |||||||||||||||||||||||||||||||||||||||||||||||||||||||||||
| Carrying out haircuts of the VBZ and ZZ | We begin the haircut from the frontal protrusion. We divide the strands with vertical partings and cut them at an angle of 90 degrees to the plane. Cutting angle: diagonal, to create movement towards the occipital area. The control strand is movable. We work on the ends with straight scissors using the pointing technique. We trim the edges with a trimmer. | Straight scissors Combination comb Trimmer | |||||||||||||||||||||||||||||||||||||||||||||||||||||||||||
| Performing a FTZ haircut | Table 13 – Technological sequence of painting models No. 1, 2, 3 Table 14 – Technological sequence for laying model No. 1
Table 15 – Technological sequence for laying model No. 2
Table 16 – Technological sequence for laying model No. 3
Hair optimization Modern fashion in hairstyles influences changes in silhouette and shape. Thus, it allows you to choose a fashionable and stylish hairstyle for any type of face, changing the details of which it consists, thereby taking into account the individual characteristics of the face and figure of each person. A correctly chosen hairstyle should highlight your strengths and hide some flaws. Ideally correct facial features are quite rare. Therefore, choosing a hairstyle is a responsible matter, requiring certain knowledge, taste, imagination and skill. You can’t rely only on fashion when choosing a hairstyle. When creating images of the collection, it is necessary to take into account and adjust the individual characteristics of the models. Using a hairstyle, you can visually elongate your face, focus on your strengths and hide flaws in the structure and proportions of your head and figure. The first hairstyle is demonstrated by model Sergei. Sergei's face shape is close to an oval, his facial features are regular, which is considered ideal. The hairstyle was chosen with this in mind. Andrey demonstrates the second hairstyle. Andrey has a triangular-shaped face. Therefore, preference was given to the hairstyle Andrey demonstrates the third hairstyle. Andrey has an oval-shaped face with regular facial features. The hairstyle was chosen with this in mind. Image development The image is the result of processing modern fashion trends, intuition, fantasy and individual ideas of the designer. Any image is a harmony of clothing, hairstyle, accessories and the inner world of the individual. In this final qualifying work, a collection of men's hairstyles and images has been developed under the motto “Out of Time.” The collection's image was created based on an analysis of professional periodicals and an understanding of the need to expand the boundaries of a hairstyle designer's creativity. The task of creating the image of the collection was carried out taking into account the source of inspiration and the latest fashion trends. To create a complete look, the following clothes are offered: For model No. 1 For model No. 2 For model No. 3 Shoes and accessories are well matched to the color scheme of each model. Thus, images are created in accordance with the source of creativity, the theme of the work, the motto of the collection and fashion trends. Attention is focused not on imitation of a specific style, but on the novelty of combining two styles in one image. USE OF HAIRSTYLES IN THE COLLECTION UNDER THE MOTTO “OUT OF TIME” IN THE EDUCATIONAL PROCESS Increasing requirements for the scientific and practical training of modern people entails an increase in the role of teachers and their responsibility for training the younger generation. Activities in modern production conditions require a qualified worker to use the widest range of human abilities, to develop unique individual physical and intellectual qualities that are formed in the process of continuous practical work. And the skills necessary for a future profession are acquired in the process of practical training, in this case - hairdressing technology using laboratory and practical work. |


Hair styling is the process of curling hair for a short period of time.
Hair styling consists of various operations that can be used to create hairstyles of any shape and pattern.
There are several ways to style your hair:
- cold styling (styling with a comb and fingers, styling with curlers);
- air styling (styling with a brush and hair dryer);
- hot styling (styling with tongs);
- combined styling (laying in different ways).
The length of time the style is maintained will depend on many factors, such as: hair structure, its elasticity and elasticity; selected tools and their diameter; styling composition; weather conditions.
Let's first look at the basic elements of a hairstyle. Parting- the most common hairstyle element; is a straight line dividing the scalp into two equal or unequal parts. Partings can be straight, side and curly:
- A straight parting divides the scalp into two equal parts;
- lateral - into two unequal parts and most often runs from the frontal recesses to the highest point of the head;
- a curly parting consists of several straight lines forming various patterns.
Half parting- shortened parting line. It can also be straight, side or curly.
Wave- this is a part of the hairstyle that has a smooth bend and is limited on both sides by crowns; crown - the highest wave line where the hair reverses its direction. The crown can be high and low, narrow and wide. The narrower and higher the crown, the longer the hairstyle lasts.
In relation to the face, the waves can be protruding or reverse. The protruding waves are directed towards the face and extend beyond the hairline. Reverse waves are deployed from the face.
In relation to the parting, the waves are straight, oblique and transverse. Straight waves are located at an angle of 45° to the parting; oblique waves - parallel to the parting; transverse - perpendicular to the imaginary parting.
The sizes of the waves are wide and narrow, shallow and deep. The narrower and deeper the wave, the longer the hairstyle will last. The optimal wave width is 2 cm.
Curl- a strand of hair curled into a tube. According to their location on the head, curls are distinguished into vertical, horizontal, and descending. According to the principle of curling, curls can be curled up, down, figure eight, half eight.
Cold hair styling. Styling with a comb and fingers has been used for a very long time. This style does not harm the hair. This installation method allows you to widely vary the width and depth of the waves. Use the following order of operations:
- moisten hair with styling fixative and comb thoroughly from the forehead back. If there is a parting, then comb from the parting in the direction of the distribution of the hair in the styling;
- insert the comb at the hairline above the forehead or at the parting and move the comb to the side (Fig. 3.2, a). This will result in the first half wave. Hold the comb in your right hand in the third way (see subsection 2.1);
Rice. 3.2. Performing cold hair styling:
a - half wave; b - one wave; c - two waves
- With your left hand (index finger or edge of the palm and little finger) press half-wave hair along the comb to the scalp. Move the comb forward in your hair and move it in the opposite direction (Fig. 3.2, b). Remove your left hand from the pressed half-wave strand and press the second half-wave. You will get one wave;
- then again, with your left hand, press the half-wave hair along the comb to the scalp, move the comb to the side. The result will be the third half-wave.
- repeat the movements of the comb back and forth and pressing the hair with your hand until the desired number of waves is obtained;
- Having laid one section of the head in waves, move to another, continuing to style the hair in the same way (Fig. 3.2, c).
When styling in some places, so that the half-waves and waves do not move, they need to be fixed with clips and hairpins, but care must be taken to ensure that there are no hair creases left.

Rice. 3.3. Types of fixation of flat rings
For very short hair on the back of the head, you can style it in the form of flat rings:
- Apply styling fixative to hair;
- Use your thumb and forefinger to twist the strand clockwise or counterclockwise and secure with one or two thin pins, clips, clips, or invisible pins (Fig. 3.3);
- choose the width of the rings 1.5x1.5 or 2x2 cm. Twist clockwise in one row, counterclockwise in the other, etc.
Hair styling with curlers currently not very relevant in salons and hairdressing salons. However, there will always be clients who prefer this type of styling. In addition, modern types of curlers allow you to get beautiful natural curls, especially on long hair. By using various styling products (hair styling), you can diversify the client’s appearance. To do this, it is important to choose the correct diameter of the curlers, wind them correctly and dry them correctly, as well as comb your hair. For example, by combing your curls with brushes, you can pull out the strands, or you can simply separate the curls with your fingers and spray them with varnish, thereby obtaining a modern style of styling. When using thin curlers, the curls will always be small and bouncy. Medium curlers on short hair will simply add fluffiness and volume to the hairstyle, on medium-length hair - large waviness, and on long hair - soft waves. Large rollers can be used to straighten curly hair. Styling with curlers is always done on damp (for example, moistened with styling compound) hair.
Rules for curling hair with curlers:
- before curling, the hair is divided into zones depending on the chosen layout of the curlers;
- the thickness of the strand should not exceed the diameter of the curler;
- the width of the strand should be slightly less than the length of the curler;
- to lift the root of the strand, the strand is pulled at approximately an angle of 90° to the surface of the head;
- rotate the curlers so that the hair is evenly distributed along the plane of the curlers;
- when curling, maintain uniform hair tension;
- Depending on the type of curlers, they are secured with an elastic band or hairpin.

Rice. 3.4. Various schemes for curling hair with curlers

In Fig. 3.4 shows diagrams for curling hair with curlers. After all the hair is curled, the client is put on a hair net and seated under the dryer. Before unwinding the curlers, they are allowed to cool for better fixation of the curls. The curlers begin to unwind from the lower occipital area so that the hair does not get tangled. Then start combing your hair.
At the client's request, after wrapping, the hair can be combed or blunted. To give your hair a smoother shape, you can use styling gel or wax. To preserve volume for a longer period of time, the hairstyle is fixed with varnish.
Air styling. Hair styling with a brush and hair dryer is carried out depending on the length of the hair.
Blow-drying to lift the roots using a flat skeletal brush is called bombing. It is used in both men's and women's rooms when performing everyday evening and model hairstyles.
The order of operations is as follows:
- The strand is grabbed with a brush at the root, against hair growth, for maximum lift. A stream of air is directed onto the strand tangentially to the head and the resulting hair crease is fixed. Allow this section of the strand to cool on the brush until completely dry;
- The entire length of the strand is pulled with a brush, directing the hair dryer jet in the direction of the lines of the intended hairstyle. After this, remove the brush from the dried strand of hair;
- In the same way, they continue to perform styling on other parts of the head, gradually moving from the occipital zone to the frontal one.
Use a round brush to shape the ends of your hair or straighten curly hair. This installation method is called brushing, it only applies to the women's room.
A hairdryer is convenient for styling hair of any length. Hairstyles with short hair will be more voluminous and will last longer if the hair is moistened at the roots with gel, liquid hairspray or styling foam.
Blow-drying requires special care. You need to dry your hair very carefully, trying to ensure that already dried hair does not come into contact with wet hair; clearly work out all the details, while simultaneously creating a three-dimensional shape of the hairstyle and making sure that the air stream does not burn the skin. To do this, it is recommended to direct the air stream along a tangent line to the head, from the roots to the ends of the strand. After styling, comb the hair with a wide-toothed comb.
Using a comb, a flat brush and a hairdryer, you can create waves. To do this, hold the comb perpendicular to the separated strand, insert the teeth of the brush into the hair at a distance of two to three fingers' width and move it slightly to the right. This is how the first wave is formed. Then the comb is turned with its teeth up, tilted towards itself and dried with a stream of air, directing it to the left. The second wave is obtained in the same way, changing the direction of the brush and hair dryer. The comb is moved to the left 1 cm and turned towards itself. The hair is dried with a hair dryer directed to the right.
You can start styling from the parietal area of the head or from the parting. The brush is held parallel to the head, grabbing a strand of hair, the hair is lifted at the roots and turned slightly towards itself, after which the brush is moved away from the parting, gradually drying the hair along the entire brush. This technique is repeated several times to give the hair the desired shape.
You can wind long strands on a round brush and dry each strand first from the outside and then from the inside. To do this, comb the strand with your left hand, slightly twisting the brush, as a result of which the hair is well fixed to the brush, taking the shape of a curl. In this case, the hair will curl beautifully downward, without giving the impression of being curled in curlers (Fig. 3.5).

Rice. 3.5. Styling hair with a round brush
Hot styling. Hair styling with electric curling irons is performed only on dry and clean hair, since using electric curling irons with wet hair is dangerous. And if hairspray or other fixative was applied to the hair the day before, this will greatly damage the hair structure - it will lose its shine, become dry and brittle.
The order of operations is as follows:
- Separate the strand with a comb, grab it at the roots of the hair with tongs, place it between the roller of the tongs and the clamp;
- warm up by moving the tongs along the entire length of the strand, and wind the hair onto the roller of the tongs. To avoid burning your scalp, place a comb under the strand of hair that is currently being wound (Fig. 3.6);

Rice. 3.6. Hair styling with electric curling irons
- hold for 20 - 30 s and carefully remove the tongs from the curl. The direction of curling with electric curling irons should be determined by the desired result of the future hairstyle;
- perform this operation on all areas of the head where it is desirable to get curls;
- Having received tube curls, you can begin final styling. If necessary, use blunting, backcombing, hairpins, pins, etc.;
- fix the hairstyle.
It should be noted that daily use of electric curling irons is not recommended, as the hair becomes very dry.
Combing and blunting hair. These operations are necessary to design some models of modern hairstyles. When performing both operations, use a comb with teeth of different heights.
Combing is the dense beating of hair over the entire width and thickness of the strand being processed. When combing, the strand is processed both from the inside and from the outside. When starting to comb, first of all, use a ponytail comb to separate a strand on the desired area of the scalp. Then grab the middle part of the strand between the middle (or thumb) and index fingers of the left hand and pull it perpendicular to the surface of the head. Next, bring the comb into the strand of hair at a distance of 5 - 6 cm from its base. Then, by moving the comb towards the base of the strands, combing begins. The movement of the comb down to the base of the strand is stopped at the first feeling of its braking, and each subsequent time the comb will stop further and further from the base of the strand. These movements are usually repeated several times, and each time the comb is inserted 1 - 2 cm higher. At the same time, the left hand holding the strand of hair is also moved upward, towards the ends of the strand. Move the fingers of your left hand up the strand and insert the comb into your hair in a coordinated manner. The movement of the hand with the comb is performed in a circle. Using these techniques, a strand of hair is processed on both sides.
Touping is beating the hair only half the thickness of the strand. Tuping can be thought of as part of backcombing. When performing blunting, a strand of hair is usually pulled not perpendicular to the combing surface, but in the direction in which it will lie in the hairstyle. In this case, the comb is not inserted to its full thickness, but so that its teeth in no case protrude from the outside of the strand. Using this technique, a strand of hair is processed only on the side that will be internal in the hairstyle.