Step-by-step construction of a dress pattern. Sheath dress: pattern construction and ready-made options How to sew a sheath dress with your own hands
There are things that, once they appear on the fashion catwalk, never go out of fashion, almost immediately becoming classics. One of these things, of course, is a sheath dress.
This is a model that effectively emphasizes the figure and, at the same time, hides existing flaws. But the reason for its enormous popularity is not this, but the versatility of the outfit. Photos of models allow you to see that the dress can look strict and businesslike or formal and elegant.
The cut of the classic sheath dress is as simple as possible. This is a sleeveless model with a midi length and a semi-circular neckline. However, over time, the model changed, and new fashionable styles came into use. Short varieties of dresses and floor-length models appeared, called “mermaid”.

However, all models have common features, these are:
- fitted silhouette;
- the dress does not have a cut-off line at the waist;
- deep grooves on the shelves and back.
The style of the dress emphasizes the beautiful curves of the female figure, focusing attention on the thin waist and seductive hip line. Modern designers offer any neckline options. In addition to the classic semicircular neckline, you can find a neckline in the shape of a heart, square bob or oval. Evening dresses often feature asymmetrical necklines.
Depending on the season for which the dress is intended, there are models with long sleeves or with open shoulders and straps.
Depending on the cut, as well as on the fabric from which the dress is made, one can distinguish business-style models, outfits for every day, or evening and cocktail dresses. That is, a sheath dress is an indispensable element of the toilet, a basic thing on the basis of which you can create a wide variety of looks.
When did it appear?
We owe the appearance of the sheath dress to the unforgettable Mademoiselle Chanel. The year of his birth is considered to be 1928. This model became a logical continuation of the “little black dress”, which a little earlier managed to make a splash in the fashion world. But unlike the monochrome model, sheath-cut dresses can have a variety of colors or be made from printed fabrics.

The dress became popular almost immediately after its appearance, then there was a surge in popularity in the sixties. The reason for the revival of interest was movies. Heroines of cult films of that time often sported dresses of this cut.
Office dresses
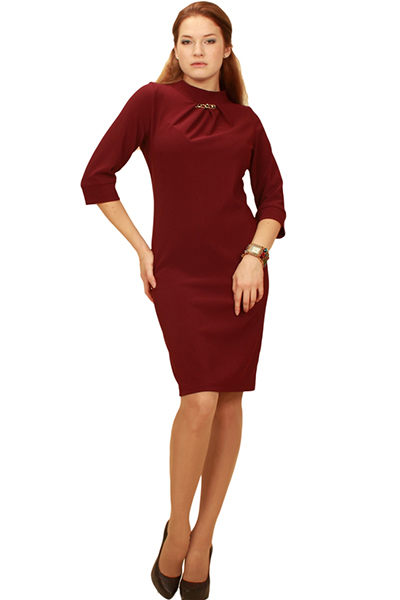
Office models of sheath dresses, as a rule, have styles close to classic ones. The length should be below the knee and the neckline should be moderate. Slits, transparent or lace inserts and other revealing details are not welcome.
The dress can have sleeves of different lengths. Models with ¾ sleeves are sewn that can be worn without additions. While sleeveless office dresses are combined with jackets and cardigans.

Models with a collar of a contrasting color or a stand-up collar look interesting. But you can choose a model with a classic boat neckline.

They sew an office sheath dress from fabrics that hold their shape well. These can be models made of gabardine, wool, cotton-based fabrics, etc. Most often, they sew a sheath dress with a zipper on the back. But there are models in which the zipper is located on the side. Dresses with button closure at the front are less common.
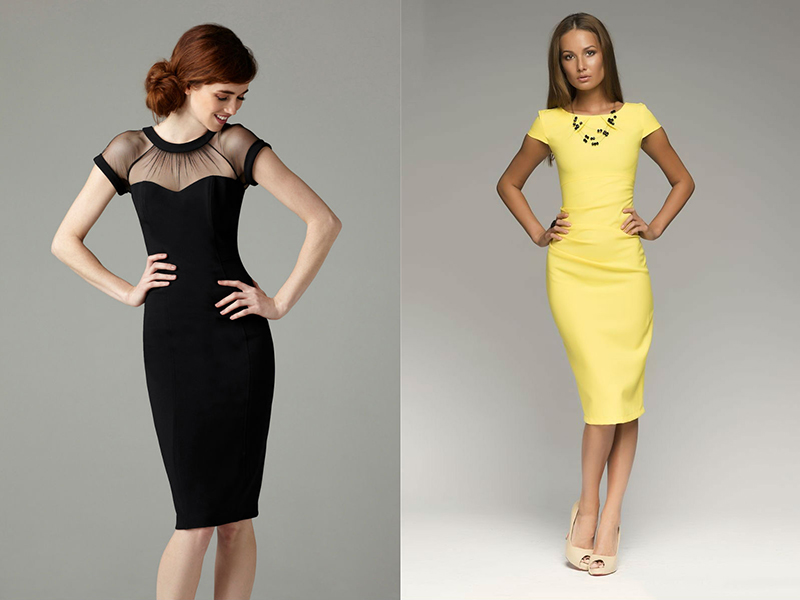
The color of the office outfit is chosen depending on the requirements of the company. The classic solution is a black dress. It can be worn with a jacket in white, red or beige. A gray sheath dress looks no less formal. It can be a dark shade (slate, charcoal) or a very light gray dress with hints of blue or green.
Acceptable colors for office dresses are muted shades of blue (especially in combination with black), beige, and brown. The outfit does not have to be monochromatic; it can be made from checkered or striped fabric.
What to wear with it?
Classic shoes or boots are ideal for an office dress. For sleeveless models, a jacket or cardigan is required. Jewelry for an office dress should be modest; as a rule, it is enough to wear stud earrings. A briefcase-shaped bag will complete the look.

If there is a special event coming up right after work, then you can quickly turn an ordinary office outfit into a festive one. First of all, you will need to put on different shoes. We replace practical office shoes with an elegant model with thin heels.
Then replace the comfortable and roomy bag with an elegant clutch. It is not at all necessary to choose a model with rhinestones. Remember, what makes a thing elegant is not the amount of sparkles, but high-quality materials and elegant shape.
Now it's time to pick out the decorations. It is thanks to them that a simple office dress will sparkle with completely different colors. But you shouldn’t hang yourself with decorations like a Christmas tree. Large earrings and a necklace matched to the neckline of the dress will be enough. If the neckline does not allow you to wear the jewelry around your neck, then you should choose a bracelet instead of a necklace.
Another nuance of the transformation is that a strict office jacket can be replaced with a romantic bolero or a beautiful stole.
Everyday looks
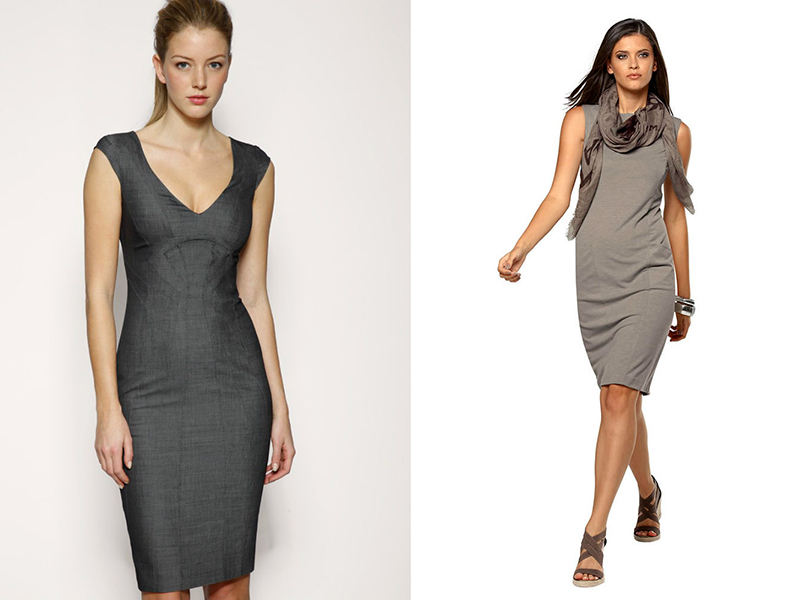
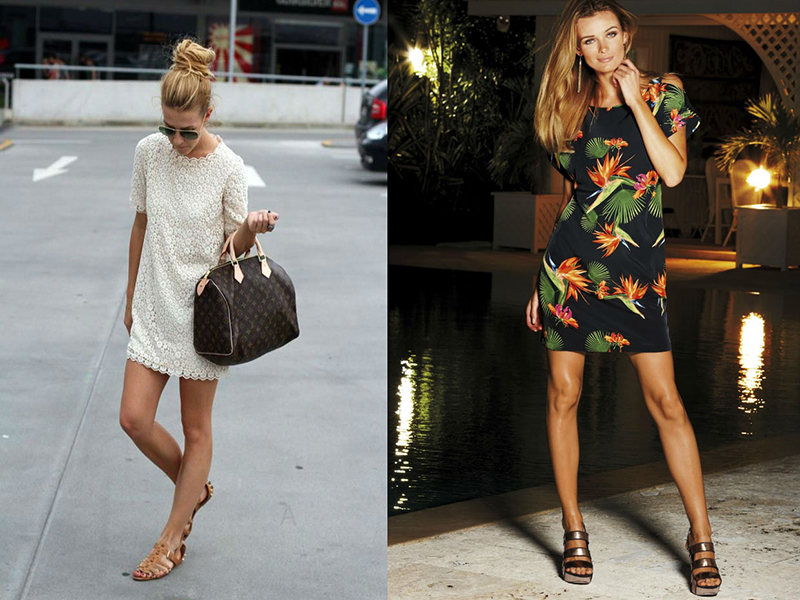
A sheath dress is also perfect for creating everyday looks. This could be a comfortable knitted sheath dress that does not restrict movement, or an outfit made from natural fabrics.

Various models for summer. A summer sheath dress can look completely different. These can be plain models in bright colors, or outfits made of fabric with a floral print. Multi-colored dresses with a blurred watercolor effect are trendy.
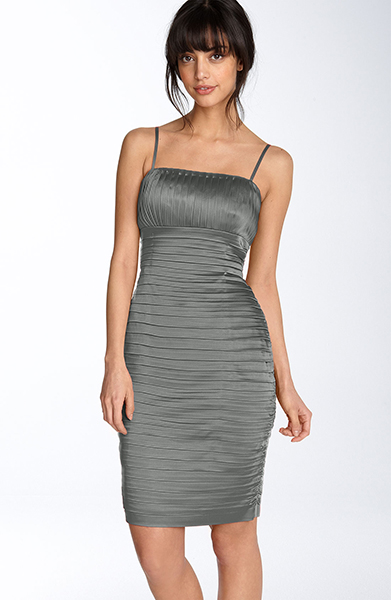
The cut is also varied. It can be a classic cut sleeveless model, a model with straps or a bustier-style bodice. Models with an asymmetrical neckline with a wide strap on one shoulder look interesting.

If your figure does not allow you to wear a dress that fits like a second skin, then you should pay attention to models with draperies. These spectacular details will help hide minor imperfections.
The current model for every day is a denim sheath dress. The fitted silhouette will allow you to present your figure in a favorable light. You can complement a denim dress with a strap of an interesting texture.

It is better to make a winter sheath dress for everyday wear from elastic materials, as they are more comfortable to wear than fabrics that hold their shape well. For winter it is not at all necessary to choose dark colors; on the contrary, bright dresses and an interesting print will add charm to the model. The dress can be made with long sleeves. And if you have to spend most of the day in a well-heated room, then it is better to sew a sleeveless dress, complementing it with a knitted cardigan.
What to wear with it?
You can combine sheath dresses with a wide variety of accessories. For light summer models, you can wear sandals, ballet flats or strappy sandals. The choice of shoes will depend on the cut of the dress. Strict tailoring requires classic shoe models; avant-garde dresses look great with original-shaped sandals.
For a plain dress, the jewelry is chosen to be bright and colorful for summer; dresses with bright prints can be complemented with strict accessories, for example, a plain belt that repeats one of the shades of the dress.

An interesting accessory is a wide-brimmed straw hat. She can perfectly complement a fashionable summer look. On a cool evening, the dress can be worn with a jacket, cardigan or denim jacket
In the cool season, a sheath dress is worn with a coat or classic trench coat. It is better to choose shoes of a classic style.
Evening looks
Sheath dress is great for special occasions. It will be relevant for youth parties and at official celebrations.
A short sheath dress in bright colors is perfect for a youth party. It can be sewn from a material with glitter. Asymmetrical cut models with a strap on one shoulder look especially impressive. These dresses are comfortable to wear, unlike strapless models, you can move and dance freely in them without worrying about how your neckline looks.


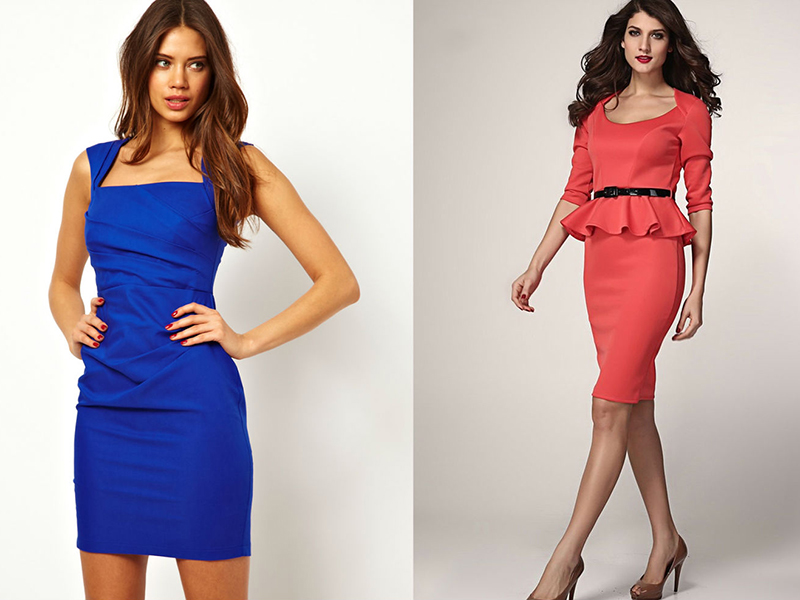
The model with a peplum looks attractive. This decorative detail will help hide some figure flaws and draw attention to the most advantageous features.
A very interesting solution is a leather sheath dress. This is a rather extravagant wardrobe detail, but it is impossible to remain unnoticed in it. Only high quality soft leather is used to sew the dress. Zippers, belts, and pockets are used as decorative finishing. Leather dresses with fur trim or models whose individual details (sleeves, yokes, etc.) are made of perforated leather look impressive.
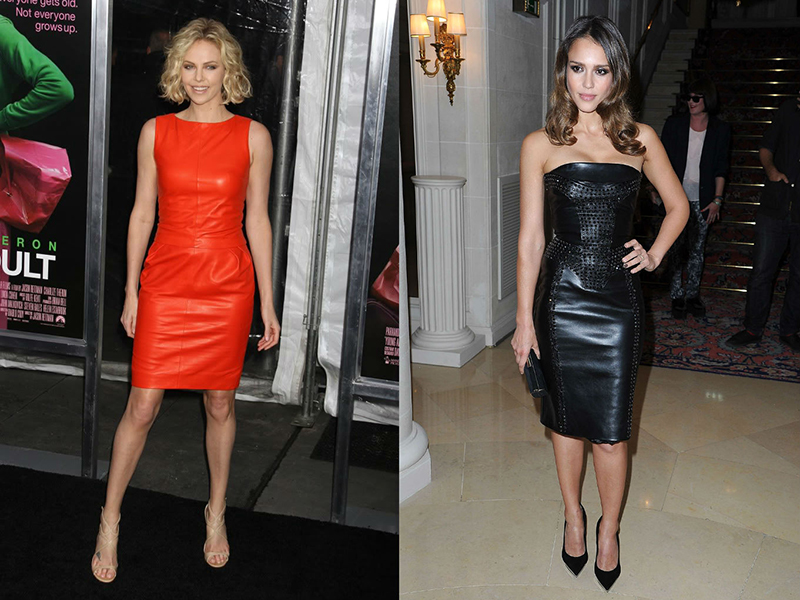
For those who are hesitant to purchase a leather dress, we can recommend purchasing a model with leather inserts. Such models look no less impressive.
It is recommended to sew a sheath cocktail dress from expensive and beautiful fabrics. Outfits made of satin or silk look great. The current solution is a sheath dress made of jacquard. This fabric has an interesting texture, so a dress made from it should have the simplest possible cut without draperies or decorative details.

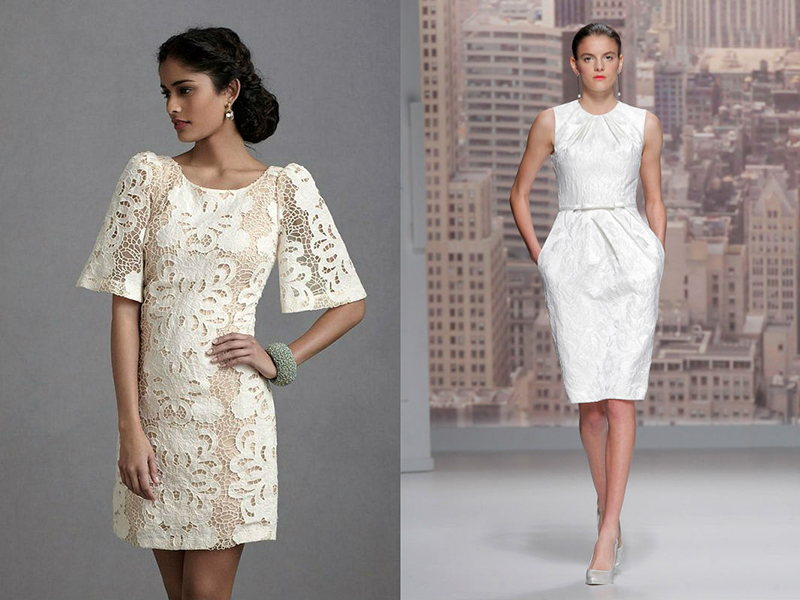
Guipure models look elegant and sophisticated. You can sew a classic sheath dress from this material; it will look great due to the type of fabric. Brave girls can afford a guipure sheath dress with an open back. The neckline does not have to be as deep as possible; it can be made moderate.
For those who are hesitant to wear provocative cutouts, we can advise you to sew a sheath dress from a fabric with a smooth texture, and instead of a cutout on the back, use an insert with lace.
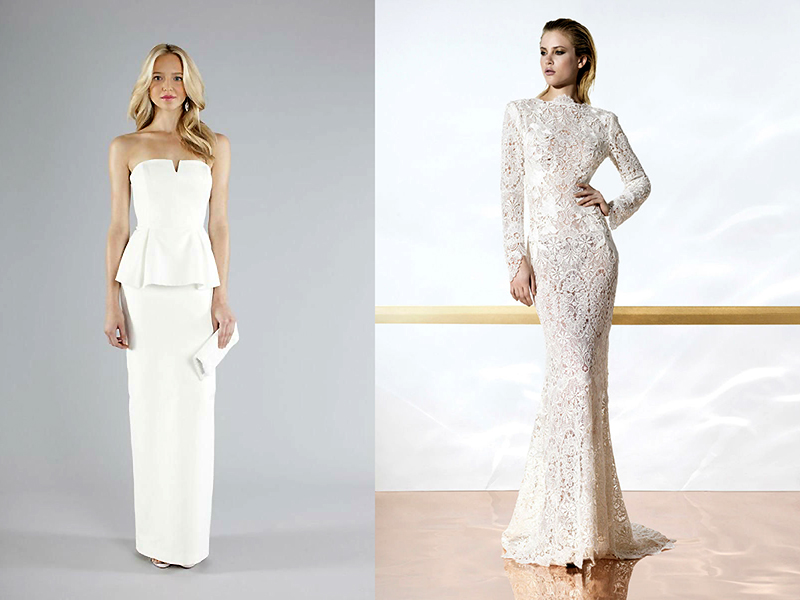
Long sheath evening dresses are called column dresses. They fit tightly at the waist, emphasizing the figure. The dress may have a straight silhouette; in this case, for ease of movement, a slit is made on the skirt. Mermaid cut dresses are trendy today. This style suits girls with an ideal figure. The dress fits tightly to the body, and the flared skirt begins from the mid-thigh line or from the knee.
What to wear with it?
It is necessary to select accessories for the dress taking into account its color, cut, and also the format of the event. So, if this is an event that requires a strict dress code, then we can recommend the following look: wear a classic black sheath dress complete with a beige jacket with black trim. We complement the look with beige classic stiletto pumps, a black clutch and a string of pearls. The look will be impeccable; you can even wear it to a reception with the Queen of Great Britain.

To create less formal looks, you can use dresses in original styles and colors. They are paired with classic shoes or sandals. The choice of jewelry depends on the fabric, decor and neck shape. So, a jacquard or guipure dress has an interesting texture, so it’s better to avoid a necklace and limit yourself to earrings and a bracelet.
You can complement the look with a beautiful belt; it can be matched to the color of the dress or based on contrast.
Makeup, hairstyle and manicure must be impeccable to create a complete look. It is not necessary to have a complex hairstyle; a modest but well-executed styling is sufficient.
Wedding looks
An elegant and feminine sheath dress is ideal for such a special event as a wedding. The even cut of the dress without horizontal lines will make a slender figure even more attractive.

You can make a sheath wedding dress down to the knee or choose the option with a floor-length skirt. The top of a wedding dress can also be decorated in a variety of ways. It can be a boat neckline or a V-shaped neckline, an off-the-shoulder option or with an American armhole. The choice of neckline is made taking into account the bride's body type. If a girl’s shoulders are wider than her hips, then you need to visually narrow them. And if the shape of the figure resembles a triangle, then it is better to choose a dress with puffy sleeves or flounces along the neckline. If a dress with open shoulders is chosen, and the couple plans to get married in a church, then a bolero or cape will be required so that the bride’s outfit is not too open.
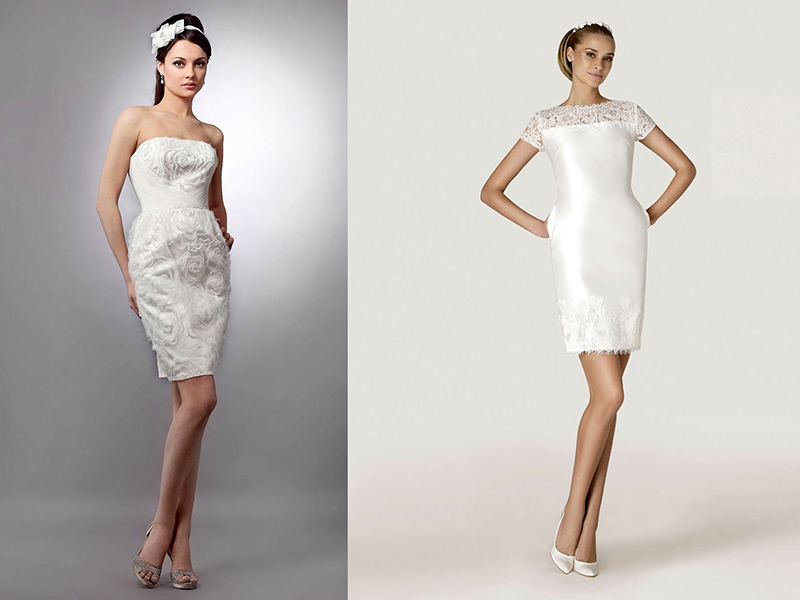
A wedding sheath dress made of lace looks impressive. This outfit can be made from colored lace on a white cover. A model made of snow-white lace on a pastel-colored case will look no less beautiful.
What to wear with it?
Let's figure out what to wear with a wedding sheath dress. Choosing accessories for this outfit is easy. As a rule, classic shoes are recommended for a sheath dress; the best choice is stiletto pumps.
A veil can be present in the bride's image, regardless of the length of the dress. A short veil looks harmonious with knee-length dresses; you can wear a lush and multi-tiered veil with a long dress.

Wedding hats look no less elegant. This could be a small pillbox hat with a veil or a wide-brimmed hat. Gloves can be an interesting detail of the look. You can wear gloves above the elbow length with a sleeveless dress.
Jewelry is chosen according to the image. In most cases, pearls will do. Elegant white metal jewelry looks good.
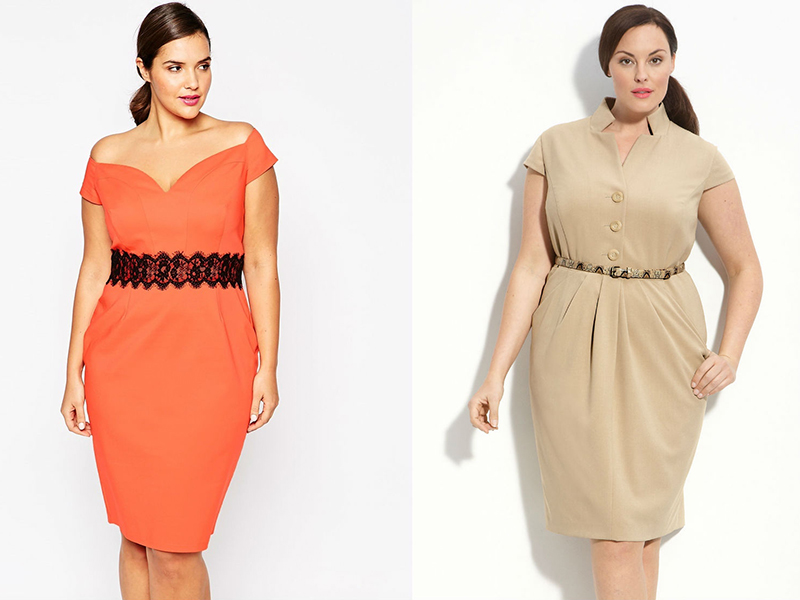
How to choose?
The sheath dress is a model that will suit all women without exception.. The classic version of the dress is the most acceptable option; it looks equally good on both young girls and ladies of an elegant age.

For women of short stature, it is better to opt for knee-length models; for tall fashionistas, elongated dresses up to mid-calf are also suitable.
Girls whose figure is not ideal should choose dresses made of fabric with a matte surface and smooth texture. Fabrics with sparkles, models with rich decor, and translucent inserts should be avoided. It is also very important to purchase an outfit that is the right size. If you wear a tight dress, your fullness will be more noticeable. If you have full arms, it is recommended to choose even summer dresses with sleeves or use a bolero.
So, a sheath dress is a classic that will always be relevant. Therefore, all fashionistas, regardless of age and body shape, should include it in their wardrobe. Based on this item, using accessories, you can create a wide variety of, but always fashionable, looks.


Step-by-step construction of a dress pattern - building the base
If you decide to sew for yourself, the first thing to start with is to take measurements and create a base pattern from which you can model any style. Today we will give you a step-by-step construction of the pattern for the base of the dress.
But first, let's take measurements.
To draw a drawing of the pattern-basis of a women's dress (size 48), you need to take the following measurements:
1. Dress length 100 cm
2. Back length to waist 38 cm
3. Shoulder length 13cm
4. Half neck circumference 18 cm
5. Half circumference above the chest 44 cm
6. Half bust 48 cm
7. Half waist 37 cm
8. Half hip circumference 50 cm
9. Armhole depth 20.5 cm
IMPORTANT! All calculations performed when constructing a dress pattern are valid for a Bust Circumference (BC) of more than 80 cm.
Where to start?
Before you start creating the base pattern for the dress, decide on the silhouette. It is important to determine for yourself what kind of dress you want to sew: tight-fitting, tight-fitting or loose. Based on this, we will make an increase in the freedom of fit of the product.
We are building a dress with a close-fitting silhouette and adding 1.5 cm to the half-circumference of the chest.
Step-by-step construction of a dress pattern - calculation of auxiliary values
Let's calculate the auxiliary values that we will need when constructing the pattern:
Back Width (BW). Formula for calculation: 1/8 OG +5.5 cm = 17.5 cm
Armhole Width (ShPr). Formula for calculation: 1/8OG -1.5cm=10.5
Chest Width (CH). Formula for calculation: 1/4OG -4cm=20 cm
Armhole depth (GPr). We measure it or, to check the measurements, calculate it using the formula GPr = 1/10OG + (10.5-12 cm) = 20-21.5. If the calculated value does not match the measured value, take the average between them.


Step-by-step construction of a dress pattern fig. 1-2
Move 10-15 cm down from the top of the paper and place point A in the left corner. Down from point A, draw a vertical line 100 cm long (the length of the dress as measured). To the right of point A, draw a horizontal line with a length equal to 1/2 of the chest circumference according to the measurement of +1.5 cm (increase in freedom of fit) - points D and B are obtained - draw segments DC and BC.
Armhole line. From point A downwards, set the Armhole Depth according to the measurement + 0.5 cm - points G and G1 are obtained. Draw a horizontal line.


Step-by-step construction of a dress pattern fig. 3-4
From point G to the right, set aside the Back Width +0 cm (to fit freely) and the Armhole Width + 0.5 cm (to fit freely), chest width + 1 cm. In total, we added 0+0.5+1=1.5 cm - this is the increase that we included above. Draw vertical lines from the obtained points upward until they intersect with AB.
Waistline. From point A downwards, set the length of the back to the waist according to the measurement - point T. Draw segment TT1.
Hip line. From point T, set aside 20 cm downwards - the height of the hips according to the measurements - point L. Draw segment LL1.


Step-by-step construction of a dress pattern fig. 5-6
Side line. Divide the width of the armhole with the increase in half, draw a vertical line down from the division point until it intersects with DC - you get a side line. Divide the left and right auxiliary vertical lines of the armhole with crosses into 4 equal parts.
Back neckline. From point A, set aside 6.5 cm to the right (1/3 of the half-circumference of the neck as measured + 0.5 cm) and upward 2 cm (for all sizes). Draw a curved line for the back neckline.


Step-by-step construction of a dress pattern fig. 7-8
Back shoulder. On the left auxiliary line of the armhole, set aside 1.5 cm from the top down. Connect points 2 (back neckline) and 1.5 (shoulder slope) with a straight line. Shoulder length when measured is 13 cm.
Back armhole line. From the lower left corner (the width of the armhole), draw a bisector of the angle 2 cm long (for all sizes) and, using a template or by hand, draw a cutout for the back armhole, based on the control points: point 13, the middle auxiliary dividing point, point 2, to the side line.


Step-by-step construction of a dress pattern fig. 9-10
Lifting the shelf. From point G1, set aside 24.5 cm upward (1/2 of the half-chest girth according to the measurement +0.5 cm) - point W. Draw a horizontal line from point W. Raise the auxiliary vertical line of the armhole (see Fig. 9).
Front neckline. From point W, set aside 6.5 cm to the left (1/3 of the half-circumference of the neck according to the measurement + 0.5 cm) and down 7.5 cm (1/3 of the half-circumference of the neck according to the measurement + 1.5 cm). Draw a front neckline according to the pattern (or by hand).


Step-by-step construction of a dress pattern fig. 11-12
Front shoulder to dart. From point 6.5 (neck) set aside 4 cm to the left and 1 cm down (for all sizes). Draw a short sloping line.
From point 1 down, draw an auxiliary perpendicular with a dotted line to the armhole line GG1. Set aside 1 cm to the right and connect points 1-1 with a straight line (the right side of the chest dart is built).


Step-by-step construction of a dress pattern fig. 13-14
Bust dart. Divide the right side of the chest dart in half and draw a horizontal line 4 cm long from the division point (Half chest circumference minus half circumference above the chest: 48-44 = 4 cm). Through point 4, draw the left side of the chest dart with a length = the length of the right side of the chest dart (Fig. 13).
Front shoulder line. Draw an auxiliary dotted line from the top of the left side of the bust dart to the top dividing point of the auxiliary line of the back armhole.


Step-by-step construction of a dress pattern fig. 15-16
Along the auxiliary dotted line, set aside 8 cm (13 cm (shoulder length as measured) minus 4 cm (shoulder length to the right side of the chest dart) minus 1 cm) and down at a right angle 2 cm (for all sizes). Draw a front shoulder line.
From the extreme point of the front shoulder, draw an auxiliary dotted line to the lower point of dividing the auxiliary line of the armhole, cut it in half (Fig. 16). From the lower right corner (armhole) draw a bisector 2 cm long.


Step-by-step construction of a dress pattern fig. 17-18
From the point of division of the auxiliary dotted line, place it at a right angle 1 cm to the right (Fig. 17). Using the pattern or by hand, draw the cutout of the front armhole along the control points: shoulder point, point 1, point 2, to the side.
Calculation of darts:
We calculate the darts in this way: 1/2 Bust circumference minus 1/2 Waist circumference = 48-37 = 11 cm. This is excess fabric around the waist, which we need to remove into darts. We put 1/3 of the resulting value in the side darts and 2/3 in the back and front - a little more in the back and a little less in the front.
Side darts: 11 cm /3 = 3.6 cm (rounded to 4 cm) (Fig. 18). IMPORTANT! The side lines shift to the left and right from the starting line (hip circumference control: 1/2 of the hip circumference according to the measurement + 1 cm). The lack of volume at the hips + 1 cm is divided in half and added to the back and shelf on the sides (from the hip line to the bottom of the product).
The tuck on the back is 4 cm, on the front - 3 cm. Total 11 cm.


Step-by-step construction of a dress pattern fig. 19-20
Back tuck: Divide the width of the back waist to the side in half and from the division point draw a vertical line to the armhole and hips. Draw a dart as shown in Fig. 19.
Front waist tuck. From the top of the bust dart, draw an auxiliary perpendicular to the waistline. Draw a dart as shown in Fig. 20.


Step-by-step construction of a dress pattern fig. 21-22
ADVICE! If you have a narrow waist and a “kinked” back, excess fabric can be tucked into the middle seam along the back and an additional dart (see Fig. 21 blue lines).
Rice. 22. Finished pattern. Re-make the front pattern and the back pattern of the dress separately and proceed to modeling.
Note:
The laconic sheath dress came into fashion at the beginning of the last century and has not left the ladies’ closet since then. Its main feature is the cut, which “outlines” the figure and tapers downwards. “Sheaths” most often have a round neckline and no sleeves. However, over the many years of its existence, the dress has changed and become more practical. So, today the style of sheath dress with sleeves is especially popular, the pattern of which is presented in this article. This model, if paired with appropriate accessories and shoes, is equally suitable for work, an evening out and everyday wear. By the way, “cases” were the favorite outfits of such famous women as Audrey Hepburn and Jacqueline Kennedy.
In addition, a sheath dress is a basic pattern that can be used to model other dress options in the future. Today I propose to study how to create a dress pattern according to your figure, as well as ready-made patterns and several drawings with calculations.
How to make a sheath dress pattern
If you decide to create a dress pattern yourself, then below you can enlarge the images with detailed instructions from the book “Cutting and Sewing Courses at Home.”
Ready-made sheath dress patterns
Well, if you don’t want to bother with pattern modeling, I suggest downloading ready-made versions of dresses with and without sleeves. Sizes are based on European size chart (see below).


I also offer another version of a sleeveless sheath dress with a round yoke. This pattern comes in 3 sizes - 38, 40 and 42.

And a few more drawings of sheath dress patterns with ready-made calculations (the sizes in the caption to the photo are indicated in the size table above):


Pattern drawing for a sheath dress (according to the size chart, size 40)


Where else can I get a sheath dress pattern?
The wonderful RedCafe program has a basic set of patterns. Having chosen a dress model, you can create a pattern to suit your individual parameters. I wrote more about how to use the RedCafe clothing editor.
How to sew a sheath dress: a quick guide
Once your pattern is ready, you can safely transfer it to the fabric and start sewing!
What you will need:
- Dress fabric 2 m * 1.5 m;
- Lining fabric for 1.4*1.4m;
- One hidden zipper
- Specialist. sewing machine foot.
Allowances:
Leave an allowance of 1.5 cm for all parts, including the lining parts. Don’t forget to also add 4 cm for the hem of the bottom.
Step-by-step progress:
Step 1. Sew darts on the front and back.
Step 2: Stitch the zipper along the middle edges of the back. Next, sew the middle seam from the top end of the slit to the zipper.
Step 3: Sew shoulder and side seams.
Step 4: Sew darts onto the lining. Sew the middle seam along the back of the lining, starting from the bottom end of the zipper opening all the way down to the bottom. Sew the lining to the dress.
Step 5. Sew darts on the sleeves. Sew the seams on the sleeves. Iron the allowances intended for hemming the bottom of the sleeves inside out and sew by hand.
Step 6: Sew in the sleeves. Iron the seam allowances along their edges.
Step 7: Press the hem allowance inside out and hand stitch. Hem the bottom on the lining. Please note that the lining should be 2 cm shorter than the sheath dress itself.
Greetings, dear readers! I hope you are in a great mood and in a fighting spirit because... Today you and I have to master one of the longest and most demanding stages of creating clothes - and independently make a pattern for the base of the dress. Do you already know why you need your individual base pattern?
Let's explain. For any modeling, you will need the basis of the dress - a pattern according to your measurements. It’s not called the base for nothing - on its, hmm.. basis, you can build an unimaginable number of different dress models! We have written about this in other articles about basic modeling techniques. For example, here we describe what you can turn your dress pattern into using such a simple modeling technique as. And here is how to do it. I’m already silent about, or a lesson about creation.
You can use the instructions given in this article and, after making all the necessary calculations, build it yourself. Or visit our basic pattern page using your measurements and make your pattern in minutes!
Right here
Enter your measurements in the special fields, click the “generate pattern” button, pay for the service and quickly get down to the fun part - modeling and sewing!
If you decide to build a basic dress pattern with your own hands, then below in the article a detailed construction sequence with drawings is described - substitute your measurements into the formulas, count them and you can start building a dress drawing.
So, our goal is to create a pattern for the base of a woman’s dress, and we have a couple of free hours, a large sheet of paper and a lot of patience), so let’s get started.
Creating a drawing grid for a basic dress pattern
Initially, we need to decide on the length of the dress. We plot this value vertically AN, placing the segment at the left edge of the graph paper (For example: AN = 110). Through A and H to the right we draw perpendicular lines.
From point A to the right, we smooth out the size of the half-circumference of the chest with an increase in freedom (For example: AB = POG + Pr = 48 + 5 = 53 cm.). Place point B. Draw a line from B down to the intersection with the bottom line and place point H1.
From point A downwards we lay down a segment AT, the length of which is equal to the length of the back to the waist plus an increase (For example: AT = Dts + Pr = 38 + 0.5 = 38.5 cm) and put a point T. From T to the right we draw a line to the segment BH1 , at the intersection we place point T1. The segment TT1 is the waist level.
Then, from T down, we set aside the height of the hip line. The size of this segment is equal to half the length of the back (For example: TB = ½ * DTS = ½ * 38 = 19 cm). We place point B. From B to the right we draw a hip line, the intersection with the segment BH1 is designated B1.
.png)
Construction of the back neck
Initially, from point A to the right, along the segment AB, we set aside the value of the width of the back plus the increase (For example, AA1 = ShS + Pr = 18 + 1.5 = 19.5 cm). We put point A1.
From point A1 to the right we lay off the segment A1A2 equal to 1/4 of the half-circumference of the chest plus an increase (For example: A1A2 = 1/4 * POG + Pr = 1/4 * 48 + 0.5 = 12.5). We put point A2. Now we draw lines of arbitrary length from A1 and A2 down. Segments A1 and A2 are the boundaries of the width of the armhole.
Then, from point A to the right, we lay off segment AA3 equal to 1/3 of the half-circumference of the neck plus an increase (For example, AA3 = 1/3 * NOS + Pr = 1/3 * 18 + 0.5 = 6.5 cm). We put point A3. AA3 indicates the width of the neck at the back.
From point A3 upward we draw a segment A3A4 equal to 1/10 of the half-circumference of the neck plus an increase. (For example A3A4= 1/10*POSH + Pr=1/10*18+0.8=2.6 cm). We put point A4. A3A4 – back neck height.
In order to beautifully draw a neckline, we should divide the angle AA3A4 at point A3 in half and draw a line. On this line we set aside the value of the auxiliary segment A3A5 (For example, A3A5 = 1/10 * 1POSH - 0.3 = 1/10 * 18-0.3 = 1.5 cm) and place point A5.
We connect the points A4, A5 and A obtained as a result of construction with a smooth curve - this is the line of the back neckline!
Construction of the shoulder section of the back
Initially, from A1 we lay down the segment A1P and put point P. (The size of the segment A1P depends on the shape of the shoulders - for normal A1P = 2.5 cm, for sloping A1P = 3.5 cm, for tall A1P = 1.5 cm).
We connect points A4 and P with a straight line. Then from A4 we lay off a segment A4P1 equal to the length of the shoulder plus an increase (For example, A4P1= Dp +2=13.5+2= 15.5 cm) and place point P1.
On the resulting line A4P1 from A4 to the right, set aside 4 cm and place point O. It is from point O that we will build a shoulder dart on the convexity of the shoulder blades.
From O we put 8cm vertically down – we get point O1. Then, also from point O, we put 2 cm to the right - we put point O2. We connect O1 and O2 with a straight line. The segments ОО1 and О1О2 are the sides of the dart, but we need to equalize them. To do this, from point O1 through point O2, draw a segment O1O3 = OO1 and place point O3. Then we connect points O3 and P1.A4O + O3P1 – arm length.
.png)
Now let's decide on the level of the chest line. To do this, from point P downwards we lay off the segment PG=1/4*Pog+Z. (We select the Z coefficient depending on the posture: 7 cm - for a normal figure, 7.5 cm - for a stooped figure, 6.5 cm - for a crooked figure).
(For example PG=1/4*48+7=19 cm).
Through point G to the left and right we draw a horizontal line - it determines the level of the chest and the lower level of the armhole. We denote the point of intersection with straight line AN as G1, with the line of the armhole width as G2, and with line BH1 as G3.
From point G up, set aside the value of the rear angle of the armhole, equal to GP2 = 1/3 of the distance PG + 2 cm, and set P2 (For example, GP2 = 1/3 * 19 + 2 = 8.3 cm).
Divide the angle at point G in half and draw a segment GP3 equal to 1/10 of the armhole width + 1.5 cm and set point P3. These manipulations will help us beautifully draw the armhole line. (Armhole width = segment size A1A2). (For example, GP3=1/10*12.5+1.5=2.8 cm). We divide line GG2 in half and put point G4.
By connecting points P1, P2, P3 and G4 we get the back armhole line.
Construction of the front part
From point G2 upward we lay off the segment G2P4=1/4* Pog+W. (We also choose the W coefficient depending on the type of posture: 5 cm - for normal; 4.5 cm - for stooped; 5.5 cm - for crooked).
(For example: Г2П4=1/4*48+5=17 cm). We put point P4. From point P4 to the left we set aside P4P5 = 1/10 *POG and put point P5. (For example: 1/10*48 = 4.8 cm).
From point G2 upward we draw a segment G2P6 equal to 1/3 of the value G2P4 and put P6. (G2P6=1/3*17=5.7 cm).
Now let’s perform several auxiliary constructions to draw a beautiful armhole! Connect points P5 and P6 with a straight line and divide them in half. Then to this line to the right, at a right angle, we will set aside 1 cm. We divide the angle at point G2 in half and draw a segment G2P7 equal to 1/10 of the width of the armhole plus 0.8 cm (For example: G2P7 = 1/10 * 12.5 + 0.8 = 2.1 cm). We put point P7. We connect P5,1,P6,P7,G4 with a smooth curve - the front armhole line.
.png)
Construction of the shelf neck
From point G3 upward we set aside the value G3B1 = 1/2 *POG +R. (We select the coefficient R depending on the posture: 1.5 cm for normal and crooked; 1 cm for stooped). (For example, 1/2 * 48 + 1.5 = 25.5 cm). And then we put point B1.
From point G2 upward we set aside a value equal to G3B1 and place point B2. Then we connect B1 and B2. From point B1 to the left we set aside B1B3 = 1/3 * NOS + 0.5 cm and place point B3. B1B3 - neck width. (For example: 1/3*18+0.5=6.5cm). From B1 downwards we lay off the segment B1B4 = 1/3 * NOS + 2cm and put point B4 (For example 18:3+2=8cm). We connect B3 and B4 with a straight line and divide it in half. В1В4 - neck depth.
From point B1 through the division point we draw a line on which we lay off the segment B1B5 = 1/3 * NOS + 1cm and place point B5. (For example 18:3+1=7cm). We connect points B3, B5 and B4 with a smooth line and get the neck of the shelf!
Construction of a dart
From point G3 to the left we lay off the segment G3G6, which is equal to the position of the center of the chest. We denote it by point G6.
From G6 we draw a line upward until it intersects with the line B1B2. At the intersection we place point B6. From B6 down we put B6G7 = VG and put point G7. Then, in the same way, from point B6, we put 1 cm down and put point B7. Then, we connect points B7 and P5 with an auxiliary segment. Along the line P5 B7 from point P5 to the right we lay off a segment P5B8 equal to the length of the shoulder minus the value of the segment B3B7 and minus 0.3 cm (For example, B3B7 = Dp-B3B7-0.3 = 13.5-3-0.5 = 10.2 cm) . We put point B8. From point G7 through point B8 we draw a segment G7B9 with a length equal to the segment G7B7. We denote the resulting point as B9. Connect points B9 and P5. G7B9 and G7B6 are the sides of the dart, P5B9 + B7B3 is the length of the shoulder.
.png)
At this stage we will construct the side seam of the base of the dress. Initially, from point G to the right we lay off a segment GG5 equal to 1/3 of the width of the armhole (armhole width = segment A1A2). (For example GG5=1/3*Shp=1/3*12.5=4.2 cm). We get point G5.
We draw a vertical line through point G5. At the intersection with the armhole line (with a curved line) we place point P. The intersections with lines TT1, BB1 and HH1 are designated T2, B2, H2, respectively.
We find the auxiliary quantities necessary to construct the side seam:
For example G =TT1 – (POT +1cm), (G=53 -(38+1)=14 cm).
Then we determine the coefficients:
F = 0.25*G (14x0.25=3.5cm),
L= 0.45*G (14x0.45=6.3cm),
S = 0.3*G (14x0.3=4.2cm),
Y = (PB +2 cm. –BB1)/2 (53+2-53)\2=1cm).
(Pb-half hip circumference)
If it turns out that Y is a positive number, then we move from point B2 to the left and right along Y cm (1 cm) and put points B3 and B4.
From T2 to the left and to the right we set aside 1/2*L (For example 6.3:2=3.2) and put points T3 and T4. Point P is connected to T3 and T4. Connect points T3 B4 and T4 B3 with auxiliary lines, divide the segments in half, set aside 0.5 cm from the division points to the side of the barrel and connect them with a smooth curve to points B3 and T4 on one side and with B4 and T3 on the other side.
If it turns out that Y is a negative number, we also move from point B2 to the left and to the right along Y cm. But pay attention - the way of connecting points B3 and B4 will change.
.png)
If Y=0: then points B3 and B4 will coincide with point B2.
.png)
From point B1, we lay down the segment B1T5 = accident + 0.5 cm and place point T5 (For example, B1T5 = 43 + 0.5 = 43.5 cm). We connect T4 and T5 with a smooth line.
From B1 downwards we set aside the value of the segment equal to T1T5 and place point B5. Connect points B5 and B3 with a smooth line.
Construction of darts and design of side seams
Let's start building darts on the front and back. It is their size that determines the degree of fit of the product according to the figure. Initially, we divide the segment GG1 in half, denoting the division point as G8. From point G8 we lower the line down until it intersects with line BB1. At the intersections with lines TT1 and BB1 we will put points T6 and B6.
From T6 to the left and to the right we set aside the back dart solution T6T7 = T6T8 = S /2 (For example 4.2:2 = 2.1) and put points T7 and T8. From point G8 down we set aside 1 cm, from point B8 up - 3 cm. Connect these points to T7 and T8.
As a result, we get a waist dart on the back, where G8B8 is the center of the dart, T6T7 = T6T8 is the tuck solution).
.png)
We begin building the dart on the shelf. From point G6 we draw a line down to the intersection with line BB1. The intersections with lines TT1 and BB1 are designated T9 and B7.
From T9 to the left and to the right we set aside the tuck solution for the shelf T9T10 = T9T11=F/2 (For example 3.5:2=1.7) and put points T10 and T11.
From point G7 down, and from point B7 up, we set aside 4 cm, then these auxiliary points and connect them with T10 and T11. And now we have already built a dart. G7B7 - line of the middle of the dart, T9T10 = T9T11 tuck solution.
.png)
Now let’s complete the side seams of the dress base drawing. To do this, draw lines from B3 and B4 down to the intersection with HH1 and mark the intersection points of H3 and H4. From H1 downwards we set aside the value of the segment T1T5 and place point H5. We connect points H3 and H5 (Figure 8).
.png)
And finally we made the pattern for the base of the dress!
It probably took about an hour to build it. Of course, if you decide to seriously engage in designing, modeling and sewing clothes, it will be interesting (and useful) for you to build the basis of the dress yourself, to figure out what dimensional characteristics are laid down and in what sequence. And yet, do you want to spend your time on this construction? Isn't it better to start creating your model right away?
So experiment, create, create something new and unique. And we will help you with this.
Have a good mood and see you soon!