Folk embroidery textbook. How to cross stitch correctly? Rules for cross stitching for beginners Clothes decor with sequins
Evgenia Smirnova
To send light into the depths of the human heart - this is the purpose of the artist
Content
For many centuries, embroidery on clothes has not lost its relevance. In ancient times, embroidery was used to judge a person’s class; the robes of rich officials and the clergy were decorated with gold, and ordinary people were decorated with modest ribbons and beads. If earlier a thread pattern was also a talisman, today embroidery is in the foreground for the aesthetic perception of clothing and decoration. There are several embroidery techniques, each with its own materials and process.
Why do you need embroidery on clothes?
Modern clothes with embroidery belong to the arts and crafts of needlework. The principle of embroidery is working with a needle or crochet, a machine to create a pattern, a three-dimensional image. Decorate leather, felt, cotton. For work they use linen, cotton, silk, woolen threads and beads, pearls, stones, sparkles, sequins, gold, and sometimes even coins. With the help of women's hobbies, you can create entire ornaments, logos and inscriptions - indispensable for workwear, custom-made sports uniforms, and national costumes.
Depending on the type of embroidery technology,
The pattern, its density, and openwork (richelieu) differ. Ornaments and patterns can have a flat or convex appearance, be slightly contoured, lacy, or tightly covering the entire surface of the product. Functions of modern embroidery:
- improving or emphasizing the aesthetic properties of the material;
- emphasizing the texture and color of the fabric;
- can decorate things.

On T-shirts
Embroidery on T-shirts or tank tops is popular. With its help they become brighter and more expressive. More often, T-shirts with embroidery are decorated with a logo and are used for sports uniforms and workwear. Lettering on clothes made by embroidering emphasizes the color and texture of the fabric and distinguishes its owner due to its improved aesthetic properties. For embroidery, use pockets, the upper part of the back, and the front surface at chest level.
On jeans
Embroidery on jeans is more often used to decorate women's clothing; men do not perceive such design. Pants can be “colored” with bright patterns, embroidered with individual flowers, stars, or completely filled, for example, with one pant leg. The pattern decorates the jeans and emphasizes the slenderness of the legs. Popular places for application are pockets (back and front), the front of trousers, the bottom hem, and the belt area.
On shirts
Logos and inscriptions are often used to decorate shirts with embroidery. They are placed on the collar, cuffs, pockets, and belt. It is advisable to apply a repeating pattern (ornament) or inscriptions. For the latter, the machine method of decoration is optimal. With a pattern applied, a polo shirt looks more attractive, more respectable, and can be used to create a unified style (football teams, companies with a dress code).
On dresses
Dresses decorated with VHI embroidery look rich. These are national costumes for dance teams or clothing used in everyday life. Bright contrasting threads are used for decoration; the pattern is applied to the collar, sleeves, belt, and hem edge. The choice of design depends on the mood and purpose of the item. The ornament is suitable for everyday use, rich designs like flowers or forest motifs are suitable for evening events.
To start embroidering, you need to become familiar with the types of stitches used in the process. There are several of them, each differing in technology and type of application:
- The chain stitch is the most common and is a loop stitch, machine or hand stitch. Sometimes called a chain stitch, you will need a chain stitch or needle to perform it. From the starting point, point the needle to the left, loop the thread under the tip from right to left. Pull the thread through the fabric, again point the needle to the left to the second point, pass through the loop, lead to the third point, place the loop under the tip of the needle. A variation of the stitch - fastened: repeat the first step, pull the thread and secure the loop with a small stitch, make 5 stitches in a circle (you will get a “daisy” pattern).
- Lingette (overcasting) - included in the group of loop stitches, they are distinguished by close placement to each other with the formation of a tight “ribbon”. The fabric is visible between each vertical stitch. Execution process: from the starting point through the second, draw the needle to the third point, which will lie to the right of the starting point. Pass the thread under the tip of the needle from left to right, pull the thread, rise to the fourth point (located close to the right of the second), bring the needle to the fifth point, placing the thread under the tip of the needle. Embroider in rows with tight, even stitches.
- Crossed - sometimes called moss, Persian, Russian, goat or witch. Refer to the group of crosses: from the starting point, pass the needle through the second point to the third, make a cross with a cross of threads at the bottom. Repeat on the other side.
- Herringbone - a loop stitch to create a light ornament. Other names are feather or rosehip. From the starting point, move the needle through the second to the third point, pull the thread under the tip of the needle to the right, bring the needle to the left, repeat pulling the thread twice.
- A running stitch is a simple linear stitch made at intervals equal to or nearly equal to the length of the stitches. Through the second point, move the needle to the third without pulling the thread through the fabric, bring it through the fourth point to the fifth, pull the thread without pulling the fabric. Try to make the stitches even and the same length.
- The cross stitch is the second most popular stitch, otherwise called the Prussian, patterned or printed stitch. It can be done at any scale and at any angle. From the starting point at the bottom right, draw the thread diagonally to the second point in the top left corner, from the top right point, draw the thread to the bottom left. Repeat with even stitches at equal intervals.
- Lowercase - similar to machine stitching, used for a clear outline. It belongs to the group of straight stitches, similar to the “back needle” and Holbein stitch. The work begins from the lower right point by pulling out the threads. Sew a series of small line stitches to create a line.
- Stem - a contour stitch from a group of straight lines. It is distinguished by graceful, partially overlapping lines with a smooth, raised tip. Bring the needle through the second point over the working thread, pull the thread, holding it under the needle, and finish the stitch.
- Satin stitch is the main stitch for embroidering flowers, otherwise called damask. Place the stitches close to each other, bring the threads from bottom to top from right to left. Make sure that the edges of the motif are even, stretch the threads for a smooth design.
- Knot (bead, French dot, lace knot, rococo) - performed separately or side by side to create a soft outline, embroidering the center of the flower. At the starting point, wrap the thread around the needle counterclockwise, holding the needle over the fabric, and repeat. Gather the twists together, move the needle to the tip, insert it into the fabric close to the starting point.

Materials for embroidery on clothes
First, you need to wash the clothes that the craftswoman will decorate. This is necessary to protect against shrinkage of the fabric, distortion of the pattern and check for shedding. Embroidery on clothing requires a number of materials - from threads and canvas to needles and non-woven fabric. If you embroider by hand, you need to prepare a comfortable, well-lit place. For the machine process you will need a free table and a lamp for lighting. Additional materials: seam ripper, scissors, copying or tracing paper for transferring the design.
Threads
For embroidery, special embroidery threads are used. The color of the thread is selected depending on the type of pattern. Before decorating clothes, the material is checked for color fastness: it is wetted and wrapped in white cloth. If it is stained, you can fix the color of the threads with a special compound - lather it heavily with laundry soap and immerse it in very hot water for 15 minutes. After this, the threads are thoroughly rinsed with cold water and immersed in a solution of vinegar and salt for 2-3 minutes (a tablespoon of 9% vinegar and salt per glass of water).
When choosing threads, their thickness is taken into account - the thicker it is, the lower the number on the package. Thread types:
- Polyester - resistant to color loss during washing and chemical exposure.
- Viscose - suitable for decorating clothes made of thin fabric, reflects light, emphasizing the elegance of the pattern.
- Cotton - more often used in machine embroidery, but over time they can lose elasticity, become deformed, fade, become thinner and become tangled in knots. Ideal for use on leather and denim clothing.
Needles
Embroidery on clothes should not spoil things during the decoration process, so you need to use needles with a thin small eye (otherwise puncture marks will remain). You can choose special or universal needles size No. 70-90. If embroidering is done on elastic, knitted fabrics or leather, you will need special needles.
Hoop
Wooden hoops are suitable for hand embroidery. These are two circles that pull the fabric tightly and prevent it from moving during the process. For the machine process, a plastic hoop with an adjusting screw with a diameter of 15-20 cm is suitable. Large circles are not suitable - the fabric will stretch, bubble, and wrinkle. When fixing clothes in the hoop, make sure that they lie freely without stretching, otherwise the design will be deformed.

Textile
When choosing clothes to decorate with embroidery, pay attention to the type of fabric from which it is made. Counted fabric has an equal number of threads in the weft and warp, resulting in even stitches with equal spacing. The more threads of the fabric, the denser the pattern will be. Smooth materials include velvet, satin, silk and wool. They are more difficult to embroider on.
For embroidery, choose a heavy fabric that will hold the threads, but at the same time light to create an impressive raised pattern. Before decorating, make a test pattern on a small area of clothing. To prevent the fabric from stretching, iron it from the wrong side before embroidering - this will prevent warping and deformation of the design on the finished garment.
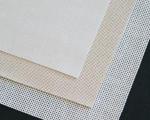
Overlay canvas
For smooth and beautiful embroidery on clothes, especially cross stitch, a canvas is required. It is a mesh-like, rigid material that makes it easy to create crisp, tight stitches. After ironing the clothes, attach the ironed canvas to the place of the design, choosing a slightly larger size than the design itself. Secure the canvas tightly with pins or a temporary seam, and smooth out the “wrinkles” with your hands.
When making a drawing, try not to sew on the canvas itself, otherwise it will be difficult to remove. To do this, alternately pull out the threads of the canvas of horizontal or vertical rows with your hands or tongs. If you cannot remove the canvas completely, pull out only the outermost ones, and cut the rest to the tip. This way the crosses will retain their density and evenness, and the pattern will not be deformed.
Nonwoven
To secure the pattern, adhesive cushioning materials on a non-woven basis are used. Non-woven fabrics are popular. It is a paper-like material made from cellulose fibers with the addition of polyester. It is available in different densities and with a continuous or spot adhesive coating. For embroidery, the material is cut “lengthwise” so that it does not stretch.
It is optimal to choose interlining interlining with a lining so that it does not fluff when washed. After finishing the decoration, stick a piece of non-woven fabric slightly larger than the design itself on the back and iron it well. This will secure the threads, prevent them from unraveling after several washes, and maintain the density and necessary rigidity of the clothing. For embroidering on the edges of things (hems, sleeves, pockets, cuffs), non-woven tapes are used.
How to embroider clothes by hand
The choice of technique depends on the color of the fabric and surface (smooth, printed or fleecy). First you need to transfer the design to the fabric. To do this, use a special pencil (evaporates after 24 hours from the moment of application) or a stencil, you can also use tracing paper, and for thin fabrics, transfer the design to the light. The safest way to apply a design is to attach tracing paper with safety pins and embroider directly over it. Having transferred the pattern, secure the fabric in the hoop, prepare the threads and needles, and begin embroidering according to the pattern.
Cross
Traditionally, cross-stitching on clothing is considered the easiest to perform. This style is suitable for decorating summer dresses, sundresses, children's or adult jeans, and caps. For decoration, choose pockets, sleeves, collars; from the patterns, an ornament will be optimal. Baste the canvas to the desired area, fasten the hoop, first embroider crosses of one color, then other shades. Use dense, smooth threads, making sure the stitches are even. After embroidery, remove the canvas by pulling out rows or simply dissolving it in cold water (there are also such types).

Gladue
Satin embroidery on clothes looks no less elegant, but its execution is more difficult because you need to monitor the clarity of the stitches. To begin, put on a hoop, apply a pattern from thin paper, sew the outline by hand or apply the pattern with a chemical pencil or soap. Starting with a small section of the pattern, make dense, even stitches of the same size, placing them as close to each other as possible.
For satin stitch embroidery, a scarf, the hem of a dress, the sleeves of a shirt or the leg of jeans are ideal. Chinese and Japanese stitch can be double-sided or one-sided, straight or oblique. If floss threads are used for embroidery, it is better to use cotton, linen or burlap. Lawn, satin, and silk are embroidered with silk threads, and dense fabrics are embroidered with iris threads. For embroidery, choose the thinnest possible needles and pull sections of clothing tightly. First, the outline is drawn, then the relief of the drawing itself is filled.
Beads
Bead embroidery on clothes and shoes looks incredibly beautiful. It's difficult for beginners, but there are some secrets to getting an elegant drawing. Basic stitches for bead embroidery:
- Monastic - the front part consists of diagonal stitches with beads; on the wrong side, vertical rows are obtained.
- Lowercase - one bead for each stitch. The needle is brought out from the wrong side between the first and second beads, the bead is strung, the needle is inserted in front of the first bead. Having brought the needle out from the wrong side between the second and third bead, string the second bead and insert the needle between the first and second bead. Repeat to create a smooth, tight line. For a tighter stitch, pull the yarn through the backstitch at the end of each row.
- Stem - fasten the thread, put on the bead, insert the needle into the fabric and bring it out behind the strung bead. Go through the bead again, thread the second one, insert the needle into the fabric behind the new bead, and bring it out between the last two. Embroidery this way turns out to be very dense.
- Arched - used for non-rigid embroidery. String several beads onto each knit stitch, but attach only the one at the intersection of the stitches to the fabric.
A few more useful rules for bead embroidery for beginning craftswomen who want to decorate things:
- sew the beads evenly, with the same slope;
- use beads of the same size;
- pull the hoop tightly;
- use fishing line, synthetic or chrome threads so that they do not sag under the weight of the beads;
- The color of the thread must match the color of the canvas, embroider in rows;
- the length of the thread per row should be 4-5 times the width of the embroidery;
- to prevent the thread from getting tangled, wax it (press it to the wax and pull it through it, remove the excess);
- do not secure the thread with rough knots;
- a popular decoration technique is a half-cross;
- choose needles No. 10 or 12, do not re-tighten the threads from the wrong side, secure the working thread with a double knot from the wrong side.

Machine embroidery on clothes
Machine embroidery is very widespread because, compared to hand embroidery, it is faster, of higher quality and lower in cost. Embroidery machines have special equipment and software control, which helps to make identical patterns for an entire batch of clothes. A needle is installed on the machine, a thread is threaded into it, the fabric is prepared, and secured with a plastic hoop. The machine embroidery process requires almost no canvas. After installing the program and selecting a pattern, a pattern is applied to the clothing.
Video

Machine and hand embroidery on clothes
Cross stitch is a fascinating, but labor-intensive and monotonous activity. We will share with you the secrets of how to quickly cross stitch.
So, you will need a pattern, canvas and threads. In addition to these mandatory things, you must have:
- a copy of the diagram;
- hoop holder or machine;
- colored markers;
- double-sided needle;
- organizer;
- pencil for marking fabric.
All of these items will greatly simplify the process.
Tips for quickly cross-stitching any picture
On a copy of the diagram, cross out the sewn areas with a felt-tip pen. This clearly demonstrates your progress and will help you better navigate your work.
Buy or make an embroidery machine. By securing the hoop in the holder, you will free both hands.
You'll cross stitch faster if you save time turning the needle. In the double-sided model, the eye is located in the middle; the needle does not need to be turned over to make the next stitch. You can master this device in just a few minutes.
Having pencils or markers for marking fabric in your arsenal, you can line the fabric into sections of 10x10 squares. Thanks to this, you will avoid errors in calculations and will quickly cross stitch. When purchasing a marker, pay attention to the fact that it can be disappearing or washable. You need the second option because the marks from the first will disappear in a few days and your marking efforts will be in vain.
To prevent the threads from getting tangled and you can quickly select the color you want, use an organizer. You can buy it or make a blank from cardboard, in which a number of holes are made. In each thread, one color of thread is fixed, the name of the color and the symbol with which it is designated in the pattern are written on top.
By following these simple tips, you can quickly cross-stitch even a large picture, saving energy and time.
To embroider quickly and beautifully,
You don’t need to have 36 hours a day and eight hands.
The time for embroidery is always limited by the physical capabilities of the body and common sense, so that your favorite activity - embroidery - remains, first of all, a pleasure, and so as not to harm your own well-being.
It’s difficult to sit for more than an hour or two at a time embroidering. You will have to rest or change your occupation. I manage to alternate embroidery with a lot of other obligatory and necessary or useful and enjoyable things.
My embroidery time– one to two hours, several times a day, at a convenient time according to the circumstances of the daily routine. On average from 2 to 8 hours a day.
And I have two hands, the same as everyone else. Perhaps a little more skillful and trained in needlework than the average majority.
I started embroidering in January 2007, but a needle is a familiar tool: I have been self-taught in sewing my entire adult life (since I was 13 years old, amateur in form, but almost professional in content). So I managed to master the cross stitch technique right away, quickly and quite successfully.
And immediately I learned how to embroider rationally. With two hands.
Two-handed embroidery involves equal participation of both hands in the process of embroidering each stitch.
Both the left hand and the right move together, and each hand performs monosyllable actions in turn.
Position of hands while working
Each hand has its own workplace relative to the embroidery plane.
One hand works above, above the front side.
Other hand - from below, and performs similar actions from the inside out, working blindly, by touch.
I have the left one on top.
I am right-handed, and therefore it was easier for me to get the hang of using my right hand from below, without looking, to quickly and accurately hit the right point with a needle.
And train your left hand to stick a needle in a visible place above.
Which hand goes where is a personal choice for each embroiderer.
Many people work with their left hand from below, or with both hands equally, periodically alternating them.
The body position is level, free, slightly leaning back, I put a pillow under my back, my shoulders are not tense, my arms are straight down from shoulder to elbow, the other part of my arm seems to hug the frame (embroidery), leaning against it. The arms are relaxed, the hands and fingers are working. I don’t swing my arms while embroidering, my arms are in a stable, resting position. I don’t lean on the frame, I don’t lean my elbows.
Process and order of embroidering stitch
I can’t help but say my opinion about some common embroidery instructions and the visual pictures in them. I believe that many of them are not written clearly and competently enough, and tend to confuse rather than teach.
For example, often, in order to more clearly demonstrate at which point the needle should enter the fabric and from which point it should exit when performing a stitch, they depict a needle stuck into the fabric in TWO places, that is, as if in the position of a pin when we cut the fabric (when both sides of the needle stick out on one side). A very poor method of explanation!And nowhere do they write that this drawing just shows in one picture two actions, which must be done to make one stitch.
First action . We stick the needle into the right place from above, pierce the fabric with the needle, and pull the thread to the other side of the fabric.
Second act - insert the needle from the back side and pull the needle and thread to the side from which you started the stitch. That is, TWO actions.If we take the picture quite literally, then we get double stitch. This is a basting stitch. It is widely used in sewing, when we need to rough two pieces of fabric with large random stitches.
For embroidery, such a stitch with two punctures is NOT SUITABLE!
Of course, no one forbids us, and we can embroider in the same way, and people embroider...
But any complex and beautiful embroidery will not work. Embroidering neatly and quickly this way will not work. Again, it is obvious that you should embroider on a flat plane of well-stretched fabric. So, on a well-stretched fabric it is completely difficult to make such a stitch.

So, believe it or not,
A embroider (namely EMBROIDERY, not sew) should be done this way:
We fasten the thread on the wrong side and bring it to the face. (We do the fastening of the threads in any way convenient for this embroidery. The main thing is that the fastening should be flat and without knots)
With the “top” hand we stick the needle into the desired point in the fabric.
With the “bottom” hand we take the needle from below, pull the thread with the “bottom hand” down to the wrong side.
Then, using the “bottom” hand, insert the needle into the desired point in the fabric.
With the “top hand” we take the needle from the face and pull the thread completely until the stitch is completed. Continue in the same way many times.

This photo shows embroidery using the technique tapestry
The needle should enter the fabric as perpendicularly as possible , pull the thread completely up and down with each stitch.
I don't use long threads.
At first I was guided by the length of the threads in the Dimensions sets. I got so used to it that I cut the threads.
Then I experimentally determined the most comfortable length for you cuttings: this is 70-75 cm, I thread a 35 cm thread (folded in half) into the needle.
When the thread is short, it is convenient to embroider using only your hands, the amplitude is small, and the movements are faster and more accurate.
The longer the thread, the slower it is to embroider, and the fewer stitches you can make per unit of time.
A short thread is easier to control, make sure that it does not twist, that the threads do not cross in the stitch on the fabric, and lie parallel.
A short thread sews faster, therefore it is pulled through the fabric less often and frays less, and the stitches with a smooth, non-fringed thread will be more uniform and beautiful.
During the process, I constantly see if the thread lies a little unevenly, if two threads are not parallel in the stitch, as soon as I feel that the thread is about to begin to twist, I simply turn the needle a little in my fingers to align the thread. This can be done automatically, mechanically.
I don’t use thimbles for embroidery . I didn't use them for sewing either. True, at one time at the beginning of my embroidery journey, until I had trained my stitching technique, when I didn’t have good needles , and I had to push the needle with my finger, I got unpleasant marks on my finger.
But then I set out to track the stitching process, and learned to hold the needle this way and insert the needle into the fabric so as not to injure my fingers.

Good tension, and what is very important - tension is UNIFORM across the ENTIRE surface of ALL embroidery
only possible on the frame.
By the way, it is with this tension that neither a half-cross stitch nor even a tapestry stitch will warp the embroidery.
The frame is held by the machine in a position convenient for work. I use the machine to adjust the position of the embroidery plane to suit my comfortable posture.
When embroidering crosses, on the wrong side parallel “sticks” are desirable. But this is not an end in itself! If we set ourselves the task of achieving strictly identical stitches on the wrong side of the entire embroidery, then we can get a conflict between the ideal wrong side and the ideal cross on the face. The technique of the ideal reverse allows (and even prescribes), for the sake of strictly identical stitches on the reverse, to do a lot of illogical actions that make embroidering difficult, for example, such “oddities” as embroidering first the top cross stitch, and then the bottom one, by diving the needle under the top stitch. And this in no way contributes to the beauty of the cross on the face, unnecessarily complicates the embroidery process, and increases the time of stupidly fiddling with the embroidery.
So - I leave the perfect backside to her fans .
I embroider easier.
I always attach the tails of the threads only on the wrong side , I tuck it horizontally under 3.4 “sticks”, I try to have the same or similar color.
I do broaches up to 5 squares calmly in all directions, vertical and horizontal if possible, but if the shortest path goes diagonally or if you need to make the broach longer, securing it, I push it under the stitches on the wrong side. Diagonal broaching along the wrong side can deform the front stitch when you do not know how to control the thread tension when laying the stitch.
Cross stitch technology is very popular today, as the ranks of needlewomen have recently expanded significantly. If previously it was mainly mature women who were engaged in embroidery, modern youth today do not want to lag behind their mothers, grandmothers and aunts.
How to cross stitch step by step
Let's talk about how to learn cross stitch. The first step is to prepare tools and materials.
To work you will need:
thimble;
a set of needles;
threader;
multi-colored threads (floss, darning, lilac, gamma);
You can embroider not on canvas, but on regular fabric, but this is much more difficult and is practiced only by experienced craftswomen.
How to quickly cross stitch
There are special double-sided needles with an eye in the middle. The work happens like this: one hand is on the front side of the canvas, the other is on the back side. The needle moves back and forth, and the work does not require turning over. Time is saved significantly.
You should get a thread organizer and a large number of needles. Each thread must be inserted into its own needle before starting work. During the embroidery process, the craftswoman does not have to be distracted too often by threading.
Secrets and tricks of cross stitch
From the upper right corner of the cell, the thread is drawn to the lower left corner, creating a half-cross. This is how the entire row is performed according to the scheme. On the last cell of the row, the thread is drawn in the opposite direction and in the reverse order. From the wrong side, transitions are made to adjacent rows.
The following video clearly demonstrates how to embroider single crosses.
How to embroider the wrong side
You need to get used to embroidering the perfect backside from the very first lessons. If you start doing it sloppy at first, it will be difficult to get out of the habit. Although some craftswomen believe that the perfect reverse side is a waste of time and thread, which takes a little more. So it's a matter of taste.
To get a beautiful back you need:
perform all facial crosses in one direction;
the picture should start from the top or bottom, and not from the middle;
the formation of nodules should not be allowed;
the remaining threads from the row are hidden in adjacent rows;
When performing single-color segments, you should not pull the thread more than 4 cells.
How to cross stitch evenly
Let's look at the basic rules that will help you embroider evenly and beautifully.
Choose high-quality canvas, threads and needles.
Before work, the canvas should be starched, dried and ironed. The gratings will become stiffer and will deform less during operation.
The needles should correspond to the cells of the canvas, that is, be somewhat thinner than the holes in the canvas.
In order for the thread to lay flat and not twist, its length should be no more than 50 cm. Before work, the threads should be divided one at a time, and only then folded into several layers.
How many threads to embroider
It is impossible to say unambiguously how many threads a particular fabric is embroidered with. The number of threads is determined, as a rule, experimentally, and it depends on the thickness of the material. Most often, needlewomen embroider in two threads, then the outline is partially visible from under the image.
If you want the outline to disappear completely, then choose 3-4 folds. To correctly assess the finished result, it is recommended to make several crosses in two, three and four threads and settle on a more suitable option.
How to embroider without knots
There is no thread without a beginning and an end, so it needs to be secured somehow in the work. When sewing, a knot is tied on a thread, but this technique is not acceptable for embroidery and here’s why:
the presence of nodules will cause tubercles on the facial surface;
during work, the thread will cling to the knots and get tangled;
numerous knots will cause deformation of the canvas;
it is almost impossible to correct a mistake on the wrong side, dotted with knots;
If the knots come undone during washing, the entire work will be ruined.
To prevent the thread from jumping out of the canvas, a loop fixation is used. The thread is threaded into the needle twice and pulled through so that a loop is formed on the front side. A needle and thread are passed into it and lightly tightened. There is no knot, but the fastening is reliable. You can not fix the thread, but leave a long tail, which is then hidden in the crosses of another row.
How to beautifully cross stitch
Beautiful cross stitch is, first of all, a neat reverse side, as discussed in the previous section. But there are some nuances for the front side.
All crosses should face the same direction, so the work should always be held the same way, and not turned to the right, left or upside down.
Make sure that the thread does not twist, then it will not look like lumps. Twisting usually occurs when the thread is too long. At the same time, she also gets confused, which is fraught with knots that cannot always be untied.
What thread to embroider
The quality of the finished product largely depends on the threads that the embroiderer chose for the work.
Main criteria to consider when purchasing:
When working on a simple drawing, where there are not so many shades, choose a color palette within 200 shades. When embroidering paintings with a rich range of colors (icons, landscapes, portraits), preference is given to series in which there are a lot of shades.
The strength of the threads is of great importance. They should not tear at the slightest tension. This quality can be checked with your hands; if the thread breaks without effort, it will not be suitable for work.
If a pillowcase or clothing is embroidered, the product requires further washing. Therefore, you should choose threads that do not fade or fade. These qualities are also tested experimentally.
How to cross stitch according to a pattern
A canvas with a pattern is a canvas on which a color scheme has been applied in advance. The advantage of this method is that the craftswoman does not need to calculate and draw crosses on the fabric with a pencil. She embroiders directly over the color print.
You can purchase a canvas with a pattern printed on it at any craft store. Manufacturers produce these blanks in a wide variety, so both beginners and experienced needlewomen can choose a suitable plot for themselves. All shade numbers are marked at the bottom of the canvas, so choosing threads is very easy.
It’s even more convenient to buy a ready-made set, which, in addition to the canvas with a pattern, contains needles and threads in the required shades and quantities.
How to cross stitch on canvas
When embroidering on canvas, the craftswoman must pay attention to the tips that accompany the patterns. Before purchasing canvas, you should determine its size so that it does not unexpectedly run out during work.
If you look closely at the diagrams on the Internet, you will see that they indicate the size of the finished product. It is recommended to add 5 cm to this size on each side; they are needed for fixing in a hoop and placing the work in a frame. Using a ruler, measure the number of cells per 1 cm and proceed with further calculations.
How to cross stitch according to the pattern
For embroidery, you can choose a pattern from the Internet or come up with your own plot. The printed image is transferred to the canvas using carbon paper. The color drawing should always be kept in sight while working. Before starting a new row of crosses, they can be marked on the canvas with a simple pencil or a disappearing marker.
Experienced craftswomen mark the drawing and outline into equal large squares, which makes it easier for themselves to find the desired fragment. When using a disappearing marker, check first to see if it erases easily.
How to cross stitch without a pattern
Only experienced embroiderers can embroider without a design. The diagram should be in front of your eyes at all times. Crosses are applied to the fabric with a pencil as the work progresses. If the embroidery is done on a canvas, a simple counting of cells is carried out. For this purpose, it is better to divide the canvas into small squares (5 cm).
If you can start embroidery according to a design from different places, and after completing one fragment of the image, move on to one that is located somewhere to the side (this method is often used when filling the canvas with one color at once), then this cannot be done without a pattern. The likelihood of errors is too high, which are then difficult to correct.
What fabric is cross-stitched on?
The most convenient and cheapest base for embroidery is canvas. It comes in several types, each of which is unique in its own way.
Rigid canvas (stramin) is used for making tapestries, icons and carpets. This material is available with grids of different sizes, which allows you to use different embroidery techniques.
Rare canvas overlay is necessary for embroidery on clothes. The canvas is divided into squares by blue threads. After completing the work, the canvas is removed in separate threads.
Water-soluble polymer canvas dissolves in boiling water. To work with it, floss threads are used.
Plastic canvas is used for making postcards and 3-D paintings. It holds its shape well, so the finished product is very neat.
Water-soluble interlining also dissolves in water, but at a lower temperature than its polymer counterpart.
Aida is another common embroidery base, but it is designed for counting. The fabric is made of 100% cotton.
How to cross stitch on regular fabric
The question of how to cross-stitch without canvas is asked by many beginning needlewomen. Cross stitch without outline is very difficult. But when it comes to clothing, canvas is not suitable. To make the task easier, experienced embroiderers resort to tricks. They take a rare canvas, lay it on the fabric and embroider the design through these two layers. When the image is ready, the canvas is simply pulled out one thread at a time with tweezers.
Thus, a voluminous applique appears on the fabric. This method is very good for embroidering children's clothing. There is a special “thin” canvas. This is exactly what should be used.
How to cross stitch on linen
Due to its high density, linen is ideal for embroidery. Depending on the weave, the material is divided into several varieties, in which the number indicates the number of threads per 1 inch (2.54 cm).
Cork 20 - for working in one thread.
Dublin 25 - for embroidery using two strands of floss. Recommended for beginner embroiderers.
Keshel 28 - also for working in two threads, but differs from the previous two types in the variety of colors.
Beface 32 - like Keshel, is available in different shades, but has increased rigidity, which allows you to create unique patterns.
Edinburgh 36 - two-thread embroidery, used for finishing clothing elements (collar, cuffs, trims).
How to embroider large pictures correctly
When a novice needlewoman masters the basics of embroidery, she can move on to creating complex fabrics. Today, embroidered paintings are very popular and can add variety to any interior.
The same skills and techniques are used when working on large paintings. The only difference is that a large hoop is required here. However, many needlewomen work without this tool at all - just on their hands and find this method convenient.
When using a diagram for large paintings, they resort to a technique called “parking.” Its essence is that the work is performed strictly in rows, and several needles and threads are simultaneously attached to the canvas. Having embroidered an area in a row with one color (several crosses), the craftswoman sticks a needle into the canvas and takes another. What is it for? The parking method minimizes the likelihood of confusion in the pattern.
What can you do with cross stitch?
Cross stitch is used for:
textile decoration;
creating paintings, icons, panels and tapestries;
clothing decorations;
bag design;
greeting cards.
And this is not the entire list of products in which this needlework technique is used.
Cross stitch a pillow
For embroidery of pillows, bedspreads and towels, an applied or water-soluble canvas is used. You need to start work only from the center, so that later the work does not “move” to the side. Determining the center point of the canvas is very simple: fold the fabric in four, the angle of intersection of all sides will be the center. You should start drawing squares from there (if the embroidery will be without outline) or attach the middle of the outline to this place.
The embroidered sides of the pillow must be assembled correctly. If the pattern has a direction (top, bottom), both sides of the pillow should be symmetrical.
Cross stitch an icon
An icon embroidered with a cross yourself is a very valuable gift. This kind of work requires patience, attention and complete peace of mind. When embroidering an icon, you should not drink alcohol, swear, or keep bad thoughts in your head.
Now regarding the technical issue. First you need to look through many schemes and choose the one that most suits the moment and your mood. It is allowed to deviate slightly from the colors shown in the picture.
In icons, the face and hands are not embroidered, so you need to purchase diagrams on which these parts of the body are already painted. All other details are embroidered as usual.
Cross stitch napkins
Napkins are those things on which the basics of embroidery are mastered and the technique is honed. Linen or cotton fabric is best suited for work, as it is dense and resembles canvas in its structure.
First, the border is embroidered on a napkin, then the main design. The reverse side of this product must be perfect. The finished napkin should be wetted with hot water, dried and steamed with an iron. The edge of the fabric is processed with an overcast stitch - manual or machine.
Cross stitch a bag
A bag embroidered with a cross cannot fail to attract the attention of others. For work, an overhead canvas must be used. The most popular patterns for embroidering bags are ethnic motifs and oriental ornaments.
To make the embroidered image expressive and complete, it is recommended to sew its outline with a “needle back” stitch. Embroidery is often used on beach bags, denim crossbody bags, miniature clutches and children's backpacks.
Master class: how to cross-stitch a photo
You can cross-stitch not only a picture, but also a portrait of a loved one from a photograph. To create a pattern, there are special Internet programs, using which embroiderers create realistic photos on fabric bases. A detailed explanation is provided in the following video.
How to cross stitch letters
As a rule, printed letters and numbers are embroidered with a cross. The craftswoman must ensure that all stitches are performed in one direction throughout the entire work. Printed letters have a simple geometry, so there shouldn’t be any difficulty in making them.
If you need to embroider words in an ornate font and multi-colored threads, it is better to use the “parking” technique. To make the letters look beautiful, you need to strictly adhere to the chosen scheme. Any inaccuracies will be visible very clearly. As with embroidery on a bag, the outlines of the letters should be highlighted with a back stitch.
How to cross stitch clothes
Embroidering clothes in this type of needlework is considered the most difficult task. Beginners are not recommended to start decorating sweaters, trousers and children's clothes. First, it’s better to practice on napkins, towels and embroider a simple picture.
You should start embroidering clothes only with already honed skills and sufficient experience. The first job should be as simple as possible, and the item to be decorated should be something dense, with visible weaves.
The lining canvas is simply necessary in this situation. It can be pulled out from the finished work by thread. When embroidering jeans, you don’t have to remove the applied canvas, but only trim it along the edges, leaving a few millimeters at the edges. It will turn out quite original.
The reverse side when embroidering clothes should be neat. The presence of numerous knots will cause discomfort when worn.
How to cross stitch a flower
To learn how to cross-stitch various flowers, we recommend watching the following videos. After studying a detailed master class, even a novice embroiderer will be able to create a unique masterpiece.
Cross stitch roses
Cross-stitched poppy
Cross stitch peonies
How to teach a child to cross stitch
You can teach a child to cross stitch. It is best when mother and her child study at the same time. Adults often do not have the patience to teach children, but when both master the technique at the same time, it is much easier.
Of course, you should choose the simplest patterns for your child. These can be stars, leaves, hearts, bears, bunnies, chickens. The first works should not have many shades. Solid colors are welcome, highlighting minor details.
If the child is small, adults need to be nearby and monitor the baby’s actions all the time, because in addition to making mistakes, he can also prick his finger with a needle. Embroidery for children is an activity that cannot be overestimated. Handicrafts develop perseverance and perseverance in the baby, fine motor skills of the fingers develop, and the little person gets an idea of color and shades.
Want to learn cross stitch? We will help! Let's figure out where to start and what materials to choose, what methods and styles of embroidery exist and which of them are most suitable for you. So, in order not to turn this soothing activity into a real hardship with the wrong tools and the wrong technique, let's first get acquainted with the basics of this handicraft art.
1. Materials and tools for work
Before you sign up to become an embroiderer, you will need to stock up on basic tools and materials. The minimum set of items that every craftswoman should have includes:
- needles;
- pincushion or pincushion;
- hoop or machine;
- threads;
- thimble;
- scissors (large, small and medium);
- ruler.
Why so many? Believe me, everything will come in handy! Now about each point in more detail.
Needles
A pincushion is needed primarily so as not to lose one of the needles on the table, sofa or somewhere else. Plus it's very convenient. As for the needles themselves, there will be much less lyrics here. Selecting needles is quite a complex matter; firstly, each type of fabric requires its own specific needle of the required thickness and length. The thinner and more airy the fabric you are going to work on (cambric, voile, canvas or linen), the thinner the needle is needed. Accordingly, a thick needle is suitable for a coarser type of material, such as wool.
Tapestry needle sizes (in mm)
Best to use tapestry needles- the large eye will not fray the thread in the process, and the blunt end will not damage the base itself. A set of high-quality needles will last you more than one embroidery project.
To ensure that the fabric does not tighten under the design, craftswomen from time immemorial have used hoops during the embroidery process. With this device you can secure the fabric tightly. Skilled embroiderers choose wooden hoops, as they hold the fabric more securely and do not damage the material, unlike plastic counterparts. Another tip: choose a hoop with a smooth and even surface, because any roughness or unevenness can damage the fabric.


Threads
The choice of threads is an entire art, because the effect of the finished pattern depends on it. The most popular and widespread are the following types (we recommend choosing from them, as they are easier to buy and easier to work with):

Floss– such threads are very easy to connect with each other to get the desired color. Each thread consists of 6 twisted fibers. This type of thread is the most popular in embroidery and is used in almost all ready-made kits. They don't tangle or lose color over time.

– you can combine this interesting material with cotton floss or wool threads to obtain a shiny, sparkling effect.

– consists of very soft threads. An excellent choice for tapestry or satin stitch embroidery.

– such a thread can be used in combination with other materials, and separately. Such threads are indispensable in wool embroidery on fabric.
Thimble
A thimble not only protects your fingers from punctures, but also helps to better push the needle through thick and unruly fabric. Before you buy it, you first need to try the product on your middle finger - it should fit like a glove and not cause any discomfort. Only in this case can you be sure that it will become a faithful assistant in embroidery, and feel free to buy it.
Scissors
Buy several types of scissors at once that will help you out in different situations. For example:
- Small scissors will help you delicately trim a thin thread and remove unnecessary marks.
- The medium ones will be convenient when processing fabric.
- Large ones will be indispensable in the cutting process.

Additional accessories
Among the additional tools, we also recommend stocking up on a water-soluble pencil for marking the outline, a magnifying glass and a thread organizer. Markers or pencils are more convenient than traditional soap or chalk, as they can be easily washed off when hand washing the product. In addition, they can be used on any type of fabric and with their help you can draw more accurate and elegant sketches.
A magnifying glass is needed so as not to strain your eyes while embroidering the smallest curls, and a thread organizer will allow you to distribute colors according to a natural gradient, building a clear palette. This will make choosing the right shade as easy as possible, and you can easily find out which color to use in your product.
Ready-made set for beginners
Of course, you can try to select all the “ingredients” for beautiful and high-quality embroidery yourself. But still, this stage frightens many people, and they stop being interested in this type of handicraft art. Therefore, we advise you to purchase ready-made embroidery kits. Firstly, it is very convenient, since any such set already contains everything you need in the right quantity. Secondly, you won’t have to spend a long time selecting each material and tool, which will save you a lot of time. Better devote it to studying patterns or the embroidery process itself.
2. Selecting a canvas
Canvas is our basis for embroidery. It is made from different materials - linen, cotton, hemp fabric, acrylic, wool and even plastic. We advise you to select a canvas from a material that is ideal for your idea.
- Hemp fabric most often chosen for its durability. You don't even have to use a hoop to embroider on it. This fabric is very dense and retains its shape for a very long time.
- Plastic- this is a new hit among craftswomen. This canvas can turn your product into anything, as it easily changes shape. Just cut out the shape you need - and the base is ready. Children especially enjoy embroidering on plastic, it's so easy and fun.
- For those who want to add volume and texture to their embroidery, we recommend using wool canvas. But no matter how beautiful the finished product looks on such a basis, it is still not very convenient to embroider on wool due to the numerous fluffy threads sticking out.
- Cotton- this is a true classic of the art of embroidery. And all because this material is very even and smooth. Embroidering with this material is a pleasure.
- Is it difficult to work with wool, but still want a little volume? Then choose acrylic. Despite its non-natural origin, it is much easier to embroider on it than on wool, and it is also less fluffy.
- Linen also popular among craftswomen. But if you decide to decorate any item of clothing with a beautiful ornament, then it is better to check how such fabric behaves by first washing it.
For beginners, we recommend choosing a cotton canvas Aida. This brand is famous for its versatility. Everyone can choose a material with the desired cell size. This canvas is used by both beginners and already skilled embroiderers.


Aida canvas is divided into cells, which greatly simplifies the process of cross stitching.
Another equally popular canvas is produced by the brand Hardanger. Do you want to embroider using tapestry or satin stitch techniques? This material is the best base. But, unfortunately, it will not suit you as beginners. If this is your first time picking up a needle and thread, it is better to start with canvas No. 8. It is actively used for teaching embroidery.
3. Step-by-step training in cross stitch
First of all, you need to prepare your workplace. Make sure you are comfortable embroidering. The best place for needlework is a soft, comfortable chair. You should also take care of the lighting, as your eyes can get tired quickly if there is insufficient lighting. For such cases, use a table lamp, which will be your lifesaver in the evening, at night and during the day, in poor natural light. Arrange all the materials and tools in a way that is convenient for you, and it is better to put the diagram in the most visible and illuminated place.
Working with fabric is the next step in the beginning of embroidery. Don't be afraid, you will only need four steps - and you can start the main work.
- Measure and cut as much fabric as you need for embroidery, as they say, “with a margin.” To do this, leave approximately 7 - 10 cm allowances on each side to stretch the fabric onto the hoop.
- Then trim the edges to prevent them from puffing up or unraveling. You can use clear varnish or special glue.
- Count the number of crosses on the diagram and on your canvas.
- Time to mark your base before embroidering. Measure out 10x10mm squares (use the cross marks on the fabric as your measurement units. 10 crosses on each side of the square is 10x10mm). We draw the markings with a washable marker or soap.
Video on how to mark a canvas:
Then you need to decide which method you will embroider. Choose from the following:
- Traditional (cross stitch)– embroider one cross after another separately. Make sure that the working length of the thread is 25-30 cm, maximum 50 if the pattern is quite large. Make two stitches and the cross is ready. To do this, move the needle from the upper right to the lower left corner of the cage. The second stitch goes from the top left corner to the bottom right corner.
- Danish embroidery method- first you close the row only with the first stitches (from the top right and down to the left or vice versa), and then you return, closing the remaining halves of the crosses.
- Skip stitch method– it is used when you need to skip several cells on the tissue. To do this, the thread passes in a cross along the wrong side of the fabric.
- Simple diagonal– make stitches diagonally. First you need to move from top to bottom, and then from bottom to top.
Video on how to start embroidering:
Now let's look at the diagram. It shows the required number of crosses and their location on the fabric markings. By the way, the diagrams come in both color and black and white. It is easier to work with colored ones, since you immediately see the desired color, but if the color scheme of the picture is varied, then many cells will be highlighted with symbols or numbers corresponding to some color in the decoding.
Carefully read the decryption key for your specific scheme and especially pay attention to the empty cells, which are most often not filled with anything. Working with the scheme is quite simple, because all the necessary data is written there.
Video on how to work with the circuit:
4. Types of embroidery and techniques
There is a huge variety of embroidery techniques and styles. All you have to do is choose the one that suits you best:
- Counted cross– Do you want to embroider the image on the diagram exactly? Then this type of embroidery will suit you. This method is used on fabrics with a regular weave and is distinguished by the count of threads on the fabric.
- Another simple technique is uncountable cross. Embroider everything that is highlighted in colors, strictly following the pattern.
- Printed cross performed on a canvas with crosses already applied.
- Tapestry technique very reminiscent of a half-cross, but the reverse side should coincide with the front side of the design.
- Smooth surface. To decorate your project using this technique, simply transfer the design onto the fabric and carefully fill the entire space inside the design with straight stitches.
5. Advantages and features of ready-made kits
The main advantage of working with ready-made kits is that you don’t need to spend a lot of time and effort searching for all the tools and materials. Just choose the set you like, and all the components (threads, needles, diagram) will already be there.
There are different sets, and you can choose according to the type of canvas and pattern. Most often you can purchase the following options:
- The drawing is applied directly to the material and there is a diagram
- The drawing is not applied
- The canvas is tinted and the background is applied
- Only a diagram is drawn
- The material has a water-soluble pattern.
Difficult? Not if you follow our advice:
- To begin with, you should choose designs with a small number of colors, with predominant large details in the pattern. The more details, the more difficult it is to embroider, but a simple drawing will not take much time.
- Choose sets with Aida canvas for large embroidery sizes; No. 14 is suitable for any beginner.
- Don't throw away leftovers! Some materials from the set may be useful in other crafts.
Embroidery is not difficult and even interesting if you embroider what you like and love. It is easy to learn this craft, and there are also many benefits from it. So use our tips, and you will soon go from a beginner to an embroidery master!