DIY New Year's cards. How to draw a New Year's card with a pencil step by step Draw a children's Happy New Year card
Even a modest souvenir accompanied by a beautiful handmade postcard will be an excellent gift. Such a card will not only convey warm wishes, but will also become an excellent home decor. We are sharing ways to make amazing New Year cards easily and simply.
1. Almost knitted card

You can put the leftover knitting yarn to work by making a DIY New Year's card out of it. Cut out a triangle from cardboard that will become a Christmas tree, generously coat it with glue and wrap it with colored thread. The more colors of yarn you use, the better. Then glue the Christmas tree onto a regular card and decorate it further if desired.
2. Contrasting textile applique

Pieces of brightly colored fabrics are useful for creating cards. Choose textiles that will not crumble. Cut out simple figures from fabric - Christmas trees, Christmas balls, animals - and glue them onto a white card. Contrasting color combinations look most impressive.
3. Balls and ribbons

Using ribbons in decoration is a win-win solution for those who want to create a festive mood. Draw the outlines of a New Year's ball on paper or lay it out using glued beads, and place a bow tied from a narrow ribbon in the upper part. The presence of three-dimensional elements makes the decorative card very original.
4. Christmas tree with voluminous branches

Roll thin tubes from multi-colored paper. Lubricate one of the edges with glue so that it does not unfold. Then glue tubes of different lengths onto the card. The postcard with a three-dimensional Christmas tree is ready.
5. Laconic stripes

Fans of minimalism will appreciate a discreet but effective card, where Christmas tree branches are made from strips of paper. The only decoration of such a postcard is the decorative stitch on the paper branches and the frame along the edges of its front part.
6. Fragrant message

A card that not only looks great, but also smells great is a truly pleasant surprise. Use cinnamon or vanilla sticks as the basis for a decorative composition, surrounding them with New Year's tinsel, beads, and pictures.
7. Winter lace

White lace becomes snow-covered Christmas tree branches, and sequins glued to it become New Year's balls. For the background, use paper of any pastel shade or textured fabric, such as burlap.
8. Simple drawing

Even a simple drawing on a New Year's card can look impressive. In order for the card to look noble, pay special attention to the accuracy of its application. We also recommend using rough craft or snow-white glossy paper.
9. Sewing on paper

An easy way to make a card three-dimensional is to sew on any paper shape with one seam running through the center and bend its edges. You can also use several figures of the same shape, stitching them with a common seam, and gluing one of them as a background. Then the image will be even more voluminous.

10. With quilling elements

Quilling is the art of creating decorative compositions from strips of paper. It will not be possible to fully master it in a couple of days before the New Year, but it is quite possible to apply certain techniques in decorating a postcard. Circles of twisted narrow strips of paper become Christmas balls, and the tree is a green curved line drawn on a postcard.
11. Combination of several different textures

Another simple way to diversify the usual appliqué is to use materials with a different texture. For example, knitted fabric, cardboard, ordinary thin paper. Then, despite the simple shape of the elements, the postcard will look non-trivial.
12. Eye-catching contrasts

It is not at all necessary to use white paper as the base of the card and make the applique bright. Do the opposite, and the decorative composition will sparkle with new colors.
13. Either an inscription or a drawing

To apply inscriptions and designs, choose paint that contrasts with the paper base. The more intricate and decorative the inscription, the better. Don't forget to surround it with small, simple designs.
14. Lovely landscape

A simple landscape applique will become a real decoration for a New Year’s card. Complete it with voluminous elements - cotton wool imitating snow, beads, sequins, and even chains. This DIY New Year's card looks very cozy.
15. Elegant brutality

On thick, richly colored paper, make holes along the outline of the triangle. Pull the threads between them in a chaotic manner. You shouldn’t make too many stitches - our New Year’s card is valuable for its brevity.
16. Maximum shine

Draw a Christmas tree on paper and generously coat it with silicone glue. Then add sparkles and beads. After drying, you can glue a thick thread along the contour. This DIY New Year's card will sparkle with all the colors of the rainbow.
17. Paper snowmen

The basis for the snowman card is white paper folded several times. Lubricate it a little with glue so that the snowman holds its shape. From the leftover fabric, make a hat and scarf for the snowman, and draw his face.
18. Second life of old buttons

In every home there are many buttons that are no longer needed, but it’s a shame to throw them away. On the eve of the New Year holidays, buttons will come in handy. Glued onto a postcard, they become New Year's balls. Complete the composition with a simple inscription. Your DIY New Year's card is ready.
When gifts for loved ones are ready, it’s time to think about decorating your own home. Do not forget
It’s quite easy to create a New Year’s mood, because it’s all in the little things. Try making wonderful New Year cards with your own hands, it’s very fun and simple, such an original gift will be appreciated by friends and family. We invite you to familiarize yourself with several master classes on creating postcards and turn the proposed ideas into reality.
Master classes
Mini-album-postcard “Herringbone”

What is necessary:
- Pastel paper;
- Corrugated cardboard with an image;
- Double-sided tape;
- Spray paint;
- Cutter;
- Rhinestones;
- Decorative lace (golden);
- Pigment cushion;
- Glue “Moment” and for attaching rhinestones (transparent);
- Ruler;
- Mat mock-up;
- Creasing tools;
- Pencil.

Origami Christmas tree for postcard
Today, postcards in the scrapbooking style have become very popular; the finished product looks bright and very beautiful. We recommend that you familiarize yourself with the scrapbooking master class for beginners.Required materials: 5 squares of colored paper measuring 10 cm; 9 cm; 7.5 cm; 6.5 cm; 5.5 cm.
How to do:

- So, you need to take the largest square and fold it so that you get a triangle.
- Unfold the square and make the exact same triangle by folding opposite sides of the cardboard.
- Place the unfolded sheet of cardboard in front of you.
- Fold the sheet along the folds to form a three-dimensional triangle.
- Now one of the sides of the figure will need to be bent inward, as shown in the photo.
- In the same way, fold the cardboard on the second side - this is the first module of our Christmas tree.
- We add the remaining modules using the same scheme; accordingly, their sizes should be different - from larger to smaller.
- You need to glue a small piece of tape to the top of the first module. We place the largest module inside the smaller one and do the same with the rest.
Christmas tree made of decorative tape for a postcard
Creating wonderful cards for the New Year 2019 with your own hands is very entertaining, so involve the kids in this process. Preparing for the holiday will be more fun with children.
To work, you will need a minimum of material - decorative tape, as well as strips of colored paper.

Manufacturing Features:
- Stick a piece of tape (preferably plain) vertically onto the cardboard blank; the top of the strip should be slightly narrower than the bottom - this is the trunk of the future Christmas tree.
- After this, you will need to cut the tape into strips of various sizes. The ends of the strips should be cut obliquely, imitating spruce branches.
- Glue the strips in a pyramid pattern (from largest to smallest).
Manufacturing instructions:

- Take green colored paper, cut out a circle, cut into two halves.
- Fold the edge of the paper as shown in the photo.
- Now make the next bend in the opposite direction, thus folding the edge again and creating a Christmas tree. The paper craft looks original.
- Glue the “branches” to the base using a glue stick and you can start decorating New Year’s cards with your own hands.
3D New Year card
Making voluminous New Year's cards with your own hands is not at all difficult; see this in the example of the proposed master class.You need to prepare:
- Double-sided tape;
- Multi-colored cardboard;
- Glue;
- Scissors;
- Figured hole punch.


Postcard “Christmas balls”
You can make an unusual New Year's card with your own hands in just a few minutes; prepare an excellent gift for your loved ones for 2019.You need to prepare:
- Colored paper of two colors;
- Scissors;
- Stationery glue;
- A pen for writing.

- Before you start making a New Year's card with your own hands, as in the photo, you will need to prepare all the necessary materials and tools.
- Fold blue paper in half for the base; the background made in this way will contrast perfectly with the light blue “balls”.
- Cut out circles from light-colored paper.
- Fold each one in half.
- Now you need to attach these circles to each other, thus forming three-dimensional balls.
- Glue them on the outside of our card.
- Using a pen, draw the threads that “hold” the balls. Now your DIY New Year's card is completely ready, you just need to sign it.
Quilling holiday card
You can even create beautiful children's cards using quilling, try it, you will like it.You will need to prepare:
- Colored cardboard;
- Colored stripes;
- Glue;
- Toothpicks;
- Scissors;
- Corrugated light paper.

- Take quilling (green strips), make cuts at equal distances using nail scissors.
- Wind the prepared ribbons onto a toothpick, so you get several skeins, as in the photo.
- Now you need to fix the bottom of the skein with glue and straighten the fringe, you will get voluminous balls.
- Next, we proceed to the final stage of making a New Year's card with our own hands. You should glue the balls on a sheet of cardboard in the form of a pyramid, you will get a Christmas tree. Now you can “decorate” it as you wish.
Bright "Christmas tree"
Required:- Paper of various colors and textures;
- Double-sided tape;
- PVA glue;
- Decorative hole punch;
- Rope.

- You will need to fold a piece of colored paper in half, glue a triangle of green paper and a small rectangle of brown paper to create a Christmas tree.
- Cut out circles of various sizes, then use a hole punch to make snowflakes.
- Glue all the figures onto the Christmas tree, decorate it with beads, and then decorate the lower part with openwork paper ribbon. You can also come up with your own card design.
- Wrap the string around the card, then tie a bow. You can glue white paper at the bottom for text.
Volumetric Christmas tree with beads
Required tools and materials:- Colored paper with ornaments for scrapbooking;
- White postcard without design;
- Scissors;
- Stationery glue;
- Double-sided tape;
- Ruler;
- Decorative pins with carnations.

- It is necessary to cut out 12 rectangles from paper, their length should be 10 cm. The width of the smallest one is 9 cm, all the rest are 6 mm wider.
- Wrap each of the rectangles around a pencil to create tubes.
- Now you need to glue them together, the longest one will be at the base, and the shortest one should be located at the top.
- Glue the Christmas tree to the card and decorate with carnations and pins. That's it. Everything is ready.
Children's card with fingers
Children are introduced to this method of creating postcards in kindergarten, try doing this at home.

These photos demonstrate how you can keep the kids busy and prepare for the New Year; for this you need to prepare paints and paper or cardboard.

Postcards with “potato print”
If you don’t know how to have fun celebrating the 2019 Year of the Pig, then get creative with your kids. This master class demonstrates the original creation of a holiday card.You will need:
- Raw potatoes;
- Paints.

How to do:
- Cut the potatoes in half, dip them in paint, and make a print on the cardboard.
- Now all that remains is to complete the details of the drawing, you will get a cute penguin or snowman.

You can make the following design from felt:


Ideas for inspiration


Quilling:


Video about creating a postcard in scrapbooking style:
Origami crafts for cards:


Guys, we put our soul into the site. Thank you for that
that you are discovering this beauty. Thanks for the inspiration and goosebumps.
Join us on Facebook And In contact with
In stores today you can find New Year's cards for every taste. But the editors website believes that homemade ones are much warmer. After all, when we make something for someone with our own hands, we put our love into it.
Below we have collected ideas for beautiful, original and, most importantly, “quick” New Year’s cards, the creation of which does not require any rare materials - beautiful paper, cardboard, and colorful ribbons and buttons lying around the house.
Volumetric Christmas trees
Volumetric Christmas trees made of white and colored paper are so simple to make that you can make them at the last moment. Read more on the Bog&ide blog.
Making 3D Christmas trees even faster. All you need is a ruler, sharp scissors and cardboard. This blog shows you how to cut them.
Penguin
We really liked this penguin, well thought out. You will need black and white cardstock (or white paper), an orange paper triangle, and 2 miniature snowflakes, which we all know how to cut out. The eyes are, of course, the highlight of the postcard, and you will have to look for them at a hobby store (or tear them off from an unnecessary children's toy, with the consent of the children, of course).
Gifts
This cute and simple card requires 2 sheets of cardstock, a ruler, scissors and glue. And also pieces of wrapping paper that you have left over from gift wrapping, ribbon and ribbon. The manufacturing principle is very simple, but for those who want more details, we recommend taking a look at this blog.
Santa Claus
A friendly Father Frost (or Santa Claus) can be made in just half an hour. The red hat and pink face are strips of paper pasted onto a card or gift bag. The fur of the hat and the beard are obtained like this: you need to take drawing paper and simply tear off strips of the desired shape to get uneven edges. Place on the card over the red and pink stripes. And then draw two squiggles - a mouth and a nose - and two dots - eyes.
Simple drawings
An irresistible idea in its elegance is to draw Christmas balls with patterns with a black gel pen. The main thing here is to draw the correct circles and mark the lines for the patterns. Everything else won't be difficult - stripes and squiggles that you draw when you're bored.
The same principle that underlies the postcard with black and white balloons. Simple silhouettes, painted with simple patterns, this time in color - best done with felt-tip pens. Warm and very cute.
Many, many different Christmas trees
A couple more ideas from the Bog&ide blog. For the first, you will need decorative tape or colored cardboard (with or without glitter - now you can easily buy these at an office supply store or in hobby stores). For the second - elegant straws for drinks and good glue.
This is where patterned paper or cardboard left over from children's crafts or wrapping paper for gifts will come in handy. The Christmas trees are sewn in the center - this is not at all necessary, you can glue them on. But if you really want to, you first need to make holes with a thick needle along a ruler, and then sew with thread in 2 rows - up and down, so that there are no gaps left. Draw a snowball with white gouache.
A laconic and stylish idea is a grove of Christmas trees, one of which is glued to foam double-sided tape (and therefore rises above the rest) and decorated with a star.
This card requires 4 or 3 layers of cardboard (you can do without the red one). You can use paper rather than cardboard as a color layer. In the top, white one, cut out a Christmas tree (a stationery knife will do this well) and glue it with double-sided tape for volume.
A round dance of Christmas trees made from various leftover cardboard, scrapbooking paper, and wrapping paper, tied with a simple ribbon and decorated with a button. Try playing with colors and textures - here you can find an incredible number of options using different colored ribbons, paper and even fabric.
Wonderful watercolor so in the spirit of New Year and Christmas! A simple watercolor sketch can be done by anyone, even those who last painted in school. First, you need to outline the patterns with a pencil, color them, and when dry, carefully erase the pencil sketches and complete the patterns with a felt-tip pen.
Winter landscape
For this postcard, it is better to use structured cardboard, but you can get by with regular, smooth cardboard - it will still turn out impressive. Using sharp scissors, cut out the snowy landscape and moon and paste it onto a black or dark blue background.
Another, white-green, option for a winter landscape that will take a little more time. If you find velvety cardboard (remember, back in school they made crafts out of this), it will be great; if not, you can simply color the Christmas trees with a felt-tip pen. Snow - polystyrene foam disassembled into peas. You can also use a hole punch to make circles out of cardboard and glue them to the card.
Hugging snowman
The author of the blog My kid craft made this snowman with her children. The snowman throws his arms up in joy when the card is opened. You can write your wishes inside. Children will be interested in making an applique (and painting their hands and hat), but for those who want everything to be done quickly, the blog has ready-made parts that can be printed on a color printer and simply glued together.
More snowmen
Snowmen peering inquisitively into the starry sky will look better if you can find a bright ribbon for a scarf.
For that postcard on the left, You need unpainted cardboard, white drawing paper and foam tape to glue the snowman with. Drifts are made simply: you need to tear off the drawing paper so that you get a ragged wavy edge. Fill it in with a blue pencil and blend it with anything, even with your finger or a piece of paper. Also tint the edges of the snowman for volume. For the second You will need buttons, a piece of fabric, eyes, glue and colored markers.
You will want to keep this card for a long time. All you need are circles made of cardboard, a nose and twigs made of colored paper. All this must be assembled using double-sided bulk tape. Draw eyes and buttons with black paint, and a snowball with white gouache or watercolor.
Balloons
Balls are one of the main symbols of the New Year and Christmas. These are made from velvety colored paper and ribbon. But balls are such a win-win option that you can allow yourself to fantasize: make balls from patterned paper, wrapping paper, fabric, lace, cut out from a newspaper or a glossy magazine. And you can simply draw the strings.
Another option is to stick paper with a pattern on the inside of the card, and cut out circles on the outside with a sharp stationery knife.
Volumetric balls
For each of these balls you will need 3-4 identical circles of different colors. Fold each one in half and glue the halves to each other, and the two outer halves to the paper. Another option is colored stars or Christmas trees.
Multi-colored balls
Wonderful translucent balls are obtained using a regular eraser on a pencil. It’s worth starting with a pencil to outline the outline of the ball. Then dip the eraser into the paint and leave marks on the paper. Fun and beautiful.
Cards with buttons
Bright buttons will add volume to the cards, and will also evoke subtle associations with childhood.
In this lesson I will show you how to draw a New Year's card with a pencil step by step.
Everyone loves to receive gifts for the New Year, maybe someone dreams of getting a car, a doll, a house, someone wants attention, and someone wants pets and has been begging for a whole year to buy and buy, but to no avail. The New Year has come and most of the wishes have come true.
A New Year's card is a drawing related to the New Year or there is a New Year's theme, for example, a Christmas tree, gifts, Christmas tree decorations, etc. I decided not to make a classic card, because... I have a lesson on a classic postcard - Santa Claus on a sleigh with gifts ().
This is what we will draw - a small dog in .
How to draw a New Year's drawing
Let's start drawing with the dog. Draw the shape of the head and the area of the muzzle, then use curves to show the middle of the head and the location of the eyes. These lines should be barely visible so that they do not leave traces on the paper when erased.

Click to enlarge
We sketch the ears and show the sides of the hat. The vertical line shows the distance from the neck to the bottom of the paws, we will need it.

Click to enlarge
Draw the white part of the hat.

Click on the picture to enlarge
Draw the tip of the cap and the bubo.

Draw the shape of the eye, nose and small mouth.

Erase where we drew the muzzle and in the same place imitate the fur with separate curves of different lengths and in the direction, as in the picture. Hair falls into my eyes. Draw small hairs around the nose and mouth.

Erase the part in the eyes where the fur covers, we don’t paint over there. We also make the ears and head fluffy.

Add more lines only in a lighter tone, either press lightly on the pencil, or use a harder pencil.

We make the white part of the hat fluffy. Let's start drawing folds.

Draw more folds, adding shape to the hat, our bubo is also shaggy.

We darken the dark areas.

If you are not particularly good at drawing folds, it is better to skip this step and move on to the next one, saving yourself nerves and time. You can draw the shadow in a very light tone.

And so that the drawing becomes a New Year's card, we will draw a Christmas tree branch with snow on the side. Just draw a branch, then erase a small part and trace it, it will be snow. We also draw garlands on top, and write “Happy New Year!” on the bottom. For beauty, you can draw stars. You don’t have to draw them, you can do it differently, see the next picture.

You can draw, you can add more. If you want, draw it differently, as you like, this is what came to my mind first. You may have your own option.
Every child wants a dog in the house, a very good gift for a child to give it for the New Year. A puppy will always be a welcome gift for the New Year; this cute creature will fill your heart and the heart of your child with kindness and tenderness. Oh my God, tell me, what a cute puppy, how affectionate and playful he is. How happy will your baby be? And if a child brought you such a postcard, perhaps this is a signal, an intention to say: “Look what I want! I want it as a gift." You don’t have to think about who will feed him, who will clean up after him, who will take him out for a walk - just look into your child’s eyes when he sees this little fluffy ball, and all your doubts will disappear. It's worth doing a lot for this.
How to draw New Year, choose.
I don’t know about you, but I get into the New Year’s mood already in November. And this is good. After all, there is a lot to do before the New Year: home decoration, cards, gifts...Therefore, you should start preparing in advance!
And the question arises, what to draw for the New Year to please your friends and loved ones?
We have collected 25 ideas for New Year's stories for you. Useful for postcards, wall newspapers, paintings for gifts. Choose the ones you like and draw with inspiration! And reference pictures will help you achieve the expected result :)
25 ideas on what to draw for the New Year:
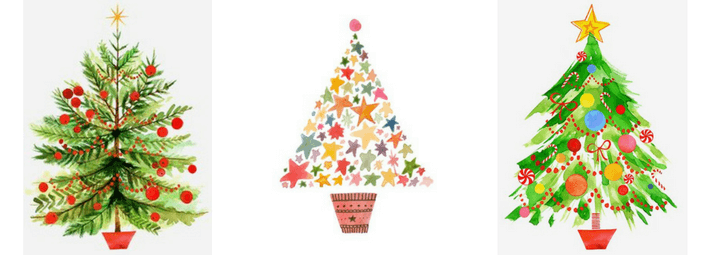
1. Christmas tree
You can imagine the New Year without streamers, sparklers, even tangerines, but if there is no festively decorated Christmas tree, consider that the holiday did not take place!
Drawing a Christmas tree is very easy! In this case, you can use the simplest images that even children can do.
2. Santa Claus
And what would New Year be without Santa Claus?
Red nose, rosy cheeks, beard, and most importantly - a red sheepskin coat and a bag of gifts!
![]()
3. Snowflakes
Don't wait for snowfalls and blizzards - you can draw beautiful snowflakes!
Is it difficult to come up with an openwork pattern? Then find several options you like on the Internet using the queries “paper snowflakes” or “snowflake templates” :)

4. Snowman
The snowman is a fairly popular character in New Year's and winter stories.
And it’s very simple to draw: a couple of round pieces, a nose like a carrot, handles and a twig, and all the other attributes are a flight of your imagination!
Don't know how to draw people? The snowman will completely replace them! Can do everything like a human: give gifts, skate, laugh and dance.
? MK in pictures!
The history of the creation of the first snowman, according to ancient legend, takes us back to the distant year 1493. It was then that Michelangelo Buonarotti, a sculptor, poet and architect, sculpted the first snow figure. But the first written mention of a beautiful huge snowman is found in one of the books of the 18th century. The 19th century was marked by a “warming” in the relationship between man and snowmen. These winter beauties become good heroes of holiday fairy tales, integral attributes of New Year's cards.

5. New Year (Christmas) wreath
Decorating a house with a Christmas and New Year's wreath is a very beautiful custom that came to us from Western countries. In recent years, New Year's wreaths have become a popular interior decoration.
“Weave” hand-drawn New Year’s wreaths from fir branches or holly, add red “Christmas star” flowers, fruits, ribbons, beads, and Christmas tree decorations. When composing compositions there is room for your imagination to run wild.

By the way, you can decorate the wreath not only with the usual New Year’s decorations, but also with everything that your imagination can tell you. For example - dried flowers, pine cones, berries, fruits, vegetables, cinnamon sticks, spices, citrus peels cut in a spiral, cayenne pepper, tangerines, apples, flowers, candies, sweets, Christmas cookies.
![]() More interesting and useful information about drawing
More interesting and useful information about drawing
from the artist Marina Trushnikova
You will find it in the electronic magazine “Life in Art”.
Receive magazine issues to your e-mail!
6. Socks for gifts
Do you know where the tradition of hanging socks on mantels for gifts came from?
According to legend, a poor man was worried that his daughters would not marry because he did not have a dowry for them.
Saint Nicholas, having learned about their plight, wanted to help them. On Christmas Eve, after the girls had hung their stockings on the fireplace to dry, he threw a few gold coins into the house's smoker. The coins landed in the stockings and filled them.
As word spread, other people also began hanging up stockings in hopes that they would receive gifts.

This is interesting:
7. Gingerbread cookies and gingerbread
Perhaps the most delicious plot of our New Year's selection!
Every housewife probably has molds in the shape of stars, houses, hearts... They can be used not only in baking, but also in drawing:)
By the way, if you have a proven cookie recipe, share it in the comments!

8. Atmospheric cups
If you are not yet familiar with my course
In one of the lessons we draw a cute watercolor scene with cups. Such a sketch will be an excellent addition to a gift for your mother, sister, friend, or someone with whom you want to have a heart-to-heart talk over a cup of tea or coffee...

9. Christmas balls
Christmas balls are one of the most common subjects for New Year's cards.
They can be drawn very simple, flat, with an emphasis on the pattern. Or you can, if you know how, in all their glassy glory.

10. Holly and poinsettia
Red bright poinsettia flower resemble a star. This plant blooms in winter. Therefore, poinsettia flowers began to be called the stars of Bethlehem.
Holly (holly)- one of the most common Christmas plants. It is believed that holly reveals its magical properties at Christmas time, bringing health, love and prosperity to the home.

11. Christmas cupcakes (cupcakes)

12. Mittens
Knitted mittens are a very cozy winter accessory. For those whom you want to warm with the warmth of your heart!

13. Skates
A pair of skates can not only brighten up a winter weekend, but also become an unusual element of New Year's decor or decorate a greeting card with an unusual idea!

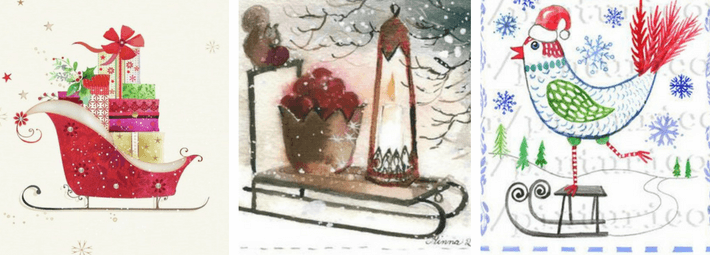
14. Sledge
How do you like this story with winter sleds? And the gifts can be stacked on them, and the winter character can be taken for a ride.
15. Dwarves, elves
Little people in red caps open the door to the world of magic and fairy tales!

16. Angels
The image of an angel will effectively decorate your gift and emphasize the sincerity of your wishes. By the way, from the ancient Greek language the word “angel” is translated as messenger, messenger. Let your holiday pictures and New Year's cards bring good news and lift your spirits!

Are you new to watercolor? Want to see how pictures like these are created?
Do you want to draw cards with winter angels after the artist?
Master class “Angel of Christmas” for you!

As a result of this video master class, you will draw 3 beautiful Christmas (New Year) images.
Use them for cards or frame them.
17. Snow globe
Snow globes are exquisite souvenirs for Christmas and New Year.
A figurine is usually placed in the center of the ball: a snowman, Santa Claus or a famous landmark. By shaking such a ball, you can see snowflakes falling.
I just love them... 
18. Bells, bells
Bells from the cart harness of Father Frost and Santa Claus are a good option for a simple image. (This is if you don’t know how to draw deer and horses..)
And just a bell is a very good decoration, often found in New Year’s themes.

19. Gifts
Do you like beautifully wrapped gifts? Or do you pay more attention to filling?
In any case, a mountain of bright holiday boxes with colorful bows is a great idea for what to draw for the New Year!

20. Lanterns
A pleasant flickering light in the night, against the backdrop of snow - it’s so romantic and beautiful! And, again, simple!

21. Winter landscapes with houses
Even if we live in a metropolis, for some reason our symbol of home comfort is a snow-covered house with a welcomingly glowing window...
Well, then let’s please ourselves and our friends with such festive houses!