Health group program for the elderly. Therapeutic exercise for the elderly
Elderly people face social problems,
health problems,
lack of attention from surrounding people.
Let's clarify the age names:
- Old age – 60 – 70 years;
- Senile age – 70 – 80 years;
- Centenarians - over 80 years old.
In old age, as a rule, there are many different chronic diseases accumulated throughout life. The aging body gradually loses the ability to produce “youth” hormones - sex hormones, as well as adrenal hormones, which reduce the likelihood of exacerbations of previously suffered diseases.
There is no doubt that any disease leaves some consequences. In youth, this is not so noticeable, but with age, due to the atrophy of organs and the extinction of their functions, the body has difficulty coping with stress, immunity decreases, a person quickly gets tired, and chronic diseases often worsen, which often have an atypical course with insufficiently expressed symptoms. Something always hurts. Some women tend to think that they have been jinxed. But there is no one to blame.
Life goes on, and you need to strive to improve and strengthen the body, maintain self-care skills, not allow yourself to relax: try to do all your homework, keep your home clean and tidy and your body hygienic, take care of your appearance, be neat and collected (thoughtful) so that rationally carry out the necessary things and save energy and time, which “flies” faster and faster with age.
Physical therapy is necessary for older people. Indeed, with the most common diseases such as osteochondrosis of the spine, osteoporosis of bones, arthrosis, vegetative - vascular dystonia, sleep disorders, hypertension, diseases of internal organs, metabolic disorders and other diseases, the body needs compensation (adaptation to internal and external conditions that matter for health and life expectancy).

Skeletal changes in bone osteoporosis.
When selecting physical activity for older people, we take into account that metabolism is reduced, the content of under-oxidized breakdown products is increased (easy fatigue, overwork should not be allowed);
there are changes in the skeleton, increased tone and decreased muscle strength, impaired posture and gait due to a shift in the center of gravity;
possible cerebrovascular accidents, encephalopathy, problems with coordination of movements and balance;
there may be prolapse of internal organs, urinary incontinence;
decreased vital capacity of the lungs, dystrophy of the heart muscle.
In older patients, there is limited movement of the eyeballs (especially upwards), you have to turn your head, and you may feel dizzy.
We must also remember about age-related changes in the psyche. With age, pre-existing character flaws worsen. Emotional lability appears (tearfulness, moodiness, grumpiness), apathy, and there is a reluctance to exercise.
Due to the constant feeling of fatigue and illness, older people may find it difficult to perform exercises. And yet you need to force yourself to overcome the malaise and, starting with the simplest exercises, gradually increase your physical activity. Physical exercise is an excellent means of preventing body disorders, and therapeutic exercises for the elderly improves quality of life in many diseases, increases self-confidence and improves mood.
Control of the cardiovascular system is very important to avoid myocardial infarction.
Need to determine heart reserve. To do this, you need to calculate the maximum permissible heart rate during physical activity and heart rate at rest in 1 minute.
HR (heart rate) maximum = 180 – age.
For example, age 62 years. Maximum heart rate = 180 – 62 = 118 (beats per minute).
Use a stopwatch to calculate your resting heart rate (after 15 minutes of rest) in one minute. Let's say 84 beats per minute.
HR (heart reserve) = maximum heart rate – resting heart rate.
RS = 118 – 84 = 34 beats per minute (100%). This means that your heart rate during physical activity should not be higher than 118 beats per minute. And you need to know the heart reserve because for people over 60 years old it is not necessary to give a 100% load.
In old age (60–70 years), we use up to 90% of the heart reserve.
In the elderly (70 – 80 years old) – up to 50%.
For centenarians – no more than 40%.
We approach this gradually, starting with the load
20% of individual heart reserve.
So, for example, at the age of 62 years, the heart reserve at a resting heart rate of 84 beats per minute is 34 beats per minute - this is 100%.
During the first sessions of therapeutic exercises, you can allow an increase in heart rate by 20% - in this example, by 7 beats per minute.
And in the future, after gradual adaptation to physical activity, you can allow an increase in heart rate to 90% of the heart reserve - in this example, by 30 beats per minute.
So, in this example, at the age of 62 years and with a heart rate at rest of 84 beats per minute in the first classes, we allow an increase in the heart rate by 7 beats per minute (= 91 beats per minute), gradually increasing the load, we allow the heart rate to reach 90% of the heart reserve (at 30 beats per minute). Heart rate will be up to 114 beats per minute.
Now take a piece of paper and a pen, a watch with a second hand, sit in a chair for 15 minutes to rest.
1). Write how old you are.
2). Now subtract this number from 180. Write: “The maximum heart rate is …”.
3). Calculate the heart rate for 1 minute using the second hand and write this figure as follows: “Pulse at rest is …”.
4). Calculate cardiac reserve using the above formula. (HR (heart reserve) = maximum heart rate - resting heart rate). Write this number.
You can adjust the load from 20% to 90% of your heart reserve by monitoring your heart rate during exercise.

Classes using the small group method in the clinic.
Small group classes are useful for older people, as this involves communication with peers, which older people really like. But you can practice on your own at home.
Exercises for all muscle groups are used.
Class density is 50 - 60%. The rest of the time is used for counting the pulse, demonstrating exercises, changing the starting position, and static breathing exercises.
The duration of the lesson is no more than 30 minutes, 2 – 3 times a week.
All initial positions are acceptable, but ref. the standing position should not prevail.
Exercises with sharp turns and bends are excluded. Dthe movements are smooth, the pace is slow.
Exercises for balance and vestibular functions are required.
It is necessary to know what factors contribute to poor balance and unexpected falls in older people.
- Tremor of the limbs.
- Increased reaction time.
- Weakness of the hip and leg extensor muscles.
- Orthostatic hypotension (a sharp drop in blood pressure with a rapid change in body position from the initial lying position to a standing position.
- Visual and hearing impairments.
- Shifting the center of gravity forward.
- The cervical-diaphyseal angle is changed (from obtuse it becomes straight), which reflexively affects cerebral circulation.
- In men, it is difficult to bring their legs together; in women, on the contrary, they spread their legs apart, which makes it difficult to maintain stability when losing balance.
Falls must be excluded, since with osteoporosis, falling from a height can result in bone fractures and other injuries.
Therapeutic gymnastics for the elderly carried out only when satisfactory condition of the patient.
Contraindications for group classes is urinary incontinence and a categorical refusal to exercise.
Version of a set of exercises for the elderly for copying without pictures.
Let's prepare a ball the size of an orange (or better yet, an orange), a gymnastic stick (the length of the stick is selected as follows: the distance from the left shoulder joint to the fingertips of the right hand straightened towards the side, or while standing, measure the distance from the floor to the xiphoid process of the sternum, subtract 10 from this figure).
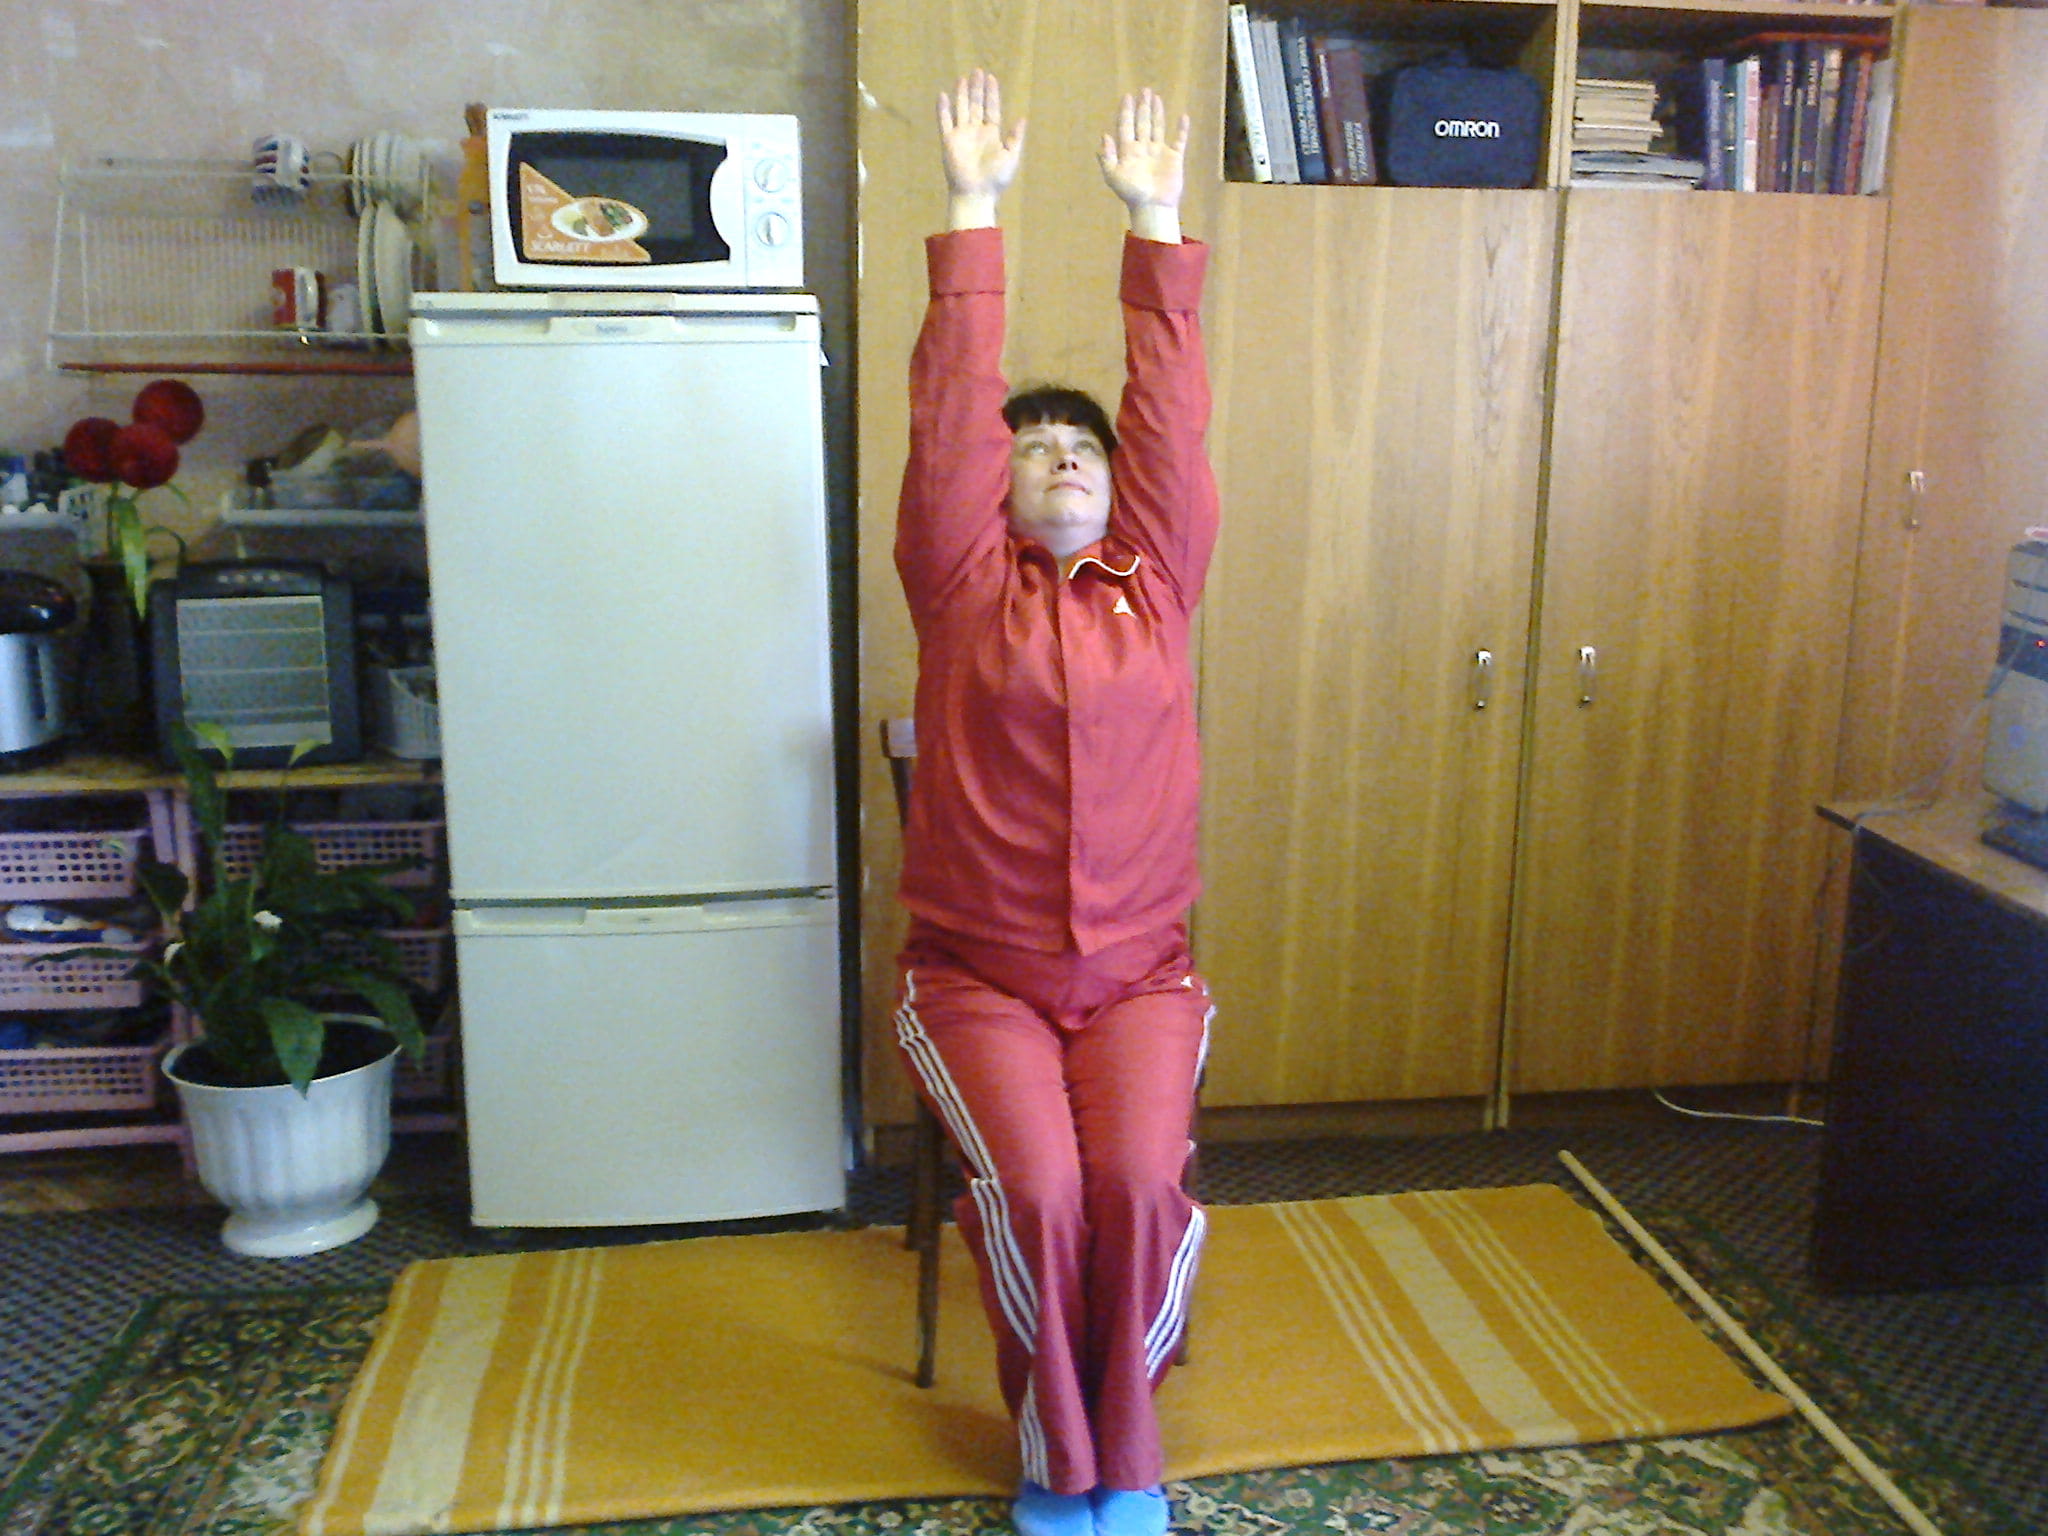
1). "Open - close." Hands on knees, feet shoulder-width apart. 1- Hands to shoulders (start of inhalation). 2- Straighten your arms to the sides, open your palms (inhale). 3- Hands to shoulders again (beginning of exhalation). 4- Place your hands on your knees and bend forward slightly (exhale). 4 times.
2). “Raise your leg.” Hold the seat of the chair with your hands. 1- Raise your straightened right leg. 2- Lower into original. position. 3- Raise your straightened left leg. 4- Return to original. position. 4 times.
3). "Shoulder rotations." Hands to shoulders, feet shoulder-width apart. 1, 2, 3, 4 – Draw one large circle with your elbows. 4 times. Then do the same in the opposite direction 4 times.
4). "One foot at a time." Hold the seat with your hands, legs spread wide. 1 - Place your right leg on your left, tightly squeeze your pelvic floor muscles (inhale). 2 - Return to original. position (exhalation). 3 - Place your left leg on your right, squeeze your pelvic floor muscles (inhale). 4 - Return to original. position (exhalation). 4 times.
5). "We're swinging the stick." (Balance exercise). Place the gymnastic stick vertically with one end on the floor, press the lower end with your feet, spread your knees wide, place your hands on the upper end of the stick on top of each other. 1 – Leaning on the stick, straighten your arms forward, slowly leaning forward so that your head drops between your hands at ear level (exhale). 2 - Return to original. position (inhalation). 6 times slowly.
6). “Put the stick vertically.” Take the stick between your palms so that the ends of the stick rest against the middle of your palms, lower the stick down (on your hips), feet shoulder-width apart. 1 – Place the stick vertically on your right leg so that your right hand is at the top and the left is at the bottom (inhale), look at your right hand. 2 – Return to the starting position (exhale). 3 - Place the stick vertically on your left leg so that your left hand is at the top and the right hand is at the bottom (inhale), look at your left hand. 4 – Return to the starting position (exhale). 4 times.
7). “Roll a stick on your back.” Press the stick to your back with your elbows, legs apart for stability. Move the stick along your back with your elbows up (inhale) - down (exhale), do not bend over, keep your back straight.
8). Diaphragmatic breathing 6 times. Place your hands on your stomach, bend your legs at the knees. 1 – inhale through the nose, inflating the stomach. 2 – Exhale through the mouth in a thin stream slowly, pursing your lips into a tube; the stomach “deflates”, pull the abdominal wall “into itself”.
9). "Ball under the knee." Arms to the sides, ball (orange) in the right hand, straightened legs together. 1 – Bend your right leg, transfer the ball under your knee to your left hand (exhale). 2 - Return to the starting position (inhale), ball in your left hand. 3 – Bend your left leg, transfer the ball under your knee to your right hand (exhale).
10). “The ball is in the other hand with a turn.” Arms to the sides, ball (orange) in the right hand, straightened legs together. 1 – Raise your right hand with the ball and move the ball to your left hand, turn your body to the left, take the ball in your left hand (exhale). 2 - Return to the starting position (inhale). 3 – Also transfer the ball to your right hand, turning your body to the right (exhale). 4 - Return to the starting position (inhale). 3 times.
eleven). “The ball is in the other hand behind the head.” Arms along the body, ball in the right hand, legs straightened. 1 – Hands slide across the floor behind your head, pass the ball to your left hand, without moving your head, raise your eyes towards the ball (inhale). 2 - Return to the starting position (exhale). 3 – Place the ball behind your head in your right hand, raise your eyes up (inhale). 4 - Return to the starting position (exhale). 3 times.
12). “Rotate your hands and feet.” Arms bent at the elbows, hands in fists, feet shoulder-width apart. Slowly and smoothly rotate your fists and feet inward, then in the opposite direction for 4 circles. Repeat again.
13). Arms along the body, legs straightened. 1 – Raise your right hand up and place it on the floor behind your head, while simultaneously bending your left leg at the knee, sliding your foot along the floor (inhale). 2 - Return to the starting position (exhale). 3 – Raise your left arm up, bend your right leg at the knee, sliding your foot along the floor (inhale).
14). "Tension - relaxation." Arms along the body, legs straightened. 1 – Clench your hands into fists, your feet towards you, and squeeze your buttocks tightly (inhale). 2 – Relax all muscles (exhale). 6 times.
15). "Opposite limbs to the sides." Arms along the body, legs straightened. 1 - Move your right arm and left leg to the sides (inhale). 2 - Return to the starting position (exhale). 3 – Same with left arm, right leg (inhale). 4 - Return to the starting position (exhale). 4 times.
16). Diaphragmatic breathing 6 times. (See exercise No. 8).
We count the pulse for one minute and write it down. (Pulse should not exceed maximum heart rate).
17). “Rest your head in your hands.” Arms bent at the elbows, lying in front of you, head raised, look up. 1 – Lower your head onto your hands with your right ear, turning it to the left (exhale), relaxation. 2 - Return to the starting position, raise your eyes up (inhale). 3 – Place your head on your hands on your left ear, relax (exhale). 4 - Return to the starting position, eyes looking up (inhale). 4 times.
18). "Hands on the pelvis." Arms extended forward, legs straightened. 1 – Place your right hand on your pelvis. 2 – Place your left hand on your pelvis, raise your head and chest, look forward. 3, 4 – Return to the starting position in reverse order, relaxing. 3 times.
19). "Beach". The head lies on the hands. Alternately - counter flexion and extension of the legs at the knee joints.
20). “Raise opposite limbs.” 1 – Raise your right arm forward, left leg back, maintain balance (inhale). 2 - Return to the starting position (exhale). 3 – Raise your left arm, right leg (inhale). 4 - Return to the starting position (exhale). 4 times.
21). "Look at the hand." 1 – Raise your right hand to the side - up, look at it (inhale). 2 - Return to the starting position (exhale). 3 – Raise your left hand to the side - up, look at it (inhale). 4 - Return to the starting position (exhale).
22). “Stretch your hand forward.” 1 – The right hand slides forward as far as possible, lower the head (exhale). 2 - Return to the starting position (inhale). 3 – The left hand slides forward, lower the head (inhale). 4 - Return to the starting position (inhale). 3 times.
We count the pulse for one minute and write it down. (Pulse should not exceed maximum heart rate).
23). Lying on your back, diaphragmatic breathing 6 times. (See No. 8).
24). “Kitty” (Bend and arch your back).
25). “Fox tail” (Bending of the spine now to the right, now to the left).
26). Sitting on a chair, hands hold the seat. Rolling from heel to toe.
27). Sitting on a chair, hands on knees. Raise your arms up to your sides (inhale), lower them to your knees, and bend forward slightly (exhale). 5 times.
Homework.
2). Train the vestibular system: lying on the bed on your back, bend your knees, turn on your side, lower your legs off the bed and, pushing off with your hands, sit on the edge of the bed for a few seconds, stand up (spread your legs shoulder-width apart), straighten up, stand for a while, trampling from foot to foot. Now, in reverse order, lie on the bed in the other direction. 3 times in each direction slowly, monitoring your well-being. Avoid dizziness. You can simplify the task by eliminating standing up.
3). Diaphragmatic breathing 6 times before bed. (This exercise helps with the appearance of chest pain due to angina pectoris, since the diaphragm, rising and falling, promotes the movement of blood in the systemic circulation, facilitating the work of the heart).
4). Self-massage of hands and fingers. Exercises for fingers (“Coins” - circular movements with the thumb on the tips of all other fingers, “Shalbans with all fingers in turn”, “Buttons” - press the thumb on the tips of all fingers in turn, “Figurines between all fingers”, “Call to you” all fingers in turn”, “Straighten each finger in turn from the fist”, “Straighten and spread all fingers - clench your fingers into fists”.
5). Long walks, you can run (breathe only through your nose, if there is not enough air, go to walking), skiing in winter, swimming in the pool and classes in a health group according to age are useful. Remember to monitor your blood pressure and pulse.
6). Gymnastics for the eyes.
Let's prepare a ball the size of an orange (or better yet, a real orange),
gymnastic stick ( gymnastic stick length: the distance from the left shoulder joint to the fingertips of the right arm straightened towards the side or standing, measure the distance from the floor to the xiphoid process of the sternum, subtract 10 from this figure),
chair with backrest and rug.
Let's ventilate the room.
Starting position sitting on a chair.
1). "Open - close."
Hands on knees, feet shoulder-width apart.
1- Hands to shoulders (start of inhalation).
2- Straighten your arms to the sides, open your palms (inhale).
3- Hands to shoulders again (beginning of exhalation).
4- Place your hands on your knees and bend forward slightly (exhale). 4 times.
Initial position.

Once! Start of inhalation.

Two! Inhale.
Three! Beginning of exhalation.

Four! Exhale deeply.
2). “Raise your leg.”
Hold the seat of the chair with your hands.
1- Raise your straightened right leg.
2- Lower into original. position.
3- Raise your straightened left leg.
4- Return to original. position. 4 times.
Initial position.

Once! Raise your right leg. Inhale.

Two! Exhalation.

Three! Left leg! Inhale.
3). "Shoulder rotations."
Hands to shoulders, feet shoulder-width apart.
1, 2, 3, 4 – Draw one large circle with your elbows. 4 times.
Then do the same in the opposite direction 4 times.

Once! Circular rotations of the arms in the shoulder joints.

Two!

Three!

Four!
And repeat in the other direction 4 times.
4). "One foot at a time."
Hold the seat with your hands, legs spread wide.
1 - Place your right leg on your left, tightly squeeze your pelvic floor muscles (inhale).
2 - Return to original. position (exhalation).
3 - Place your left leg on your right, squeeze your pelvic floor muscles (inhale).
4 - Return to original. position (exhalation). 4 times.
Place your feet shoulder-width apart.

Right leg - One! Squeeze your patience muscles. Inhale.

Two! Exhalation.

Left leg - Three! Squeeze your patience muscles. Inhale.
Four! Exhalation.
5). "We're swinging the stick."(Balance exercise). Place the gymnastic stick vertically with one end on the floor, press the lower end with your feet, spread your knees wide, place your hands on the upper end of the stick on top of each other.
1 – Leaning on the stick, straighten your arms forward, slowly leaning forward so that your head drops between your hands at ear level (exhale).
2 - Return to original. position (inhalation). 6 times slowly.
Initial position.

Once! Exhalation.

Two! Inhale. Stick to the chest, straighten your back.
If dizziness does not bother you, then this exercise can be complicated by securing the lower end of the stick with your feet, and slowly rotating the upper end, bending deeply forward, then straightening up, bringing the upper end of the stick to the sternum (clockwise and counterclockwise).
6). “Put the stick vertically.”
Take the stick between your palms so that the ends of the stick rest against the middle of your palms, lower the stick down (on your hips), feet shoulder-width apart.
1 – Place the stick vertically on your right leg so that your right hand is at the top and the left is at the bottom (inhale), look at your right hand.
2 – Return to the starting position (exhale).
3 - Place the stick vertically on your left leg so that your left hand is at the top and the right hand is at the bottom (inhale), look at your left hand.
4 – Return to the starting position (exhale). 4 times.
Initial position. A stick between the palms.

Once! Inhale.

Two! Exhalation.

Three! Inhale.
Four! Exhalation.
7). “Roll a stick on your back.”
Press the stick to your back with your elbows, legs apart for stability.
Move the stick along your back with your elbows up (inhale) - down (exhale), do not bend over, keep your back straight.
Initial position.

Inhale - stick up.

Exhale - stick down.
We count the pulse for one minute and write it down. (Pulse should not exceed maximum heart rate).
Let's calculate the pulse in 1 minute.
Starting position lying on your back.
(Pillow under the head to reduce the risk of high blood pressure).
8). Diaphragmatic breathing 6 times. Place your hands on your stomach, bend your legs at the knees.
1 – inhale through the nose, inflating the stomach.
2 – Exhale through the mouth in a thin stream slowly, pursing your lips into a tube; the stomach “deflates”, pull the abdominal wall “into itself”.
Diaphragmatic breathing. Inhale through the nose, “inflate” the stomach.

Diaphragmatic breathing. Exhale through your mouth in a thin stream, pursing your lips into a tube.
9). "Ball under the knee."
1 – Bend your right leg, transfer the ball under your knee to your left hand (exhale).
2 - Return to the starting position (inhale), ball in your left hand.
3 – Bend your left leg, transfer the ball under your knee to your right hand (exhale).
4 - Return to the starting position (inhale). 3 times.

Once! Place the ball in your left hand under your knee. Exhalation.

Two! Inhale. The ball is in the left hand.

Three! Place the ball in your right hand under your left knee. Exhalation.

Four! Ref. position. Inhale. The ball is in the right hand.
10). "Ball in the other hand with a turn".
Arms to the sides, ball (orange) in the right hand, straightened legs together.
1 – Raise your right hand with the ball and move the ball to your left hand, turn your body to the left, take the ball in your left hand (exhale).
3 – Also transfer the ball to your right hand, turning your body to the right (exhale).
4 - Return to the starting position (inhale). 3 times.
Ref. position. Inhale.

Once! Exhalation.

Two! Inhale.

Three! Exhalation.

Four! Ref. position. Inhale.
11). "Ball in the other hand behind the head".
Arms along the body, ball in the right hand, legs straightened.
1 – Hands slide across the floor behind your head, pass the ball to your left hand, without moving your head, raise your eyes towards the ball (inhale).
3 – Place the ball behind your head in your right hand, raise your eyes up (inhale).
4 - Return to the starting position (exhale). 3 times.
Ref. position. The ball is in the right hand.

Once! Hands up, inhale. Ball in left hand.

Two! lower your arms along your body. Exhalation. The ball is in the left hand.

Three! Inhale. Ball in the right hand.

Four! Ref. position. The ball is in the right hand.
12). “Rotate your hands and feet”.
Arms bent at the elbows, hands in fists, feet shoulder-width apart. Slowly and smoothly rotate your fists and feet inward, then in the opposite direction for 4 circles.
Repeat again.
At the same time, we rotate our hands and feet slowly and efficiently.

At the same time, we rotate our hands and feet slowly in one direction, then in the other direction.
13). "Raise your arm, bend your leg".
1 – Raise your right hand up and place it on the floor behind your head, while simultaneously bending your left leg at the knee, sliding your foot along the floor (inhale).
2 - Return to the starting position (exhale).
3 – Raise your left arm up, bend your right leg at the knee, sliding your foot along the floor (inhale).
4 - Return to the starting position (exhale). 4 times.
Initial position.

Once! Right hand, left foot! Inhale.

Two! Exhalation.

Three! Left hand, right foot! Inhale.
Four! Exhalation.
14). "Tension - Relaxation". Arms along the body, legs straightened.
1 – Clench your hands into fists, your feet towards you, and squeeze your buttocks tightly (inhale).
2 – Relax all muscles (exhale). 6 times.
Once! Squeeze your hands into fists, lift your feet towards you, and squeeze your buttocks! Inhale.

Two! Straighten your fingers and stretch your toes. Exhalation.
15). "Opposite limbs to the sides".
Arms along the body, legs straightened.
1 - Move your right arm and left leg to the sides (inhale).
2 - Return to the starting position (exhale).
3 – Same with left arm, right leg (inhale).
4 - Return to the starting position (exhale). 4 times.
Initial position.

Once! Inhale. Right hand, left foot!

Two! Exhalation. Initial position.

Three! Inhale. Left hand, right foot!
Four! Exhalation. Initial position.
16). Diaphragmatic breathing 6 times. (See exercise No. 8).
We count the pulse for one minute and write it down. (Pulse should not exceed maximum heart rate).
Starting position lying on your stomach.
17). “Rest your head in your hands.”
Hands bent at the elbows, lie in front of you, raise your head, look up.
1 – Lower your head onto your hands with your right ear, turning it to the left (exhale), relaxation.
2 - Return to the starting position, raise your eyes up (inhale).
3 – Place your head on your hands on your left ear, relax (exhale).
4 - Return to the starting position, eyes looking up (inhale).
4 times.
Initial position. Inhale.

Once! put your head on your right ear. Exhalation.

Two! Inhale. Initial position.

Three! Exhalation. Place your head on your left ear.
Four! Inhale. Initial position.
18). "Hands on the pelvis." Arms extended forward, legs straightened.
1 – Place your right hand on your pelvis.
2 – Place your left hand on your pelvis, raise your head and chest, look forward.
3, 4 – Return to the starting position in reverse order, relaxing. 3 times.

Initial position.

Once! Start of inhalation.

Two! Inhale.

Three! Beginning of exhalation.

Four! Exhalation.
19). "Beach". The head lies on the hands. Alternately - counter flexion and extension of the legs at the knee joints.
Alternately - counter movement of the legs. The body is relaxed.

Alternately - counter movement of the legs.
The starting position is knee-wrist.
20). “Raise opposite limbs.”
1 – Raise your right arm forward, left leg back, maintain balance (inhale).
2 - Return to the starting position (exhale).
3 – Raise your left arm, right leg (inhale).
4 - Return to the starting position (exhale). 4 times.
Initial position.

Once! Inhale.

Two! Exhalation.

Three! Inhale.
21). "Look at the hand."
1 – Raise your right hand to the side - up, look at it (inhale).
2 - Return to the starting position (exhale).
3 – Raise your left hand to the side - up, look at it (inhale).
4 - Return to the starting position (exhale).
Initial position.

Once! Inhale.

Three! Inhale.
22). “Stretch your hand forward.”
1 – The right hand slides forward as far as possible, lower the head (exhale).
2 - Return to the starting position (inhale).
3 – The left hand slides forward, lower the head (inhale).
4 - Return to the starting position (inhale). 3 times.
Initial position.

Once! Exhalation. We stretch our right hand forward.
Two! Inhale.

Three! Exhalation. We stretch our left hand forward.
Four! Exhalation.
23). "Kitty."
1- Bend down (inhale).
2- Arch your back up, head down (exhale). 4 times.

"Kitty." Bend your back down. Inhale.

"Kitty." arch your back upward. Exhalation.
24). "Fox Tail" 1- Move your feet and head to the right with your ear towards your right shoulder. Inhale.
2- Ref. position (exhalation).
3- Move your feet and head to the left to the left shoulder (inhale).
4- Ref. position (exhalation). 4 times.

Once! Inhale.
Two! Exhalation.

Three! Inhale.
Four! Exhalation. Initial position.
We count the pulse for one minute and write it down. (Pulse should not exceed maximum heart rate).
Roll your feet onto your heels.

Roll from heel to toe.
27). Sitting on a chair , hands on knees.
1, 2 - Raise your arms up through your sides (inhale).
3, 4 - Lower to your knees, bend forward slightly (exhale). 5 times.
Initial position.

Once! Hands up, raise your eyes. Start of inhalation.
Two! Hands up. Inhale.

Three! arms to the sides, exhalation begins.

Four! Exhale deeply, bend forward, resting your hands on your knees.
Homework.
1). Self-massage of the back with a roller back massager.

It is better to buy a back massager the size of a gymnastics stick so that you can roll it on your back with your elbows.

Body Massager.

Back massager.

Back massager.

Back massager.

Massage mat for feet.
2). Train the vestibular system: lying on the bed on your back, bend your knees, turn on your side, lower your legs off the bed and, pushing off with your hands, sit on the edge of the bed for a few seconds, stand up (spread your legs shoulder-width apart), straighten up, stand for a while, trampling from foot to foot. Now, in reverse order, lie on the bed in the other direction. 3 times each wayslowly, monitoring your well-being. Avoid dizziness. You can simplify the task by eliminating standing up.

We practice getting up and lying down.

First, bend your knees.

Bend your knees towards the edge of the bed and turn onto your side.

Lower your legs off the bed and, pushing with your hands, sit on the edge of the bed.

Slowly sit on the edge of the bed and sit for a while to get used to the upright position.
Stand up decisively, legs apart for stability, arms to the sides. Maintain balance.
Sit down slowly and smoothly, leaning forward slightly, without falling onto the bed.

Lie on the other side, put your feet on the bed.

Turn onto your back. (Training to change body position).
3). Diaphragmatic breathing 6 times before bed. (This exercise also helps with the appearance of chest pain due to angina pectoris, since the diaphragm, rising and falling, promotes the movement of blood in the systemic circulation, significantly facilitating the work of the heart).
4). Self-massage of hands and fingers.
5). .
“Coins” - circular movements with the thumb on the tips of all other fingers,
“Shalbans with all fingers alternately”,
“Buttons” - press with your thumb on the tips of all fingers in turn,
"Figurines between all fingers",
“Call to you with all fingers in turn”,
“Straighten each finger in turn from the fist”,
“Straighten and spread all your fingers - clench your fingers into fists”.
6). Long walks, you can run (breathe only through your nose, if there is not enough air, go to walking), skiing in winter, swimming in the pool and classes in a health group according to age are useful. Remember to monitor your blood pressure and pulse.
7). .

Health group in the pool.
2. Buy a modern exercise bike (increases blood circulation in the pelvis) or an elliptical trainer.It creates an imitation of the movement when running, creates a vertical load on the bones of the lower extremities, which helps strengthen the bones during osteoporosis and for the prevention of osteoporosis, the heart muscle also receives a good load. It is better to buy a magnetic ellipsoid, as it works quietly and smoothly, is very pleasant, and makes you want to practice on it. There is monitoring of the cardiovascular system and other capabilities.
Recruitment is being announced for older generation health groups in the direction of “yoga” at the Lokomotiv sports complex (Lenin St., 90). Schedule: Monday, Thursday from 10:00.
Registration for the group is carried out by phone. +7 906 916-32-17 (Head of the “Senior Generation” sports and recreation center of the Directorate of Sports and Mass Events - Svetlana Lutsko).
For reference
In order to solve the problems of improving the quality of life of older people, promoting the active participation of older people in society, solving the problem of loneliness and social isolation from society of older people, improving physical health, through free physical education classes in 2002, the administration of the city of Krasnoyarsk initiated the creation of health-related groups for people aged 55 years and older.
Since 2013, within the framework of two long-term city target programs, the budget of the city of Krasnoyarsk has been paying for the services of instructors to conduct physical education and health classes in health groups for elderly people who have extensive experience in coaching, teaching and physical education and sports work. By agreement, sports areas are provided by social institutions and commercial organizations on a free-of-charge basis.
The following work is organized:
- work with health groups 29 instructors;
- formed 130 physical education and health groups on the basis of 13 municipal institutions - sports, culture and education and on the premises of 10 organizations of various forms of ownership - commercial and government;
It is planned that the number of older Krasnoyarsk residents involved in physical education will reach 2,000 people in 2015.
EXPLANATORY NOTE
This training program of art therapy sessions for older people “Know yourself and your creative potential” is intended for recipients of social services of the Comprehensive Center for Social Services for the Population of the Primorsky District, a department for servicing citizens living in residential premises of a specialized social housing stock.
An increase in the number of elderly people is typical for St. Petersburg. The total population of the city is four and a half million people, one million are elderly people, that is, almost every fourth person in St. Petersburg has already reached retirement age.
This situation is typical not only for St. Petersburg, but also for other cities. Improving the quality of life of older people, creating conditions that ensure active, long life for older people is an important task of society.
The concept of “quality of life” (in contrast to the “standard of living”, which determines material well-being) is characterized by the absence of serious psychological problems, freedom from the psychological stress of everyday life, the presence of various opportunities to improve the level of education and culture, accessibility of information, and a developed sense of personal self-esteem.
In practice, we are faced with the fact that older people who have retired and feel the strength to develop and contribute to society are forced to live out their lives on a very modest pension. Now, at the Social Service Centers there are not only departments providing assistance to pensioners who have lost the ability to self-care, but also departments working with the so-called “active pensioners”. Not long ago, emergency psychological aid departments were opened in the centers, which are designed to form a psychological culture and strengthen the mental health of older people.
The training program of art therapy classes for older people “Know yourself and your creative potential” is relevant in the realities of our time, since among all the factors influencing a person’s satisfaction with life at any age, health is considered the most important. Deteriorating health leads a person to feel worthless and helpless. It is not surprising that in old age this problem becomes most urgent: physiological changes in the body and a decrease in sensory functions are observed. And at the same time, solving age-related problems: understanding the path of life, helping to raise grandchildren, passing on accumulated experience requires physical and energy expenditure. As can be seen from the above, it is very difficult to combine the important task of adulthood (summing up life's results) with the life circumstances of most pensioners.
The developed Program has a specific focus.
Educational focus of the Program. The program is aimed at introducing methods of self-presentation, techniques of creative work and work in art therapy techniques, and revealing the inner potential of participants. Providing assistance in understanding yourself and your needs.
Developmental orientation of the Program. The program promotes the development of positive motivation and interest in activities, the ability to work in a team, sensory and non-verbal contact with others. And also, the establishment of communicative and interactive communication, the development of the creative potential of participants, the skill of hearing themselves and identifying their own needs, the skill of knowing the inner world of themselves and others, and the skill of relaxation. Develops the ability to find a way out of a conflict situation and the desire to engage in friendly interaction .
Educational orientation of the Program. The program provides for the relief of neuropsychic stress using art therapy methods and techniques, and instilling a desire to work in a group. Developing a desire among participants to be happy.
The novelty of the program lies in the successful combination of several art therapeutic techniques, allowing participants to understand their inner world, unleash their creative potential, and establish communicative and interactive communication. Develop the ability to find a way out of conflict situations, the desire to enter into friendly interactions and learn to work in a group.
The rationale of the Program is that it is quite difficult for older people to talk about their experiences, since they evoke painful memories. Classes based on art therapeutic techniques will help older people throw out their worries and re-establish contact with the people around them. Such group classes help pensioners concentrate on their bodily sensations and through this turn to their internal mental processes, accumulate their life experience, and promote acceptance of themselves and their life path.
The forms and methods of activity in the classes are exciting, as they reveal a person’s creative potential, and comfortable, as they improve the communication skills of the participants.
Educational and thematic lesson plan
Table 1
| № p/p | Lesson topic | Number of classes |
| Collaging “Sympathy” | ||
Total: 10 classes. One lesson lasts from 1 hour to 1 hour 30 minutes
table 2
| № p/p | Lesson topic | Number of lessons / minutes |
||
| practice | ||||
| Plasticine painting “My mood” | ||||
| Mandala “My state here and now” | ||||
| Painting of satin flowers “Let's get to know each other” | ||||
| Drawing on starch “My World” | ||||
| Collaging “Sympathy” | ||||
| Tissue art therapy. “Scarf communication” technique. | ||||
| Salt isotherapy “Conflict situations” | ||||
| Fairytale therapy “The Tale of Orange Friends” | ||||
| Music therapy “My ideal world” | ||||
| Espresso topiary from napkins “Tree of Happiness” | ||||
| Total lessons: 10 Time 750 min. |
||||
| 1 lesson lasts from 1 hour to 1 hour 30 minutes |
||||
Table 3
Methodological support of the program:
| Lesson topic | Forms of classes | Techniques and methods for organizing the educational process | Methodological material | Material and technical equipment of classes | Summing up forms |
| Plasticine painting “My mood” | Group, individual | Conversation, story, demonstration, | Visual material | Markers, posters, thick white cardboard, modeling board, simple wax pencils, napkin, palette, drawing glass, brush, acrylic paints, plasticine. | Relaxation, reflection, exhibition of works |
| Mandala “My state here and now” | Group, individual | Information message, independent activity | Visual aid, templates | Templates, scissors, glue, colored pencils. | Reflection |
| Painting of satin flowers “Let's get to know each other” | Group | Explanation of technology, demonstration, independent activity | Visual aid, templates painting reproduction | Satin ribbons, decorations, felt blanks, frame with backing, white cardboard, Titan glue | Reflection, presentation of the painting |
| Drawing on starch “My World” | Group, individual | Explanation of technology, independent activity | Visual material | Starch, water, acrylic and watercolor paints, toothpicks. | Relaxation, reflection |
| Collaging “Sympathy” | Group | explanation of technology, independent activity | Visual aid, templates reproduction painting, | Coffee beans, frame with backing, fabric, burlap, acrylic varnish, brush, rope, pins. | Reflection, collage presentation |
| Fabric art therapy. “Scarf communication” technique. | Group, | Explanation, independent activity | Visual material | Silk scarves or pareos (according to the number of participants) | Reflection |
| Salt isotherapy “Conflict situations” | Group, individual | Story, demonstration, explanation of technology, independent activity | Visual aid, templates | Salt, dough dye, white cardboard, glue stick, mortar (according to the number of participants). | Reflection, exhibition of works |
| Fairytale therapy “The Tale of Orange Friends” | Group | independent activity | Visual material | A4 sheets, pencils. | Reflection |
| Music therapy “My ideal world” | Group | Conversation, story, independent activity | Visual aid, musical accompaniment | musical instruments | Relaxation, reflection |
| Espresso topiary from napkins “Tree of Happiness” | Group | Demonstration, explanation of technology, independent activity | Visual aid, templates | Flowerpots, cable channel, newspaper, napkins, alabaster, glue gun, scissors, stapler, decorative tape and beads. | Relaxation, reflection, presentation of the “Tree of Happiness” |
Lesson 1. Plasticine painting “My mood”
Purpose of the lesson: getting to know the participants, establishing communicative and interactive communication, clarifying the expectations and concerns of the participants, relieving emotional stress, developing creative potential. Self-presentations.
Introductory part
Announcement:“The purpose and objectives of our training sessions.”
The facilitator introduces the participants to the goals and objectives of group work. The conditions and mode of work are discussed, and the rules for group work are introduced. The presenter tells what form the classes will take and what main topics they will be devoted to.
Dating procedure: participants say their names and express their concerns and expectations regarding the proposed form of work, provide certain information about themselves, the facilitator invites participants to write their name on a badge or what they would like to be called in the group. Attach the badge to your chest.
Main part of the lesson
Exercise “Goal Tree”
Goal: to determine the conditions for effective group activity, the prerequisites for successful work in the group.
Equipment: markers, posters.
Progress of the exercise:
a) the leader asks the question: “What do I expect, what do I hope for by taking part in this group?”, “What do I like about myself, and what prevents me from feeling comfortable and confident?”, “What is needed for this?”;
b) participants are divided into small groups (2 people each) and try to complete sentences on the topic: “I am in a group... Trust in the group”, “I feel confident because...”: What confuses me... What for does this need to be done?
Creative work: Plasticine painting “My mood”
Goal: team building. Promote emotional development of personality, development of creative potential and communication abilities through the creation of a picture from plasticine.
Equipment: thick white cardboard, modeling board, simple wax pencils, napkin, palette, drawing glass, brush, acrylic paints, plasticine.
The presenter invites all participants to talk in an unusual way about the mood with which each of them came to the group. To do this, he demonstrates the equipment and informs that during the lesson everyone will be able to create a picture that will symbolize their mood. The picture will be painted, not only with paints, but also with plasticine.
The technique with which our paintings will be created is called “Plasticineography”. Plasticineography is the drawing of three-dimensional pictures using soft wax plasticine using additional materials.
For work we need thick white cardboard, a modeling board, simple wax pencils, a napkin, a palette, a drawing glass, a brush, acrylic paints, and plasticine.
The presenter invites participants to take white cardboard and draw their mood with a simple pencil.
After completing the drawing, the technique of working with plasticine is explained.
For the background, you can use acrylic paints if necessary. I would like to note that acrylic paint, after drying, acquires a glossy surface. This is necessary so that the plasticine sticks easily and holds well. To draw with plasticine, we use the same techniques as when modeling from plasticine: mixing, pressing, pressing, smearing.
You can appreciate the advantage of acrylic paint if you applied plasticine and you didn’t like it, then with the help of a stack you can easily fix everything and continue working.
If you need to press in any part, use a wax pencil to do this. All explanations are accompanied by demonstrations. The presenter draws his mood with plasticine.
Participants begin work after explaining the technique of drawing with plasticine.
After completing the work, the presenter invites each participant to demonstrate their plasticine painting - “My mood” and continue the phrase “My mood today .... Because …".
Final part
Reflection
At the end of the lesson, the facilitator invites the participants to remember what happened during the lesson. Asking questions:
Was the work interesting for you?
What feelings did you experience during the lesson?
Has creative work improved your mood?
All participants stand in a circle, hold hands and close their eyes. The presenter explains the rule of the exercise. Now, with a light touch from my neighbor’s hand, I will share my energy with him. As soon as you receive an impulse from your neighbor, immediately transfer some of your energy in the same way to the neighbor who is on the other hand from you.
After the impulse transfer is completed, everyone is forgiven.
Lesson 2. Mandala “My state here and now”
Purpose of the lesson: development of group work rules for its effective functioning. Creating an atmosphere of trust in the group that will facilitate the free expression of feelings and help to realize them. Formation of positive motivation and interest in the activity.
Introductory part
Exercise“What does my name mean?”
The exercise is done in a circle. Each participant says his name (tells about himself and his name).
Plastic sketch“Let’s warm each other with rays of goodness”
Goal: creating a positive emotional background, increasing integration and cohesion of group members.
Tender names make you feel warm, like the sun. It seems to me that each of us has become like a bright sun. Let's warm each other with rays - with our palms. (Participants gently touch each other with their palms.)
Main part of the lesson
Exercise “Group Rules”
Goal: to develop rules for the group to function effectively.
Equipment: markers, tape, “Our Rules” poster.
Progress of the exercise: in the previous lesson we tried to determine what is needed in order for you to feel comfortable in the group and to be able to take an active part in its activities. Let’s try to formulate our own rules based on the identified prerequisites for successful work in a group.
Indicative rules:
Volunteerism and activity. If you don't want to, don't do it.
Do not interrupt. Everyone wants to be heard.
Honesty, truthfulness.
Confidentiality.
Here and now.
Discuss the action, not the person, and only what is happening in the group now.
Don't judge.
Individual work. Mandala “My state here and now”
This method is not only corrective, but also diagnostic. It is with the help of mandalas that a psychologist can not only determine the state of each participant, but also help them consolidate the achieved result. Mandalas are a powerful tool for diagnosis and psychotherapy. It will help to establish a dialogue between each participant and their unconscious.
Artistic creativity is the most ancient and natural form of correction of the emotional state. With the help of our work you will be able to know yourself more fully. The Mangalatherapy method will allow you to work with yourself.
The presenter invites participants to depict their current state in a circle, in images and colors exactly as they imagine and feel it.
And to do this, select from the palette of all pencils three colors that in your opinion appeal to you the most, that is, the most pleasant for you. And with these crown colors in a circle, create a certain drawing that will display: you, your desired state and the obstacles that prevent you from acquiring the desired state. You can draw symbolically.
And now, after creating three images, you need to schematically draw a certain life that is seething around these three images (some events, some situations, people, meetings). Everything needs to be depicted schematically. Just draw, even if at the moment you don't understand what it looks like. Your unconscious will speak to you in the language of images and symbols. The more symbolism, the more understanding.
The participants are working.
Now look carefully at your drawing. What does it look like? What kind of world is this? What would you call it? What is this?
Look, there is something important and unique in your mandala. This drawing contains important information. Your unconscious mind has started working and is telling you about a resource that will help you overcome any obstacles on the path to your well-being.
Look at the drawing and highlight some element or detail that will symbolize your resource or your quality, unique ability, talent.
Maybe at the moment you don’t understand exactly how this should manifest itself in your life, but there is something important in your drawing. Highlight this part for yourself and outline it with a bright color.
Now write for yourself: “What does this part convey? What does it symbolize? Oh, what is she telling you?”
Your task now will be as follows. Please prepare now a second sheet of paper with a circle and place it to your right.
Now we return to the first work and the part you circled, the resource part, you need to select from the work (carefully tear it out or cut it out). After you have selected the resource part from the Mandala, transfer it to a blank sheet of paper and place it in the center. Anyone who wants can glue it.
Now tear up the first mandala, and on the second you need to create an image of good health, which should come out of the state of the central image. Where will this image be relative to the central part? And what will happen around you when your central image becomes friends with your good state. That is, now we are creating a mandala for the interaction of a resource image with the desired state of health. At this stage of work you can use all colors.
The participants are working.
Look at your work. Express your deep gratitude to her for coming into your life. And give her a sweet name.
This is your key to overcoming barriers to success.
If only your work could express its grace to you and convey an inner message, recommendation or advice. What would she say?
Participants' responses.
This is your inner message, your well-being. Listen to your heart, what is your work telling you? Remember, this is said by your unconscious and must be put into practice to improve your condition.
Final part
Reflection
Have you received inspiration from your mandala?
Lesson 3. Painting of satin flowers “Let's get to know each other”
Purpose of the lesson: Continue to develop communication and group work skills. Relieving emotional stress, developing the creative potential of participants.
Introductory part
Exercise"Compliments for a friend"
The exercises are performed in a circle. Participants, calling their neighbor by name, pay him a compliment.
The facilitator invites participants to get to know everyone who is present at the lesson better.
Main part of the lesson
Creative work. Painting of satin flowers “Let's get to know each other”
The presenter invites the participants to create a common picture from satin ribbons, which will have the name “Let's get to know each other.”
Now you will be presented with the kanzashi technique made from satin ribbons. You will have the opportunity to learn how to make a flower from satin ribbons.
The presenter invites you to familiarize yourself with the presented equipment.
We need a satin ribbon 2.5 cm wide and about a meter long. We take the ribbon with the wrong side facing us and wrap it at a right angle, lower it down and fold the free edge under the bottom - this will be the first petal. We string the petal onto a needle and thread. Then we lift the ribbon up, lower it down, turn right and left from the inside - this is the second petal. We also string it on a needle and thread. We continue along the entire length of the tape. We cut off the excess tape and treat it with matches. Next we sew our flower. We wrap the edges of the ribbons inward. We straighten our flower, glue the decoration to the middle, and glue a circle of felt on the back side to make it easier to glue the flower onto a plane to create a picture.
In order to get started, you need to close your eyes and think about which color you associate yourself with. Now open your eyes and take a ribbon of the color you thought of and which seems to you to be your reflection in the mirror. If you saw yourself in the light of several colors, then take exactly as many ribbons and the colors with which you made the association.
Participants choose tapes to work with.
Now you can start creating a flower from the satin you have chosen. Those with several ribbons should make exactly that number of colors.
Participants create flowers.
Now I suggest you look very carefully at all the participants and identify yourself next to the person with whom you feel comfortable. Your flower will be in the picture next to the flower of this group member, but only if the place on the plane also suits you.
All participants arrange and secure their flowers. The overall picture has been created.
Final part
Exercise"Take your time, but remember"
The presenter offers to draw a “flower of friendship”, a daisy. As you draw each petal, say the following words to prove that each of you is a true friend, for example:
I try to be honest with my friend.
If necessary, I always help a friend.
I remember everything well and try to forget the bad.
Now give your flowers to the person you want to give a gift to.
Reflection
Now, I will ask you to answer a few questions in a circle.
Was the lesson and this technique of creating a painting interesting for you?
What color did you choose for your flower? Why?
Did you manage to place your flower in a place that was comfortable for you?
If not, why not?
What feelings did you experience while creating the overall picture?
Lesson 4. Drawing on starch “My World”
Purpose of the lesson: Creating a psychologically relaxed atmosphere in the group. Unlocking the internal potential of participants. Developing the ability to hear yourself and identify your own needs.
Introductory part
Exercise"Let's say hello"
At the beginning of the exercise, the presenter talks about different ways of greeting, real and comic.
Participants are invited to greet each other with their shoulder, back, hand, nose, cheek, and suggest their own unique way of greeting for today's lesson.
Main part of the lesson
Art therapy Drawing on starch “My World”
In front of you is diluted starch on a plate. To draw, you need to take a toothpick and squeeze out acrylic paint (gouache), which is in tune with our inner world. Since today each of you will draw a picture on the topic “My World”. Listen to your inner world and start drawing. You can mix colors to get new shades. Follow the starch to “where the hand calls.” The water absorbs your movements very easily, and there is thick starch inside. You can play with water and your drawing will change. Draw with a toothpick as if you were holding a brush.
This technique will allow each of you to become an artist.
When choosing colors to paint, listen to yourself.
Final part
Relaxation(music sounds)
Close your eyes, pick up your drawing and listen to your inner state. You can make movements with your hands to the music or convey your inner state with your movements. What's on your mind right now? Are you feeling good and calm? Are you resting or working?
A light and gentle breeze blows in your face. Do you feel like a happy person? Are you full of energy? Listen to yourself. Make the final movement with your arms. Now open your eyes. Look at your painting. Has she changed or not? What do you see in your drawing now?
Reflection
Did you get any inspiration from painting?
Was today's lesson interesting for you?
What mood are you leaving in?
Lesson 5. Collaging “Sympathy”
Purpose of the lesson: Formation of relaxation skills. Developing participants’ empathy for themselves and others. Develop a desire to engage in friendly interactions .
Introductory part
Exercise"Cup of Kindness"
Participants perform the tasks of the leader to the music for relaxation.
Sit comfortably, close your eyes, breathe calmly, evenly, deeply. Relax. Imagine a sheet of white paper in front of you, and on it your favorite cup. Paint it in your mind the way you want. Take a close look at the cup again. Fill it to the brim with your favorite drink. Now imagine another cup, empty, and pour into it. And next to it is still empty... And more... Pour your favorite drink into all the cups. Now look into your cup. She's full again! What happened to her? This cup became especially charming. After all, she was filled with your kindness. Open your eyes. Let’s calmly and confidently say: “It’s me! I have such a cup!”
Discussions. After finishing the exercise, participants talk about it. What cups they saw, they exchange opinions about why the cup was always filled.
Why does the cup get fuller every time, even though you pour it into other cups?
Main part of the lesson
Today we will make an unusual collage with you - a coffee collage on the theme “Compassion”. But first...
Exercise Brainstorm
What is empathy? You need to say one word that you can associate with sympathy.
Collaging"Sympathy"
Today we will create a general collage of coffee beans. Our collage should convey an understanding of what empathy means to all of us.
Listen to the instructions for coffee collaging.
To create a collage, you will need certain materials: cardboard, different types of rope, coffee, titanium glue.
First you need to cover the cardboard with fabric or burlap. Insert the backing into the frame. Then draw the desired pattern on the fabric. A tourniquet is laid out along the drawn lines; for convenience, it is secured with safety pins. Then carefully glue the tourniquet onto the base. All those parts that will be filled with coffee beans must be filled with glue (titanium), step by step. After a small area of the design is filled with glue, you need to cover it with coffee beans and carefully and evenly distribute it. After all the necessary details of the drawing are sealed with coffee beans, they need to be opened with acrylic to give the collage dazzling.
The participants get to work.
Upon completion of the work, the presenter asks to answer the question. What do you see in the created collage?
Final part
Exercise"Be my friend"
Participants offer their friendship to each other and at the same time put forward an argument. For example: “I really want you to become my friend because...”
Reflection
Was today's lesson interesting for you?
What did you like best?
What new did you learn?
Did you get inspiration from coffee collaging?
What mood are you leaving in?
Lesson 6. Tissue art therapy. “Scarf Communication” Technique
Purpose of the lesson: Creating a good mood and emotional comfort in the group. Formation of positive motivation and interest in the activity. Develop the ability to understand the inner world of yourself and others.
Introductory part
Exercise“Give me a smile and a good mood”
Participants sit in a circle, take each other’s hands, look into the eyes of the neighbor on the right and give a smile. This is how the smile is passed around the circle. You can greet the one sitting on the right, say “Good morning!” and say the name. If participants are ready, invite them to pass on a touch or gentle stroking.
Main part of the lesson
Technique"Scarf communication"
To complete the task, the presenter invites all participants to pick up a large, light scarf (pareo).
The presenter addresses the participants.
Imagine that the scarf in your hands is some kind of living substance. What do you want to do with it right now?
Participants answer.
The presenter gives the task.
If now it was necessary to show a movement with a scarf, in order to show its maximum potential, what kind of movement would it be?
What does this movement mean? How does this make you feel? How often in life do you encounter this feeling?
The presenter gives the task.
If in this space that surrounds us, you would be asked to find for your scarf the place where you are, and then the place where you would like to be. What kind of place was this?
The facilitator asks each participant.
When you placed your scarf in this place, how does it make you feel?
The presenter gives the task.
Now get into pairs and make a composition, imagining that you are, for example, girlfriends, business partners, neighbors. How comfortable would you be to interact?
The facilitator asks each pair.
Tell us why this is so? How does this make you feel?
The presenter invites everyone to take their scarf so that it is comfortable.
What do you feel? Is this feeling different from the one you had after completing your first task? Participants' responses.
What can you do with the scarf now to make it feel comfortable and protected on your part?
This technique makes it possible to diagnose how a person treats himself (handling a scarf).
What was this technique for you?
What were you able to understand about yourself as a person?
The presenter offers the participants salt dough so that everyone can use it to fashion a way out of the conflict situation they have drawn.
What kind of solution to a conflict situation did you create from the test?
Final part
Exercise"Give a Gift"
The facilitator asks questions to the participants:
Do you like receiving gifts?
What about giving them?
What do you like best?
The presenter invites each participant to give a gift for the whole group. Each participant plays their gift on the instrument and answers the questions:
What kind of gift was this?
Why does everyone present need it?
Reflection
Was today's lesson interesting for you?
What did you like best?
What new things have you learned about yourself?
What mood are you leaving in?
Lesson 7. Salt isotherapy “Conflict situations”
Purpose of the lesson: continue to develop collaboration skills. Develop empathy among group members. Ensure psychological relief for all group members. Learn to find a way out of a conflict situation.
Introductory part
Exerciseﹶ“Painting by two artists”
The presenter gives the task: get together in pairs and, without any agreement, the two of you holding one pencil, draw any picture: a cat, a house, a Christmas tree, etc.
How did you feel working as a couple?
Did you manage to complete the task?
What helped you and what hindered you?
Main part of the lesson
Salt isotherapy"Conflict situations"
The presenter invites all participants to take up drawing in an unusual way - drawing with salt.
To do this, each participant proceeds to the next task: coloring the salt. All participants create one shade of color. White salt is poured into a ceramic mortar and dough dye is added to it. The salt is thoroughly mixed until it acquires a certain shade. Due to the fact that each participant created his own color, the result was many colors.
The presenter invites the participants to take and place cardboard sheets in front of them.
In today's lesson we will draw a picture with salt on the topic “Conflict situations”.
To do this, you need to draw a drawing with glue (glue stick), and then, choosing a specific color, apply salt to the drawing drawn with glue.
The participants get to work.
After completing the task, participants are asked to present their picture and answer the questions:
What does your picture mean?
How did you feel while completing the task?
Is it possible to get out of the conflict situation depicted in your painting?
Suggest a way out of the presented conflict situation.
Final part
Exercise"Tree and Elk"
The facilitator invites all participants to form pairs. One is a tree, and the second is an Elk. The tree stands firmly, but the Elk rubs, resists, and tries to break the tree.
After clapping, the participants in the pair change roles. The participant who was a tree now becomes an Elk and vice versa.
After the exercise, the facilitator asks questions:
What did the confrontation mean for you when you were in the role of a tree and in the role of a Moose?
How did this exercise make you feel?
Reflection
Was today's lesson interesting for you?
Do conflict situations often arise in your life?
What kind of solutions do you find out of the conflict situations that have arisen?
What new did you learn?
What mood are you leaving in?
Lesson 8. Fairytale therapy “The Tale of Orange Friends”
Purpose of the lesson: develop skills of self-regulation and working on your feelings. Promote analysis and self-reflection. Develop association skills. Continue to cultivate the desire to work in a group.
We all know about the state of the safe space and therefore I invite everyone to get ready to work. Because it is very important for working in a group. Our lesson today will be based on one of the methods of art therapy, namely Fairy Tale Therapy.
But first...
Exercise"Association"
Participants throw the ball to each other and name any association that the color orange evokes in them. It doesn't have to be orange.
The presenter warns the participants that everyone should have the ball.
After completing the exercise, the presenter clarifies that this exercise was carried out to update the color orange.
Main part of the lesson
The presenter announces that the group work will be related to a fairy tale. And the participants will work with orange. The brightest star in the sky shines this color. And our fairy tale will be dedicated to the color orange. And it's called "Orange Friends".
Somewhere far away, in the vastness of space, among unfamiliar stars and alien galaxies, there was a planetary system similar to the solar one. But it was different in that there was no sun on it.
It consisted of small planets on which it was always dark and cold. On this planet there were houses that looked like mushrooms. Creatures similar to humans lived in them. But they differed in that they had no feelings. They did not know sunlight and therefore did not know how to feel. They were never happy or sad, never laughed or cried, never got angry, or did good deeds. They sat quietly and indifferently in their mushroom-shaped houses or wandered aimlessly around their cold planet.
In the evenings, when the reflections of the cold planets faded and it became completely dark, the inhabitants of the planet gathered around the tables and lit yellow and orange lamps. Then the windows of their houses began to glow. And at that moment it seemed that it was becoming lighter.
At that very time in our native land. The sun was shining brightly, green grass was growing and colorful flowers were blooming. All people, especially children, were happy and sad, laughed and cried, and did their own thing.
One day, cheerful children got together and decided that they needed adventure. They built a large rocket and set off on an interplanetary journey. And, in order not to get bored on the way, they took a lot of oranges with them. The children merrily ate oranges and flew further and further into the depths of uncharted planets.
One evening, flying through dark outer space, where only the reflections of distant cosmic stars penetrated and there was no sun, the children saw the windows of the inhabitants of this planet glowing with warm light in the darkness.
The houses stood on the planet like mushrooms and their windows looked like large oranges. The children stopped their rocket and landed on a small planet. The children took a lot of oranges with them and ran into the houses, looking like mushrooms, and began to treat the inhabitants of the planet. The children had a lot of fun and played together with the inhabitants of the planet. It was at that moment that the residents were filled with orange juice and lit up like sunlight. It's their first time in their lives. We heard laughter and saw fun.
And when the children got ready to go back, the planetary inhabitants became sad. That's how the miracle happened. Creatures from a distant planet learned to laugh, have fun and feel. Their life sparkled with different colors. Illuminated and filled with meaning. This made the planet so bright, as if the sun had appeared above them.
So children from planet earth had orange friends in a distant galaxy. They returned to earth and began to live their former lives. They were happy and sad, laughed and cried, grew and did their own thing. And every time people looked at the evening sky, they saw how on a distant planet, in houses that looked like mushrooms, the windows were glowing. And good feelings shine! And distant orange friends rejoice and send them their friendship.
The presenter suggests revealing your impressions on a sheet of paper using lines and color spots. After completing the work, the participants voice its name and talk about their feelings and about the fairy tale. The drawings of all participants are analyzed.
Final part
Exercise"Taste of Orange"
The presenter invites all participants to try an orange and talk about its taste.
How does the taste of orange make you feel?
Reflection
Was today's lesson interesting for you and what did you remember?
Have there been situations in your life when you came to the aid of a person?
How exactly did you help someone who needed it?
What new did you learn?
What mood are you leaving in?
Lesson 9. Music therapy “My ideal world”
Purpose of the lesson: Help participants understand themselves and their capabilities. Develop the skill of sensory and non-verbal contact with others. Help relieve mental stress by listening to music.
Introductory part
Exercise"My Interest"
The presenter invites one of the participants to take hold of the edge of the thread. Name your interest in life and pass the ball to another participant, who, naming his interest, passes the ball to the next one.
Main part of the lesson
Exercise"Sound of the surf"
Participants listen to a recording of the sounds of the sea. After this, the presenter invites them to “breathe,” just as the sea breathes during the surf. To do this, you need to take a quiet and soft breath into your stomach while gently raising your arms up. And then, exhale to the sound “SH”. You need to exhale for a long, long time, drawing in your stomach. When you exhale, all the air should come out. Then you need to smoothly lower your hands down and inhale again.
Exercise"Walk in the Woods"
Music therapy"My Ideal World"
All participants have various musical instruments in their hands. The presenter asks to play “I am good” on his instrument, after which work with feelings follows:
Have you ever wanted to play “Am I Good?”
What did you hear in the melody you played?
Would you like to change anything about playing “I'm Good”?
Those participants who, when answering the question: “Did you like the melody that you performed while depicting your ideal world?” given a negative answer, it is proposed to make changes.
What exactly did you change, and why now the melody performed is more similar to the inner world you imagine.
The facilitator asks all participants to simultaneously imagine their ideal world.
Did you like the melody of our group's ideal world?
What exactly did you not like?
Final part
A minute of dance therapy
The presenter turns on pleasant music. He starts dancing and invites the participants to dance with him. Everyone dances the way they know how and want. The facilitator gives everyone the opportunity to release energy; this time also serves as a dynamic pause.
Reflection
Was today's lesson interesting for you?
What mood are you leaving in?
Lesson 10. Espresso topiary from napkins “Tree of Happiness”
Purpose of the lesson: Develop analysis skills. To instill in participants the desire to be happy. Determine whether the participants' expectations were met.
Introductory part
Today we are completing our program. This is our last activity, which we will devote to such a pleasant feeling as happiness.
Exercise"Be happy"
The presenter asks all participants to wish happiness to the one who comes to the center of the circle. The participant standing in the center thanks everyone for their warm wishes.
Main part of the lesson
Espresso topiary made from napkins"Tree of Happiness"
The presenter asks questions:
What do you think is a happy person?
What does it take to be happy?
The presenter invites all participants to create a tree of happiness.
Technique. In order to make topiary from napkins, you need certain materials: flower pots, cable duct, newspaper, napkins, alabaster, glue gun, scissors, stapler, decorative tape and beads.
You need to make a ball for the topiary and for this you will need a newspaper. Show.
The ball is wrapped with thread. The next step is to secure the barrel. Next, you need to make blanks for the topiary, and for this you need a napkin. Show. The napkin must be folded twice and cut along the second fold line. Each part is fastened in the middle with a stapler, and a circle is cut out of the blank. A flower is formed from the blank. Show. We bend each layer towards the middle, forming a flower.
Who would you like to give this topiary to?
Final part
Exercise"Tree of Happiness"
The presenter invites each participant to close their eyes, listen to the noise of the trees and feel and see that the “tree of happiness” is giving you its gifts as a keepsake of our lessons:
What were these gifts?
Why did you receive this particular gift?
Reflection
Were our classes interesting for you?
What did you like most?
What feelings did you experience throughout the program?
Were your expectations met?
What mood are you leaving in?

Health group classes, which have been held in the park since 1997, are popular among the older generation of visitors to the Central Park of Culture and Culture. They take place three times a week (Tuesday, Thursday and Saturday). Starts at 9.00 at the Yolochka cafe.
Free classes are organized in the fresh air and do not require special preparation. Regular training for retirees helps strengthen joints and muscles, increase endurance, and maintain the respiratory system and cardiovascular system in working condition. Experienced instructors have selected a whole range of useful physical exercises that eliminate the possibility of damage and injury.
Classes in a health group for retirees help older people stay young, fit and active for as long as possible.
Chess Club

“Chess Town” is one of the oldest places in the park. Amateurs and professionals of chess have been gathering in the park for decades. After all, chess is a wonderful exercise for the mind.
Research shows that during a game, two hemispheres of the brain are actively working. Intuitive and logical thinking develops.
This board game has the best effect on the functioning of the nervous system: it develops concentration, logic, abstract thinking, and trains memory.
Playing chess disciplines. Each new step requires greater concentration and endurance from a person.
Dance Club

The dance floor for vacationers on Saturdays and Sundays at 16.00 is open on the fountain square in front of the stage. Melodies and songs of past years are played for visitors. Favorite and popular songs from the 1960s, 70s, 80s and 90s will appeal to many and get everyone moving.
We invite everyone!
10521 0
Physical education becomes of particular importance for a person in the second half of his life, when the adaptation of the circulatory system gradually decreases. The physical activity of most middle-aged and older people is significantly reduced. Physical culture in this case can be an important factor in the prevention of various disorders and deviations in the function of the cardiovascular system. We are talking not only about the relationship between muscular activity and the function of the cardiovascular system, but also about the comprehensive influence of physical culture and sports exercises on the entire body, on increasing its adaptive ability to the demands of life.
It is known that the development of adaptive processes is ensured to a greater extent in conditions of movement and physical training: with regular and long-term physical exercise, the resistance of a healthy person to various unfavorable environmental factors increases (hypoxemia, overheating and cooling, overload, etc.).
Physical exercises with middle-aged and older people should solve the following problems:
- have a tonic effect on the nervous system;
— constantly stimulate the functions of the cardiovascular and respiratory systems;
— improve metabolic processes;
— strengthen the muscular system, maintain and improve mobility in the joints;
- maintain the fullness of vital motor skills and abilities.
An increase in physical activity should help slow down the processes of involution in the body and reduce their severity.
When organizing classes for middle-aged and older people, it is necessary to take into account their age characteristics and health status. Based on medical indications and age, each student is recommended to have an individual movement regimen, including hygienic gymnastics, walking, walking, running and much more.
The daily routine cannot be the same for all people, regardless of age, profession, or health status. However, there are general hygienic requirements that are the same for people of any age: a) the correct combination of mental and physical labor; b) physical education classes; c) regular and proper nutrition; d) alternation of work and rest.
Motor mode. Individual motor modes that can be recommended for middle-aged and older people differ in their main focus, the volume of loads used, the choice of physical education means, and the conditions for conducting classes. They are conventionally divided into 4 groups.
The rehabilitation motor regimen, which involves the use of means aimed at restoring health after an illness, injury, or surgery, is carried out in the rehabilitation treatment departments of clinics, hospitals, sanatoriums or rehabilitation centers.
A general physical training regime aimed at the comprehensive development of physiological functions and restoration of impaired qualities and skills is carried out in health groups.
The training regimen, carried out in groups of recreational running, swimming or individual jogging, is carried out according to a specific system that provides for a gradual and rational increase in loads in order to increase the functional capabilities of the body.
The regime for maintaining sports longevity is aimed at maintaining sports performance for sports veterans for as long as possible thanks to systematic training in a specific sport and in the absence of contraindications to participation in mass sports events.
Hygienic gymnastics
Physical exercises used in hygienic gymnastics should be easy and should exclude static muscle loading, which causes severe tension and breath holding. Exercises that affect various muscle groups and internal organs are selected, taking into account the state of health, physical development and the degree of work load.When compiling a set of exercises, you should know a number of provisions.
Slow walking at the beginning of the session causes a uniform increase in breathing and blood circulation.
. Exercises such as pull-ups deepen breathing, increase the mobility of the chest and spine, strengthen the muscles of the shoulder girdle, and correct posture.
. Raising the arms, moving them to the sides and back, slow rotations in the shoulder joints, flexion and extension of the arms in the elbow joints and other similar movements increase the mobility of the joints and strengthen the muscles of the arms.
. Exercises for the feet and legs help increase joint mobility and strengthen muscles and ligaments.
. Squats strengthen the muscles of the legs and abdominals and have a general tonic effect.
. Walking with slow, deep breathing promotes relaxation and restoration of body functions.
. Snatching and swinging movements of the arms develop the muscles of the shoulder girdle, strengthen ligaments, and help increase the range of movements.
. Bend the torso forward strengthens the back muscles and increases the mobility of the spine; These exercises go well with deep, energetic breathing.
. Backbending and other exercises for the back muscles help increase the mobility of the spine.
. Lunges with the movement of the arms and torso strengthen the leg muscles well and have a training effect.
. Arm strength exercises increase muscle endurance and strength.
. Turns, bends, and rotations of the torso promote mobility of the spine and strengthen the muscles of the torso.
. Raising straight legs in the starting position while lying on your back strengthens the abdominal muscles.
. Running and jumping train the cardiovascular system and increase its endurance.
. Walking at the end of the lesson helps to uniformly reduce physical activity, restore breathing, and relax.
There is such a form of physical education as health groups, in which, under the guidance of a specialist, classes are held in gymnasiums, therapeutic pools, and parks. At the same time, an assessment of the entire set of age-related changes in older age allows us to highlight some methodological recommendations.
Any group activities for older people - gymnastics, skiing, swimming, games (volleyball, etc.) - should be held separately from young people.
The organization, selection of funds, intensity, density of classes should be different than at a young age.
Considering the duration of the recovery period (rest) after classes, individual training, group classes should be conducted no more than 2-3 times a week.
The effectiveness and usefulness of physical activity when performing physical exercises is influenced by: a) awareness of actions, interest, activity; b) starting position; c) versatility and variety of exercises; d) gradual increase in difficulty; e) number of repetitions and tempo of execution; f) amplitude (span) of movements; g) the duration of the activity and the fragmentation of physical activity.
Epifanov V.A.