DIY flowers craft for March 8th. creative indoor flower
The most beautiful, blooming spring holiday is very close - March 8th! He is a harbinger of spring, beauty and sunny days. On this day everything blooms and smells. The first spring flowers - snowdrops - are blooming, birds are flying in, everything in the area comes to life. On this holiday, all women, girls and girls are waiting for something special. So how can you congratulate your beloved mother, granny, niece, friend, sister?
Of course, the best gift is one made with your own hands. In this article you will see many craft ideas for March 8th.

Craft materials
So what can you use to make a craft for the eighth of March:
- Colored paper or thick cardboard.
- Pasta.
- Plastic spoons (bottles).
- Beads.
- Candies.
- Plasticine.
- Salty dough.

- "Blooming Lily"
- "Flower for Mom"
- Snowdrops spoons.
- Paper rose.
- Unusual chamomile.
- Flower of cotton swabs.
- Magnet - a heart made of salt dough.

"Blooming Lily"
You will need:
- Colored cardboard (green).
- The paper is white.
- Scissors.
- Heart templates (can be drawn by hand).


Manufacturing progress:
Let's take a heart template and cut it out on green paper. Lily flower template cut out. Cut out the center of the lily from yellow colored paper. Glue the flower onto the heart. Attach the yellow center to the flower. The blooming lily is ready!

"Flower for Mom"
We will take:
- Black pencil.
- Thick cardboard.
- Corrugated paper.
- Stencil of a large flower.

Progress:
We outline the stencil on cardboard. Roll balls out of corrugated paper. Dip the resulting balls in glue and glue them onto the flower. The flower is ready!

Snowdrops from spoons
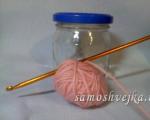
To make these beautiful spring flowers we will need:
- Plasticine mass (green and yellow shades).
- Plastic spoons.
- Already old unnecessary plasticine.
- Cocktail pipes (green).
- Green bottle.
- Napkins (green).
- Flower pot.

Instructions for making crafts:

We twist a ball from unusable plasticine and place it on the bottom of the pot. Roll 7 carrots from green plasticine and do the same with yellow plasticine. Attach a yellow carrot tightly to the tube. We carry out similar actions with all seven cocktail straws.

Cut off the handles of the plastic spoons. We insert three petals into each tube. We will cut out leaves for our snowdrops from a green bottle. We attach the snowdrops one by one to the plasticine located in our pot. We also attach the leaves.

We put green napkins in the flower pot to imitate grass. These wonderful snowdrops are ready, all you have to do is give them to your mother or grandmother.

Rose
To form a flower you will need:
- Double-sided paper in different shades.
- Green corrugated paper.
- Wire (preferably aluminum).
- Scissors.

Instructions:
- Cut out a circle from multi-colored paper in red shades. Draw a spiral in the resulting circle.
- We cut it carefully in a spiral, trying to be as even as possible. We twist the spiral.
- Glue the resulting structure together. Let it dry. Cut out leaves for the rose from green colored paper.
- Glue the flower bud to the leaves. We wrap the wire in green paper. We attach the bud to its base with glue.


Chamomile from cotton pads
You need:

- Cotton pads.
- White sewing threads.
- Acrylic paint.
- Plasticine mass.
- Durable, varied colored cardboard.
- Multi-colored paper (any color).

Manufacturing process:
First we make the petals of our chamomile; to do this, we twist the cotton pads with the edges up. This is how we make 8-9 petals. We connect the petals with thread.

For the core of the flower, take a disk and dip it in yellow paint. Let it dry. Apply glue to the center and form a flower. Let's make a stem from green paper and 3-4 leaves per stem. Forming a flower. The chamomile is ready.

Chamomile
For fake we will take:
- Cotton swabs.
- Plasticine mass for modeling (yellow).
- Felt pens or markers.
- Scissors.
- Colored cardboard.

Instructions:
We take a piece of colorful cardboard, absolutely any color your heart desires, this will be our basis. Now we need to cut the sticks into two parts, scissors will help us with this.


We make the heart of our inflorescence from plasticine. Roll a plasticine ball. Insert cotton swabs in a circle into the resulting ball.

We stick the resulting flower to thick cardboard. Using markers we draw in the stem and leaves. If you wish, you can add pleasant words of congratulations.

Salt dough heart magnet
We will need:
- Corn flour.
- Salty dough.
- PVA glue.
- Magnetic.

Manufacturing process:
First, prepare the salt dough. To do this, take 300 grams of regular wheat flour and 150 grams of salt, so that the dough has a smell, you can take sea salt with some kind of smell. Add water and any food coloring. Mix well.

Roll out the dough and use a cookie cutter to give it a heart shape. Let's let our heart dry out.

The dried heart needs to be smeared with glue and decorated with cornmeal on top. Apply glue to the other side of the heart and attach a magnet. You can add beads if you wish.

Finally
Every girl, girl, woman, grandmother will be pleased to receive a gift on this gentle spring holiday. And it’s even nicer if this gift is made by yourself. Therefore, do not be lazy and take a little time to make a gift and give it to your beloved women. By the way, you can show off to your friends photos of the crafts you gave on March 8th.

Photos of crafts for March 8


Useful tips
Content:A gift made with your own hands is the most valuable. It’s always a pleasure to give cards and crafts for March 8th to your mother, grandmother, friend, or beloved girl.
The fact that you came up with something and made it with your own hands shows how warmly you treat a person, appreciate and love him.
On our website you will also find:
Postcards from March 8. Mini-secret.

You will need:
Scissors
Stationery knife
Pencil
Colored cardboard (red and pink)
Scrap paper
A beautiful image (in this example, a photo of a girl). You can use personal photos.
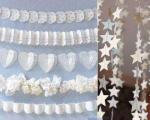
Openwork napkin
Lace, flowers, openwork napkin, paper curl (can be replaced with feathers) and other decorations
All preparation can be divided into 2 stages: creating a mother card and a daughter card, i.e. main large postcard, to which a smaller secret postcard will be attached.

Stage I
1. Prepare thick red paper or cardboard and cut out a blank for your card from it. In this example, the size of the workpiece is 15x16cm.
2. Prepare pink cardboard and cut out a rectangle from it, which will be only a couple of millimeters smaller than the red cardboard blank.
3. Prepare scrap paper and cut out a rectangle from it, which in turn will be a few millimeters smaller than the pink cardboard blank. You should get something like this: the largest blank is red, the smaller one is pink, and the smaller one is made of scrap paper.
4. Glue all the blanks to each other as shown in the picture.

5. Let's start decorating the card. The first thing you can do is glue lace at the bottom of it. Use instant glue for this.

6. We continue to decorate - glue an openwork napkin and a paper curl to the card.

Stage II
7. Put the main card aside for a while to start making a daughter card.
Prepare a beautiful design and make a backing for it using red cardboard. Glue the image to the backing.

8. Prepare a small blank from pink cardboard (see picture). It can be decorated with beautiful red patterns. They can be made using stamps or a red pen, drawing the patterns yourself.


9. Glue your drawing with a backing to the mini-blank. Also add small pieces of tape to the right and left sides of the mini card. Glue one of the ribbons to the main blank in advance, and then press it with a mini blank (see picture).

10. Glue the entire mini-card to the main card.
11. Glue a few artificial flowers to the corner of the card.

12. Write a beautiful poem related to the holiday in the main card, and inside the small card write your most sincere, personal wishes and tie a bow.
DIY postcards from March 8th. Spring card.

You will need:
Cardboard (preferably with a pattern made in green tones)
Sheet of office paper (light green color)
White paper (any light tone is possible)
Small artificial flowers
Beads
Rope
Lace
1. Prepare colored cardboard and make a blank from it.


2. Prepare light green and light-colored paper and cut them so that their size is a couple of millimeters smaller than the workpiece.
3. Glue the light paper to the light green one, and then glue everything to the base. Light-colored paper can be tinted a little or some kind of pattern applied to it.


4. Use leftover paper and cardboard to make little tags like these. The cardboard tag should be slightly smaller than the paper tag. You can tint light paper a little with watercolors.
5. Glue your tags together and make a hole in them.


6. In order for you to be able to thread the lace trim through, you will have to make a small cut at the bottom of your card.

7. Glue several artificial flowers above the braid, and glue beads in the middle of them.
8. Prepare a string and thread it through the hole in the tag. Next, tie a bow and glue it to the upper right corner of the card.


9. Write a short congratulation on the label, and inside the card you can write any wish.

DIY postcards for March 8th. Bouquet of roses.

You will need:
White or colored paper
Colored cardboard (thick paper)
PVA glue
Scissors
1. The first stage is to make roses from paper and leaves. Click on this link to go to the article "How to make a rosette", where you can find many different ways to make a rose with your own hands.
* Cut out a circle from white or colored paper and then make a spiral cut as shown in the picture.

*Use scissors to shape the rose petals.

* Roll into a spiral.

* Apply glue to the edges of the resulting paper tape and glue it to the last central petal.

*To make the leaves, simply draw their shape on green paper, cut it out and fold it in half (see picture).
2. Making a paper basket for roses.

* Cut out a basket shape from paper.
* Prepare colored paper and cut out strips from it.
* Now you need to make vertical cuts in the basket to pass the strips through.
* Glue the ends of the paper strips to the basket.
3. All that remains is to glue the basket, roses and green leaves to the card. You can decorate the card with splashes of paint, glitter, etc.
Paper crafts for March 8th. Paper flowers with candies

You don't need to be an expert to make such a beautiful, colorful, and sweet homemade gift.
You will need:
Scissors
Candy on a stick (chupa chups, for example)
You just need to cut out circles from soft paper, thread candy sticks through them and fold the paper upward, as if “wrapping” a lollipop.


DIY gifts for March 8th. Roses.

You will need:
Paper (any - color, newspaper, magazine)
Scissors
Wire
Jewelry (beads, sequins)
1. Cut out a circle from colored paper. It can be any size.
2. Start cutting out a spiral inside the circle with scissors (see picture).
You can decorate your flower at the initial stage. In this example, cumin (seeds) was used. Simply apply glue to the spiral and sprinkle cumin on it.
You can use glitter, flour or other decorations.


3. Leave the flower to dry.
4. Curl the outside of the rose and glue the end of the paper to the bottom of the flower.


5. All that remains is to make a couple more roses, attach each one to a wire and you will have a beautiful bouquet.

Beautiful application for March 8

Women's holiday is simply impossible to imagine without flowers. And flowers made by yourself are doubly pleasant to give.
In this master class you will learn how to make a small, cute bouquet of paper flowers.
You will need:
Colored paper
Corrugated paper (can be replaced with paper napkins)
Simple pencil
Ruler
Scissors
1. Fold a green piece of paper in half (lengthwise).
2. Draw a line 1.5cm from the fold. It is a border that does not need to be cut.

3. Draw vertical stripes with a pencil on the remaining part of the paper (from the border to the fold) and make cuts with scissors along these lines (do not touch the vertical line (border).

4. Now prepare the glue. You need to glue the paper so that one side of the border is slightly higher than the other. You will end up with semicircular leaves.


6. Fix the bush by placing it in a vase, which you can also make with your own hands, and it will help you with this next master class .

7. Meanwhile, prepare the flowers. To do this, you need to cut out 4x4cm rectangles from a napkin or corrugated paper.

Each rectangle needs to be crumpled and glued to green leaves.
Crafts for March 8th. Flower vase.
And here is the same vase that was discussed in the previous master class.


To make it you will need:
Corrugated paper
Scissors
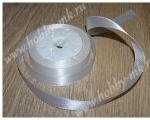
Stapler
Decorative ribbons
PVA glue
A plastic cup
1. Cut a long strip of cardboard and wrap it with decorative ribbon. Next, secure with PVA glue. This will give you a handle for your vase.
2. Prepare corrugated paper and cut out a rectangle from it, the length of which should be sufficient to encircle the plastic cup. Make a wave out of paper along the edges of the cup.
3. Use a stapler to attach the paper and cardboard handle to the cup.
Now you can insert flowers into the vase, and these can be either artificial or real flowers, for which you need to pour water into the vase.

How to make a three-dimensional postcard for March 8th. Eight of flowers.

You will need:
Colored cardboard
Colored paper
Flower-shaped hole punch (can be replaced with a ready-made set of flowers)
Making a petal
To make flowers, you need to prepare 20 petals for each. For a small flower you need square sheets of paper measuring 2.5x2.5cm, and for a large one - 4x4cm.

1. Draw a diagonal in the square.
The task of all men is to provide their women with attention on March 8th. If the husband or loved one can buy a gift, then the sons can make their own wonderful gift from scratch. The most beautiful DIY crafts are made very simply and take little time.
Such work has become traditional in schools and kindergartens. The most popular gift material for mom is colored paper. It is the most convenient way to make a pleasant surprise for a spring day.
Every child wants to surprise his mother, especially on such a spring day. For the holiday, children make various crafts in schools. Anything can be used as a material. In second grade, children can be asked to make clay figures and then paint them. Mothers and grandmothers will put such toys as a souvenir on a shelf or attach them to the refrigerator (magnet).

Crafts made from colored paper
Option #1
You can create a very beautiful craft from colored paper. It is suitable for primary school children. It is done quickly, but it turns out very beautiful.
To create a craft you will need:
Colored paper (green, red, white and yellow);
PVA glue;
scissors;
purple felt-tip pen;
simple pencil.
Creating a masterpiece:
First, lay out all the tools and materials in front of you. First of all, we will make weed. Take a whole sheet of green paper. Now start folding it into an accordion from any edge. You can start from the top or from the bottom, as you wish. Make sure each fold is the same size. When you reach the end, connect the conics to make a fan.
Now he will make tulips. Draw the simplest tulip on red colored paper and cut it out. Fold the red paper four times to make 6 more flowers. Attach the tulip to the paper and trace with a simple pencil. Cut carefully. The result should be 7 tulips.

Next, cut out the daisies from white paper. We do it according to the same principle as tulips. But in addition to the flowers, we also cut out the centers from yellow paper. We also make 7 flowers. We attach the centers to each daisy using glue.
All that remains is to assemble our composition. Glue tulips to the ends of the fan, alternating with an accordion. And scatter daisies in the center and glue them too. Our craft is ready!
Option No. 2
Also, children in first grade can easily make flowers using the origami technique. Since Women's Day is celebrated in the spring, you can make a bouquet of tulips. These will last a long time and delight the mother’s eye.
Colored paper (5 sheets of red and 5 sheets of green);
scissors.
Progress:
We begin to create a festive bouquet from a bud. Take a sheet of red colored paper and place it in front of you. Grab the top right corner and fold the sheet diagonally to the end. Draw a line and cut. The result should be a square and a wide strip.
Bend the square diagonally, then straighten it. Take the upper left corner and also bend it diagonally, then straighten it again. Now reach out so that both fingers on your right hand are on the same diagonal, and your left hand is on the opposite side. Bend the square into a triangle.
Now take the left corner of the first triangle and flip it to the right. Then turn the craft over. Now there are 3 corners on one side, and 1 on the other. Where there are 3, turn one corner over to the opposite side.

Look carefully. There should be a hole at one end and 4 petals at the other. Blow into the hole as if you were inflating balloons. Then bend the tips of the petals.
Take a piece of green paper and cut a strip the same size as the red paper left over. Then wrap it lengthwise into a thin tube. So our stem is ready. All that remains is to stick it into the hole on the bud. Thus, you need to make the remaining flowers. The result should be 5 tulips. You can experiment with colors and make tulips of different colors (yellow, red, orange).
Option #3
By March 8th, all women are usually given a mimosa. These yellow flowers not only lift your spirits, but also give off a wonderful aroma. You can make such flowers with your own hands. They will delight mom and grandma all year long.
Required tools and materials:
Colored paper (green and pink);
simple yellow napkins;
PVA glue;
a simple pencil;
ruler;
paints;
scissors;
disposable cup.
Progress:
Let's start making the stem. Cut a long strip of green paper. Then twist a thin tube. Apply glue to the ends and wait until they dry. If you don't have glue on hand, use a stapler.
Let's start making flowers. Mimosa flowers resemble fluffy balls. Take yellow napkins and cut 3 cm strips. Fold each strip in half. Next, make cuts along the entire length and roll it up.
The opposite side should be fluffy. Make a lot of these balls. Do the math at the end. It is necessary that the number of flowers be odd. Then glue the fluffy balls to the stem. You can install them tightly to each other, in small piles.

But we will just end up with a bare stem with flowers, so we need to attach leaves. Cut out two long ovals from green paper. Fold in half and make cuts. Spread the leaves, apply glue to one end and attach to the stem.
Original beadwork
By March 8, boys in junior classes for mothers and grandmothers can make their own crafts from colored paper, and girls from beads. Now we will show several ways to create a souvenir.
Small bouquet of flowers
Even a first grader can handle this craft. But basically, only from the 3rd grade do they begin to teach beading. There is nothing complicated in this technique, the main thing is not to rush.
Required materials and tools:
Round beads (pink, green and purple);
wire (not thick enough to fit twice into the beads);
yellow beads;
small, decorative vase.
Progress:
First we make the buds. Each flower will consist of 5 identical petals. Take a piece of wire, about 10 cm. Insert one pink bead into one end. Wrap the other end and insert the end into the hole, but from the other side. This way you will fix the beads. Now string two pieces and go through them with the other end. Then do the same with three pieces.
The result should be a small pyramid. You should also do up to 5 beads, then go down. That is, first: 1, 2, 3, 4, 5; and then: 5, 4, 3, 2, 1. At the end, twist the two ends of the wire along the entire length.

Use the same principle to make the remaining petals. We will need 10 pink petals and 15 purple petals. By the way, the leaves are made according to the same pattern as the petals, but from green beads. It's not difficult to count, we need 10 leaves.
For the centers, take a 10 cm wire and secure the bead. There should be 5 centers in total.
The next step is to collect our bouquet. Take 5 petals, place the middle in the center, and twist everything. Take two leaves and also twist them around the stem. Then straighten everything out. Also add all the flowers. Insert the finished bouquet into a vase or tie it with a beautiful ribbon. This is how easy it is to make small souvenirs. To add a spring mood, all the petals can be made multi-colored.

Creative works made from salt dough
Souvenirs made from salt dough will be a wonderful surprise for mom or grandma. This is a safe method, since it does not require piercing or cutting tools. In order for you to get beautiful figures and not fall apart, you need to properly prepare the salty composition. First, we will describe the recipe for salt dough, and then we will describe the process of work.
Required ingredients:
Wheat flour;
fine salt;
water.
Preparing the dough:
Take flour and salt in equal quantities and mix. Add some water and knead the dough. Then you need to put it in a bag and place it in the refrigerator for a couple of hours. After which you can safely begin sculpting. If it seems to you that the dough is not elastic at all, add a little cream. This will be useful for your hands, and it will be more convenient to sculpt figures.

For a souvenir:
Ready salted dough;
gouache paints;
brush;
water;
magnet.
Progress:
Now it's up to your imagination. You can make small flowers in a basket. First, make a round basket and attach a handle. Place 7 or 9 small flowers inside, like a chamomile, but with 5 petals. Leaves may stick out on the sides.
When everything is ready, you need to wait for the dough to dry and become stone. Then dip your brush in water and start painting. The basket can be made brown, the flowers pink, and the centers yellow. Accordingly, the leaves turn green. You can sprinkle glitter on top.
Our advice to you! Do not wet the brush too much in water, otherwise the paint will run off and the whole craft will be ruined. Next, when the figure is dry, you will need to glue a magnet on the back side. This is an original souvenir that mothers and grandmothers can make for March 8th.

All children want to surprise their mothers on this wonderful spring day. They come up with various souvenirs with their own hands. Kids can make gifts from colored paper, and older kids can do serious things. In general, crafts can be made from anything. You can sew a pillow and embroider a picture of your mother on it. All you have to do is take a photo on a flash drive to a photo salon, and they will transfer the image onto paper.
You can use simpler advice, especially if you don’t have time. Make a card out of cardboard by folding the sheet in half. Then cut out a big figure eight and glue it to the card. Glue flowers around the entire perimeter of the number. Inside you can write beautiful wishes for mommy.
Such gifts are always appreciated as they are made by hand. Your soul was put into their preparation. Use your imagination and surprise mothers and grandmothers with your surprises on this magnificent International Women's Day.
International Women's Day on March 8 is not only a wonderful holiday with the kindest and brightest traditions, but also an excellent occasion for the manifestation of a child's talents. It’s not for nothing that in kindergartens and schools, on the eve of the main holiday of all women, there are always lessons on making themed crafts, which are great as gifts for mothers and grandmothers. Most often, children's crafts for March 8 are made with their own hands from simple materials: colored paper, cotton pads, cardboard, napkins. Well, the most popular theme for children’s DIY crafts on March 8th are, of course, flowers. In their beauty, such homemade bouquets are not inferior to real flowers, and in their touching power for a woman’s heart they are many times greater. Find out more about how to make an original craft for March 8th from simple materials at hand in our article today with step-by-step master classes for the junior and senior groups of kindergarten.
DIY craft from cotton pads for March 8th in kindergarten for the younger group, step by step with photos
The first one we suggest is mastering a craft made from cotton pads with your own hands on March 8th for the younger group of kindergarten. The craft itself is a bouquet of beautiful flowers that can be given to your mother or grandmother. Find out how to make a craft from cotton pads with your own hands for March 8th in kindergarten in the younger group from the step-by-step master class with the photo below.

Materials for crafts from cotton pads for March 8th for the younger group of the garden
- cotton wool cosmetic pads
- green drinking straws
- ear sticks
- yellow paint
Instructions for DIY crafts from cotton pads for March 8th for kindergarten

Do-it-yourself crafts for March 8 in kindergarten for the older group from paper, master class with photos
Another touching bouquet for March 8, but already in the senior group of kindergarten, can be made with your own hands from colored paper, which is ideal for children's crafts. Such a bouquet will be made in the form of an applique, with which you can decorate a memorable card or present it as an independent gift. Learn step-by-step instructions on how to make crafts for March 8th with your own hands in kindergarten in the senior group from paper from the following master class with photos.

Necessary materials for crafts for March 8 from paper for the senior group of the garden
- colored paper
- simple pencil
- cardboard
- scissors
Instructions on how to make a DIY craft for March 8 from paper for kindergarten

DIY children's crafts for March 8th for mom - master class with step-by-step instructions for a child
You will find another version of the original bouquet - a children's craft for March 8 with your own hands for your mother in the following master class with step-by-step instructions for the child. This craft is more suitable for pupils of senior and preparatory groups of kindergarten, as well as for children of primary school age. The peculiarity of this DIY children's craft for March 8th for mom (master class with step-by-step instructions for the child below) is that the flowers for the bouquet are made from the most ordinary cardboard packaging for eggs.
Necessary materials for DIY children's crafts for March 8th for mom
- egg carton packaging
- wire
- green electrical tape or paper tape
- paints and bones
- scissors
- yellow paper
Step-by-step instructions for a child on how to make a DIY March 8 craft for mom
How to make a craft with a photo for your grandmother on March 8th with your own hands, step-by-step master class
But probably the most memorable and touching DIY crafts for March 8th for both mother and grandmother are souvenirs with a photo of the child. These can be homemade photo frames, pendants, cups or just memorable souvenirs. From our next step-by-step master class you will learn how to make a craft with a photo for your grandmother on March 8th with your own hands from salt dough.

Necessary materials for DIY crafts with photos for March 8th for grandmother
- salt - 1 glass
- flour - 1 cup
- water - 1/2 cup
- red paint with brush
- photo
- heart-shaped, for example, pasochka
Instructions on how to make a craft with a photo for your grandmother with your own hands on March 8

3. Using the same form, cut out a suitable template from the photo and insert it into our dough piece. Gently press down with your fingers so that the photo stays well in place and does not fall out in the future. We send the workpiece to dry in the sun or radiator. 
Another simple and popular material for an original DIY children's craft for March 8th is ordinary napkins, from which you can make beautiful flowers. Despite the fact that outwardly such flowers cannot be immediately distinguished from real ones, making such a craft with your own hands is easy and quick, even for a small child. Learn more about how to make a DIY children's craft “Flowers” for March 8 from napkins in the following video tutorial with step-by-step instructions.
DIY crafts for March 8th are original children's gifts that have long become traditional in kindergartens and schools. Our article contains quite simple master classes with photos and step-by-step instructions that a child in both the junior and senior groups of kindergarten can master. Thanks to the use of simple materials, such as colored paper, cotton pads or napkins, your child will be able to make an absolutely unique and inimitable craft. This means that each of the presented options for crafts for March 8th can become a worthy gift for a mother or grandmother. We are confident that our master classes will be able to inspire creativity in adults, whose help will never hurt children.