How to weave a wide bauble from floss. Patterns for weaving baubles from floss, various types of weaving with photographs and a video selection
A bauble is a beautiful hand-made wicker bracelet. Unlike, which are woven from rope, cord and thick threads, floss threads are used to make baubles. The main techniques for weaving floss baubles are oblique and straight weaving. A simpler one is oblique weaving, but the choice of patterns for it is limited. Straight weave distinguished by a variety of patterns and inscriptions. Let's find out how to weave baubles from floss, where to start weaving and how to finish it correctly, and also look at patterns of oblique and straight weave with drawings and names. It will also be useful for beginners to watch a video with master classes on weaving baubles and bracelets.
How to do it right
All patterns for baubles are made from knots. Having studied the technique and the four basic weaving knots, you can create a variety of patterns. The rows of nodules are arranged horizontally, only their direction changes. The work is performed with three threads - the main thread, the warp thread and the auxiliary thread.
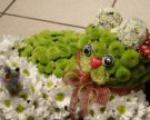
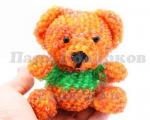
Having learned this simple view needlework, you can complicate the task and create fantasy crafts from beads and floss. For experienced needlewomen, it will not be difficult to create a large composition - a picture from floss threads - with embroidered with beads trees, flowers or animals.
Braiding
Below is Scheme for weaving a bauble from floss using three threads- braid. It is with a braid that the ends of bracelets are most often braided, securing the work with a knot.

In the same way you can weave braids using four threads. This principle applies to weaving any even number thread In order to weave a bauble from four threads, take two threads in the center. The thread that is located left side, is transferred to the right, and the right thread is transferred to the left edge.

How to make a bauble from floss With odd number threads, can be seen in the diagram. The essence of weaving is that first the left thread is taken and moved to the center, and then the right one. Repeat as many times as necessary.

Oblique weaving of baubles
Like, it is better to weave baubles from floss from the very simple circuits and technician. The most popular for beginners is oblique weaving. There are many patterns for oblique weaving. Using the same pattern and different colors, you can weave different bracelets. Such baubles are woven in one direction - from left to right or from right to left. Four main knots are used, which are woven and designated differently. In the diagram, the arrow shows which node should be made.


You will see more details on how to weave oblique weaving patterns in our master classes.
Direct weaving of floss baubles for beginners
To start weaving, you will need threads, scissors, and a pin to secure the beginning of the weaving. Detailed instructions For information on how to weave a bauble from floss in a direct way, see below.


Straight weaving of floss baubles with sharp arrows
By using step by step photos you can see, how to weave baubles from floss threads in a direct way of six threads.
- Take threads of 6 colors (2 colors of each thread) at least a meter long.
- Tie a knot 7 cm from the top and secure with a pin or tape to the work surface. Divide all the threads into two halves.

- We start from the left side. Using a red thread, make a figure like a figure of four over the next second thread from the left. Pass the red thread and thread it through the hole.

- Pull the red thread to the right and up. And make another knot as well. This double knot will weave the entire bracelet.

- As a result, the right thread moved to the right and became the second. We braid the third thread with the second thread until the second thread reaches the center. One half of the baubles was woven.
- Now repeat the same steps with right side, not forgetting to make double knots on each thread.

- Make a knot from the two middle threads and connect both halves of the bauble.

- In the same way we weave the remaining lines of the baubles to the end. At the end, make a knot and weave all the threads into a common braid. Try the bauble on your hand to get the right size.

Any finished bauble can be decorated as desired and made it unique. Such jewelry will look no worse than beaded bracelets and rhinestones. If you have a chain with rhinestones, place it along the entire length of the product and, making stitches with a needle and thread between the rhinestones, secure the chain in the center of the bauble. Such a product will be in perfect harmony with a beaded brooch and white rhinestones.

You can braid a chain along the edge of the finished bauble short length. To do this, undo the knot and select one thread, which you attach to the end of the thread with a needle.
Insert the needle at the beginning of the bauble with wrong side and hook the first link. Insert the needle into inner side and bring it to the face near the second link.

Braid to the end, secure the last link with two stitches, undo the knot and weave the thread from the needle into the overall braid.

Shiny chains tied with floss threads look very impressive. To do this, you need to place the threads on one side of the chain and pass each color through each link of the chain. In this case, the threads need to be placed one on top of the other.


You can braid the chain with floss threads on both sides according to the same instructions.
Using direct weaving, you can create not only patterns, but also various inscriptions, such as names. Using the two types of knots shown in the figure, you can weave letters. See how to make baubles from floss to get names on the product.

- We use green thread (8 pieces) for the background and blue thread (5 pieces) for weaving the name.

- We tighten the threads and knots tightly so that the names are clear. Making knots to the left, we pass the main thread down.

- Then we lift the thread up, making knots on each thread to the right.

- Let's start weaving the name. Let's say the first letter is A. Make 3 knots down to the left with the main thread. From thread 4 to 10 – knot to the right and again 2 knots to the left.

- Next we bring the main thread up. We make knots on all threads except 7 and 3. Knots to the left have already been made on these threads.

- We carry the thread from top to bottom and make knots to the left. On threads 7 and 3 - to the right.

- We finish weaving the first letter. We make knots from bottom to top to the right on threads 1, 2, 3, 11 and 12. And on the rest - knots to the left.

- Pass the thread several times to separate the letters from one another.
We also weave the remaining letters, not forgetting to try the bracelet on your hand.

You can weave flowers from beads, or you can use direct weaving to create flowers on a bauble from floss threads and get several bracelets using the same pattern different colors. Change them depending on your outfit and mood.

Baubles will add zest to your wardrobe. This is a universal decoration for women, men and children. They are especially popular among young people. For those who are interested in the technique of weaving baubles, we suggest using our patterns and video tutorials. It won't take much time and will give you a lot of fun. Offer our readers your designs and show off the baubles you created with your own hands.
Unusual and cute thread baubles have always attracted the attention of others. You won’t surprise anyone with the usual jewelry, but with such bracelets you can easily stand out from the crowd. Moreover, they are attractive not only for their brightness, but also because they can be made independently. One more important feature is a rather interesting meaning that connects two friends.
Baubles - what are they?
A bauble is an accessory in the form of a bracelet, made in the form of weaving from threads, ribbons, beads and other materials. Most often it is woven by hand, and its creation is based on the meaning of friendship between two people. But the last point is not necessary, since in modern times many perceive it simply as decoration.


The prototype of modern baubles are the jewelry of Aborigines and Indians, who exchanged similar bracelets to establish a spiritual connection. Later, this idea was borrowed by supporters of the “hippie” movement, who thereby confirmed their attitude towards this brotherhood.


A classic option is baubles woven from floss threads. They can be either plain or multi-colored. Also, depending on the type of weaving, they can depict various designs and patterns. The colors on the baubles have certain meanings, thanks to which it was possible to determine what a person was like.


Nowadays, baubles made from threads and other materials are quite a popular accessory, and you can weave them either yourself or buy them ready product. They go perfectly with summer and spring images. Moreover, they can be worn by both girls and boys.


Methods of weaving baubles
The weaving of baubles itself involves tying four types of knots. There are two main ways to weave baubles: oblique and straight. Already among them you can find interesting solutions drawing or pattern, which will differ not only in complexity, but also in execution technique.

Those who have enough experience can even combine these two weaving methods, creating new original designs and color mixtures.
Oblique weaving

The principle of oblique weaving is that the knots are knitted in one chosen direction - from left to right or vice versa. The simplest pattern that perfectly demonstrates the principle of oblique weaving is the classic three-color one.

So, you will need threads of three colors, the length of which is at least 60 cm.
- The first step will be to create a knot and start a thread out of thread. It is attached to the work surface.
- Weaving starts from left to right. It is from this side that you need to start tying knots. To do this, the two outermost threads are knitted together in a knot, while the outermost one is held in place.
- The resulting knot is transferred to the base of the thread bauble, and then another knot is made.
- The same must be done with other threads in the direction to the right. That is, the outermost thread will tie two knots on subsequent threads.
- After the first row, you can proceed to the next one. It is done in the same way as the first one. Only the color of the outer thread will be different.
- When the weaving of the thread baubles fits the size of your wrist, the final part should be secured.


Straight weave
Direct weaving of baubles is more difficult. However, those who have mastered oblique will also be able to cope with this. The advantage of this weaving method is a greater variety of patterns. Baubles can contain not only multi-colored patterns, but also full-fledged designs. This can be achieved due to the fact that the knots are knitted horizontally.

The weaving moves first from right to left, and then vice versa. It is better to start learning how to weave baubles in a direct way with two colors. One will act as a background, and the other as knots. Moreover, much more of the second is needed.

- The beautiful base of a thread bauble is made like this: the threads that will be used as a background must be folded in half.
- On the one hand, closer to the fold, a thread is tied, which is called “leading”.
- You need to tie all the background threads with the leading thread so that you end up with a beautiful, uniform loop.
- Then you need to tie certain knots on the background threads, moving towards the opposite side.
- When the first row is completed, you need to move on to the second. Here weaving will be carried out according to the same principle, but in the opposite direction. Therefore, many people call this method “snake”.
Having gotten your hang of weaving baubles in two colors, you should try your skills on several shades or start creating real patterns.

Patterns for weaving baubles from threads
To begin with, it must be said that there are two types of schemes:
- a full cycle means that after weaving the pattern has finished, it must be repeated again;
- an incomplete cycle demonstrates the principle of tying knots, that is, there will be some colors on top and others on the bottom.

As for the nodes themselves, they also come in two types:
- right is characterized by the fact that the working thread will be located on the right side of the resulting knot,
- left means that the working thread will be on the left side of the knot itself.

There are also 4 types of nodes:
- straight - shown in the diagram with an arrow pointing in a right-down direction. And for this you need to make two left nodes;
- the reverse is shown in the diagram as an arrow, which shows the left-down direction. And that means making two right knots;
- The left tatting looks on the diagram as an arrow in the form of a right angle, looking in the lower left direction. To make it, you need to do the following: first you need to tie a left knot, after which, changing the threads in places, you need to make a right knot;
- right tatting - in the diagram it indicates the direction to the right and down in the form of a right angle. It is performed according to the same principle as the previous node, only in opposite direction: first the right node, then the left one.

Often the diagrams show the colors of the nodes, however, you can replace them with others. At the beginning of the journey of weaving baubles from threads, in order not to get confused, you can mark the rows that have already been made.

As for the schemes themselves, there are a huge number of them. Thanks to them, you can create various designs and patterns on baubles. It is also possible to come up with a pattern yourself; for this purpose, special programs have been created that process the intended ornament into the form of a weaving pattern.


In the video below you will see how diverse thread baubles can be, in which case to use straight weaving, and in which oblique. Get inspired.
To create a multi-colored thread bauble, you will need floss threads - at least six colors, scissors and fasteners.

- The threads are cut in half so that there is double quantity of each color.
- The threads are then arranged so that like colors are mirrored. That is, red will be the extreme color on the left and right sides, green will be the second, etc.
- The threads can be attached in any way you like.
- Weaving can be started from any side, for example, from the left. To do this, the outer thread makes two left knots, which need to be placed right at the base of the bracelet.
- Then, again, the red thread should tie knots on other threads. They need to be tied to the middle.
- The same must be done on the other side, that is, repeat the actions, but in the opposite order.
- When the red threads come together in the middle, you need to tie a knot with the right leading thread.
- You need to start the second row from green. Everything is done in the same way as with the red thread.
- At the end of weaving, you can tie the bauble in a knot and weave a thin braid from the remaining threads. The same needs to be done with the threads that remain at the base.


How to decorate baubles?
The bauble itself is an original accessory, but this does not mean that the bracelet should be made exclusively from floss. It can be supplemented various decorations. The most simple option The decorations of the baubles are interesting locks. They can be purchased at craft stores. This could be an infinity sign, chain links, a beacon and much more. And you can weave beads, spikes, beads, stones, sequins, rhinestones into the bracelet itself.


To decorate a bauble with beads or beads, they need to be strung on a thread and sewn into a bracelet using a needle.

The decoration in the form of rhinestones looks interesting. They can be glued to the finished bauble, but in this case there is a risk that the glue will leave marks. Therefore, you can buy a thread with ready-made small rhinestones applied.
So, in order to attach a thread with rhinestones, you need to do the following:
- In the middle along the thread bauble you need to lay out a thread with rhinestones of the appropriate length.
- Then, using a thread whose color matches the bauble, you need to start sewing on the thread with rhinestones.
- To do this, you need to use a needle to make stitches that will run perpendicular to the thread with rhinestones.

To decorate a bauble with thorns, you need to stock up on special fasteners. But before that, it’s better to make markings for decorations. Then, using a needle, the spikes are applied to the bracelet and secured on the reverse side.

Weaving baubles is quite an interesting process, but difficulties can also arise with it. And the first problem for beginners is incorrectly determining the length of the threads. Firstly, you need to leave the length so that you can wear the bauble on your hand. Secondly, depending on the complexity of the weaving, threads with a length of 80 cm or more are needed. Therefore, the more complex the pattern, the longer the thread should be.

At the beginning of training, you can simply fasten the threads in the form simple node. But to make your work look more neat, you can use one of the suggested methods:
- Fixing the threads with a pin. All the threads need to be tied around a pin, and then it can be attached to a piece of fabric or even to your jeans.
- Fixing the threads with tape, electrical tape or adhesive tape to the work surface.
- Tying knots with the leading thread around the base of the bracelet.
- To prevent the end of the bauble from fraying, you need to tie it in a knot or braid it tightly.


One more important point is the quality of the threads. It should be cotton floss. But since it can be dull, manufacturers carry out a mercerization process. You can also weave baubles from silk, wool and staple threads.

If the thread runs out during weaving, and this often happens when creating complex patterns, you need to do next action: from the wrong side it is attached to the finished thread new one same colors.
If you want to create a bauble according to traditions, then you need to know the meanings of the colors:
- red symbolizes love and passion,
- green - hope and faith,
- white - innocence and freedom,
- black - loneliness and independence.

The bauble is a great decoration that is suitable for summer. And the weaving process itself can become interesting hobby, because there are many schemes of varying complexity, which you can use to create a beautiful and unusual bracelet. Also, a hand-woven bauble can become a nice present for girlfriends or friends.
Finally, easy master class on weaving the simplest baubles from threads, which will allow even inexperienced beginners to get excited about the idea of weaving.
Scheme - universal item, suitable for both beaded baubles and classic thread baubles. However, many needlewomen have difficulties with weaving according to patterns: even if it is clear whether the knot should be left-handed or right-handed, the patterns do not always reflect which threads should be used at what moment. But, despite this, as in any business, learning to weave baubles according to patterns for beginners is possible only with the help of constant practice, starting from a relatively simple patterns and ending with complex weaving. So how to use diagrams?
Basic types of knots for weaving baubles When weaving baubles according to patterns, two main types of knots are used: from left to right (left-handed or left-handed) and from right to left (right-handed or right-handed). To weave a left knot, the left thread in the pair is placed on top of the right one and pulled from below into the resulting loop. To weave the right one, the right thread in a pair is placed on top of the left one and pulled from below into the resulting loop. The color of the knot is determined by the thread, which stretches upward when the knot is tightened.
 How to weave baubles using straight weaving patterns?
You can learn to make any straight baubles after two or three woven baubles with words - then the principle is simply repeated. For a straight weave bauble you will need:
- 7 blue threads for the base and for future letters approximately 100-110cm;
- 1 black thread for braiding the bauble and creating a background;
- scissors;
- insulating tape.

- Distribute the threads as shown in the diagram, with the background thread on the left. Tie the first left double knot, moving to the right. The movement of the thread can be understood by the direction of the arrows in the diagram.


- Tie the entire first row with a black thread like this.

- We turn around and begin to weave the first double right knot. We tighten it.

- The diagram shows that the letter begins with the second node, and this node is shown with an arrow down. Let's take it blue thread and we tie the black one with it using the left knot. To avoid confusion, remember one simple rule: each knot of a different color in a row is tied in the opposite direction of the row. That is, if you weave a row from right to left, knots of a different color will be tied from left to right, and vice versa.

- This is what a bauble looks like with three knots tied.

- We complete the letter according to the diagram and tie the last knot in the row with black thread from right to left. The first row is ready!

- We begin to weave the second row. There's a knot here of blue color there will be only one, on the fifth thread from the left. We tie it from right to left, and then weave a row with black thread from left to right.

- We weave the third row in the same way - here the colored knot will be on the fourth thread from the left.

- We finish the first letter and weave a space with black thread.

- All other rows are woven in exactly the same way - for example, the second letter is woven. Let's continue by analogy.

- So you're done last letter- it's time to add the last gap.

- We divide the remaining threads into three parts and braid an ordinary braid.

- Fenechka is ready. Of course, it turned out to be very small - when weaving according to the patterns, calculate required length to place the picture in the middle. To do this, you will have to braid more background rows with black thread.

With oblique weaving you can make baubles unprecedented beauty– narrow, wide, with ornament, gradient, etc. However, you still need to learn how to read the diagrams of wide baubles, so it is better to start with a simple baubles diagram of four threads, but with both types of knots. For weaving you will need:
- 3 dark threads (in in this case turquoise) for the background;
- 1 light thread for the pattern;
- scissors;
- insulating tape.

- Distribute the threads as shown in the diagram: let the light thread for the pattern remain on the left. Secure with electrical tape, separate the two left threads and tie the first left knot with a light thread. Don't forget that all knots must be double.


- Braid the same left knot on the right side with a third green thread on the fourth.

- Now use a light thread to tie a left knot on the two middle threads.

- Tie the third row with the same knots - separately on the left, separately on the right.

- Separate the two middle green threads and use the right thread to tie a right knot around the left one. But on the fifth row, the knot on the left will be left-handed, and on the right – right-handed.

- The sixth row is a right-hand knot tied with a light thread.

- On the seventh row, tie a green thread with a light thread with a right-hand knot, and tie a regular left-hand knot on the right. Tie the two middle threads with a left knot. Weaving according to the pattern is completed. Now repeat steps 1-7 until the bauble reaches the proper length.

- On the finished bauble, all that remains is to braid the braids.

These are bracelets that are symbols of friendship and are passed from one friend to another.
These bracelets are made by hand and are usually made from threads. There are many different patterns and weaving methods. Weaving baubles is a special type of macrame. Due to its versatility, the friendship bracelet can be worn by both female and male representatives.
Creating baubles from floss, like the sewing process, should start with preparing the required materials. How to weave a bauble from floss and what materials and tools are required for the work? To work, you will need floss threads of the desired colors, scissors, small pins and, of course, a little time and patience. Depending on the size of the handmade bracelet you want to get as a result, a certain number of threads is taken (the number must be even). The optimal number can be considered 8 threads of floss, the length of which is at least one meter. A bracelet made of four or six threads may turn out to be very thin, inconspicuous and more like an ordinary cord.
The ends of the threads are attached to a rigid pad so that the bracelet does not twist when weaving. Begin weaving with the rightmost thread. The nearest thread is tied with this thread. As a rule, 2 knots are made. Then, with the same thread, knots are knitted on the next threads - and so on until the end.
The first row looks like a diagonal strip of knots. The next row is braided in the same way, only the thread that was the second acts as the far right thread.
The floss bauble is woven row by row until the required length is reached.
The finished product is removed from the pins, and the ends of the bauble can simply be braided. Some people prefer twisted fringes. In this case, you should study special technique weaving, different from the usual one.
Before you start weaving baubles with ornaments and names, you should learn less complex options. There are a great variety of patterns, differing in patterns, weaving methods (knots), and various designs. Find all up-to-date information You can visit almost every one of the thousands of sites on the Internet that are dedicated to weaving baubles from floss.
Each floss bauble is special gift. After all, it was made not by a machine, but by human hands. There is a tradition: when you give a bracelet, when you put it on your hand, you need to tie the ends with three knots, and make a wish on the last knot, which will certainly come true. A homemade bauble is given only out of good will and from pure heart, otherwise it will not bring joy to the one who wears it. Now you know how to weave a bauble from floss.
Fenechka self made- how to weave a product from floss and what tools to prepare for work. Watch the video master class:
Baubles in many countries are a symbol of friendship. However, this unusual handmade bracelet, which appeared for the first time in North America, was previously intended for other purposes. The Indians made such jewelry to protect against evil spirits, treat all kinds of ailments, conduct marriage rituals, and even tied braided braids from various herbs and threads on the wrists of warriors.
Today, a bracelet, woven with your own hands from threads, leather, beads or glass beads, rather plays the role of original decoration than a magical attribute. When everything can be bought, any thing made with your own hands has no less value than shamanic talismans. In this article I will consider in detail several types of weaving accessories from floss, I will give useful recommendations for beginning needlewomen and will help you create bright bracelets that are suitable for both personal use and as a gift.
Preparatory stage
Any craftswoman who has already created several woven bracelets will recommend floss for weaving threads. They have a soft, pliable structure, thanks to which the products are created quickly, and are pleasant, comfortable and durable to wear. Another advantage of this material is that it is available in bright, lush colors and shades. When choosing, pay attention to the length of the threads. It is not recommended to take threads shorter than one meter, since during the knitting process their length will be reduced by about four times.
In addition to the basic material, needlewomen should stock up on tape, paper clips, regular pins and office clips. All this is useful for securing threads on a flat surface and simplifying weaving.
There are many styles of weaving, but the most popular are classic methods: straight and oblique weaving. Direct weaving is distinguished by a variety of patterns and ornaments that can be made using this technique. However, it is considered more complex and time-consuming. Oblique weaving suitable for beginners, since the design of the “oblique” bauble is quickly mastered, and the finished product looks very stylish.
Straight weaving from floss threads
Beautiful bracelet, made using the direct weaving technique, can become business card any craftsman, because weaving baubles this way is not easy. If you are just starting to try your hand, it is better to train your hand for more simple ways mating.
However, if you still decide to try to create an ornament, follow following instructions for beginners:
- The color and number of bundles of floss threads is selected based on the intended pattern on the bracelet.
- Each color must be separated from the others and ensure that they are not mixed in a chaotic manner.
- The length of the threads for knitting a pattern directly depends on its size.
- The larger the ornament, the longer the bundle will be required.
- The leftmost thread is conventionally called the leading thread. It is necessary to tie the threads with it, which will serve as the internal background and go immediately behind it.
- Once the left thread reaches the right side, the action algorithm is executed back to the left. Acting in this way, our thread moves first to the right, then to the left, covering the internal main thread.
- In places where the design should be, the main thread is intertwined with those used in its creation.
Video lesson
Oblique weaving - step by step plan
I'll look into it in detail various ways oblique weaving using patterns.
- The “rope” method. Requires two threads different color 1.5 meters long. We fold each of them in half, tie it in a knot and attach it to a flat surface. Further weaving should follow this pattern.
- Fenechka, connected in a way“ribbon”, looks great in juicy summer flowers. To make it, you will need four two-meter threads, which need to be folded in half and tied in a knot. Then we continue to work according to the diagram shown.
- Braided bracelets in the “classic” style captivate with their simple design and ease of knitting. To make such a decoration, you will need six meter threads of three various colors. The floss is tied with a knot at the top and placed in a line of threads of paired colors. The first one is knitted in a knot on each subsequent thread. Next we perform the same operation. This is how each new outer thread is knitted.
Features of weaving from 4 and 2 threads
Bracelets created using a pair of threads do not have intricate patterns, but this does not prevent them from looking original. For the product, it is advisable to choose floss of different colors with a length of at least a meter.
Knitting is carried out according to to the following principle:
- Both threads are tied at the end with a knot and secured with tape or a pin.
- We pull the left thread, and with the right one we make a ring around the left one and thread the tip inside the loop. The loop is carefully tightened upward.
- Thus we make the second knot.
- For the third knot, we swap the threads, and do the rest according to the same algorithm.
- Alternately tying knots with one thread or the other, we go down and at the end we tie it into one knot. Your bauble is ready.
Weaving of four threads is performed according to the same principle.
How to weave baubles with names and inscriptions
Baubles with names and inscriptions are woven according to a straight weaving pattern, but instead of a pattern or design on the bracelet, a word, name or a whole phrase is woven. To make the letters look expressive, beginners are advised to work on them using a stencil. It can be done with my own hands from plain paper. To do this, you need to calculate the width of each letter and the distance between them. It is important not to forget to make equal indents for each letter from the edge of the bracelet - this will make the word look better.
Video instruction
- When working, wear comfortable and correct posture, use good lighting and a comfortable place. Never disregard these rules. Weaving at home should bring pleasure, and not leave behind back pain or pain in the eyes.
- Attach the threads on a flat, clean and dry surface. This could be a desktop to which they are attached with tape, a hard cover of a book and clothespins, or a stationery tablet with a clip. The main thing is that the workpiece holds tightly and weaves comfortably.
- Give preference to quality threads. Even experienced needlewoman will not work beautiful drawing, if the material has faded, fluffed or is too thin. The quality, beauty and durability of the bracelet depend on this.
And in conclusion, I will add that dexterity in work, brought to the point of automatism, over time begins to help oneself draw various patterns. There is no need to use diagrams. Experience appears that allows you to experiment with other materials and textures. Each product takes less and less time, and in return it develops fine motor skills, fantasy and the jewelry box is replenished. Don't put off until tomorrow what you can weave today. I hope that the article was useful to you.