Socks on two knitting needles without a seam. Easy way (Knitting)
If you want to please your family and friends with knitted socks that will warm them in cold weather, reminding you of your love and care, our photo and video tutorials will help you figure out this difficult matter. We invite you to learn from scratch and consider in detail how to knit correctly for adults (male and female) and children.
So, how to knit (step by step for beginners) socks using two, five and circular knitting needles.
Detailed master class "how to knit socks with knitting needles" (photo in stages)
If you learn the basics, in the future you will not be afraid of beautiful products with a jacquard pattern, unusual in the patchwork style, new models with braids, very cool with ornaments, etc.
Knitting socks on 5 needles
This technique involves knitting a product without a single seam. The socks are knitted in a spiral, as a result of which they lie perfectly on the leg.
Socks on five knitting needles are knitted on top of the sock to the toe in a circular knit, loops are picked up on four knitting needles, the fifth is working.
The number of loops is calculated based on the circumference of the leg. We take two measurements of the leg:
1st - lifting circle; centimeter measure the foot from the heel to the rise on an inclined plane.
2nd - leg circumference; measured at the foot, at the thinnest point of the leg, above the bone.
Then we determine the average circumference: add the instep and leg circumferences and divide the resulting figure by 2. For example, the instep circumference is 31 cm, the leg circumference is 21 cm; we get 31 + 21 \u003d 52, 52: 2 \u003d 26 cm. For this number of centimeters, we calculate the set of loops. It is advisable to round the resulting number of loops to a number divisible by 4, so that it is convenient to knit on 4 knitting needles.
We collect the required number of loops, distribute them on 4 knitting needles and knit an elastic band in a circular knit. Usually an elastic band is 5-6 cm, but you can knit less - if desired. Then we knit 7-8 cm with front viscous to the heel. We knit the heel on two knitting needles from half of the loops, and leave the other half on unused knitting needles. On two knitting needles we knit a fabric with a front knitting of 5.5 - 6 cm, this is the height of the heel. Depending on the instep of the leg, it may be less, but starting from the 35th leg size, this is a constant value.
Then, to give the heel a shape, we make the descent of the heel: we divide all the loops into three parts. If there are extra loops, then we attach them to the central part (if the number of loops is not divisible by 3). We will knit the loops of the central part further, and the loops of the side parts (they will form the sides of the heel) are gradually attached to the loops of the central part.
We start the descent of the loops from the wrong side to finish it from the front. We knit two-thirds of the loops from the wrong side, then 2 loops together - the last loop from the central part and the first loop from the third part - we knit them together from the wrong side. After that, we turn the knitting and knit on the front side of the heel, while at the turn we remove the first loop without knitting.
We knit the front ones, knit the last loop of the central part and the first loop of the first part together with a broach (remove the first loop, knit the second one with the front one, then transfer the removed loop to the knitted one). We turn the knitting again, remove the first loop without knitting, etc.
Continue knitting until all side loops are closed. Now we pick up loops from the side of the heel, from each second row we pick up 1 loop + 1 loop additionally, i.e. from 2 rows we collect 3 loops. We turn to circular knitting, we take into work the loops from the left knitting needles, the newly typed loops from the side parts of the heel and the loops of the central part of the heel. Knit one row in knit stitch. Then, in each 2nd circular row, for a better fit of the heel, we knit the 3rd and 2nd loops from the end of the 1st knitting needle together with the front loop and the 2nd and 3rd loops of the 4th knitting needle together with a broach.
We repeat the decrease until the initial number of loops (cast on to start knitting the product) is reached. Next, we knit the foot with facial viscous in a circle to the bone of the thumb or to the end of the little finger. Then we knit the toe of the sock. We decrease the loops as follows: in each 2nd row, we knit the 3rd and 2nd loops from the end of the 1st and 3rd knitting needles together with facial loops, and the 2nd and 3rd loops of the 2nd and 4th we knit the knitting needles together with a broach. When half of the loops remain on the knitting needles, we perform such decreases in each circular row until 4 loops remain. We tighten them with a thread and fix them.
Using two knitting needles (the easiest way)
On five knitting needles, you have already learned how to knit the simplest model, so we move on to knitting on 2 knitting needles (you can use circular knitting needles). The knitting of such a model allows you to make patterns of any complexity, but many are confused by the seam. But if you manage to finish beautifully and connect the seams correctly, the seam will be invisible visually and to the touch.
To start knitting, we calculate the number of loops based on the circumference of the leg.
For example, we take 48 loops, we collect them + 2 hem (total 50 loops) on 2 knitting needles, we knit a straight fabric 5-6 cm with an elastic band, then with the front surface or the selected pattern 7-8 cm. We start knitting the heel: the number of loops (without hem) divide into 4 parts, it turns out 12 loops. We will knit the heel on two middle parts. We knit 12 + 12 + 12 loops (three parts), turn the work and knit 12 + 12 loops (two middle parts). Again we turn the work and knit 12 + 11 loops.
Again we turn the work and knit 11 + 11 loops, etc. That is, in each row we knit 1 loop less (we make shortened rows) until we have 8 loops left in the work. Now we will begin to increase the number of working loops, knitting the previously removed loop in each row. So that there are no holes in knitting, we do this: we put a side loop on the left knitting needle, and we knit this worn loop and the next one together with the front one. Those. the number of working loops will increase by 1.
Then we turn the knitting, remove the first loop, then purl 8, raise the side loop on the left knitting needle and knit 2 loops together with the wrong one. And so on, until all loops (12 + 12) are in work.
Now start knitting a toe. Again we divide the loops into 4 parts - 12 + 12 + 12 + 12. We reduce the loops as follows: in each 2nd row, we knit the 3rd and 2nd loops from the end of the first and third parts together with facial loops, and we knit the 2nd and 3rd loops of the second and fourth parts together with a broach. When half of the loops remain on the knitting needles, we perform such decreases in each row until 6 loops remain.
We tighten them with a thread, we sew the sock with the same thread. The seam is obtained along the top of the sock.
Video tutorials with step by step description
The most interesting MK with a detailed description of the whole process.
Knitting socks on 5 needles video for beginners
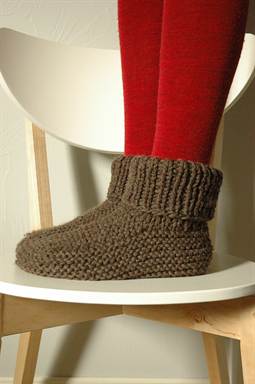
Women's slippers
Men's socks (detailed) instructions
Knitted woolen socks will help warm your feet in chilly weather. You can make such a product yourself, having only two knitting needles on hand. There are several knitting techniques for such socks: with a seam, without stitching, with a toe. Each technique has its own distinctive features.
Necessary materials
Before starting work, prepare the necessary materials:
- Spokes. Select the number (thickness in mm) in accordance with the recommendations indicated on the package with yarn.
- Knitting. Acrylic or wool blend yarn is ideal for creating socks. It is more durable, warm and holds its shape well.
- Knitting pattern, pen and paper for notes.
- Pin, markers.
- Hook for lifting air loops from work.
How to knit socks on two needles
There are many options for knitting socks with two knitting needles: with a seam, without a seam, with a toe, with a pattern, on circular knitting needles. All of them have their own scheme of work, but before you start knitting, you need to take measurements and calculate the number of loops. Armed with a measuring tape, take the following measurements:
- foot circumference;
- sole length.
Write down the results on paper. From yarn, knit a sample of 20-30 loops (the more, the more accurate the calculation). Calculate the knitting density. To do this, divide the number of loops in the sample by its width in cm. The resulting number will be the knitting density, write it down. Make measurements of the sample after washing and drying it, because. some yarn tends to shrink or stretch after WTO (wet heat treatment).
Seamless
To calculate the number of initial loops for your size, multiply the circumference of the foot at the widest point by the knitting density and divide by two. You need to divide by 2, because according to this method, the back half of the sock is knitted to the toe, then the second half, clinging the edges of the finished part along the edges. Socks on 2 knitting needles without a seam are knitted according to the following pattern:
- Knitting cuff.
- Heel shaping.
- Trace knitting.
- Toe formation.
- Cast on the initial number of stitches on the needles.
- Tie the floor of the cuff of the desired width with any elastic band.
- The knitting edge should be a flat edge (pigtail). To do this, always remove the first loop without knitting, and make the last loop purl (IP). This is necessary in order to subsequently get a neat connection.
The next stage of work - the most difficult for beginners - the formation of the heel:
- Calculate the heel height according to the following scheme: number of rows = number of loops on the needle minus 2 (if the number is even) or minus 3 (if the number is odd).
- Knit all rows of the heel in stockinette stitch.
- On the last row, start forming a heel. To do this, divide all the loops into 3 parts. If the remainder is 1 p. Attach it to the middle part, if 2 - 1 to each of the side parts.
- Mark the number of loops in the middle part with markers.
- Knit the side part with the front stitch without changes.
- Knit the first loops of the middle part, and connect the last one together with the adjacent loop from the second side part.
- Turn your work inside out. Remove the first loop not knitted. Repeat the action from paragraph 9, knitting the IP.
- Continue to join the side loops to the middle part (one at a time) until the original number of loops of the middle part remains.
There will be no complicated tricks in knitting the half part of the track - it is knitted with a straight fabric to the desired length:
- To knit the foot in the first row, pick up the hem loops on one side of the middle of the heel up to the elastic band. Turn knitting.
- Purl all stitches on the needle if it is a purl row. Pick up the loops on the other side of the middle of the heel from the hem.
- In every second row along the edges, knit 2 stitches together with the front one with a slope to the left (if the front rows) or 2 purl together (if the rows are wrong).
- At the end of the work, the originally dialed number of loops should remain.
- To calculate the length of the middle part of the foot, measure the length of the heel cup and foot - they should be the same. Multiply the heel cup by 2. Subtract the resulting number from the total length of the foot.
- Knit the resulting number in cm. Front stitch.
For the toe, it is important to make smooth bevels. Decrease every second row before and after the selvedges until 1/3 of the initial cast-on sts remain on the needles. Then the work goes in the direction from the toe to the cuff, knitting the upper half of the sock:
- Just as you cut the toe in every second row, start adding loops along the edges of the broaches. To avoid holes at the site of the increase, knit a broach, after twisting it once.
- Simultaneously with the increase, make the connection of the canvases, pulling out a new loop from one slice of the edge of the finished fabric.
- Keep track of the number of loops. Increase stitches until you have the same number of stitches as for the next piece.
- Knit the upper part of the sock in the same way - in a straight line, connecting the fabrics along the edge.
- Make sure that the number of loops does not increase. To ensure that the number of loops always remains calculated, at the end of each row, connect 2 sts together.
- In the section with the elastic, grab the selvedge by the wall facing the right side, knit it together with the last loop of the row.
- Knit the first stitch of each row so that the rib pattern continues.
- The second sock is knitted in the same way.

Socks on two spokes with a seam
To calculate the number of loops, measure the circumference of the instep (from the heel to the oblique to the instep) and the ankles at the bone (at the thinnest point). Add the resulting numbers and divide by two. The resulting number is the number of centimeters for which you need to calculate the loops according to the knitting pattern. In the example, socks on two knitting needles with a seam are knitted from 50 loops (48 main + 2 hem):
- Tie an elastic band 2 * 2 5-6 cm long.
- Then go to the front surface and knit 7-8 cm.
- For the heel, divide the number of loops (excluding edge loops) into 4 parts. It will turn out exactly 12 p. The heel will be formed on two middle parts.
- Work 3 pieces (48 sts) in stockinette stitch, turn work.
- Knit 24 sts (two middle parts), turn the work.
- Work short rows, working 12 and 11 (10, 9, 8) sts on each next row until only 8 sts remain.
- Start increasing the number of loops by knitting the loop left earlier in each row.
- To avoid holes, put a side loop on the left knitting needle and knit it together with the next front loop (LP).
- Turn knitting. Remove the first loop.
- Then 8 purl. Pick up the side loop and knit together with the other purl.
- Continue the action until all the loops are in work.
- Continue in stockinette stitch until the length of the sock reaches the middle of the thumb.
- For the toe, divide the knitting into 4 parts (12 + 12 + 12 + 12).
- Start making cuts. In each even row, 3 and 2 loops from the end of the first and third parts, knit together the LP.
- 2 and 3 loops of the second and fourth parts, knit together with a broach.
- When only half of the loops remain, do such decreases in each row until there are only 6 loops in the work.
- Pull them together with a thread, sew the product

Knitting with toe
A somewhat unusual method is suitable for those needlewomen who have a limited number of threads for work, so that you can adjust the length of the cuff in accordance with the remnants of yarn. The calculation of the loops is done in the same way as described above. Socks are knitted with two knitting needles from the toe like this:
- Cast on half of the required number of loops on the knitting needle, adding an additional slippery thread to the main yarn.
- The first row is all facial loops (LP), the last loop is purl (IP).
- The second row is all purl, do not knit the last one. Flip your work.
- Continue in partial rows until 1/4-1/3 of all sts are left open on each side of the needle.
- In each subsequent row, knit all the left loops, in front of them, lifting the broach from the previous row.
- After lifting, you get a toe.
- Remove the extra thread. On two knitting needles you will get the required number of loops.
- Transfer the loops from two knitting needles to one, while knitting them like this: knit 1 st from the front knitting needle, remove the loop from the back knitting needle without knitting.
- Purl the very last stitch.
- At the next stage, remove the first loop, knit the loops of the front fabric LP, remove the back fabric without knitting. The last loop in the work is purl.
- Continue knitting for the entire length of the foot, minus the length of the heel. At the stage of knitting the foot, one must be extremely careful and not get confused where to knit the loop, and where it needs to be removed not knitted, otherwise the two halves of the sock will connect at the place of the error, it will become unwearable. You should end up with a "pipe".
- Knit the heel of the sock in the same way as the toe.
- After knitting the heels, 1 part of the loops will be on the knitting needle, the second - on the pin.
- Continue knitting the shaft to the elastic in the same way as the foot.
- Work rib 2*2, knitting the last stitch in purl work.
- After tying the desired length of elastic, close the loops with an elastic method or with a needle.
With a scythe in front
You can knit socks with a braid using any of the above master classes. The pattern should go from the top of the foot. The braid can be knitted according to any scheme you like, for example, according to this:
- For a braid pattern, remove 2 loops on an additional knitting needle, leave before work.
- Then knit 2 LPs, return the slipped loops to the left knitting needle.
- Knit them with the front.
- Remove the next 2 loops, leave to work.
- Knit 2 sts front, return the removed loops.
- Knit them with the front.
Video
In the cold season, knitting children's socks with knitting needles is a must. It is so important that the child's feet are warm. For a year, 2 and 3 years, choose wool yarn or yarn with alpaca, mixed with artificial fibers, such as polyamide. While knitting the heel, it would be nice to add a thin bobbin thread. Summer openwork socks for beginners are knitted from cotton yarn. At the end, you will find cat patterns for knitting jacquard.

How to calculate the number of loops for knitting a sock
In order not to start work again and again, before knitting children's socks with knitting needles, we calculate the required number of loops. In order for the socks to fit the child perfectly, you need to take into account the height of the leg lift, the size of the lower leg and the size of the foot itself.
- There are circumstances when fitting a sock is impossible - then the formula is used: X: 3 x 2 = Y, in which X means the size of the shoe, and Y is the length of the foot. X: 3 x 2 = Y
where X is the shoe size and Y is the foot size in centimeters. For children's socks with knitting needles, you will need 50 gr. yarn. - If this seems complicated to you, there are tables that indicate how many loops to cast on according to the knitting density. It is necessary to knit a “probe” - 10/10 cm in order to calculate the required number of loops.
- Another option for determining the number of loops. It is necessary to take 2 measurements of the baby's leg: the 1st measurement is the circumference of the instep, it is measured in centimeters at the widest point of the instep. 2nd measurement - leg circumference, measured above the bone. Next, we find the average circumference: we add the circumference of the volume and the circumference of the leg and divide by 2. By so much, see and do the calculation for the set of p.
- And the last option. Everyone knows that the anatomy of the leg has its own proportions. Look at the size ratio of the leg. You can’t go wrong if you cast on the needles the number of stitches that match the size: (top of the foot + sole = 100%). This size is what you need for the correct set of loops. Next, we will knit beautiful socks with a step-by-step master class.

A set of loops according to the anatomy of the leg.

Size chart for different knitting densities.
Here we will knit such original socks in stages with knitting needles for a child aged 3-4 years. We will knit on five knitting needles in the simplest “grandmother's” way. Knitting children's socks is something that is suitable for beginners who are just starting to knit. This easy way to knit baby socks with knitting needles will also come in handy for those who knew, but forgot this technique.
Abbreviations: p. - loop, p. - row, l. - front, from. - purl., sp. - knitting needles, vm. - together.

For work you will need:
- 5 double knitting needles, 3 mm thick.
- Yarn - wool with polyamide (150 m / 50 gr.) - 1 skein of gray and 1 skein of blue.
- Black and red thread for the cat's face.
- Eraser at the end of each knitting needle - so that the yarn does not slip off the knitting needles.
- Pins or markers.

Table number 1, which helps to knit children's socks with knitting needles.

The foot of a child at 3-4 years old corresponds to 26/27 shoe size and the size of the foot is 16-17 cm. We collect 44 points with gray yarn. We focus on table number 1. We distribute all 44 sts into 4 knitting needles - on each knitting needle we get 11 sts. We will knit first an elastic band, and then circular rows. Mark the place of transition from one to another p. (between the 1st and 4th sp.) - a marker. The elastic band can be knitted, as in the photo (1 person / 1 out.), But, as a rule, such an elastic band quickly stretches out. Therefore, it is better to tie an elastic band 2/2. Knitted 10 p. rubber band and go to the faces. smooth surface. We knit as many rows as high as you want to make socks. In this model, there are only 6 p., Usually it is 10 cm. In this place, drawings and patterns with jacquard are usually knitted.

Next, we will knit the wall of the heel. We will do this on the 1st and 4th sp. facial smoothness. We do not touch the 2nd and 3rd knitting needles yet. We look at table 1: heel wall - 22 p. (44: 2), heel wall height - 14 p. (4 cm). If you knit the first and last stitches with a garter stitch, then this will make it easier for you to calculate the p.

Next, you need to tie the bottom of the heel. We divide 22 p. into 3 parts (7; 8; 7). We mark with markers. We got 7 p. on both sides, and in the middle - 8 p. We start with the front p.: 14 persons. p., 2 persons together., turn the work over (6 remaining p. do not knit, leave it like that.
2nd p.: 8 out., 2 vm. out., turn over (5 p. leave untied).
3rd p.: 8 persons., 2 vm. persons., turn knitting.
4th p.: 8 out., 2 vm. l., turn knitting.
And so on until there are 8 stitches left on the needle.

Here we have 8 sts left. Next, you need to dial as many sts from the edges on the knitting needles as we have in table number 1 (the number of loops for dialing along the lateral edges of the heel is 11, but we will take a little less - 9 sts. ). In the place where the tail of the thread sticks out, we pick up 9 sts on the knitting needle and knit their faces, then we have 11 sts of faces, another 11 sts of faces, and again we pick up 9 sts on the knitting needle, knitting their faces. And here again we have circular knitting. There are now 48 sts on the needles in total.

And in this place it would be good to measure the toe on the leg. If it's too wide, turn it down. If the number of p. suits - we knit further in a circle, distributing the p.: 12 p. For each knitting needle. The beginning of the circular row is in the middle of the lower part of the heel (marked with a marker). We have 48 sts on the needles. We knit through a row of 2 faces together. Let's focus on the marker. Knitted 8 p. and subtracted 4 p. Remained 44 p., on each sp. - 11 p each. Next, we begin to make ears for the cat. Our scheme is 32 p., so we add 12 p. to the scheme, 6 on each side, and start knitting from the ears, from the 30th p.:

In order not to interfere with a long blue thread from the inside, make 2 blue balls. Gray yarn: 14 persons. n. gray, 1 person. p. blue, 14 p. gray, 1 p. blue, 14 l. n. gray.
29th p.: 13 y.o. n. gray, 3 l. p. blue, 12 l. n. gray, 3 l. p. blue, 13 l. n. gray.
28th p.: 12 y.o. item gray, 5 l. p. blue, 10 l. n. gray, 5 blue, 12 l. n. gray.
27th p.: 11 y.o. n. gray, 7 l. p. blue, 8 l. n. gray, 7 l. blue, 11 l. n. gray.
26th p.: 10 l. n. gray, 9 blue, 6 gray, 9 blue, 10 gray.
25th p.: 44 y.o. n. blue.
The length of the foot to the toe is 13.5 cm (see table). We knit according to the scheme up to this point. We reach the little finger on the leg. Next, we begin to make a toe. Decrease is done at the end of every 11 p. (2 together l.). So we decrease until 2 sts remain on the knitting needles. Cut the thread. We stretch the end of the thread through these loops. We remove the tail.

The second sock is knitted in the same way, only it starts with blue yarn, with an elastic band.
On the video: how to knit children's socks on 5 knitting needles.
Children's socks on two knitting needles - a master class with a description
Children's socks on two knitting needles - this master class is useful for those who do not like to knit on 5 knitting needles. We knit socks on 2 knitting needles, three more knitting needles are auxiliary. Then we sew the product with a needle with a native thread. The product corresponds to the size 22/23, the length of the foot is 15 cm. The socks are knitted for the age of 3 years.

For work you will need:
- Yarn - wool or wool mixture - 1 skein 50 gr.
- Hosiery knitting needles 3.5 mm thick.
- The needle is thick.

We knit the upper part of the sock. We collect 39 p. And plus 2 p. Edge, total - 41 p.
1st river: edge, 1 person. p., 1 out., and so on until the end of the river, at the end - edge.
2nd p.: chrome., 1 out. p., 1 l. etc., and so on to the end, at the end - chrome.
And so continue with an elastic band for 28 rows.
Next - we make a “tongue”: we knit it for 13 points, we do not touch the rest of the points!

1st row: chrome, 26 persons. p., turn the work.
2nd p.: 13 persons. p., turn the work.
3rd p.: 13 persons., turn.

And so we knit with a garter stitch (one person. P.) 34 rows. We got: 14 sts on the first needle, 13 - tongue, 14 sts on the second needle.

35th p. without chrome. p .: 2 persons together., 9 persons., 2 persons together.
36th p.: all facial.
37th p: 2 cm. persons., 7 persons., 2 vm. persons.
38th p: all persons.
39th p: 2 vm. persons., 5 persons., 2 vm. l.
Next, knit the width of the girth of the sock.

Tied to the end of the tongue. We have left on sp. 7 p.
1st p. girth of the toe: we raise 19 p. along the left side of the “tongue”, we knit plus to these 19 p. another 13 p. from the second knitting needle and chrome. Knit faces. Turn.

It turns out 7 p. "tongue" while on a separate knitting needle.

2nd p: chrome., 32 persons., Plus 7 more p. Of the “tongue” of persons. - total 39 p.


In total, it turned out 71 points plus 2 chrome. (73 p. on the spread).
1st p.: chrome., 2 vm. persons., 28 persons., 2 vm. l., 3 l., 2 vm. l., 3 persons., 2 vm. l., 27 persons., 2 vm. l., chrome.
2nd row: chrome, 66 persons. chrome
3rd river: chrome, 2 vm. l., 26 l., 2 vm. l., 2 l., 2 vm. l., 2 l., 2 vm. l., 26 l., 2 vm. l., chrome.
4th p.: chrome., 61 persons., chrome.
5th river: chrome, 2 vm. l., 24 l., 2 vm. l., 1 l., 2 vm. l., 1 l., 2 vm. l., 25 l., 2 vm. l., chrome.
6th row: chrome, 56 sheets. p., chrome
7th: 2 in. l., 22 l., 2 vm. l., 2 vm. l., 24 l., 2 vm. l., chrome.
8th: chrome, 51 sh., chrome.


Then we sew the top, heel and foot. We hide the end of the thread. Knit the same sock.

On the video: an easy way to knit socks with knitting needles for the age of 1-2 years old.
Openwork socks are knitted for the age of 6-8 years with cotton yarn of medium thickness on 5 knitting needles 3 mm. Foot length - 20 cm. Size 30-31. We will knit fishnet socks in the round. To make it easier for you to knit, refer to table number 1 in the first master class.

We collect 48 sts on 2 knitting needles, distribute them on 4 knitting needles (12 sts each) and knit further in a circle:
1st r.: the entire r. - facial.
2nd row: purl.
3rd: persons.
4th: out.
5th, 6th, 7th - persons.
8th: out.
9th: persons.
10th: out.
11th and 12th: persons.
13th we make small holes for the laces: chrome., nakid, 2 persons together., nakid, 2 vm. l., and so on until the end of the river.
14th row: repeat the pattern from the 1st to the 12th row
Next, we knit the heel: 24 p. Knit 7 cm in height (16 rows) in two sp., The rest 2 sp. we don't touch.
17th p.: Divide the same 24 p. heels into 3 parts (7; 10; 7) p. Knit only the middle 10 p. So: 6 l., 2 wm. l., 10 l., 2 vm. l., 6 l. Work rotation.
18th: 5 out., 2 vm. out., 10 persons., 2 vm. out., 5 out.
Next, we raise the side sts from one side and the other (see the first master class). You need to raise 12 sts on each side. We distribute the sts as follows: 28 sts on 2 sp., 26 sts on the remaining 2 s. 28 p. - this is our rapport (see diagram), on these p. we will only knit a pattern (top of the sock).

On the remaining 2 sp. gradually decrease 6 extra sts so that 48 sts remain in the circle. Work 16 cm to the toe and start decreasing. Decrease do this: divide the entire canvas into 4 parts and do after each - 2 cm. (11 p., 2 vm., 11 p., 2 vm., and so on) we knit the toe to the end. We stretch the thread through the last p, fasten inside. Openwork socks are ready.

Cats - patterns for jacquard
Interesting jacquards for children are useful for decorating socks, scarves, mittens, mitts, clothes, and so on. Do-it-yourself children's things do not happen much. According to table number 1, you can independently knit socks for a child for 1 year and 2 years, as well as for 7-8-9 years. Children love bright jacquard socks - now you can knit children's socks with knitting needles.


Warm woolen socks are an indispensable part of any person's wardrobe. In addition, this is a great way to practice and get your hands on knitting for beginner needlewomen. You will learn from our article on how to knit socks with a technique on two knitting needles, and a knitting pattern with a description of the work will help you with this.
Master class on socks on two knitting needles with knitting patterns
Many of us are used to watching a grandmother knitting socks. However, she does it on 5 knitting needles, which for beginners seems to be a skill beyond the real. There is also knitting of socks, which is made on two knitting needles.
For a pair of socks in size 40-42, you will need the following:
- Warm wool yarn, about 200 g
- Needles No. 5 or No. 5.5
Instructions on how to knit socks will be painted in stages simply, even if they have not knitted on two knitting needles before.
Stage 1. Elastic band. Cast on 39 stitches. We begin to knit with an elastic band, that is, alternating the front and back loops. The last (before the edge) should be knitted with a “face”. So we perform about 28 rows. Then the number of loops is mentally divided by 3, 13 in each part. We begin to knit the middle: 34 rows of facial loops in the center.
Stage 2. Sock. 2 loops connected together and knitted as one, hereinafter referred to as combined. We continue to work with the central 13 loops.
In the first row:“Combined” front, 9 loops “face”, “combined” front.
Second row: 13 facial loops.
Third row:“combined” facial, 7 “face”, “combined” facial.
Fourth row: 9 facial loops
Fifth row: combined facial, 5 facial, again "combined".
Stage 3. Foot. In the first row, 19 additional loops are typed on the left, along the “tongue”, they are knitted with the “face”. Next, another 13 facial loops on the left side along the lower leg. In the second row, to the upper side of the "tongue" we add 7 loops, 19 from the right side and 13 loops along the lower leg. We knit everything with a “face”. After completing these two rows, count the loops, you should get 71. We knit them with facial ones for 10 rows.
Stage 4. Sole.
First row:“Combined” facial, 28 facial, “combined”, 3 “face”, “combined”, 3 facial, again “combined”, 27 “face”, “combined.
Second row: the remaining 66 stitches are knitted.
Third row:“Combined”, 26 “face”, “combined”, 2 facial, again “combined”, 2 “face”, “combined”, 26 facial, again “combined”.
Fourth row: 61 front loop.
Fifth row:“Combined”, 24 facial, “combined, 1 “face”, “combined”, facial loop, “combined”, 25 facial and again “combined”.
Sixth row: 56 "face"
Seventh row: “combined”, 22 facial, 3 “combined” in a row, 24 facial, “combined”.
Eighth row: 51 front loop.
Repeat the decrease in loops, starting from 1 row, until their number is reduced to 26. We finish the work, close the loops. The foot, heel and lower leg are crocheted or just a needle.
Here are the socks on 2 knitting needles:

The scheme of this work is extremely simple: it mainly involves only the front loops (and even the “combined” ones are knitted with the “face”).
Video on the topic of the article
"Simplified" knitting socks:
Socks on two needles:
Socks with two simple knitting needles, which are made without a seam:
"Invisible seam":
Toe socks:
Similar articles:
It is interesting for every fashionista to learn how to knit an openwork braid with knitting needles correctly and quickly, because such an element beautifully decorates any product. These patterns are in...
Many knitters like to use a special Bulgarian beginning in their work - a type of loop that allows you to make the edge of the product more beautiful and sophisticated....
Needlework is a wonderful process of creating a knitted accessory. An openwork shawl with knitting needles combines fashion, style, beauty, comfort and warmth. This is a...
We bring to your attention an easy way to knit socks on two knitting needles. The socks fit well and are comfortable to wear. This model of socks has a square (straight) heel. Such a heel allows you to tie socks to any instep of the foot: from low to high. Beginning knitters love to knit socks on two knitting needles, as this method is simple and does not require much experience. Nevertheless, if you took the knitting needles in your hands for the first time, we recommend that you look at the knitting lessons for beginners, which show the basics of knitting.
Like the post? And you want to see the description of socks more often? Let us know! Write about it in the comments!
Loop calculation
To calculate the loops, you will need the following measurements: the length of the foot and the girth of the foot in the metatarsus. The circumference of the foot in the metatarsus can be determined by the calculation method: it is equal to the length of the foot minus 1 cm for a wide leg or minus 2 cm for a narrow leg.
The number of stitches to be cast on is equal to the circumference of the foot in the metatarsus, multiplied by the horizontal density of knitting, divided by 2 (because we knit half the sock first). We get: (23 x 2.2): 2 = 25.
Progress
We collect 25 loops on the knitting needles and knit the cuff of the desired width (11 cm) with an elastic band 1x1.
Next, we move on to knitting the heel. We knit the heel with front stitch. The height of the heel is on average 1/4 of the length of the foot. Heel height can also be determined as follows: the number of rows should be equal to the number of loops on the needle minus 2 if the number is even and minus 3 if the number is odd. We get: 25 - 3 = 22 rows. We knit 21 rows with the front surface, and in the 22nd row we begin to knit the cup of the heel.
Mentally divide the loops by 3. We get 8 - 9 - 8 loops. If there is 1 loop left, we attach it to the middle part. If 2 - one to the side parts. Starting from the 22nd row, we decrease the loops. We knit 8 loops of the first part, then 8 loops of the second (middle) part, and we knit the 9th loop of the second part together with the loop of the third (side) part of the wrong loop. We turn the work to the front side. We remove the first loop, we knit 8 loops of the middle part, and we knit the 9th loop together with the loop of the side part of the front. We turn the work again, remove the first loop, knit 8 loops of the middle part and knit the 9th loop together with the loop of the side part of the wrong side. And so on, we knit only the loops of the middle part, attaching the loops of the side parts, until we join them all. There should be 9 stitches left on the needle.
Now we start knitting the middle lower part of the sock.
After knitting the heel, the number of loops turned out to be more than the calculated one. Excess loops should be cut. The area where we cut the loops is called the instep wedge.
Knitting pattern for instep wedge universal
3, 5, 7 row: at the end of the row in front of the edge loop, we knit 2 loops together with the front one with a slope to the left;
4, 6, 8 row: at the end of the row in front of the edge loop, we knit 2 loops together from the wrong side.
Thus, we reduced the loops on the instep wedge, knitting 2 loops together at the end of each row, and the estimated number of loops remained on the needle - 25.
Note: if you have a high instep, you can knit in front of two rows with decreases, 2 additional rows without reduction. This way you will provide more freedom in the area of the instep of the foot. At the same time, the height of the rise can be adjusted: you can knit 2 additional rows only before the first decrease, before the first and second, or before all three.
Wedge knitting pattern for high instep
Row 1: Pick up left side sts from edge sts (11 sts). You can pick up the edge loops by both walls or by one wall facing the front side.
2nd row: knit with purl loops. Raise the loops (11 loops) of the right side of the heel.
3, 7, 11 row: facial loops;
4, 8, 12 row: purl loops;
5, 9, 13 row: at the end of the row in front of the edge loop, we knit 2 loops together with the front one with a slope to the left;
6, 10, 14 row: at the end of the row in front of the edge loop, we knit 2 loops together from the wrong side.
We continue to knit the middle lower part of the sock to the toe. You can try on a sock and knit to the end of the little finger. It can be determined by calculation: the toe is approximately equal to the length of the heel cup. Subtract from the length of the foot (24) the length of the toe and the length of the cup (5 + 5 = 10), we get that the middle part is 14 cm or 44 rows.
Next, we knit a toe. We decrease the loops in the same way as on the instep wedge, knitting 2 loops together in front of the hem at the end of each row. When 1/3 of the loops (9) remain on the knitting needle, we raise the loops from the edge ones. In the front rows from the edge we knit the front loop, in the wrong side - the wrong one. We pick up the wall of the edge loop facing the wrong side. We do not remove the first loop of the row, as usual, but we knit the front one in the front rows and the wrong one in the wrong ones. This first loop should be knitted tighter.
So we add loops until the estimated number of loops (25) remains on the knitting needle.
We also knit the upper middle part of the sock, lifting the loops from the edge ones, but in order to keep the number of loops calculated, at the end of each row we decrease the loops in the same way as before, knitting 2 loops together at the end of each row.
Important: the corner loop should be knitted behind both walls so that the hole does not turn out to be too large.
On the gum section, we knit the edge loops differently. Now we pick up the wall of the edge loop facing the front side and we will knit the edge loop together with the last loop of the row.
We knit the first loop of the row so that the elastic pattern continues - with a purl loop. We throw the last loop of the row onto the right knitting needle, pick up the edge loop with the left knitting needle and return the last loop of the row to the left knitting needle. We knit 2 loops together in accordance with the elastic pattern: front or back loop. Thus, we reduce the extra loop and the calculated number of loops always remains on the knitting needle. The second sock is also knitted.
Contest for active commentators is in full swing! Read the competition details