Decoupage small round boxes ideas. Decoupage ideas for boxes in various styles
Once a box came out of my hands. And it was decorated only with printouts (without stencils, contours, complex decorative techniques and other embellishments). Only decoupage with printouts, aging - well, a ribbon. And more photos of the process) And since the process turned out to be quite interesting, I am happy to share it with you - so, meet : master class on decoupage of the box only with printouts and ribbon!)))
1. The idea was born from this picture - I really liked the medallion, but I decided to make my own background.
(Pictures enlarge by clicking)
2. First things first preparing printouts. The main idea is that there are no half circles in the box, so the size of the printout was very carefully adjusted. As a matter of fact, the color too - initially I just downloaded a polka-dot background from the Internet and changed, “chocolate” the colors manually.
Here they are, my good ones:


The central spot on the light one was created on purpose so that there were no halves, quarters and other fragments around the medallion :) All these fragments create a feeling of incompleteness, randomness, and in harmonious work, the less accidental, the better. Historically, all works of arts and crafts have been completed, complete, like a fully told story. But torn or cut off fragments are already an unsaid story (of course, there are exceptions to this rule, but this is not the topic of this master class :) Therefore, it was important for me to “tell the story” and make all the mugs whole.
For the inner picture, I prepared this cute candy - I cut it out from another picture and prepared it for implantation (I made a mirror image).


I ordered the medallion from a carpenter, but you can make it from plastic, self-hardening mass, or even from cardboard.
3.Print out all backgrounds and pictures, most often I do it on tracing paper (I have a laser printer, my favorite).
4.We start gluing- dark background down, light - up. I will skip this step, everything is clear here. The main thing is that everything should be symmetrical and without halves of circles.
5.We paint the sections of the sidewalls and the bottom, paint over the joints if the joint line turned out to be thick and white.


Paint with light paint(not white, closer to muted ivory - to match the top background) all other parts boxes, including the insides.
6. Slightly sanding unvarnished printouts on the sides. If there were some grains, spools, thick dust particles or some other debris under the printout (and I didn’t really try to keep it clean, on the contrary), they will peel off and become white dots. We do the same with bottom and painted sections of the sidewalls- sand to scratches and stains.

7. You can torment the poor box even more, like this:

8. After all our "torment" we get these specks of dust(from paint and toner from printouts), they will also be used: they can inflate on a brush with varnish and varnish the sides and insides, then on light spots there will be dark dust particles in some places, and on a dark background there will be white scuffs and scratches. It looks very natural (try to find them in the photos below). I just varnished some of the dust particles inside the box.

9. Walking dry brush with light paint on top- make old dark spots (a dry brush is a bristle with a drop of paint carefully distributed over the entire pile so that light dry stripes remain, and the surface seems to be dusted with the right color). By the way, while all sidewall sections are freshly painted and freshly varnished, it is best to insert a file between them, otherwise they will stick together when closed and you will have to start staining again.

10. With a dry brush with dark paint, we go through all the light areas and edges.

11. The next stage of aging: dilute liquid paint, patina, medium with water- whatever you want, and applied to internal edges and faces.


Wipe dry, there remains a slight staining of the inner ribs, this cannot be done with a dry brush.

12. We implant the pattern on the back of the lid(we coat the image itself and the place on the workpiece where we want to implant it with glossy varnish, then we apply the printout with the picture to the workpiece and carefully align it, drive out bubbles and excess varnish).

As you can see, this printout is also made on tracing paper. And it is much more convenient and faster than implanting an office sheet.

13. We torture implantation (you can use sandpaper, you can use a brush for brushing):

14. Optional apply liquid patina to the ribs(but no longer water, namely liquid based on a medium, or ready-made Antik Plaid, or paint with a moderator or medium). Target - soil the notch between two ribs.

15. The same patina apply to the corners and edges of the lid:

Thoroughly shading, removing excess. This is what aging looks like:

16. Repeat in the middle of the lid– under the medallion and around it.


And on the sides:

17. Glue the printout on the medallion, paint the side sections, go through the liquid patina along the top and dry brush with light paint along the edges of the medallion.
18.Varnishing. Solvent-based matt Marabu varnish is very cool, a couple of layers are enough. The surface is very matte, pleasant to both the eyes and the palms. No skins, let there be a lot of bumps and bumps (but not smudges of varnish).
19.Glue the bow on the sides of the lid, having previously traveled to several stores in search of a suitable chocolate shade :)
And here is the finished job. The only pity is that I only have photos taken at the exhibition: before it - I didn’t have time, after it - alas :)


(Photos enlarge by clicking)
I have always loved this box, despite its simplicity. Maybe because the chocolate color is so win-win, maybe for some other reason ... But the hands reached the master class only now, although they were made almost two years ago :)
At the next master class from "Crafts Schools" on the Baby BY we learned how to decorate a wooden box using decoupage technique. Lesson conducts Oksana Sidorskaya. We invite you to familiarize yourself with the technique.
Preparatory moments
To decoupage the box, we need the following materials:
- wooden blank of the box;
- soil universal;
- acrylic paints;
- napkin;
- glue for napkins;
- sandpaper;
- acrylic varnish;
- patina color antique;
- putty or texture paste.
We also need the following tools:
- brushes;
- sponges or sponge for washing dishes;
- palette knife;
- stencils;
- iron.
Let's get to work:
Step 1. Primer.
To begin with, when buying a blank, pay attention to its integrity. If you nevertheless purchased a box with a minor defect - a chip or crack, restorative primer or wood putty will help repair it.

|
We skin the blank, remove notches and burrs.
We paint the front side of the box white, dry it, if necessary, sand it a little (if suddenly there are obvious marks from the brush). Now we will glue the napkin. We use a new method - gluing a napkin with an iron.
We cover the painted surface with a layer of glue, not thinly, but not too thick. Make sure that the entire surface of the front side is covered.
We put a napkin on a glued and dried surface, on top of a cotton rag or a sheet of parchment paper, “glue” the napkin with a hot iron. The glue under the napkin warms up and sticks it to the surface. Carefully remove the rag and get an excellent result. The napkin did not stretch and retained its brightness.
Now paint the sides of the box in the desired color. Of course, we choose the one that will be combined with the napkin motif. What it will be - you decide.
We cover the box with a layer of acrylic varnish. I want to note one point: when using building acrylic varnishes, special attention should be paid to intermediate skinning so that the box has a beautiful, even surface.
If you use special varnishes for creativity, then this process will be much easier. Some varnishes do not require sanding at all, because they lay down in an even layer and self-level on the surface. The only thing that stops you from buying such wonderful varnishes is the price.
After the first layer of varnish, you can put stamps on the sides. If suddenly you do not like the result, then the paint from the varnish can be safely wiped off with a damp cloth.
We clean the paint with a sandpaper that accidentally got inside the box (to prevent this from happening, you should paste over the edges with masking tape). We treated the inside of the box with stain.
Using a palette knife, we smear the wood putty on top, level it, then carefully remove the stencil and, voila, we have a beautiful element without any extra effort. After complete drying, the putty lends itself remarkably to sanding, so we can remove the bumps. If desired, you can paint in the desired color.
Step 6 Lacquering.
Metal wool gives a wonderful result; it is sold in hardware stores. With a small piece in a circular motion with a little effort, we grind the last layer of varnish, cotton wool removes small flaws, but also removes gloss.
Step 7 Admiring the finished work.
.jpg)
|
When the box is ready, you can give it to a loved one. And if it’s a pity to give, then this is a sure sign that the work came out well!
Wishing you success and good health
to your golden hands, Oksana Sidorskaya
How can you radically change the design of an object? Turn an old thing into an original interior element? It is necessary to resort to the decoupage technique, which involves decorating old objects with paint, varnish, paper or napkins. One of the most common styles for decoupage is vintage. You can give a valuable antique look to a chair, chest of drawers, casket, chest, book. People who are just learning the decoupage technique are advised to start by decorating small items, such as wooden boxes, and watch the master class first.

A master class on painting and drawing a picture on the box begins with the preparation of materials and tools:
- Decoupage cards, napkins or paper with the selected image.
- Sandpaper.
- Acrylic paints.
- Craquelure varnish (optional).
- Glue.
- Screwdriver. It is necessary if the box has removable metal elements.
- Wax. You can take a candle.
- Tassels.
- Sponge.

In order to do all the work in the correct sequence, it is recommended to watch the master class on decoupage of the box on the video.

For decoupage, you can take a plastic box, but it is better to take a wooden product. Before decorating, the box must be prepared.
Step-by-step instructions for pre-processing an item:
Advice! To prevent paint from getting on the inside of the box, you need to stick adhesive tape on the inner edges of the product.
After all these steps, you can proceed to the transfer of the picture. But, if you need to get a realistic vintage thing, you should use some tricks and artificially age the product.
Technology craquelure
Valuable antiques often have scuffs and cracks. To create the same effect on a modern box, you can use a special craquelure varnish that cracks when dry. It is applied with one stroke on the base color.
You can achieve this effect with ordinary acrylic paints. For this you need:
- Cover with base paint. Done after sanding. As a base, it is recommended to take a dark color, for example, brown. The paint must dry completely.
- Apply wax. With it, you can get the effect of attrition.
- Cover the box with light paint. You can take white, cream, light gray, pale blue, pink or other light paint. Before proceeding to the next step, you need to wait for the product to dry completely.
- Rubbing with sandpaper. It is carried out until the upper one begins to protrude under the lower layer of paint. Step-by-step instructions for craquelure can be seen in the photo.
If the owner of the box does not like the worn paint, then the craquelure step can be skipped.

Decorating with an image
The next stage of the master class is drawing an image. In order for the decoupage of an old-style wooden box to be successful, all actions must be performed step by step:
- Image preparation. A napkin or decoupage card should be applied face down to the surface of the box, circle the edges with a pencil. Next, you need to cut out the pattern.
- Apply glue to the surface of the box with a flat brush.
- Attaching an image. It must also be smeared with glue on top. PVA may leave white streaks on the surface, but the streaks disappear after drying. There should be no air bubbles between the paper and the box. If they appear, you should raise the drawing on one side, lower it again, getting rid of the bubble, and grease it again with glue.
- Rubbing corners and edges with a sponge dipped in dark paint.
The final stage
After the glue has completely dried, the box should be varnished in several layers. The varnish will protect the image from abrasion. Each coat of varnish must dry before applying the next.

After the varnish has dried, the metal parts must be returned to their place. If the old jewelry does not fit the vintage style, they should be replaced.
Additional decor
As additional decorative elements, you can use old black-and-white and yellowed photographs or postcards, buttons and lace. All these elements are attached with glue.
White lace can be further aged by applying beige acrylic paint to it. After drying, the lace can be glued to the outer or inner sides of the box. Lace gives the box femininity and sophistication. No less interesting is the decoupage of a wooden box for a book. This decoration option can be seen in the photo.

Interior finishing
A decoupage box should look beautiful not only on the outside, but also on the inside. To decorate the inside of the wooden box, you can take the fabric.
All actions must be performed step by step:
- Pick up a suitable fabric and cut out of it a piece equal in size to the bottom of the box. Scarlet or emerald velvet will look beautiful.
- Attach double-sided tape to the bottom of the box.
- Dilute PVA glue with water in a ratio of 1: 3.
- Soak the fabric in glue and dry it.
- Attach fabric to double sided tape.
Decoupage is a great way to make a jewelry box, book or piece of furniture unique. To succeed in this business, you need to show imagination and creativity. One way to showcase your sophisticated taste is to place a vintage-style jewelry box in your room. You can give the object a noble touch of antiquity with your own hands, step by step following all the instructions of the masters.
Recently, decoupage has become fashionable. This is a fairly simple technique for decorating various objects with your own hands, which can be easily mastered not only by an experienced needlewoman, but also by a beginner. The essence of the technique lies in decorating the surfaces of objects with carved printed pictures and subsequent varnishing.
You can use special sheets sold in needlework departments and ordinary napkins with a pattern you like. Some masters print pictures on a napkin or photo paper. using a regular printer. In this case, the image needs to be processed a bit before being transferred to the surface. But more on that later.
What can be decorated with decoupage
Basically, anything. This technique is applicable to wood, glass, plastic, cardboard, i.e. you can decorate photo frames, vases, furniture and even candles.
In this article there will be several master classes on decorating drawers of various shapes: round, rectangular. For example, if you want to present an original gift, you can use this technique to decorate a little thing for tea bags. Or, if you have theater friends, give them a hand-decorated ticket holder.
creative ideas there is an unlimited number of decorating in this technique, but it is easier for beginners to build their ideas around a particular direction. As in any other creative direction, there are different directions in decoupage: vintage, provence, shabby chic, pinup and many others.
Decoupage looks most interesting in Provence and Vintage.
Basic tools
What to have on hand:

Caskets that are used in creativity are also called bases.
- An old chest that needs to be updated, or a blank purchased in advance in a store;
- Sandpaper (fine-grained);
- acrylic primer;
- Acrylic paints;
- brushes;
- Foam rubber (or a regular sponge for dishes);
- PVA glue;
- Pictures with a suitable pattern;
- Additional decorative elements (accessories, ribbons, twine, etc.);
- Finishing varnish (matte or glossy, purely decorative or having a protective function).
In the list of basic materials and tools, you can add polymer clay to create three-dimensional elements or a coating for craquelure to create the effect of a cracked picture. For the effect of aging, you need an ordinary wax candle (preferably colorless).
Decoupage of a round casket
Let's start with a small master class. The proposed idea is simple to implement and even a beginner needlewoman can easily cope with it.
We will need:
- Napkin with an ornament;
- A cloth with a pattern is if you do not know how to draw at all;
- If you know how to draw at least a little, then you will need a drawing that you want to draw and tracing paper;
- acrylic primer;
- Acrylic paints: white, cream + for the pattern (it depends on the napkins), in our case dark green;
- Glue varnish (instead of the usual PVA);
- Finishing coat;
- Brushes, sponges, sandpaper.
Stages of work:

An example of updating an old thing.
- If you have a blank purchased in a store, then it does not require additional sanding. If you take an old thing, then you need to clean it and walk on it with sandpaper.
- We prime the surface. Don't forget to prime the inside as well if you're painting over it. If you upholster with fabric, then you do not need to primer. Let's dry.
- We cover the outer surface and the cover with white acrylic paint. When it dries a little, we coat the inside of the product with cream (if you are going to upholster with a cloth, then this is done at the very end).
- Let's put the lid aside for a while and work on the base. Glue a napkin with an ornament on the outside with glue-lacquer. Pre-separate it into layers, you only need the thinnest top layer with a pattern. We paste it. You can pre-cut the rag to the height of the future product or carefully cut off the excess after gluing.
- We can age our casket a little. To do this, with the help of a fine skin, you need to remove part of the paint and ornament. After that, you can cover with a topcoat.
- Let's take the lid. The easiest option is to use PVA or the same glue-lacquer to stick a picture on the lid. It is better to cut off the edges of the napkin. The second option with painting requires additional preparation. On the tracing paper, apply the desired pattern. We paint over the inside of the tracing paper with a colored pencil. Next, put the tracing paper on the lid and circle with a pencil. Now there is a drawing on the lid. We mix green and white paints to get a couple of shades and paint the base. Let's dry.
- Finished with a matte finish. Let dry, cover with a second layer.
- After complete drying, you can complement our decor with rhinestones.
Often, instead of applying a patterned cloth to the sides of the base, they are simply dyed and decorated with a wide ribbon or lace, over which stick a narrower tape and tie a bow.
Decoration in Provence style
First, let's figure out what is typical for Provence. Colors: white and pastel. Firstly, abrasions and roughness. Secondly, lavender, sunflowers, everything related to winemaking, plant and flower elements.
For the next MK, the same materials are needed. We need a wax candle, acrylic paints of dark brown and any light (white, milky, lavender, etc.) colors.
Stages of work:

Provence with shades of purple always looks very sophisticated.
- If necessary, we grind our workpiece. Clean and primer.
- We cover the outer part with dark brown paint. Let's dry.
- Then, with a wax candle, we go through all the folds and corners, as well as along the sides in a chaotic manner.
- We paint over all surfaces with light paint.
- After complete drying, you need to go through the zero sandpaper in those places where we had wax, a dark layer will appear there and there will be a worn and aged effect. Instead of the skin, you can take a hard metal sponge for dishes.
- Then you can simply apply the selected ornament to the cover. First apply craquelure so that cracks appear. Then glue the cloth with the pattern.
- Finished with a matte finish.
- A good addition would be elegant antique fittings, which could be lying around in your bins and which, if desired, can be specially purchased. A small thing will look unusual if you attach antique legs to it - it will look like a chest. For decoration, it would be appropriate to hang a decorative lock or a working lock-clasp.
The photos from other master classes show interesting products in Provence, which will look good in the kitchen or in the country.
Decoupage in vintage style
Another popular style is vintage. The name originates from French winemaking term. Characteristic is the effect of antiquity, the colors are muted and pastel.
Unlike Provence, dark colors are also used here. The images contain children, toys (mostly bears), animals, ladies, chubby angels, flowers, in particular roses, but not in bright cheerful colors, as in shabby chic, but in calmer deaf colors. For additional decor, you can use imitation pearls, lace. All the effects of aging are extremely popular - craquelure, scuffs. It is round crafts that look original and elegant in Vintage.
Below you will find a small master class on making a chest in Vintage for the New Year and Christmas. So the main task is pick up pictures relevant topics. But since vintage cards, especially Christmas cards, are all the rage right now, it's not difficult.
If you don’t like anything, you can print your favorite picture on a color printer both on a napkin and on photo paper. Just attach it with adhesive tape to an A4 sheet and print, then work like with a regular napkin.


Photo paper needs to be covered with 4 layers of acrylic varnish, allowing each layer to dry for 1-2 minutes. Then we put our picture in water for a few minutes, take it out and carefully separate the top layer-film with a picture. Next, we apply to the product using a file.
Preparing the base before applying the image is the same as for Provence. Colors are selected according to the taste and color of the picture. For Christmas and New Year products, the bottom layer can be dark blue or emerald. And the top one is snow white. Before applying the finishing varnish, you can decorate with pearlescent glitter.
Experienced craftsmen show real class. Here is one example: decorating a box (video) in a French vintage style and a master class with amazing design ideas.
Let our ideas and the master class below inspire your creativity. Good luck!
Photo gallery


Today, decoupage is used in the design of completely different items: both exclusively decorative and functional. Thanks to a wide range of decor materials and the ability to choose any design theme, such a simple but effective technique is ideal for finishing products for storing personal items. In what ways and how you can make a beautiful decoupage of boxes - read the article.
To create decorative boxes, blanks are used - boxes with compartments, solid or carved, mobile, flexible or independent lid without external and internal decoration. The blank can be large and small, made of wood, plywood, MDF. Natural wood products are highly durable and environmentally friendly, when plywood and MDF blanks are cheap.
Blanks of different shapes and sizes can be made independently from papier-mâché.
There are different types of blanks of different shapes, sizes and configurations for a variety of purposes. So, a blank with a pull-out block with ten compartments is suitable for storing small items (for example, rings), can be decorated in the style of “Barbie Chest”, which can be decorated with pink fabric, sparkles, a mirror, etc. and is perfect for as a gift for a little girl. And the six-compartment blank can act as an elegant place to store tea bags.
In online stores, you can find a box blank and a pencil case blank (the principle of operation of these boxes is based on extending storage compartments), an apple blank (it can be of various diameters), slatted boxes in the form of boxes for decoupage in a loft style, a heart blank .
Blanks can be made with your own hands using newspaper tubes weaving on a thick cardboard frame, cut out of a decorative zucchini.
Accessories for decoupage boxes
The design elements of the caskets include all the details that have a decorative and applied character. So, accessories for decoupage of caskets are conditionally divided into decorative-functional and exclusively decorative. The first type of products includes all kinds of locks, corners, hinges, legs, etc., the second - borders, pictures, textiles, sparkles, sequins, etc.

Borders for boxes
For decorating boxes, you can use handicraft borders - functional blanks that can be used to decorate the lid of the box and sidewalls around the perimeter. Borders can be both patterned ribbons with floral or geometric ornaments, and stripes with various images (from flowers, fruits and vegetables, to cockerels, dogs, musical instruments, etc.)
Pictures for decoupage boxes
Pictures for decorating boxes can be represented by ordinary paper napkins, rice napkins, stickers, clippings from newspapers, magazines, books, prints on plain and photographic paper, decoupage cards. Working with any decorative element presented has its own nuances and features. So, pictures from rice napkins are not cut out with scissors, but are torn out manually, and printouts and decoupage cards with a high density are applied by “implantation” with the help of varnish.
How to decoupage wooden boxes
Decoupage of wooden boxes is the best solution for independent work of beginner decorators. This technique requires a minimum of skill, materials and time, while guaranteeing an effective and attractive result. To decoupage an ordinary square wooden box, we need a decoupage card according to the size of the lid, glue and decoupage varnish, acrylic light brown and paint to match the napkin, glazing medium, two-step craquelure, rough sandpaper, brush, file.

To perform decoupage you need:
- Sand the surface of the box and seal the lid with masking tape, on which, in the future, the drawing will be placed.
- Paint all edges of the box with acrylic light brown paint with a glazing medium.
- According to the pattern of the tree, add paint to match the napkin (also diluted with glazing agent).
- After the paint has dried, sand the edges of the box to white.
- Overlay the picture on the file inside out, soak in water
- Place the drawing on the cover, remove the file, paint over the drawing with glue.
- Sand the edges of the picture and cover it with craquelure in two layers with intermediate drying.
- Varnish the finished product.
Malachite decoupage boxes: master class
Malachite painting is a rather complex and painstaking work that allows you to get a picture that imitates the surface of a bright green mineral. In order to perform this type of decoupage, you will need: a decoupage card or a napkin with a motif in the color scheme corresponding to malachite, acrylic paints (black, white, turquoise, dark and light green), acrylic drying retarder, thick cardboard, scissors, synthetic brushes, gold pigment, foam sponge, sandpaper, plastic bag, glossy decoupage varnish.
Making the box:
- We prepare the surface of the workpiece for decoration.
- We cover, with the help of a foam rubber sponge, the entire surface of the box with white paint mixed with light green.
- We process the layer with sandpaper and varnish.
- We apply turquoise paint on the surface of the box with strokes (leaving free spaces) and press the strokes with a plastic bag to obtain non-standard prints.
- We take dark green paint and add black blotches to it, apply it in the same way to the area already drawn in turquoise.
- We take cardboard, apply it to the strokes and remove them, pull them to the side.
- We fix the result with varnish.
- We add a retarder to each paint and apply strokes using curved cardboard, alternating light paint with turquoise and dark.
- The result is fixed with a fixative varnish.
- After the product has completely dried, glue the napkin, add gold pigment to the protruding contours and varnish the product.

In this technique, both rectangular and round, oval caskets can be framed. Such decoration requires perseverance and a lot of time, but it allows you to create an incredibly beautiful, unique product with a surface that imitates malachite.
In order to perfectly master this decoupage technique, you should complete special author's lessons and take courses such as, for example, Olga Sukhova.
New Year's decoupage for the box
New Year's boxes can be decorated similarly to traditional decor with napkins or decoupage varnish printouts. The second method guarantees the maximum fusion of the picture with the surface of the box.
Lacquer printout is prepared as follows:
- We cover the picture printed on glossy photographic paper (with allowances) with acrylic varnish in four layers with a drying interval of one to two minutes.
- We soak the printout in water, after that we lay it out on the table with the paper side.
- Using a needle, separate the top film layer from the paper.
- We transfer the film-image to the file face inward.

After decorating the surface of the box in New Year's colors, you need to overlay the image on the desired area and delete the file. The image should be fixed with glue, applying strokes from the center to the periphery. You can use sparkles, sequins, glitter, artificial snow and ice (semolina, decorative putty, moment glue) as decorations for decorating the box. The finished product must be varnished.
When covering the box with varnish, you need to ensure that there is a gap between the lid and the box: the varnish should not go into the gap, otherwise the decor can be damaged when opened.
Vintage decoupage of a round box
Decoupage of a round antique box is a simple and beautiful way to get an attractive product that will look great in a French country interior. In order to make vintage decoupage, we need napkins with large flowers, acrylic brown and white paint, gold pigment, wax, PVA, brushes, foam sponge, decoupage varnish.
We make the box step by step:
- We carefully skin the surface of the box and apply brown acrylic in several layers.
- We cover the semicircular edges of the box with wax.
- We apply white acrylic with a foam sponge.
- We skin the places where the wax was applied to a brown base.
- We apply a dry napkin to the surface of the box and glue it with PVA. Thus, we completely decorate the workpiece.
- After the applications have dried, we apply brown acrylic with a sponge, and then a golden pigment, on the protruding edges of the lid, the bottom of the box.
- We cover the product with decoupage varnish-fixer or yacht varnish.

If desired, inside, the box can be decorated with a fabric with a motif corresponding to the overall design, floral patterns can be applied using a stencil.
A master class on how else you can make vintage surface aging can be found on the YouTube channel "Decoupage from Anna Turchina".
Dried lavender flowers, polymer roses can be used for volumetric decor of a box in a vintage style. The center of the lid of the box can be decorated with a plaster angel.
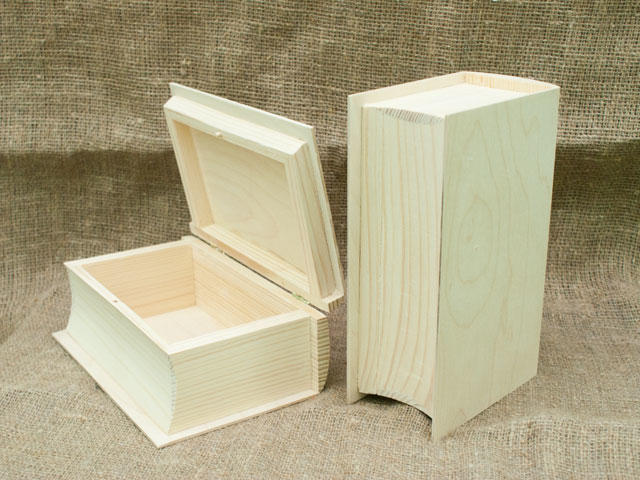
Box-book: decoupage
To design a box in the form of a book, you will need an ordinary blank, a table fork, a palette knife, acrylic paints, brushes, decorative pine-colored putty, glue, decoupage varnish, decoupage cards, sandpaper, foam sponge, file, masking tape, decorative corners.
Let's get to work:
- We skin the surface and cover with white acrylic the top and bottom covers, the sidewall with hinges.
- After the acrylic has dried, we glue the decoupage card using a file (the method is described in the New Year's decoupage master class) on the painted surfaces.
- We model the pages: we apply putty on the front side face with a three-millimeter layer and pierce the grooves of the pages with a fork.
- We tint the dried grooves, mixed with black, brown acrylic paint, add gold pigment.
- We decorate the corners of the book with carved, forged elements.
- Optionally, we make interior decoration (we decorate the inner surface with a decoupage napkin, fabric, text, etc.)

The book is ready!
Ideas for decoupage boxes
Decoupage of boxes allows you to realize absolutely any creative ideas, because the design can be done using both traditional materials (fabric, paper napkins) and improvised means that can be easily found at home (for example, small zucchini, table salt).

So, as a decoupage of children's boxes, you can use both traditional decor with napkins and stickers, and original decoupage on eggshells: this method allows you to get a unique, incredibly attractive, three-dimensional mosaic. For a tea box, a straight six-compartment blank box and decoupage with a stencil may be suitable, and for a wedding one, a heart blank and decoupage with a photo of the newlyweds.
Original decoupage ideas can be found on the Fair of Masters website.
Decoupage boxes (video)
Boxes made by hand using decoupage technique are incredibly beautiful, unique products that can be a great gift for a wedding, birthday or anniversary, for both a woman and a man, a unique and practical element of the interior. Get inspired by decoupage photos and hurry towards exciting, creative work!


