Richelieu embroidery: diagrams and step-by-step description. Features of the cutwork technique and the choice of materials
Weightless openwork, delicate embroidery - all these are integral components of richelieu. A few centuries ago, this type of needlework was incredibly popular. Richelieu embroidery was used to decorate home textiles and clothing. It is no less in demand today. A thing decorated with such embroidery invariably attracts admiring glances. Everyone can master the technique, find patterns and show a little perseverance when doing cutwork!
Richelieu do-it-yourself: features of technology and choice of materials
This type of embroidery differs from others in that an openwork is created during its execution. The fabric is not only decorated with stitches. At the end of the work, the necessary places are carefully cut out with small sharp scissors. In order for the final result to be of high quality, it is worth understanding the technique of making cutwork. It is equally important to stock up on the right material and other necessary devices.
Further use of the openwork surface depends on the composition and type of fabric. It should not stretch in different directions and deform after washing. Usually natural fibers are chosen for cutwork. For beginner embroiderers, it is better to opt for cotton or linen of medium thickness. Also suitable for satin. Remember, the thinner the material, the more difficult it will be to work with. Threads can spread to the sides. Therefore, it is better to make cutwork on silk and similar fabrics when you fill your hand.
It is important to choose the threads of the desired tone. A few centuries ago, colors matching the fabric were commonly used. Variations are now allowed. To decorate clothes, you can choose threads 2 tones darker or use contrasting colors. Their composition depends on the type of material. For natural fabrics, cotton or silk threads are usually used.
You will also need standard embroidery needles, small sharp scissors. It is clear that the outlines of the cutwork depend on the template. As it can be used stencils. Usually they are transferred to the fabric using special markers. It is more convenient to use water-soluble. They draw lines like an ordinary felt-tip pen. But if a piece of fabric is wetted, the pattern will disappear. With the help of such a marker, the work is more accurate.
Some craftswomen embroider with a sewing machine. In this case, you will need to additionally buy soluble and regular flesilin. In addition, the machine must have an embroidery option.
Richelieu embroidery: photo and step-by-step execution

Before you start embroidering, you need to decant the fabric. This is done so that it does not shrink during subsequent washings. Usually it is dipped in warm water, squeezed, and then dried. After the material is ironed. Next, they begin to translate the drawing. Most often, geometric or floral motifs are used.
You need to carefully consider the lines. Parts of the pattern must be connected to each other. Otherwise, after cutting, the embroidery will simply fall apart into pieces. If the distance between the outlines of the pattern is too large, then at the end of the work the lines can be connected with special details-brides.
At the picture, only the contours on which the stitches will be located are outlined. The canvas is fixed on the hoop so that it does not move. After that, start embroidering. Along the contour, seams are laid forward with a needle. The main stitches are performed in the technique of satin stitch. They can be in the form of flooring, contour or single. It should be remembered that certain details are embroidered in different ways.
Round elements are preliminarily performed in a circle, making stitches forward with a needle. Then, dense straight or inclined seams of the smooth surface are placed on top of them. They can lie one on top of the other. After you complete the entire circle, you need to fasten the thread. To do this, the needle is threaded under one of the last stitches. Complete the round element by creating a slot. To do this, make 2 cruciform incisions from the center. You should get "petals". They are turned up and cut close to the seams.
In order for the work to look voluminous, some elements are made using the shadow surface technique. To do this, select threads of the same color, but different shades. One should be darker than the other. Then mark the element with stitches. In one part, the light part will be located, in the other, the dark part. They are covered with satin. Stitches should be done so that the transition of colors is invisible.

Often a large volumetric detail is required. To do this, it is also pre-quilted with a seam forward with a needle. It should be located along the contour and inside it. Then, on top of the stitches, satin stitch embroidery, made with a flooring, is placed.
The embroidery is completed with the formation of bridles. They help to connect too large spaces without a pattern. The needle with the thread is pulled along the front side between 2 points 2-3 times. The thread should lie tightly on the material, without pulling it together. Then it is sheathed with buttonhole stitches. It turns out a twisted thin strip. Brides can be used to create an openwork mesh, making embroidery look like lace.
Richelieu: beadwork
Sometimes you can find a variant of cutwork with beads. It can be done in different ways. At the same time, for each of them it is worth choosing beads of the same caliber. Otherwise, the embroidery will be inhomogeneous. The smaller the beads, the denser the pattern will be.
Some needlewomen sew them on in the same way as when making paintings. Invisible punctures are made on the inside. One bead fits snugly to the other. Thus, the contours of the pattern are filled. At the end, the desired parts of the canvas are cut out.
There is another way to create a richelieu. Beadwork is done on a canopy in pre-cut areas. You can make various patterns or openwork, and then carefully attach them to the fabric in the right places. The only thing to remember is that this method is more decorative. It is not very suitable for decorating clothes. If the thread breaks, then all the work will go down the drain.

It is much more versatile to stitch the contours with beads, then make cuts. It is best to use cutwork beadwork to create openwork false collars, jewelry and dress decor.
Do-it-yourself Richelieu has a number of features:
- Cut out the fabric at the very end. After you have completed the desired sections with a smooth surface, wash the embroidery with your hands. Don't twist it. Squeeze lightly with your palms to get rid of excess water. Let the cutwork dry, iron it with an iron. Only after that you should proceed to cutting.
- In order for the work to come out elegant, do it with threads of different shades. It looks especially beautiful on floral patterns.
- Loop stitch is often used to reinforce contours. It is located at the edges and narrow sections. First you need to make a stitch from left to right. He is not pulled. Just pierce the fabric with a needle. Then she is taken up. They make a new hole. The needle is pulled down so that the thread lies under it. Pierce the fabric again, but already at the bottom.
- Finished embroidery needs special care. It can be washed by hand or by hand in the machine. In the latter case, it is better to put the fabric in a mesh laundry bag. The embroidery cannot be twisted. If it is very wet, then it is better to wrap it in a towel, after smoothing it out. When the water is absorbed, the damp cloth is ironed.
Richelieu embroidery can easily transform clothes, tablecloths and napkins. The schemes are beautiful geometric and floral patterns. Usually, embroidery is done on linen, cotton and silk using a smooth surface. It fills the contours of the elements. Openwork is obtained due to the fact that at the end of the work, empty gaps are cut out with sharp scissors and the empty spaces are connected with brids.
Richelieu needlework is also called openwork. It is distinguished by its originality and airiness of patterns. In this technique, hand embroidery and machine embroidery are distinguished. It combines several types of stitches that are also used in other embroidery techniques. Richelieu embroidery attracts many lovers of needlework with its subtlety and grace.
Basics of embroidery Richelieu
- Fabrics are better to choose cotton, linen or silk.
- The thickness of the threads must always match the material. For thick fabrics, thick silk threads are used, for delicate ones, floss or cotton bobbin threads.
- The colors of the threads are selected to match the tone of the fabric. Other colors can be used on request. Experiments with color must be carried out carefully so as not to spoil the entire product on which cutwork is performed.
- The template is transferred to the fabric with the utmost precision. It is very convenient to use special markers, the lines from which disappear after a few days or from exposure to water.
- The fabric should be lightly washed before work so that it does not sit down in the future.
- Before you start cutting out empty spaces, it is advisable to wash the finished embroidery in the hand wash mode without spinning. The product is dried neatly laid out on a towel, and ironed a little damp.
Watch related videos:
A little about Brides
Brides are the connecting elements that reinforce the embroidery. Patterns of small size with a small number of holes are performed without a brid. In other cases, they cannot be dispensed with. The gaps between them should be the same. Brides can be:
- Plain and lined. The latter contain knots and loops, which looks more impressive. There are usually two lining threads, which are sheathed in turn, then they are combined.
- Intersecting in the form of a spider.
- Brides with "twigs".
The main types of seams in cutwork
Forward needle - performed in the form of simple stitches equal in length to each other and the distance between them;
Glade roller. It is laid in a straight or oblique direction with stitches located next to each other.

The buttonhole stitch is also very simple. Stitches are made strictly vertically with respect to the edge.

Machine embroidery cutwork, the seam patterns of which include different types of stitches.

This is the usual straight line, “zigzags”, “eights”, “vilyushki”, scales and “mound”.
Using only these seams, you can safely take on the development of cutwork schemes.
Simple patterns for embroidery Richelieu for beginners
Floral motifs suitable for hand and machine embroidery.

Cutwork embroidery for beginners in the form of simple patterns can be done by any needlewoman with minimal sewing skills.
Geometric and floral details are unusually combined in the schemes.

This technique also depicts animals and fruits.

Drawings for embroidery cutwork can also be found in the form of monograms.

Openwork sewing is used to make many things. Blouses, shirts, skirts are decorated with embroidery, but it looks especially on wedding dresses.

This type of sewing is used in the decoration of tablecloths, napkins, bed linen, curtains. Here are some photos of such works.
Delicate, weightless, openwork - this is what Richelieu embroidery is called. And it's hard to argue with that, because it looks more like lace. The best samples take their rightful place in the wardrobes of wealthy fashionistas and are sometimes fabulous money. Bed linen, tablecloths, napkins, collars, cuffs, sleeves, dress hems are decorated with such embroidery.
We have great news - every girl can master this difficult and exciting art at the same time. All you need for this is: patience, perseverance and care. And the skill will grow with each work done. They say that Cardinal Richelieu himself liked to improve in this technique in his spare time.
Features of embroidery cutwork
A distinctive feature of cutwork embroidery is that the individual details of the pattern need to be cut out.
Preparatory work
We will tell you in detail how to make a beautiful pattern using this technique.

Fabric decathing is a process of wet-heat treatment, which eliminates the deformation of the fabric during operation and use of the finished product.
You can occasionally find fabrics in stores labeled "decated". But it's still worth debugging. To make sure everything is in order.
Embroidery process
Now let's get to work.

The smooth surface is straight and inclined, with and without flooring. To make the image look more voluminous, you can apply a shadow surface. This will come in handy threads of close tones.

Such embroidery looks very impressive - on clothes -, and festive tablecloths and napkins with richelieu were once in every family.

Also, the cutwork goes well with others: a cross, beads, ribbons, rhinestones.
Ideas for embroidery cutwork with patterns
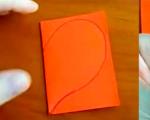
Scheme "Lily"
This cutwork embroidery scheme is ideal for craftswomen who have already mastered the steps, but are not ready to cut a lot.
In this embroidery, you need to sew all-all lines with a “forward needle” seam, fill in the double contour of the pattern and the stamens of the flower with a satin stitch. Then do the brids.

Brides are thread jumpers that hold individual parts of the embroidery and prevent it from spreading.


Schemes of motives for napkins, scarves
Richelieu embroidery is very good because simple patterns can be arranged as you like and get original drawings.

From the motifs in the diagram below, you can create a magnificent ornament that will decorate a festive tablecloth. And napkins with two or three motifs will complement the ensemble and add zest to the feast.

Schemes of floral motifs
Floral motifs look great in patterns. Due to their simplicity, they are equally easy to create with your hands and with a sewing machine. Both an experienced embroiderer and a debutante will quickly cope with them.

Such an embroidery made with a shadow stitch will look unusual. That is, the elements in color will differ from each other by several tones. This will complicate the implementation, but at the same time add sophistication and even some chic to the product.
Suitable for decorating almost everything: bed and table linen, handbags, scarves.
Embroidery pattern for a sewing machine
A simple cutwork embroidery pattern for working on a sewing machine is ideal for beginner craftswomen. This work is carried out in the classic cutwork technique: stitch all the lines with a simple seam, embroider the necessary elements with satin stitch, make bridles, cut holes with sharp scissors close to the edge.
Suitable for napkins. Such products are especially good if they are made with a tone-on-tone thread with a slight sheen with the base.

It is very interesting to combine cutwork embroidery with other techniques.

In this scheme, the cutwork is beautifully combined with both volumetric embroidery, and even with a French knot. After all, the lilac-blue flowers in the box are made exactly in. And the luxurious roses around the window are a sample. True, the creation of such beauty requires remarkable patience and great experience from the needlewoman. The photos perfectly convey all the tenderness and airiness of the cutwork embroidery.

Video with lessons of a master class in embroidery cutwork for beginners
History of needlework. cutwork embroidery
An exciting video about the history of the appearance of cutwork, about the technique of execution, ideas for application. Beautiful, informative and very inspiring.
Cutwork embroidery on a sewing machine
A simple and illustrative example of cross stitch embroidery using the main seams - a roller, a beaded seam, holes. How simple and elegant this embroidery looks at the same time.
clothing decoration
A master class in embroidery on clothes. Literally before our eyes, a simple, even nondescript dress turns into a designer outfit. Magic, and nothing more.
Tell us if this article was helpful to you? Share your opinion in the comments. For us it is very important.
The type of openwork welt embroidery is used to design fabrics, create decor items and decorate clothes. It is used both for manual work, and with the help of a typewriter. The basic principle is to create an ornament, and then to remove sections of fabric inside the pattern. Richelieu embroidery patterns for beginners help you quickly get used to the technique.
The basis of the pattern is an ornament that is repeated in a certain order. Most often, floral motifs are used, but there are also images of animals. Sometimes the embroidery is so thin and unusual that you can see whole pictures in it.

How to choose a scheme?
From the very beginning, you need to decide what the product will serve for. It can be a napkin, tablecloth, pillow, applique for clothes, tulle, etc. Novice needlewomen who have taken up this art for the first time should stop at a small job, for example, a napkin or scarf. As a result, it will turn out to get acquainted with the basic basics of work and fill your hand. Cutwork embroidery patterns for beginners:


It is worth noting that if the embroidery will decorate the tablecloth, or something like that, along the edge, then the pattern should be appropriate, create a frame. The uneven edge looks especially interesting.

Patterns for pillows and napkins are works of art, they display various objects and patterns, small sketches and paintings.

It is more difficult to embroider on clothes, such an ornament is very beautiful, but this is a responsible job, if something is damaged, you will have to redo the entire product. Fashion designers have long used cutwork to decorate their outfits. Thin lace creates a feeling of weightlessness.


Types of embroidery
There are two ways to embroider in the Richelieu technique - manual and machine. Any pattern and object is suitable for hand embroidery, but it takes a lot of time. Therefore, machine embroidery is the most common.
To embroider with a machine, you do not need any complex devices and devices, it is enough to have the simplest household machine, from which you first remove the foot and teeth that move the fabric. Additionally, you can put a special embroidery plate, but this is not necessary. Thus, the cutwork embroidery process is free running, that is, the fabric can be freely moved under the needle.
Preparing the sewing machine for embroidery cutwork:
The main difficulty in machine embroidery is speed. This, of course, speeds up the process, but does not make it easier for a beginner.
It's okay, the main thing is to adjust the speed correctly, and the result can really surprise you.
Patterns for machine embroidery cutwork:


Several basic seams
An experienced needlewoman who has taken up cutwork for the first time will not find any new ways of sewing, so there should not be any difficulties. But if this is the very first work experience, it is worth getting a little familiar with the basic symbols and seams.
Note: only the image of the picture will be drawn on the diagram, no symbols, however, the main elements are embroidered with certain types of seams.
Cutwork embroidery in manual and machine techniques differ in the seams that are used.
Hand seams:
- “needle forward” and “needle back” - the simplest seams known to everyone who has ever taken up sewing;


- satin roller - used for embroidering volumetric details and consists of a series of stitches, which are then sheathed perpendicular, lay down in different directions;

- buttonhole stitch - used to process the edge of the pattern and add volume to the embroidery;

- chain stitch - consists of eyelets, fastened with a thread in front, used to fill in the details of the pattern;

- “Goat” is a cross shifted to the right or left, serves to highlight individual details, can be done with colored threads and to fill the space;

- stalk seam - well known to a lover of smoothness and is intended for decorating floral patterns, drawing veins, stitches are performed at an angle constantly, shifting in the right direction;

Machine seams:
- simple stitch - used to define the outline of the pattern;
- warp - sewn without fabric in the slots of the pattern, necessary to create brids (partition of tight rollers);
- "Mound" - is formed if you slowly move the fabric with frequent use of the needle, used with different types of stitches to fill the pattern.

Video of the main seams:
Finished scheme
Since there are no complex conditional images in the embroidery schemes, the pattern you like can be easily copied from a photo or even a finished product. There is nothing difficult in this process.
To create a completely new pattern, you need separate motifs that are connected and shaped, the result is a unique pattern for embroidery. In addition, the modern world wide web will roll around to find everything that you can think of, there are programs for such work. For example, cut work.
Creating embroidery in the program:
In order for the embroidery to be as accurate as possible and with an even pattern, the pattern is transferred to the fabric using tracing paper. First, a tracing paper is applied to the drawing and circled in all the smallest details, then the image is transferred to the fabric using carbon paper.
Video on the topic of the article
Transferring the pattern to fabric for embroidery:
Some more helpful videos:
The type of such openwork embroidery is used for decorating fabrics, making decor items and decorating things. It is used both for manual work and with the help of a typewriter. The main principle is to make an ornament, and then to remove parts of the material inside the pattern. The schemes of this embroidery for beginners will help you quickly understand the technique.
The basis of the image is an ornament, which is repeated in the same order. Most often they work with floral motifs, but there are also drawings of animals. Sometimes the embroidery is very fine and original to such an extent that you can see real paintings in it.
First we need to decide what we will need the product for.. You can make a napkin, tablecloth, pillows, applications for things, tulle and much more. Novice craftswomen who first took up this business should stop at a small amount of work, for example, napkins or scarves.
As a result, it will turn out to get acquainted with the main basics of technology and fill your hand. It is worth remembering that if the embroidery is a decoration for a tablecloth, or something like that, along the edge, then the image should fit and create a frame. The uneven edge looks very original on things.
It's harder to embroider on clothes, it's pretty cute, but it's an important job, if something goes wrong, you'll have to redo it all over again on a sewing machine. Many fashion designers have been using cutwork to decorate their items for a long time. Thin lace adds the effect of weightlessness.
Gallery: Richelieu embroidery (25 photos)


Varieties of embroidery
There are two methods of embroidery in the technique of cutwork:
- Handmade method.
- Machine work method.
For manual technique, any image and object is suitable, but it will take a lot of time and effort. That's why more popular machine type of embroidery.
 To work with the help of a typewriter, you do not need any complex apparatus and devices, enough to have an ordinary household machine, from which you first need to remove the foot and the teeth that move the material. Additionally, you can insert a special plate for embroidery, but this can not be done. So the cutwork embroidery process is considered free-running, that is, the material can be easily moved under the needle.
Patterns for embroidery cutwork
Working on a pattern is the main stage in the process of manufacturing a product; the quality of the entire volume of work of the craftswoman depends on the correct choice of the image and its transfer to the material.
How to make a cutwork pattern, master class.
 There are many simple ready-made schemes and templates that you can start working on. They are removed from ready-made things, from magazines and books. However, all these cutwork patterns can easily serve as an inspiration for a needlewoman, and making a new, unusual pattern with her own hands.
- Embroidery can be on the entire surface of a thing, or occupy only one part - a corner, an edge, a central part. Depending on the location of the embroidery on the item, the density of the material and the purpose of the finished product, an image is selected.
- In most cases, an embroidery pattern includes floral ornaments - leaves, flowers, stems, berries, fruits and much more. Almost all the details can be similar to real things, or they can be fictional. And birds and butterflies get into the drawings of craftswomen. And a new look at art offers other patterns, any that the needlewoman finds interesting. Also often on personal items, for example, handkerchiefs, the initials of the owner of the thing are embroidered.
- The drawing is depicted on paper, using a simple pencil, or you can take a marker, the lighter the outline of the pattern on the stencil, the easier it will be to transfer it to the fabric. You can cut out a couple of different parts and try to make a picture out of them, swapping them around, experimenting. When creating a pattern for embroidery, it should be borne in mind that if the image is located in the center of a thing or on the edge, then repeating details, for example, leaves, will look good. If the embroidery is in the center of a thing, or on one of its corners, then it is worth emphasizing, for example, in the form of a large unreal flower.
- You can safely transfer only a particle of the pattern from the finished scheme to a brand new stencil by modifying the details of the pattern - making them more elongated or flat. The combination of the same parts with different arrangements and with the addition of their own, unusual particles, will make it possible to make a new scheme for a certain contour of the product.
- When transferring a drawing from a finished product to a piece of paper, you can put the thing on the glass, which is placed above the lamp. Thin paper is placed on the embroidered material and all black lines are outlined with a simple pencil. The second way is to lay out a copy paper on the finished product with the smooth, ink side up, and then tracing paper.
- Next, you need to take a simple, solid, even object (for example, a tablespoon) - start driving it along the surface of the tracing paper. On the reverse side of the tracing paper, a faint outline of the finished product will begin to appear. After that, the contour can be safely outlined with a marker.