DIY Christmas tree for the competition. We make Christmas trees from improvised means
Helpful Hints
On New Year's Eve, many people decorate their homes and offices with Christmas trees.
Of course, nothing can compare with a real big Christmas tree, decorated with garlands and New Year's toys.
However, we do not always have the time or desire to buy such a Christmas tree. In this case, we can always create a festive mood with the help of small handmade Christmas trees.
1. Do-it-yourself wooden Christmas tree for the New Year

If you want to add a modern touch to your home decoration, try making these stylish pastel colored Christmas trees.
You will need:
Wooden cones
· Paints and brushes
liquid gold paint


Paint the cones in the color of your choice and leave to dry. With a brush, draw golden tops on the cones and leave again until completely dry. You can also add small dots for decoration.
2. Cork tree: master class

You won't need serious tools to make cork Christmas trees, as it's soft enough to be cut with a regular utility knife.
You will need:
cork wood
Patterned fabric
· Shiny braid
· Stationery knife
· Ruler

Cut out a cork tree shape for a Christmas tree and glue the fabric to the part.

Leave to dry. Cut off any excess fabric with a utility knife.

Repeat the same with the other part. Glue the ribbon around the edge of your Christmas tree pieces.

It remains to thread two parts into each other.

3. Christmas tree made of branches with your own hands

Use twigs and clippings from Christmas trees, fir or other trees and flat wooden discs to create fresh miniature trees.
You will need:
tree branches
Hemp or wooden discs
Hot glue gun

Make holes in the stumps larger than the diameter of the branch. Place the twig in the hole and attach it with hot glue. Hold the branch until dry.
Decorate the Christmas tree with toys and other decorations.
4. Christmas tree craft from book or newspaper pages

If you have an old unwanted book or newspaper, you can use them to make this miniature Christmas tree. For decoration, you can add glitter to the edges of the leaves.
5. Do-it-yourself Christmas tree made of cones

Gather a few cones to make simple, cute Christmas trees for your home.
You will need:
Craft paint
tassel
· Sequins
· Pots
Wash the Christmas trees in soapy water and leave to dry for about a day.

Paint the pots the color you want. Then paint the ends of each cone flake green and leave to dry.
To create a snowy Christmas tree look, leave a dab of glue on the scales and apply some glitter. Place the cone Christmas trees in pots and decorate with a foil star.
6. Gingerbread tree
And such an edible Christmas tree will decorate any New Year's table.
7. Herringbone of beads

Use beads to create a unique and vintage Christmas tree that can be placed anywhere in the house.
For crafts, you will need cones made of paper or cardboard. You can use scrapbooking paper, lace, or just beads to wrap the herringbone cone.
Use the wire to string the beads and garland them around the cone. If you completely cover the cone with beads, you can glue them on with hot glue.
8. Herringbone from satin ribbons

These Christmas trees look whimsical but are very easy to make by wrapping ribbon or fabric around a cardboard cone and attaching them with hot glue.

9. Golden Leaves Christmas Tree

You will need:
golden artificial leaves
Styrofoam cone
Hot glue gun
· Scissors

Take the leaves and cut off the stems from them with scissors. You can attach each leaf with transparent tape, starting from the base of the cone. Wrap the bottom sheets under the base and secure with hot glue.

Continue to cover the cone with leaves so that there are no white gaps and secure on top with hot glue.
10. Original Christmas tree from books

If you have a large collection of books of different sizes, stack them together to create a miniature book tree. Place the largest books at the bottom and the smallest ones at the top.
11. Herringbone of threads

If you do not know how to knit or crochet, then this Christmas tree is perfect for you. All you need is some thread and a hot glue gun.
12. Volumetric luminous Christmas tree

These simple Christmas trees look very stylish and will decorate any interior.
You will need:
paper cones
Gold spray paint
· Glass balls

Coat the cones with spray paint and leave to dry.

Mark on the cone the places where you will attach the balls. Use a knife to make holes in the marked places. The hole should be of such a size that you can insert a glass ball or bead halfway. Apply glue to the edges of the holes and insert the beads.

Place the lights inside the cone and your glowing Christmas tree is ready!

If you have a lot of coffee filters that you don't plan to use, you can use them to create a Christmas tree.
You will need:
・Foam cone
Pins
9-10 coffee filters
Buttons
· Scissors
Hot glue gun

Fold the widow's coffee filters and cut out a circle in the center.


Open the filter and put it on the cone like a ring. Gather the filter around the cone and secure with pins. Repeat with other filters. As you move up, you will need to cut off the excess paper from the filter and use it to cover the cone.
Use decorative pins and buttons to decorate the Christmas tree.
14. Paper origami Christmas tree

You will need patience to make this Christmas tree, but it is worth it.
15. Modern cone herringbone

Paint some cones green and decorate with pompoms and chenille thread.
16. Creative fluffy Christmas tree

To make this beautiful Christmas tree, you do not need any special skills.

Millet wrap the styrofoam cone with faux fur cloth and fix it with hot glue.

17. Unusual foil Christmas tree

Make a foil Christmas tree to make the decor unique. For this craft, you need to cut out the shape of a Christmas tree from thick sheets of foil and connect them.
18. Christmas tree souvenir from branches

For a minimalist Christmas tree, collect twigs of different sizes and simply secure them into a Christmas tree with hot glue.
19. Herringbone made of felt
You will need:
Styrofoam cone
Marker and pins

Cut out circles from the felt and start pinning them to the cone, starting at the base and overlapping slightly.
20. A simple burlap Christmas tree

For this Christmas tree, wrap the cone with a piece of burlap fabric and secure it with pins. You can decorate the Christmas tree with jute ribbon, thread and beads.
Hello dear readers! Here I was decorating an apartment before the New Year and realized: a Christmas tree with my own hands could help in decorating the room. And not one. And not alone
Of course, I had several ideas that I want to implement in the near future. But when I tried to find on the Internet master classes on creating these wonderful creations. Oh, with the help of which they are just not made. Before using some materials, I would not have thought of it at all. So together with you today I will admire the masterpieces of human fantasy in the field of Christmas tree handmade!

DIY Christmas (and not only) Christmas trees: master classes
Almost all Christmas trees presented today are made using different materials. Some are very unusual, artsy, rich. I would even say elite. And others, on the contrary, are as simple and minimalistic in design as possible. A la Ikea, so to speak.
DIY paper tree
The largest group today. You will see many representatives of a beautiful spruce species. Each one is different, so take your pick.
Origami
The simplest version of a paper Christmas tree is using a square. Fold the square in half (diagonally), bend the opposite sides to the center (as in an airplane) and that's it
Tip: Use this simple technique to decorate a greeting card or fold napkins beautifully.

Angular
First things first, fold the square of paper as shown in the photo. Then:
- Fold the structure so that the side corners are inside. This will result in a square, four times smaller than the original.
- Fold the right corner towards the center
- And the left one.
- Fold the right corner to the right.
- Fold this corner under.
- Do the same with the second one.
Now turn the design over and repeat steps 2-6 only for this side. It remains only to cut off the sharp lower tip and make a few cuts on both sides. Then bend each incised tip and put the Christmas tree on the table)
Circles
To create this spruce, take paper and draw a circle on it, drawing it in the necessary way, as under number 1. Next, cut out the circle and cut each section to a small circle. Now wrap each of these small sections on both sides with the tips inward, glue. Do the whole circle in this way.
Spruce will need several rows. In the photo, for example, you see a beauty of 15 layers with a cone top. Layers, by the way, are assembled on a wire, piercing the centers of the parts.

Panel in kindergarten
In kindergarten, they gave you the task to make a Christmas tree with your child? Then this option is the easiest. Take thick cardboard and colored paper. Cut out triangles from cardboard, cut the paper into strips and glue them with an overlap. Even a child can handle this. Cut off the excess. At the bottom, you can glue a skewer and stick it into the synthetic winterizer.
Tip: the resulting product can be used as bookmarks for books.

We make using improvised materials
To create this kind of fluffy coniferous creature, you will need a long metal pin on a stand and lots and lots of waste paper. Feel free to use newspapers, old magazines, etc.
Tip: additional decoration of the Christmas tree can be done with spray paint, which can be sprayed on the leaves. This will make them stronger and more durable.

Big tree of knowledge
The next beauty will be a spruce that carries knowledge. For her, you just need to put all the available books in a pyramid. I strongly do not recommend hanging an electric garland, as in the photo: fires in the New Year occur very often, do not neglect this. It is better to put ordinary tinsel and balls on the ledges.

From tubules
Incredibly simple technology. Suitable for decorating postcards and walls. Prepare several tubes folded from paper rectangles. Glue each in the intended location. The tubes can be made gradually decreasing or with a “brush” (sometimes overlay longer elements higher than necessary).
Glue embellishments from buttons or sequins on top.

fluffy
For it, you will need many, many paper strips, which will need to be glued in layers to a paper cone. And put on a cute cone hat on top. Great craft that you can do with kids


For those who love quilling
Love to spin paper spirals? Then prepare several strips of paper of the same thickness. Roll 17 pieces into spirals and pinch one end of each. For the trunk, simply roll 4 tubes, put on a skewer. Glue all parts, according to the photo. The tips of the "branches" can be decorated with cylinders of a different color, similar to Christmas decorations.

Vytynanki
I remember that my sister once mentioned that she liked the so-called vytynanki - one of the types of Slavic folk art, in which things of amazing beauty are cut out of paper. Often they are glued to glass to enhance the festive atmosphere.
And they are made like this: the desired pattern is drawn in advance on paper. In this case, spruce folded in half. And then, with the help of a well-sharpened clerical knife, all unnecessary parts are cut out. For spruce, you will need two parts folded in half, which can later be sewn in the center on a sewing machine or by hand.

Corrugated paper
Continuing the paper theme, I want to show you three simple Christmas trees. The first, with blue roses, which are made from tissue paper (like pleated, but much thinner). Each rose is created with a strip that is twisted heavily at the center and slightly looser towards the end. Thanks to the properties of paper, roses are easily straightened and become lush.
The base is again a cone.

The next spruce is very similar to the previous one, but here the strips used to create flowers are cut along the edge, due to which they are very fluffy. They are again twisted into a flower, but they do not seek to give the appearance of a rose, but simply grind them as far as possible.

From cupcake molds
Well, that's an interesting idea. I have just a bunch of these molds, which, it seems, will never be useful to me (I'd rather buy silicone ones). From each cut off the bottom and cut from one edge. And stick on a paper cone.
By the way, you can make a flat Christmas tree on a postcard from scraps, as in the photo in the master class.

Fabric Christmas trees
Floral
For this beauty, you will need a lot of flowers from circles. For them, cut out several circles from the fabric and burn the edges. It is better to take an organza, a veil or something similar. Then collect each flower on a thread and decorate the core.
Spruce again from a paper cone at the base

From felt
To create these pendants, take soft (for the base) and dense (for other elements) felt and beads. Patterns can be made directly from the photo. All that remains is to cut out the details from the felt, which then need to be sewn with a running seam and stuffed. Well, decorate, of course.
You can give such a Christmas tree to a guy - it will be very touching

From satin ribbon
Prepare beads, satin or rep ribbon (or maybe even lace?), threads and a needle. All that is needed is to string beads and loops of tape alternately onto the thread. The main thing is not to forget to fix at the beginning and at the end of the product.

From balls
The essence of creating this wonderful Christmas tree is to create a huge number of fabric balls. For each of them, cut out the circles and tighten with a thread, laying a running seam. Put a little padding inside and pull it off. Each such ball must be glued to the base.
The base can be a foam cone, a paper cone, or sewn from fabric. You can also arrange a spruce in the form of a topiary, for this you will also need a pot with polymer clay and sprinkles to create the effect of an earthen embankment.

Here is such a charm in a marine style that I got:

Other materials or the need for inventions is cunning
Sorry, dear readers, I do not want to offend anyone in any way. It's just that this expression best describes the impossibly diverse amount of materials with which people manage to create Christmas trees :))
From beads
Pretty simple, but interesting Christmas tree. Prepare for its creation chopped beads, a couple of beads and a thin wire for working with beads. First, string the top, as in photo 1. Then make four upper paws - this will be the top.
Now prepare the branches, in each of which make several loops - smaller for the upper branches, more for the lower ones. Gather all of them into one trunk, wrapping it across with a thin wire.
From plastic bottles
I respect this master class for respect for nature and waste recycling. Take a plastic bottle, cut off a smooth central part from it, which you cut into a fringe. The lid will go to the top, the bottom can be used as a delivery. Glue all the cut elements to the central rod.

From spools of thread
My friends, if you have a certain number of wooden spools of thread, then know that you are the owner of a treasure with which you can make an amazing fir tree. To do this, clean all the coils from the threads and glue the lowest row on a round dense base. Then glue row after row on the existing ones below. Simple and stylish

From sweets
The base will again be a paper cone. Attach a row of ordinary tinsel to it, then a row of sweets, then tinsel again, etc. You can glue the most delicious candy on the top (as a star). One minus - there will quickly be nothing left of the Christmas tree

From the bark
Strict Nordic Christmas trees. Which can be done if you have a paper cone and a little (okay, a little more than a little) bark on hand. Pieces need to be glued in rows so that the tree looks like a spruce.
I only ask you not to spoil living trees for this. It is better to look for already dumped by a thunderstorm. By the way, the method with small pieces is also applicable to CDs.

From sticks
We continue the theme of nature. This time we are decorating holiday boxes. Use sticks to lay out a semblance of a tree, which, in turn, decorate with threads, buttons and other decorative details.

From clothespins
This one definitely needs to be concocted for the New Year))) I have a dozen or two clothespins with hearts, it will be cool) In general, all you need is to build a rod with a stand. For example, a cap with a knitting needle. And already put on “branches” on the knitting needle. You can insert lollipops into the edges.

bohemian
And we will make this spruce with the help of feathers. The principle is the simplest - glue the feathers in rows from below. By the way, feathers can be purchased in woven. But what they painted in green - I don’t know. Maybe someone will tell?

From wire
Build the frame like this: wrap three circles of wire around something round (cans, buckets, etc.), so that each next circle is smaller (or larger) than the previous one. Then take three pieces and use thin wire to tie them together at the top and in one place on each circle.
All this can be wrapped in a beautiful garland. If you get smart, you can even hang a few Christmas decorations.

Mesh (and sisal)
Such a Christmas tree can be built in a few minutes. To do this, take a mesh or a sheet of sisal (read what it is). Put on a paper cone and wrap in several layers. Fasten with a cord from above, wrapping it with a spiral around the spruce. Decorate with Christmas decorations.

And now is the time for the most minimalistic Christmas trees, which will decorate the house and will not take up much space.
From ... Christmas balls
Here is such a pun - Christmas tree from Christmas balls. Nevertheless, it looks great. For some reason, I immediately imagined such a structure at some cool corporate party of a large company - it looks very status.
It’s not at all difficult to make this one: take a few dozen green (or whatever you want) balls and tie a thin thread or fishing line to each. The hardest part is getting the length right. Do this: Determine for yourself the right number of balls for each row and, starting from this, estimate the length of the thread. The higher the ball, the shorter the thread.

Symbol
That's what you can call the next two conifers. The first is located on the wall and is made up of pieces of tinsel imitating spruce branches. You can attach it with double-sided tape so that the ends do not stick out.

The second is simply skilfully assembled with the help of many paintings, badges, souvenirs, etc., which were collected in the likeness of a spruce. Pay attention to how some elements seem to imitate toys that are located on a tree. An interesting idea, by the way, for an original gift for February 14 - winter will still be in force, so the tree will be quite appropriate.

Well, dear readers, it's time for me to say goodbye to you. The spruce hit parade is over, share your impressions: what inspired you, what would you take note of, etc. Be sure to tell your friends on social. networks using the buttons below. Bye!
Sincerely, Anastasia Skoreva
In autumn, you often begin to think about the coming of the New Year with its festive mood, meetings with friends and family, and, of course, gifts. In addition, the New Year has been associated with the Christmas tree for all of us since childhood! Let's talk about her.)
Fortunately, people are increasingly thinking that it is not worth cutting down a living Christmas tree for the sake of a few holidays. "Cross" and I fully support this decision and believe that a do-it-yourself Christmas tree is much more interesting and humane! In addition, these are great options for those who have nowhere to put a large Christmas tree (for example, there is no free space, or an active small child is in this free space).
We bring to your attention a large selection of master classes on creating a decorative Christmas tree with your own hands, which will serve as a wonderful decoration for your home and an original gift for a wonderful holiday!
Christmas tree made of cones
A very original Christmas tree with your own hands can be made from pine cones. But we will not use the whole cones, but only their scales, so that the Christmas tree is not too bulky.

So, to begin with, we will separate its scales from the cone. This can be done with a sharp knife, wire cutters or secateurs.

Be careful, take care of your hands!

The next step is to make a cone from thick paper or cardboard, which will be the base of our Christmas tree. We turn the paper into a cone, glue it on the side and cut off the excess at the base.


Then we just take the scales in our hands and glue them in a circle, starting from the base of the cone.

You can glue each new row in a checkerboard pattern, you can, as here, one above the other.

You can glue a clove on the top of the Christmas tree (such a spice))

After the glue dries, you can start painting our beauty. To do this, you can take spray paint or regular acrylic paint.
If you choose acrylic paint with a metallic effect, then your Christmas tree will look much more spectacular.

Then we cover the ends of the "twigs" with PVA glue and sprinkle sparkles on them.


This beauty is obtained as a result of these uncomplicated actions:

Exactly according to the same principle, you can decorate the cone with chains and beads, decorative cords, ribbons, braid, etc.

Another very popular way to make artificial Christmas trees with your own hands is to weave them from beads. This is perhaps the most painstaking way, but for lovers of beading, nothing is impossible!
The detailed process of weaving Christmas trees from beads cannot fit in one article, so we share with you links to master classes previously published on "Cross".


Christmas tree made of paper and cardboard
If you have nothing to do in the workplace) or just want to add a little holiday to the office, make a Christmas tree out of paper. What's easier?)

And this Christmas tree is very similar to the design one, don't you think? It’s all because of the colored designer cardboard, which is so beautiful and bright that you don’t need to decorate the Christmas tree with anything else) which simplifies the process of making a Christmas tree with your own hands.


Secondly, for the manufacture of a designer Christmas tree, you can use threads that are wound on a paper cone using the technology for making openwork balls.

Thirdly, flower netting and bouquet netting.

The manufacturing technology of these three Christmas trees is very similar, so the process of their creation is shown in one master class.
Feather Christmas Tree
Yes, they do too! You can buy feathers in hardware stores, or maybe you have stocks of bird feathers? For brightness, they can be dyed with food coloring. It looks original, beautiful and so airy!

Candy tree
A candy tree is not only beautiful, but also delicious! Such a gift for the New Year will be appreciated by everyone: both adults and children! Watch the video tutorial from Kateryna Bay and create!
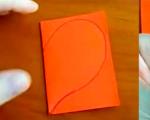
Fold the narrow side of the sheet to the wide side and cut off a rectangular piece of paper from the side. You will have a square.
 Frame: @Handimania / YouTube
 Unfold the square and bend in half again, connecting the other opposite corners.
 Frame: @Handimania / YouTube
 Unfold the paper again and turn it over. The folds should now face up. Bend the bottom of the square to the top.
 Frame: @Handimania / YouTube
 Unfold, turn the part clockwise and bend in half again. This fold line and the previous one should be perpendicular.
 Frame: @Handimania / YouTube
 Place the square with the corners up and to the side. Connect the side corners in the center and attach to the bottom.
 Frame: @Handimania / YouTube
 Fold the paper in half to make a small square.
 Frame: @Handimania / YouTube
 Bend the right and left sides of the front to the central fold.
 Frame: @Handimania / YouTube
 Turn the part over and repeat the same on the other side. Cut off the bottom corners of the shape to make a triangle.
 Frame: @Handimania / YouTube
 Unfold one side of the front and bend it inward. Do the same with all the other three sides in front and behind. The video below shows the detailed process.
 Frame: @Handimania / YouTube
 Make three cuts on the sides at the same distance from each other.
 Frame: @Handimania / YouTube
 Bend the cut corners inward on one part of the part, as shown in the photo.
 Frame: @Handimania / YouTube
 Bend this part to the other side and fold the corners on the next edge of the Christmas tree.
 Frame: @Handimania / YouTube
 Continue folding the corners on all parts until you form a Christmas tree.
What other options are there
Such a cute Christmas tree is made in minutes:
Another simple and quick craft:
Fluffy tree made from twisted paper parts:
This video shows how to make a Christmas tree from separate tiers:
Here is an unusual Christmas tree from newspapers:
From this master class you will learn how to make a small Christmas tree out of cardboard:
And this is a large Christmas tree made of cardboard in full growth:

What do you need
- White or colored paper;
- scissors;
- ruler;
- PVA glue or glue stick;
- green yarn;
- glue gun;
- green paper.
How to make a Christmas tree
Cut out a paper rectangle about 2.5 times as wide as the ruler. Put a ruler on it, bend one edge, put the second on top and glue the paper. It should completely fit the ruler.
 Frame: @Shaini Creations / YouTube
 Wrap the paper very tightly with thread.
 Frame: @Shaini Creations / YouTube
 Go over the top edge with hot glue. Cut the thread and carefully remove the paper along with the threads from the ruler.
 Frame: @Shaini Creations / YouTube
 Cut the paper and thread along the bottom edge. Remove the paper, you won't need it anymore.
 Frame: @Shaini Creations / YouTube
 Cut the piece into four pieces. Do more details in the same way. Roll the green paper into a cone, fix it with glue and trim the bottom edge so that the figure can stand.
 Frame: @Shaini Creations / YouTube
 Lubricate the top edge of one piece with a glue gun and glue it to the bottom of the cone.
 Frame: @Shaini Creations / YouTube
 Continue gluing the parts in a circle in rows.
 Frame: @Shaini Creations / YouTube
 In the same way, glue the entire cone to the very top.
What other options are there
Very beautiful Christmas tree made of woolen "flowers":
Fluffy pom-pom tree:
Such a tree will turn out if you wrap the cone with threads dipped in glue and remove them after drying:
In this master class, a Christmas tree made of threads was decorated on the wall:

What do you need
- cones;
- green spray paint;
- brush;
- PVA glue;
- salt;
- glue gun or superglue;
- decorative star.
How to make a Christmas tree
Fully cover the cones with paint and dry.
 Frame: @Art and Craft / YouTube
 Using a brush, coat the edges of the cones with glue. Roll in salt to make a "snowball".
 Frame: @Art and Craft / YouTube
 Glue beads in some places with hot glue or super glue.
 Frame: @Art and Craft / YouTube
 Glue a star on top.
What other options are there
The original Christmas tree will turn out if you glue a lot of cones to a cone-shaped base:
Here's how to make a very beautiful Christmas tree topiary:
And such a stylish Christmas tree is made not from whole cones, but from their scales:
How to make a Christmas tree from cotton pads with your own hands

What do you need
- The basis for the Christmas tree (you can make a cone out of cardboard);
- cotton pads;
- glue gun;
- beads or sequins;
- decorative star.
How to make a Christmas tree
Fold the cotton pad in half.
 Frame: @Pane, amore e creatività / YouTube
 Lubricate it with glue under the fold on one side and attach it to the bottom of the cone.
 Frame: @Pane, amore e creatività / YouTube
 Glue a few more of the same parts in a circle.
 Frame: @Pane, amore e creatività / YouTube
 In the next row, glue the discs so that they are located between the previous ones.
 Frame: @Pane, amore e creatività / YouTube
 Continue decorating the Christmas tree in the same way.
 Frame: @Pane, amore e creatività / YouTube
 Decorate with beads or sequins and a star.
What other options are there
You can make something like flowers from disks and glue them to the base: What you need
- 4 green plastic bottles of 2 liters;
- scissors;
- candle;
- lighter or matches;
- awl;
- White paint;
- brush;
- PVA glue;
- sequins;
- drill;
- wooden stick;
- glue gun;
- decorative;
- beads.
How to make a Christmas tree
Cut off the neck and bottom of the bottle. Cut the rest of the piece and flatten. Divide into six equal rectangles measuring 8.5 x 6 cm and cut.
 Frame: @Art and Craft / YouTube
 Cut each piece into a petal shape. Bend the narrow end. Make many cuts on all sides, as shown in the photo and video below. Lightly burn the cut edges with a burning candle.
 Frame: @Art and Craft / YouTube
 Try to make sure that the cut edges do not look straight. Make a hole in the bent tip with an awl.
 Frame: @Art and Craft / YouTube
 Do the same for the rest of the cut out rectangles.
From the rest of the bottles, cut six more pieces 7 x 6 cm, five pieces each 6.5 x 6 and 6 x 6 cm, four pieces each 6 x 5.5 and 6 x 5 cm and three pieces 5 x 4 .5, 5 x 4 cm and 3 x 3 cm.
Make the same petals with holes out of them.
 Frame: @Art and Craft / YouTube
 Paint the edges white. When it dries, cover with PVA glue and sprinkle with glitter.
Put one cut off bottom of the bottle on the second. Drill a hole in the middle with a drill, insert a stick there and fix it with hot glue.
Put one of the largest petals on the stick with sequins up and also fix it with glue on the “trunk”.
 Frame: @Art and Craft / YouTube
 Put on the remaining parts of the same size in a circle, fixing each with glue.
 Frame: @Art and Craft / YouTube
 For each next row, use smaller parts. Continue until you run out of petals.
 Frame: @Art and Craft / YouTube
 Glue a bow to the top, and beads to the “twigs”.
What other options are there
This tree is made even easier:
Here's how to make a Christmas tree out of plastic "fringe":
And this craft can even replace a real tree.
Summary: How to make a Christmas tree with your own hands. Original Christmas trees made of cones and tinsel. Photos and templates of Christmas trees made of paper. Homemade origami Christmas tree. Candy tree.
Even kids can take part in preparing for the New Year and making New Year crafts with their own hands. For example, even a two-year-old can make a Christmas tree from an ordinary cone and plasticine. You just need to teach him to roll balls of different colors from plasticine and fix them on the cone. The base of the Christmas tree is a spool of thread wrapped in foil.
Here are more complex options for Christmas trees made from cones. In the first case, the bump was painted with acrylic paint in green and white. In the second version, the pine cone was decorated with beads.


From a large number of cones, you can make such a Christmas tree with your own hands. The basis for the Christmas tree is a cone made of thick paper or cardboard, which is then pasted over with cones on all sides with a glue gun. Decorate the finished Christmas tree with beads and large beads.

Another very simple homemade tinsel Christmas tree. You can make it in literally five minutes.

To do this, you need to make a cone out of cardboard and stick tinsel on it in a spiral.


Candy tree. DIY candy tree. How to make a candy tree
If, before wrapping a cardboard cone with tinsel, you can fix sweets on the future Christmas tree with adhesive tape, you will get a sweet Christmas tree made of sweets. For a detailed New Year's master class on how to make a Christmas tree from sweets, see the photo below or follow the link. When creating a Christmas tree from sweets, it is convenient to use double-sided tape.


A large number of Christmas trees can be made with your own hands from paper. Let's start with the simplest Christmas crafts.
DIY paper Christmas trees
DIY Christmas tree made of paper (option 1)

Print on thick paper or cardboard and cut out the blanks with scissors >>>> Bend each Christmas tree in half and glue them together. This Christmas tree is made according to the same principle as the Christmas ball from our previous article. See link >>>>

According to the same principle, openwork Christmas trees are made from the Country of Masters website.

Epson's Singapore site offers ready-made Christmas tree templates:


DIY Christmas tree toy (option 2)
If you have an unnecessary cardboard box, then you can make such a Christmas tree out of it using the same technology.

DIY Christmas tree toy (option 4)

And you can make a curly Christmas tree by pasting the base-cone of cardboard with strips of twisted paper.


DIY Christmas trees made of paper (option 10)
To make such a Christmas tree, you must first cut out circles of different diameters from paper. You will also need a wire and a stand, which will be successfully replaced by a half of a large "kinder surprise". The Christmas tree is easily assembled on a wire, and, most importantly, it is easily disassembled. See link >>>>


Origami tree from a magazine
This origami Christmas tree is very easy to make with your own hands. Small format magazines that can be found in any home are suitable as material.

Work plan:
The procedure described below must be done with each page in the magazine. If the cover is thick, you can simply peel it off (tear it off).
1. We bend the page, the upper right corner, at an angle of 45 degrees to ourselves.

2. Once again, fold the sheet in half diagonally.

3. We pass all fold lines with a fingernail or other object so that they do not open, especially thick pages.
4. The lower corner, which goes beyond the boundaries of the magazine, is turned up.

Thus, we add up all the pages in the advertising magazine.

The result is a cute origami Christmas tree.

Origami tree from a magazine
Another model of origami Christmas trees from for the New Year. Unlike the previous origami tree from a magazine, the pages here do not fold, but are figuratively cut out according to a template.

The manufacturing principle is very simple. It is necessary to prepare a half-Christmas tree template, circle it on one page and cut it out. Further, the cut page will itself be a template for other pages. You can cut several pages at once, but you should not cut a lot at once, as the cut line will turn out to be uneven (jammed) and the tree will not open well.

The tree itself turns out to be more one-sided; to achieve volume, you can fold and glue 2-3 magazines together. But trust me, she looks good.
Christmas tree origami from modules. Modular origami tree
Assembling a Christmas tree from triangular origami modules is not at all difficult. It consists of individual branches, so you can make Christmas trees of a wide variety of shapes and sizes. In addition, from such branches you can make New Year's compositions, make toys, snowflakes, stars. See the New Year's master class at the link >>>>

Christmas tree coloring on the wall
Large Christmas tree coloring on the wall. Separate parts of this New Year's beauty must be printed on 22 A4 sheets and pasted on the wall in the correct sequence. The advantage of this New Year's paper craft is that the Christmas tree is made in black and white, so the printer's ink consumption is small. In addition, this Christmas coloring book with many small details will captivate the child for a long time. Link >>>>

Do-it-yourself Christmas tree from napkins
A master class on making a very beautiful, unusual Christmas tree from napkins can be found at the link >>>>

How to make crepe paper Christmas trees
The Land of Masters website invites you to make two Christmas trees with your own hands from corrugated paper.
Option 1. Candles and the Christmas tree itself are made of corrugated tubes. Link >>>>