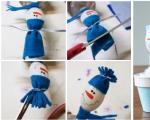
Finishing the top of the skirt with a lining using a stitched belt. How to build a straight one-piece belt for a skirt or trousers in AutoCAD
Instructions
The pattern for the belt is usually not included specifically with the details of the skirt. It is supposed to be so simple that you can do it yourself.
Then measure the width of the belt (according to your wishes and the width of a special pad that is easy to buy) and make allowances for the seams - 1.5 cm along all sections.
Iron the special interlining that you chose in the store to the wrong side of the cut-out belt. It can be called bundfix or non-woven and have (or not have) perforated edges for ease of sewing. The top edge of the waistband will end up on your fold.
Next, take the skirt and sew in a belt. Pin the waistband to the top edge of the skirt (right side to right side) so that there is a seam allowance at the left edge and a seam and clasp allowance at the right edge. Now the belt can be stitched (preferably exactly along the perforated line).
After this, turn the waistband up and press the seam allowances onto it. Iron the second longitudinal seam allowance onto the wrong side of the waistband.
Now the belt needs to be folded in half lengthwise, right side inward, and the ends pinned and stitched so that the left one is exactly next to the edge of the skirt slit, and the right one protrudes the width of the fastener. Cut the seam allowances next to the stitching, and cut the top corners diagonally.
And the last step: turn the ends of the belt inside out, pin the inner edge over the stitched seam and sew it on by hand (or sew it on a machine, stitching it along the edge to the edge). When the belt is sewn, you can sew a loop on the left end, and try on the button on the right end and sew the button to the clasp.
Helpful advice
The belt will effectively highlight the figure and give the product completeness, becoming a winning finishing touch.
Sources:
- how to sew elastic into a belt
There are many models of trousers - trousers without belts or with elastic, flared or tapered, high-rise and low-rise. But there are classic trousers that are familiar to everyone, which must be sewn with a belt. If you have sewn classic trousers, you should also sew and sew a belt on them.
Instructions
Cut out the belt to the required length and width. Glue it with a special adhesive or non-woven material. Remember that each fabric uses its own adhesive. So, for woolen and denser fabrics with an uneven structure, it is most convenient to use a special adhesive tape, but for thinner and smoother fabrics it is recommended to use adhesive dublerin or adhesive interlining with dots. All this is necessary to ensure that your belt remains in the correct shape and does not become deformed.
Process the inner cut belts bias tape. To do this, iron it and stitch one edge of the trim to the edge belts, then bend the bias tape around the cut and sew the stitch again.
Pin the belt to the top edge of the trousers, but not with the side where the trim is sewn, but with the other side, then sew a stitch along the entire length belts. Then bend the belt and gently iron it through a damp cloth.
Now start processing the corners belts. To do this, you need to grind one corner straight, and leave a button strap in the second corner.
Trim the corner and turn the waistband inside out, then iron it and be sure to make small bevels where the zipper of the trousers is located. This is necessary so that the zipper does not reach the belt and does not catch it.
If trousers that you really like have become too big, you can find a solution to this problem. They need to be sewn in on the sides or in the waistband. To do this correctly and quickly, follow the instructions below.

You will need
- - mirror;
- - chalk;
- - tape measure;
- - ruler;
- - scissors;
- - threads;
- - needle;
- - sewing machine
Instructions
If your trousers have become too big in the waist and need to be sewn in, open the belt loop, carefully support the belt and then cut it in half. Remove some of the stitching (finishing) along the middle seam. Next, work on the middle seam: close it enough so that the trousers fit better.
If you need to sew your trousers in at the seams, first put them on, stand in front of a mirror and mark the places (on yourself, chalk) where you need to reduce the volume: the back middle seam, the side seams and the seams on the inside of the leg. Mark other places that will be sutured.
Take off your trousers and baste first one leg, then the other, along the marked lines.
Put your pants back on and stand in front of the mirror and compare the legs. If you are satisfied with everything, rip out the seams and make new ones along the intended lines.
To ensure that the trousers retain their shape, reduce the size equally on both the outside and the inside of the product.
Once you have made the new seams, press them and try on the pants.
Only after you are sure that everything has been done correctly and the trousers are now just the right size for you, can you cut off the excess seam allowances and serge them again.
If you want to sew slightly flared trousers straight or to the bottom, put them on, mark the knee line with a pin. Mark the desired leg width. Take off your pants, take a long ruler and draw a straight line for the taper. Sew a seam along it, overcast the edges and press the seams. Evaluate the result in front of the mirror. If you did everything correctly, the trousers should fit you perfectly without any distortion.
Another option: put the trousers on the left side and evaluate on the spot to what condition you want to sew them, you can immediately baste or draw a seam. Remove and sutured according to the marks.
Even novice dressmakers can sew a skirt on their own. Moreover, often this is the product that many people start sewing with. As a rule, at first these are simple circle skirts with elastic and a-line. But, having become proficient, the craftswomen begin to work on more complex models. And here the first difficulties await you - some knots do not work out the first time and cause difficulties.

You will need
- Main fabric, glue fabric, scissors, threads to match the main fabric, pins, needles, ruler, chalk.
Instructions
Especially often the work gets stuck at the belt. To sew a belt to a skirt correctly and accurately requires certain knowledge.
First you need to prepare the belt itself. To do this, cut out a strip 6-7 cm wide from the fabric along the grain thread and add about 2 cm for allowances. The length of the belt should be equal to the waist circumference and another 7 cm, which is for allowances and for the fastener.
In order for the future belt to keep its shape, it needs to be duplicated. To do this, you need adhesive fabric, from which a strip is cut out in length and width equal to the finished belt. On the wrong side of the future belt in its upper part, stepping back from the upper cut by the amount of allowance, place a strip of adhesive and press it with an iron.
After this, the part is folded in half with the right side inward and stitched along the edges, going beyond the corners by about 1.5 cm. The seam allowances are cut out at the corners, and at the end of the stitching, notches are made on each side. After this, the belt is turned out, the corners are straightened and ironed.
The belt is placed with the front side on the front side of the skirt, the sections are combined, basted and machine stitched on the side of the belt. Then the seam is wrapped around the belt, its free cut is turned inside out (the cut can simply be overcast to avoid layering) and basted. The machine seam is placed on the right side either along the edge of the waistband or directly into the stitching seam.
At the end of the operation, the product must be ironed well.
One of the weakest points on jeans is the zipper. I really don’t want to throw away almost new, perfectly preserved jeans because of a broken codpiece, but wearing them, constantly risking being in an awkward position, is also not worth it. If the zipper just comes apart or the pawl breaks, don’t worry - just buy a new pawl, remove the fasteners at the bottom and put it on. But if the fastener teeth fall out or it breaks, it needs to be replaced lightning on jeans.

You will need
- - jeans;
- - new zipper;
- - sewing machine;
- - threads;
- - needle.
Instructions
Buy a zipper of the appropriate size from a store or cut it from other jeans. To sew lightning to jeans, carefully open all the parts of the old fastener, including the waistband and part of the seam that seams the legs. Then iron all the parts.
Baste one side of the zipper to the right half of the zipper. Then cover it from the wrong side with a facing and baste it again.
Since not all sewing machines are capable of sewing multiple layers of thick denim, tap out all seams with a hammer. At the same time, the material will become softer, and you can sew it without difficulty.
Stitch lightning in place of the old stitch on the sewing machine. Place another line next to it to keep the zipper secure and for a decorative effect.
An ordinary skirt is not difficult to sew. Any girl can cope with this task. But there are not the easiest moments in processing a product. Many questions and misunderstandings arise when sewing a belt. However, after reading the necessary instructions and studying photo examples, this process will not seem tedious and time-consuming, because There are different ways that can significantly facilitate this task.
How to sew a belt to a skirt 
To correctly and accurately sew a belt to a skirt, you must follow a certain procedure. There are no little things that can be missed in this process. Let's take a step-by-step look at the main stages of the preparatory process:
- First you need to make the correct pattern. The belt in this example will be fastened with a button. Using a measuring tape, measure the top cut of the product and add 2 cm to the resulting number for processing the seams and 3 cm for the protruding tip to which the button will be sewn. So, if the cut of the skirt is 70 cm, then you should draw a strip 75 cm long;
- Next, we calculate the width of the element. For example, if you need a width of 4 cm, then the total width of the entire part should be about 10 cm, where 2 cm in this case means allowances for further processing of the product;
- It is important to strengthen the element with a lining before connecting it to the product itself. You can use non-woven fabric or other duplicating composition as a lining. It is worth choosing a composition that matches the texture of the fabric. This fabric can be of different colors, so it is better to choose a lining that matches the product. For dark and dense fabrics, a black or gray lining is suitable, and for light ones it is better to give preference to white;
- We cut a strip of dublerin according to the same parameters as the belt part. Next, glue this part to the fabric. This is easy to do in a simple way: take the lining with the adhesive side and place it on the wrong side of the strip. Cover the top with damp gauze and glue the lining material using an iron;
- Next, you should dry the duplicating fabric. It is worth remembering this point: if you start work right away, the lining material may come off. Therefore, it is important not to rush into continuing the work. It is more effective to cut the belt in advance so that it is nearby at the right time;
- The belt also needs to be folded in half and ironed thoroughly. The lower cut of the inner part is treated with an overlocker or a beautiful ribbon or trim is sewn on.
Then we proceed to sewing the strip in the following sequence:
- We baste the part to the upper cut, starting from the side seam, where the zipper is sewn;
- We baste the halves from the front, folding the skirt and belt right sides together;
- We retreat one centimeter from the edge of the part. Don't forget about this important centimeter - this is the seam allowance for a short cut;
- After basting, the end should protrude by 4 centimeters. And don’t forget that from this number, you need to leave 1 cm for processing. Pins can be used as auxiliary material. This is how professional seamstresses sew products;
- We sew the elements together on a sewing machine. We remove the basting threads and be sure to iron the seam, bending it to the top of the waistband;
- Then you need to carefully connect the side sections, carefully connecting the horizontal seam of the stitching of the part on both parts;
- We fold the part with the right sides inward and make connecting seams vertically at the location of the fastener. Next, turn the product inside out and iron the seams;
- Sew on a button and make a loop. The loop can be either slotted or made from a small flagellum of fabric.
Attention! The fabric does not need to be ironed for a long time. One strong pressure for a couple of seconds is enough. Thus, we glue all the dublerin to the material.
A quick way to sew a belt to a skirt

An easier way to attach a belt is with an elastic band. It can be either open or closed. For a quick product, it is better to take a soft decorative elastic band. Such a belt will be guaranteed to be beautiful and neat. Let's consider the main stages of work:
- First you need to prepare the elastic band and find out the length of the strip. To do this, it is enough to know only your waist size. However, the elastic band should be 3-5 cm shorter, because it will stretch during sewing;
- Next, we connect the side sections of the elastic band. We sew first along the wrong side, and then along the front part;
- We insert the elastic into the skirt. It is necessary that the elastic is evenly distributed along the upper section of the skirt. First, we connect the elastic at the side seam with the side cut of the skirt using a pin;
- Let's start sewing the elastic on the machine. You should sew in sections, constantly stretching the elastic and straightening the fabric.
You can also make a part with a closed elastic band. The main advantage of using a drawstring is that you can take almost any elastic band, even the wrong color. And if you leave a small hole in the drawstring, then the elastic can be tightened as necessary, thereby obtaining the desired size of the product. Follow these steps:
- We cut out a strip. Its width should be approximately 1 cm greater than the width of the elastic band. It is also necessary to include seam allowances. The length should be equal to the waist circumference;
- Fold the resulting strip in half and iron it;
- Next, we connect the side sections of the belt, leaving a small hole there. In the future we will thread an elastic band into it;
- Next, we connect the skirt and belt right sides together using pins and sew them on a machine;
- We take the elastic band and insert it into the drawstring. Next, we connect the side cuts of the cutter using a machine;
- Straighten the resulting belt. To secure the elastic more firmly, you can make securing stitches along the front side of the belt. This stitch will allow the elastic to lie evenly, without turning over or twisting;
- This way you can make several seams perpendicular to the elastic at a certain distance from each other.
Reference! Skirts with elastic bands are often made for children, because... They are stretchy and very comfortable to wear.
Basics of Sewing a Belt to a Zipper Skirt 
Let's look at the process of sewing a belt that will be fastened with a zipper. The difficulty is that the zipper needs to be sewn both to the belt and to the main product. Let's get started in the following sequence:
- The pattern of such a strip will differ very slightly from a belt with a button. To its length it is necessary to add allowances for sewing on a zipper of about 1.5 cm. A tail for sewing on a button is not needed in this example;
- Next, we chop and process the bottom edge of the element: duplicate and process the bottom edge with an overlocker;
- We sew the strip according to the pattern discussed above and proceed to sewing in the zipper;
- To do this, distribute the zipper along the belt and skirt. We pin it first with pins, and then we baste it and stitch it on a machine;
- Next, we fold the part of the fabric with the zipper and sew the edge on the machine as close as possible to the zipper;
- To ensure that the corner where the zipper closes is even, the excess fabric from the allowance must be cut off;
- Then the strip is turned inside out and a securing stitch is made along the front side of the product. To do this, you need to align the sections of the belt and pin it to the skirt;
- A stitch is made along the front side of the product, trying to get exactly into the seam of the connection between the belt and the skirt;
- At the end of the work, iron the entire product completely.
Important! For sewing on hidden zippers, there are special feet that greatly simplify this process.
Thus, among the various methods of sewing on a belt, you can find the most convenient one. Beginning craftswomen are recommended to sew products on simple belts and then, increasing the level of their professionalism, move on to more complex options.
The final element of any wardrobe item is the belt. In particular, this applies to all kinds of skirt models. Since this accessory is most often sewn on at the very end of the work, it often turns out to be of insufficient quality or incorrectly processed. Therefore, today we will look at a completely new technique for making this part, we will learn how to sew a belt to a half-sun skirt or any other model quickly and efficiently.
How to make and sew a one-piece belt yourself?
In this section we will learn how to make a belt for a stitched skirt without belt loops.
Important! This option for processing the upper cut is suitable not only for skirts, but also for women's formal trousers. If it has belt loops, you can even use it for men's pants.
The work consists of several important stages, each of which will be considered separately below.
Determining the size
When making a pattern for the skirt itself, many needlewomen try to take into account every millimeter, because they believe that the more accurately the pattern is constructed, the better it will fit the figure. To their great disappointment, this kind of scrupulousness is absolutely useless, sometimes even unnecessary, because it does not allow mistakes to be corrected along the way. Such accuracy is especially dangerous when calculating belt parameters. You carefully calculate everything, take into account every millimeter, cut out all the details, but when grinding it suddenly turns out that you are literally a little short in length.
For what reason does this happen?
- Just the wrong side must be treated with adhesive cloth. As you know, it shrinks under the influence of a hot iron, as a result of which the fabric itself shrinks.
- During processing of the codpiece, darts and pockets, the volume of the waistline may change.
Important! More often, the product stretches, so it is recommended to cut out the belt with a margin of length and width, because the excess can be trimmed at any time.
One-piece belt
As mentioned above, a one-piece model must be reinforced with a special glue-based fabric.
Before sewing the belt to the circle skirt, you should iron it in half. Then it is checked that its length matches the cut dimensions of the skirt. Next, you need to pin it with pins to the cut of the product so that the edges meet flush with the edges of the cut of the skirt.
Important! If you are new to this business, then it is better to carry out this manipulation using threads.

Sewing to the product
At this stage, do not allow allowances of more than 1.5 cm; ideally, it is better to measure 1 cm. Also, we must not forget about allowances of 1.5-2 cm for the transverse seam located along the edge of the waistband.
Follow this simple pattern to sew a belt to a circle or sun skirt:
- Iron the sewn part immediately. More often, the width of the stitching element is 3-4 cm, plus hem and seam allowances, resulting in a total width of approximately 9-10 cm.
- Then press the bottom edge of the waistband into the hem. Its right edge is sewn up so that the inverted side is in line with the codpiece vertically.
- Then the corners are cut off so that it fits better into the corners.
- The left side of the product is sewn up.
- Turn it completely inside out, iron it, check how symmetrical it is and whether the top lines of both parts match the connecting seam.
- Fasten the zipper of the codpiece, press the top edge of the accessory so that all the lines coincide.
Important! If any problems arise, then at this stage you can rip out certain areas and redo everything again.
Final processing
Now we need to properly process our one-piece stitched waistband, following the instructions below:
- We carry out estimating work using threads - it is not recommended to use pins here.
- Along the wrong side, baste the hem of our product so that the seam is located at the same distance from the extreme point of the hem when laying the final stitch along the front side.
- It is better to start finishing from the top of the accessory, for example, from the left edge, from the location of the button.
- The bottom securing stitch should be done with extreme care. Here it is not allowed to place the fabric under the foot; you will have to pull it out with your hands and pull it tight. Everything must be done so carefully that it does not stretch. Otherwise, your waist size may change, causing the skirt to become too tight or loose.
Important! Constantly inspect the wrong side so that the thread does not get caught, the seams pass clearly along the edges of the hem or at the same distance from the edge.
- Do not cut the threads near the seams; it is better to manually thread them into the needle and hide them inside the belt.
- Using a machine, sew out a loop and sew on a button.
That’s how simple and clear the master class turned out to be, from which we learned how to sew a belt for a skirt. It is important at this stage to do everything carefully, strictly following the instructions in order to get a wonderful result. The only exception is skirts with elastic; in such situations, everything happens completely differently due to the unique design of the products.
How to make a belt on a sun skirt with an elastic band?
It turns out that not even all experienced craftswomen know exactly how to sew a belt to a circle skirt with an elastic band so that the result is perfect. If your product does not have seams, then only the bottom and waist line need to be processed. The sewing technology is quite simple:
- Fold the skirt in half, aligning the top edge with pins.
- Measure the length of the top cut with a centimeter ruler and multiply this figure by 2.
- Cut out a belt from a rectangle of fabric. Its length will be equal to the length of the upper cut of the product itself, plus 1 cm for allowances on each side. The width directly depends on the width of the elastic band itself, which you then insert into it.
- Substitute the width of your elastic band and calculate the width of the belt. If you want to make more than one row of elastic bands, then perform the calculation according to the same scheme. Determine the number of rows and multiply by the width of the elastic.
- Cut out our piece from fabric. The shared thread should run parallel to its long or short side.
- Sew the product into a ring, folding it right side inward, aligning its short sections. Stitch, retreating 1 cm from the cut. But the stitching should not be done completely, so that there is a hole left for threading the elastic.
- Iron the seam allowances, laying them out in different directions.
- Fold the workpiece in half inward with the wrong side aligned, aligning all the cuts, iron it while fixing the folds.
- Connect the belt to the top edge of the product, placing the outer side to its front side. The seam on it should be located strictly above the seam of the skirt. Align the cuts, chips with pins and sew the part, retreating 1 cm from the edge.
- Press seam allowances inwards.
- Iron the finished product from the wrong side.
- Measure out the required amount of elastic. Wrap it around your waist and stretch it to a comfortable size so that the skirt stays at your waist without being too tight.
- Using a pin, hook the end of the elastic and pull it inward. Be sure to hold the other end of the elastic so that it does not disappear completely. Finally, pull the pin through the hole.
- Connect the ends of the elastic band and sew them into a ring.
- Release the elastic bands and distribute evenly.
PROCESSING THE TOP OF A LINED SKIRT WITH A STITCHED BELTImportant! If you plan to store the skirt in the closet on hangers, you can sew several loops on the sides from the inside out. You can make them from narrow braid or sew them yourself.
If the skirt is lined, then before attaching the waistband, you need to connect the skirt with the lining at the zipper. Can be hemmed by hand. I prefer to hem by machine.
We open the zipper to the end and bend the edge over it, put the edge of the lining on it, and place the parts face to face. We pin and sew a basting stitch to the zipper slider. When you have some experience, or if you already have it, you don’t need to do a basting stitch.


Now we install a double-sided zipper foot on the machine and sew close to the zipper teeth to the runner, making a good bartack at the end of the stitch. Our guide for stitching is the fold of the allowance. We repeat the same on the other side of the zipper. We start from one side and the other from the top of the skirt! and down to the runner


The result looks like this. In the second photo I placed white paper under the seam so you can understand how much the lining seam is still unstitched, about 1.0 - 1.2 cm. This is necessary so that the lining does not interfere with the runner and everything looks beautiful

Iron the lining near the zipper. Place a basting stitch along the top of the skirt, connecting the skirt to the lining. And we sew the loops into the side seams. The loops do not need to be made too long, as I often see on purchased items. It turns out that the skirt just dangles on the hanger without maintaining its shape. The length of these loops when folded in half should be equal to the width of the finished belt + 1.5 - 2.0 cm. Don't forget to add 1.0 cm to the seam.
When the zipper is located in the side seam, the loop is sewn, retreating 1.0 cm from the zipper to the back, the second loop, accordingly, also moves relative to the side by 1.0 cm, towards the front. 
I prefer to hang skirts on hangers with clothespins. The appearance is preserved very well, no creases or sagging are formed. They are especially good for skirts with pleats. But I definitely make loops.
We cut out the belt. You can cut out both along the lobar and transverse threads. I have adopted the method of cutting along a transverse thread. I don’t even know why, but by share I don’t like it. It seems to me that the cross belt fits better.
The length of the belt is equal to the length of the top section of the skirt + 3.5 cm allowance for the fastener + 2.0 cm for seam allowances. Width: two belt widths + 2.0 cm for allowances. I usually make the belt width 2.8 - 3.0 cm (i.e. 3+3+1+1=8 cm). Mark an allowance of 1.0 cm with soap and baste just below the marked seam.


Now about strengthening the belt with padding.
Most often I use the method of strengthening the belt with a grosgrain ribbon, which is what I’m showing you now.
It can be reinforced with non-adhesive or non-adhesive non-woven interlining. There are also woven interlinings. Both grosgrain ribbons, woven interlinings, and non-woven strips are sold in completely different sizes and colors - choose what you need.
The first photo shows the grosgrain ribbons that I buy. They come in different colors, width 5.0 cm. Why I like them more than others: they hold the shape of the belt very well, almost do not wrinkle, unlike non-woven and woven pads that lose their shape. But they are not suitable for the belts of summer skirts, they are too dense. In summer, you can use non-woven fabric.
In the second photo there is a woven spacer, width 2.5 cm, also available in different colors. It is convenient because you don’t have to cut anything, just take it and do it, but it’s quite soft. A non-woven strip, 4.5 cm wide, is quite rigid, can also be used instead of a grosgrain ribbon.


Let's continue. Cut the required length of the corsage ribbon. It is equal to the length of the top section of the skirt + 3.5 cm allowance for the fastener. We mark the width of the belt we need and cut off the excess. It turns out that one edge of the corsage ribbon remains with the edge, but the other does not.
With this edge and edge we place the grosgrain ribbon on the waistband and sew along the previously marked line.


At the ends of the belt the grosgrain ribbon looks like this


After stitching the corsage tape, the basting can be removed. Now you need to check whether the belt is sewn evenly at the fastener. To do this, bend the belt up. If there is a discrepancy on the right and left, it needs to be redone. If everything turns out smooth, then bend the belt up and iron it.


You've probably already noticed that all my raw cuts are "jagged". I’m so used to working with zig-zag scissors so that the cuts don’t get “shaggy” when working and don’t bother me. I cut all my things with these scissors. The dangling fringed threads just drive me crazy... Apparently everyone has their own cockroaches)))
Naturally, when performing any operation where I need a smooth edge, I cut off these “teeth”.
I still do this now to sew the bias tape evenly. I iron one edge of the finished bias tape, leave the other ironed - it’s very convenient to make an even stitch along it. The binding can be pinned with pins, or you can stitch it this way, whichever is more convenient for you.
Look at how the edge of the binding is located on one and the other side of the belt


Now iron the binding, bend the edge and baste, the width of the binding is 0.5-0.6 cm

Fold the belt in half with the right side inward and process the longitudinal edges of the belt. At the “long” end of the belt, where the allowance for the fastener is, you need to stitch almost to the teeth of the zipper, get as close as possible. Please note that in the first photo, I glued a non-woven rectangle under the short cut. This is necessary so that the corners of the turned out allowance for the fastener lie nicely. If this is not done, sometimes the threads may come out when turned inside out. The grosgrain ribbon is not stitched when processing cuts; it is free


And on the other hand


We trim the allowances, cut them diagonally in the corners


We turn the belt right side out, this is how it turned out on one side and the other


We secure the edge of the belt with pins and baste. In order for everything to turn out smoothly, you need to baste it well. In the photo, pay attention to the basting stitch; on the wrong side it goes right along the edge of the bias tape.


On the front side we sew the belt close to the stitching seam. As a result, on the front side the stitching is almost invisible; on the wrong side the stitching should go just above the bias tape. This is why I cut off the excess, remember?


Now we iron the finished belt. After this, we give it a slightly concave shape at the top and iron it. This is necessary so that it follows the shape of the body.


There's just a little bit left to do: make a loop and sew on a button. The button must be made on the leg. To do this we use a match. Since this button has a very difficult fate, especially during feasts, we fasten the end of the thread several times, conscientiously


In this article we will talk about how to sew a belt to a skirt.
We cut the belt, placing it across the piece of fabric, that is, we place the warp thread of the fabric (lobar) across the belt. The length of the cut exceeds the finished size of the belt by 6-8 cm. Width = twice the finished width of the belt + two seam allowances. In our example, the finished width of the belt is 4 cm, which means in the cut its width = 4*2+1*2 = 10 cm.
We cut out a duplicate layer of the same size. 
We iron the duplicating layer to the tailored belt, bend it in half lengthwise, iron it and secure the fold with a wooden block. 
Now you need to form the belt into an arc. 
We pull the belt along the open edges and iron it along the fold. 
We stop the formed belt with a block. 
Before sewing to the skirt, the belt should look like the photo below. 
We adjust (specify and trim) the width and sew over one long side of the belt. 
Mark the middle of the belt with a pin. To one side we put aside 1/2 OT (waist circumference) + 1 cm for the allowance, to the other side from the pin we put 1/2 OT + 5 cm. Try on the skirt. We specify the location of the waist line and sew the lining. We cut off the finished lining with the skirt along the waist line. 

We attach the lining to the skirt along the waist line, not forgetting to sew loops along the side seams. 
Sew the belt to the skirt. Important! We lay a line along the waistband. 
We sew short sections of the belt. Close the zipper and check what the belt fastener looks like. 
Lightly press the seam allowance along the waistline onto the waistband. 
We install a hook at one end of the belt. You can make a buttonhole. 
We baste the inside of the belt. 
We sew the inside of the belt - we sew exactly in the seam where the belt is attached to the skirt. We put a line along the skirt, not along the waistband. We install the mating part of the hook or sew a button on the second end of the belt. 
We do the finishing WTO (wet heat treatment), the belt is sewn.