DIY greeting cards. As well as a variety of materials
Handmade gifts and cards are valued much more than standard store-bought ones. And this is not surprising. After all, all products hand made– unique and created in a single copy. Moreover, a handmade greeting card with warm wishes will pleasantly surprise the birthday person and complement the birthday gift.
Many people think what to create beautiful postcard at home without expensive materials and instruments is impossible, but this is far from true. Knowing the basic principles of cardmaking and scrapbooking, you can make original postcards Happy Birthday with your own hands from scrap materials that are found in almost every home.
What will you need to create a Happy Birthday card?
- First of all, you need to prepare the base of the postcard. It is best if it is cardboard or whatman paper. The base color is any, preferably monochromatic.
- You will need two types of scissors - some large ones to cut out the base of the card, others - small ones for manicure. The latter are convenient for cutting out miniature applications or pictures.
- A ruler and pencil are needed to correctly mark the length and width of the card on the cardboard.
- You can use colored pens, especially helium pens with glitter beautiful inscriptions and drawings on postcards.
- A glue stick will help you make beautiful ones without smudges or stains. paper applications on postcards. For attaching fabric, lace, felt, it is better to use PVA glue, and for more “serious” decorations, such as buttons, rhinestones, sequins, etc., use universal glue “Moment” or glue gun will help you avoid troubles associated with postcard parts falling off at the most inopportune moment.
- Anything can become a decoration for postcards: colored paper, felt, pictures from old magazines and newspapers, beads, rhinestones, sequins, beads, coffee, pasta, cereals, old twine, threads and much, much more. In general, anything that is in every home.
The process of making a simple Happy Birthday card
Making any postcard, no matter how simple or complex, begins with preparing the base. Postcards can be single or double, of different formats, configurations and sizes.
The simplest postcard is, of course, a single one, when a square or rectangle of the required size is cut out with scissors. If you need a double postcard, fold the cardboard in half and mark right size postcards and the detail is cut out along the contours.
The size of the base can be any. However, if you are going to send the card by mail, it is best to make it under an envelope.
Envelope sizes:

The same applies to the configuration of the postcard - it can also be varied: in the form of any shape - round, square, rectangular, oval with smooth or fancy-cut edges.
When the base is prepared, move on to preparing decorations for the card. The simplest thing is, of course, applique, when the parts are glued to the base. For example, here is a postcard on which is glued balloon, is done very simply and quickly, the whole secret is in the selected materials:

You don’t even need to use glue, just sew it on necessary elements using a sewing machine:

For universal cards happy birthday that are suitable for any person, flowers are best. The parts can be cut out using templates or you can come up with something of your own.


The edges of the card can be decorated with ribbons, lace, beads, etc. 
And the finishing touch is the inscription. You can sign with a colored pen, a felt-tip pen, or you can use beautiful inscriptions for cards “Happy Birthday!” and “Congratulations!”, made using scrapbooking technique, print on the printer:

Creative ideas: how to make original DIY birthday cards
- Usage various types unusual basics. For example - watercolor paper for the background. Or apply a drawing by stamping on tracing paper, and use a bright one as a backing for it decorative paper.
- The color scheme, correctly selected, is the most simple composition will make it original. It is enough to use three colors - two contrasting and one neutral.
- Usage various options folding cards, breaking symmetry.
- For inscriptions and postcard signatures, use calligraphic outlines of letters and apply them with silver or gold paint.
- Using scrapbooking technique. The base of the postcard is made of colored cardboard. Are being selected decorative elements and backgrounds for them, combining texture and color. Each background with decorative elements is glued layer by layer (using gel-based glue).
- Using quilling technique. These are three-dimensional drawings made from folded strips of double-sided colored paper. Figures are made (spirals, leaves, flower petals are rolled up) and glued to the base.
- Using decoupage technique. Select a napkin with the appropriate pattern, remove the top layer and carefully stick it with PVA glue diluted with water onto the base of the card, avoiding the appearance of wrinkled folds.
As you can see, it’s quick to make a simple and creative postcard not that difficult. If you spend a little more time on production, you can make more original cards with your own hands.
Original DIY birthday card made from watercolor paper
Making a birthday card using watercolor or ink on watercolor paper doesn't take long.

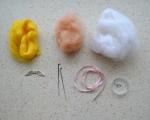
Materials:
- watercolor, ink, ink;
- watercolor paper;
- aqua brush;
- colored cardboard for the base;
- themed sets of stamps for drawing.
Manufacturing
- If you are making a square card, then the length of the cardboard should be twice the width. To fold the workpiece in half, you need to align the upper left corner with the upper right. Do the same with the lower corners, then make an even break in the middle and cover with a weight for a few minutes.
- Watercolor paper should be in the shape of a square, the side of which is commensurate with the width of the cardboard base.
- A design is applied to the paper using flower stamps. Stamping is done in a circle, changing the angle. The image is obtained in the form of a wreath of flowers and leaves directed both inside and outside the circle. Then the drawing is painted with watercolors or ink using an aqua brush. On separate sheet It is recommended to practice choosing color range for the wreath.
- When the drawing is dry, it needs to be trimmed (the sides of the square of the watercolor sheet should become slightly smaller than the sides of the base). The glue should be applied in dots in several places, or double-sided tape should be used. The picture is placed in the center. If you wish, you can make the inscription “Happy Birthday!” in ink.
The next craft is more difficult to make, but very beautiful.
Volumetric birthday card
An original option could be a voluminous postcard, made with your own hands according to the principle of children's books. When the postcard is opened, three-dimensional compositions with elements on different planes are formed.
You will need:
- thick decorative paper;
- white cardboard;
- curly and regular scissors;
- PVA glue or pencil;
- colored paper;
- colored pens.
Manufacturing
- You need to take decorative paper rectangular shape, fold in half. This will be the cover for a future postcard.
- For the “filling” you should cut cardboard to the appropriate size and also fold it in half.
- An outline drawing of the image is made in the center (using a stencil or patterns). It's enough to draw one big flower or use as an idea with the following templates For voluminous postcards- from simple to complex:
- You can make an applique on the flower from bright colored paper or leave it white and use a colored pen to highlight the details of the image.
- Using curly scissors, cut the cardboard along the edge.
- You should glue the cardboard with the flower to the cover and place it under the weight.
- Write your congratulations and wishes near the flower.
- On the outside of the card you can stick palettes, a ribbon, and write “Happy Birthday!”
A beautiful handmade greeting card will delight your loved ones for a long time.
When preparing for the holiday, you not only carefully choose a gift, but also carefully consider the ideas how to make a postcard with your own hands, which can complement your main store-bought gift. Paper is the main material used to create greeting cards - different color, thickness and texture, they allow you to achieve the uniqueness of your craft. Thin ribbons, rhinestones, buttons, and pieces of fabric are used as additional decorative elements.
How to make a postcard for the teacher with your own hands
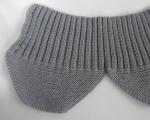
Choosing ideas how to make a card for the teacher with your own hands, the student will certainly give preference to options for cards with flowers and leaves; you can design the front bar in the form of a school board. Since Teacher's Day is autumn holiday, then the decorations can be in autumn colors. IN school team There are not only women teachers, but also men, for whom schoolchildren always carefully choose gifts and congratulations. Whatever one may say, the entire congratulatory industry for teachers revolves around female teachers: in the store you can only find Greeting Cards With bright bouquets, which are definitely not suitable for a man. Therefore, we offer you a congratulation option for a male teacher: a bright and original card, decorated with a paper shirt.
For work we will need thin cardboard of two colors: one color - the main one - this will be the postcard itself in the form of a shirt; another color is a tie, it should be contrasting and stylish. For decoration, we should also prepare two miniature buttons that will decorate the collar. In progress, how to do simple postcard with your own hands, you can’t do without the main tool - scissors; it’s better to take the glue in the form of a pencil so that there are no marks left on the paper.

The thin cardboard from which you will make the base must be double-sided. The base sheet must be folded in half to form a blank for the future postcard. If necessary, the edges can be cut to give it the shape and size you need. Next, you need to work with scissors: step back about 2 cm from the top and make cuts on the sides of the front strap, which will determine the boundaries of the future collar of your shirt. Look carefully at the photos presented in the master class before making cuts on the paper.
On the back, you need to cut off a strip with scissors, the same width as we marked the collar, this way we will select a collar that will be separated from the rest of the part. We move again to the front bar and finish the design of the collar - we fold the cut strips towards the center. They need to be glued to fix the shape of the collar, but only the fold line needs to be glued, leaving the corners free.

Now you have formed the base of the card, and you can move on to making a tie, for which you will need any paper, preferably choose contrasting color. We need to measure the required length and cut out a rectangle. You can immediately cut out the shape of a tie from paper, or you can fold a rectangle to make the tie voluminous. It must be folded as shown in the photo. The finished piece must be glued under the collar so that its bottom remains free. All that remains is to decorate the collar with buttons, and you can sign a card for your favorite teacher.
This idea will also come in handy if you are cooking for dad on February 23 or for his birthday.

How to make a DIY card for mom
Since we have considered the option of a men's postcard, now you will be interested in considering several original ideas, how to make a DIY card for mom. Children always perform with special trepidation, because it must be made with love, be beautiful and neat. For example, you did beautiful bouquet with your own hands made of fabric or paper, and you can attach a greeting card to it.

On the “men’s” card we had a picture of a shirt, it’s easy to guess what for female version we will choose the dress as decoration element. Idea, how to make a beautiful card with your own hands with a dress, it will also be useful for original design wedding invitations, but in this case the skirt should be made full, and for the card itself you should choose gentle colors.
This option is ideal for a preschool child, since the craft will take no more than half an hour, and just four steps will allow you to make a beautiful and original greeting card. There are other ideas where the dress is folded from bright paper using the origami technique. For decoration, you can use openwork napkins with a carved edge, with which you can recreate a lush multi-layered white dress.

How to make an easy postcard with your own hands
To work, you will need a tight bright paper, for example, deep red, purple or bright yellow color. You will also need White list- for the design of a contrasting central part of the card, as well as a small section satin ribbon to decorate our dress. During the work you will need glue, pencil and scissors.

For the base, you need to cut out a rectangle, the card itself must be high so that the dress turns out beautiful. The rectangle should be folded in half: in order for the fold line to be smooth, without nicks or distortions, you must first lay a ruler along the line and draw it with a blunt thin object, for example, with an empty pen refill. Now we need to register inner part- cut out a white rectangle, its size should be smaller than half of the base rectangle by approximately a centimeter in width and height. The finished white rectangle must be glued to the second half of the base, placing it in the middle, leaving a frame of the main color on the sides. You can glue it with a glue stick, carefully covering the edges of the paper; you can also use thin double-sided tape.
When the base is ready, you can move on to the second stage of the process, how to do light postcard with your own hands. On the front panel with a pencil, without pressing hard, you need to draw the outline of the future dress with narrow waist And full skirt. When the outline is drawn and, if necessary, adjusted, it can be cut along the line; for this it is better to use not scissors, but a sharp stationery knife, which will allow you to carefully cut out the corners. After you cut out the dress along the outline, you will have the central white part of the card “exposed”, where you can write a congratulation.
All that remains is to decorate it with a bow, which will be tied at the waist. You need to make a small cut on the fold, where a thin ribbon is threaded; it is tied in a bow at the front.

How to make a voluminous postcard with your own hands
If you are looking for options, how to make a voluminous postcard with your own hands, then two ways open before you: firstly, you can decorate the front bar with volumetric elements greeting card, glue voluminous flowers and leaves to the surface, and make a picture using the quilling technique. Secondly, three-dimensional elements can appear only when you open a postcard; such crafts are also called 3D. They really turn out bright, colorful and unique.
We will dwell in detail on the technique of creating a 3D card, and even a child can master such a master class. This idea will come in handy if you are still undecided, how to make a postcard for an elderly person with your own hands, and you can see other options for congratulations.
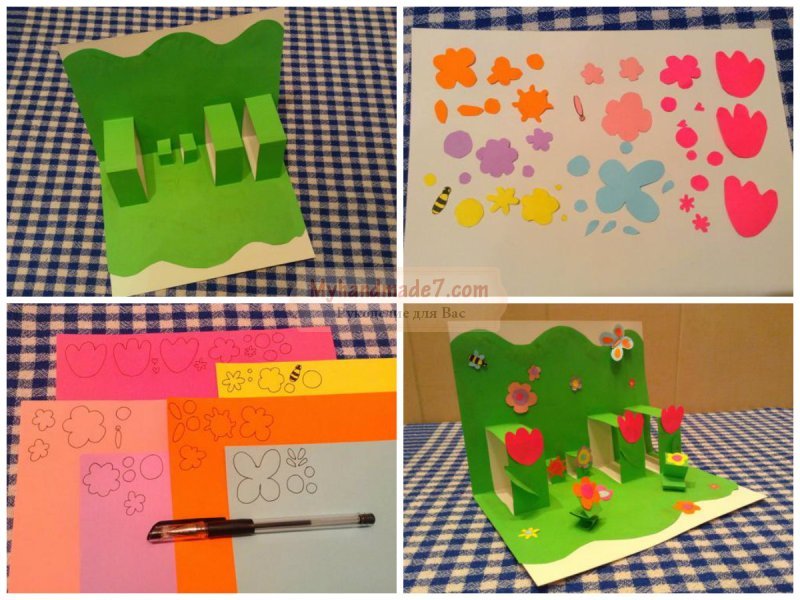
Be sure to choose a bright one for such a craft. beautiful paper with a delicate spring pattern, which will become the basis for a flower meadow. The base itself will consist of two parts: the first is monochromatic - the outer one, it can be deep green, the second can be with a delicate light green pattern, you can print the selected template yourself on white thin cardboard. In addition to paper, we will need a ruler and pencil, scissors and glue.

At the first stage of making the postcard, you need to draw the inner sheet, as shown in the picture: seven lines in the middle of the long side, with a distance of 1 cm between them. To make the lines symmetrical relative to the middle, pay attention that on each side the distance to the line is 11.5 cm Next, you need to make folds along these lines to create an accordion of three folds.
Using green paper with different prints, you need to cut out blanks for the grass, which are glued between the folds on at different levels to achieve a volumetric effect. Separately, on thick white paper, you need to print out patterns of butterflies, bright and of different sizes, which you then glue to the grass.
To explore other options, how to make a postcard with your own hands, video master classes you can use, but remember that beauty finished crafts depends not so much on skill and careful actions, but on correctly selected materials.

How to make a postcard with your own hands from paper
If you pick up ideas for every holiday, how to make a postcard with your own hands from paper, then it’s time for you to think about special tools that can greatly facilitate the process of completing them. We are talking about shaped hole punches that will help create an openwork carved edge on a postcard and various decorative elements. With the help of some hole punches you can even make even and neat blanks for flower petals.

Small hearts, stars, snowflakes, carved butterflies - all these elements that scrapbooking masters use to decorate cards, you can make yourself using figured hole punches. Hole punchers with flowers different sizes will help you create voluminous flowers that can beautifully decorate a card for mother and grandmother, for best friend and sisters.
Now you have a lot of ideas and master classes at your disposal, how to make a postcard with your own hands - Day Birthdays on March 8 and February 14 will turn out to be bright, original, and after the holidays only the warmest memories will be preserved. In the manner of Western traditions they are now made in Russia, they are performed in the form easter egg, like valentines, or with the image of the Easter bunny.
Birthday in childhood - special holiday for any child. He is the center of attention, receives gifts and congratulations. This makes the child feel his importance, individuality and the love of loved ones, so children really look forward to their birthday and carefully prepare for it. With no less enthusiasm, they go to holidays with their friends and congratulate loved ones on their special day.
The birthday boy most likes to receive congratulations, and the child can do this with the help of a postcard. Try making it yourself. This activity is of particular importance for children: he puts his skill and effort into the craft, learns patience and working with paper, cardboard, scissors, and glue. Not only does he develop fine motor skills, but also a sense of beauty.
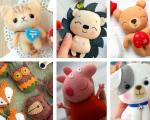
We offer you 10 ideas for cards that a child can make himself or with a little help from an adult.
Card with buttons
Postcard with 3D applique
Card with balloons
Volumetric flower for a postcard
Butterflies can be cut out of paper or use ready-made stickers
Envelope with confetti
Heart balloons
A teenager can make such a card, but kids can glue ready-made pom-poms onto paper
Bouquet of paper flowers
For this card, you first need to cut out flowers from colored paper, stick them on paper or cardboard and draw a stem.
How you can surprise and amaze loved one? A gift made with your own hands. It doesn't have to be big, voluminous thing. Make a postcard using the cardmaking technique. You can get inspiration by looking at photos of voluminous postcards; your imagination will tell you the rest.
Postcard using cardmaking technique
More from Ancient China The technique of making postcards with your own hands is known, and in the 15th century the first postcards appeared in Europe. Until recently, the tradition of giving cards for the holidays was widespread. Alas, in the age of computer technology we are often limited short SMS or by email.
However, the popularity of handmade products is increasing and original ideas voluminous postcards are of interest to many. This is not just a craft - it is a piece of the master’s soul brought to life.
What you will need to make a postcard:
- cardstock for the base (you can use watercolor paper);
- scrap paper (buy a small set in the desired theme: this will be enough for one postcard);
- decorative elements, ribbons, voluminous flowers.
Important! Scrap paper has two important qualities: does not fade or fade, has required density. Therefore, it is recommended to choose it for creating crafts in the style of scrapbooking and cardmaking.
Two main rules for a good postcard:
- multi-layering: the more layers are applied, the more interesting and voluminous it will be;
- correctly selected composition.
Don’t turn the postcard into a child’s applique: every element in the composition must be thought out. Arrange them around the central, main detail that creates the plot.
How to make a voluminous postcard with your own hands:
- determine the theme and main element of the postcard;
- match it with backgrounds and decorative elements.
Glue the background onto the cardstock blank. It should be no more than 2 mm less than the base on each side. To make the card look more impressive, the edges of the background can be treated with a colored stamp pad, slightly tinted.
For shabby chic style cards, you can artificially age the edges by going over them with scissors or a special aging tool.
Another option for edge design is to stitch around the perimeter on sewing machine. Moreover, accuracy is not so important in in this case, how much decorativeness.
Important! You need to glue the elements of the postcard with “Moment” glue or similar. PVA will turn yellow over time, and not a trace of beauty will remain.
The following layers are applied to the background. They should not repeat the shape of the postcard; you can use horizontal and vertical elements that match the color and style. Before gluing them, assemble the entire composition.
For beginners, it is best to use templates - sketches that give an idea of the correct distribution of parts to create a balanced composition.
Now gradually, layer by layer, attach the parts using decorative elements:
- chipboards (cardboard parts);
- paper cutting;
- flat and voluminous flowers;
- chips and buttons;
- tape (try not to use satin ribbons- they make it cheaper appearance work);
- rhinestones and tops (enamel drops).
Having finished designing the outer side of the postcard, you can also design the inner side if you wish, write beautiful congratulations and give it to a loved one.
Postcard in pop art style
This is the name for the technique of creating postcards with three-dimensional elements inside. Can you imagine the surprise and delight of the recipient when, when opening a postcard, a voluminous bouquet or a lock appears?

Such work requires painstakingness and some skills; a master class on voluminous postcards in the pop art style can be found on the Internet. They look incredibly impressive.
But even without any special skills you can create unusual gift. We offer step by step instructions for making simple postcards with three-dimensional elements inside.
For the work you will need the same materials and tools as indicated above, but stock up on flat decorative elements (images of flowers, animals, any figures on the chosen topic).
You need to start working by designing the inside of the postcard. The simplest option:
- glue the background inside the workpiece (don’t forget: it should be 2 mm smaller on each side than the base);
- on a piece of paper slightly larger than less postcard print the diagram and cut it out with a sharp edge stationery knife all elements indicated by solid lines. Bend the dotted lines toward you, and the dotted lines away from you;
- Carefully glue the sheet inside the card onto the background, not forgetting to check whether it closes and opens well;
- decorate the outside of the card.
You will find various types of voluminous postcards on sites dedicated to the fascinating art of scrapbooking. Get inspired and create unique gifts to your loved ones.
Photos of three-dimensional postcards

On March 8, on a birthday or an anniversary, I would like to congratulate my beloved mother sincerely, from the bottom of my heart.
Buy ready-made postcard in any version at present - not a problem.
But how many emotions will your mother receive if you give her a handmade card?
Handmade postcard– this is not just a small bonus to the main gift, but a real testimony of love and gratitude to dear mother. Such a souvenir will be kept in a visible place by mom for many years.
 Always remember! A card on Mother's Day does not have to be perfect and look flawless.
Such a postcard is always very beautiful, elegant, original, easy to make and does not require much time or material investment. Be sure to find one for yourself suitable option and create a postcard with your own hand - make your loved one happy!

You can take a soft cherry shade of cardboard as a basis and cut out a rectangle from it. Next, we take checkered cardboard and cut out a shape from it in any shape up to half of our cherry base, glue it, and decorate the gluing area with exquisite white lace. We decorate the card with bows, beads and buttons, add good my sincere congratulations and our surprise for our beloved mother is ready!

The basis of the postcard will be the same cardboard. We glue two strips of fabric of different widths onto the base. On the top wide strip you can stick the words “mom” in letters cut out of different cardboard. We leave the bottom strip for decoration and warm words congratulations. The decor can be ribbons, beads, pieces of lace, various flowers, in general, everything that your imagination tells you.

The base of the postcard will be white or other light cardboard. On top of the cardboard we glue flowers, leaves, hearts in the form of an applique, ladybugs, cute birds, etc. colors must be selected very wisely - no more than 3 shades so that your card looks harmonious. For volume, you can add beads, laces, and buttons.
DIY birthday card for mom made of paper step by step.
For this we need:

To work, you will also need to print it on a printer. vase template.

Do you like such a miracle made on your own?
Unusual and voluminous
If you have a desire to make a complex and unusual postcard, there are many such options.
Which one is right for your mother personally is up to you to decide. Each of them is original, beautiful and easy to perform in its own way.

Magnificent and original
If you really want to give your mother something more complex, give her something that will truly surprise and give positive emotions.
Take some of your precious time and create a 3D postcard, or a postcard from unusual materials. This is not at all difficult to achieve, but it will require a little more time, as well as patience and perseverance, attention and hard work. But such a masterpiece will be truly appreciated and will cause a flurry of positive emotions!

Master class “How to make an endless postcard?” watch in our video:

You can add your own twist, change colors or materials, add what you think are missing decorative elements, etc. but most importantly - kind, warm and sincere words for my beloved mom!

Beautiful card for your beloved mother's birthday
In order to create such an unusually beautiful card you will need:
- double-sided cardboard coated white;
- paper with poems, maybe with notes, with an aging effect;
- - artificial leaves and flowers;
- - two round stickers with congratulatory inscriptions;
- - blue ribbon;
- - colored sequins;
- — a sticker or pre-printed inscription “Congratulations!”;
- - pencil, scissors, ruler, double-sided tape, glue.
Let's get to work.

In conclusion, I would like to note that in your postcard made with my own hands For your beloved mother, the most important thing is not the paper, ribbons or rhinestones, and not even the wishes that you write on the spread of the card. The most important thing is your sincere desire to please dear mother, show care and attention!
Views: 1,266