Volumetric Santa Claus made of cardboard. Paper Santa Claus: simple, interesting and fast
When preparing for the New Year, there are no trifles. After all, you need to think through everything - decorating your home, the holiday menu, as well as gifts for loved ones. Regarding the last point, it is not always necessary to run to the store. You can prepare gifts yourself, involving your children in this. For example, you can make a lot of New Year's crafts. We suggest doing Santa Claus using origami technique. The process of creating it is simple, if you follow the step-by-step photographs of our master classes from Marina and Vasilisa.
Origami Santa Claus, option No. 1
To make Santa Claus we will prepare:
- 2 squares of red single-sided paper;
- glue.

Initially, the squares should be the same size, we took 10 x 10 cm. From one we will make a head with a cap, and the other square will be needed to make the body. Let's start with the head. To do this, we make small folds on both sides.

We bend a small corner from the opposite edge. This will be the top of the cap.

Now we turn the square to the other side. Here you need to bend a third first.

Then we make a symmetrical fold on the right side.

This is how we formed the Santa Claus hat.

The bottom corner needs to be folded up.

Then we make a slight bend in the opposite direction.

We bend the top part of the cap to the side and, if necessary, glue it a little.

To make the body, take another square. We make small folds on it on opposite sides.

Fold in half.

After this, we unfold it, so we have outlined the middle line. First we bend the left edge to it.

Then we make a symmetrical fold on the right side.

We turn the top part in the form of corners.

We bend the top side down. After this, you can glue a little on the wrong side.

We connect the two parts together. To do this, we will use glue again.


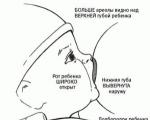
If you wish, you can draw his eyes and mouth. This craft can become part of a New Year's greeting card.

Paper Santa Claus, option No. 2
To create Santa Claus we will prepare:
- a square sheet of red single-sided paper;
- black marker;
- red felt-tip pen.

When making this craft, it is important to use red paper, which will be white on the reverse side. If you don’t have one, then you can take 2 sheets of red and white. First, fold the red square diagonally.

This is how we outlined the middle fold line, which will become a guide in further work.

You first need to bend the right corner to this line.

After this, we perform a symmetrical fold of the left corner.

For further convenience, let’s slightly rotate the blank of the future Santa Claus.

Now you need to fold the workpiece in half. To do this, bend the bottom corner up, aligning it with the top corner.

The next stage we will form the beard of Santa Claus. To do this, bend the top corner down.

Let's make a small border. To do this, we will again bend the upper part in the form of a narrow strip.

We bend the left protruding part back.

Now we need to do the same with the right side of our workpiece.

Let's take a red marker. We will use it to draw a nose. Using a black marker we will mark the eyes.

Our Santa Claus made from paper using the origami technique is ready.

Such a craft can later become part of a New Year’s greeting card.
Marina's master class on how to make paper Christmas tree, look.
Option No. 3
You will need:
- felt-tip pens (or pencils) black and red,
- square sheet of paper 10 by 10 cm (you can take more or less). The paper should be two-colored - white on one side, red on the other. If you don’t have such paper, you can glue together sheets of white and double-sided red paper.

We need to bend our square diagonally.

Unfold the workpiece and also bend it in half along the second diagonal.


We bend the outermost corner to the top of the workpiece.

We see we have a line drawn, we need to turn the corner back.

We turn back. We see that we have a line; we need to bend a corner to it.

Now we can completely wrap up our lapel along with the corner. You will get it like this.

We work with the bottom of the craft. We bend the bottom corner to the top point.

We make a bend to the bottom point.

Turn over:

We make narrow stripes on the sides.

The same on the opposite side.

We see the middle line and bend both sides towards it.

And the second one.

We take the white parts and make a fold along the red line to the white one.

We bend this strip and make a square.

We do the same on the opposite side.

And a square.

And when we turn the figure over, we can see Santa Claus.

You need to draw his eyes and nose.

And that is all!

You don’t need to look for a special reason to practice with children, because it helps mental development and the formation of useful skills in smart kids. But the theme of all kinds of crafts may differ depending on the season, the child’s mood or upcoming events. So, New Year is the most long-awaited holiday of the year. Absolutely all children remember him as soon as the first cold weather arrives. Naturally, interesting New Year's creativity helps brighten up the anticipation of a bright holiday.
In this article we will tell you how to make a paper Santa Claus from a cone with your own hands; the master class is provided for the convenience of creating crafts together with children. Primary schoolchildren will be able to make such a souvenir, but children of kindergarten age will need the help of adults. Follow the tips to spend time with your children fun and easy.
A funny paper Santa Claus made from a cone is made from the following materials:
- a small sheet of cardboard, preferably one side of it is white;
- scissors;
- scraps of red, white, black and yellow paper;
- glue and stapler;
- white napkin;
- a piece of fabric and thread.
Step-by-step tutorial on how to create a paper Santa Claus from a cone with your own hands
1. Prepare a thick sheet of cardboard in the desired format. The height of the paper Santa Claus will depend on its width.

2. Roll a piece of paper into a cone. For quicker and more secure fastening, use a stapler.

3. Wrap a small piece of red paper around the top of the cone to make a blank for Santa's hat. Cut a rectangle from a ribbed white napkin.
By the way, if you are interested or would like to try your hand at the modular origami technique, then we suggest you make something like this.

4. Roll the rectangle into a tube and glue it to the bottom edge of the hat to imitate white fur.

5. Cover the bottom of the cone with red paper, but leave a white gap between the fur coat and the hat.

6. Glue black dots – eyes and a red nose – onto the front of the paper Santa Claus from a cone. Also frame the lower part of the fur coat with a napkin tube.

7. To make hands, use red paper, roll it into a tube and decorate it with fur from a white napkin.

8. Create a strap from black corrugated paper and a yellow square, and buttons from black circles.

9. Use PVA glue to attach the colored paper Santa Claus sleeves.

10. Make a mustache and beard from white pieces of paper and attach to the craft to complete the look of Santa Claus.

11. Now the funny paper Santa Claus from the cone is ready to take pride of place under the small New Year tree. Be sure to make a small bag out of a piece of fabric secretly from the child and put candy in it.

And from cardboard you can make something like this
Larisa Shilina
There is no New Year without Grandfather Frost and his beautiful and gentle granddaughter Snow Maidens. Everyone knows this. Grandfather Frost and Snow Maiden bring gifts to children, joy to the house. Every child waits with impatience and trepidation whether they will come to him this year or not. There are many different dolls, figurines, and souvenirs in the form of Grandfather Frost and Snow Maidens. There are small and large, expensive and not so expensive. Glass, wood, plastic, rubber, basically made from anything. For the New Year's interior and creating a New Year's composition, I decided to make Snow Maiden and Santa Claus made of paper.
I took it for work: thick sheets of red and blue paper, compasses, scissors, glue.
1. Made a cone from a circle.

2. I cut out the silhouette of the crown and face.

3. I drew a face. I made a braid from felting wool.

4. Made cones for hands from small circles and decorated the crown.

5. I glued all the parts to a large cone.

6. Decorated the fur coat. The Snow Maiden is ready.

Grandfather Frost did the same. I covered my beard with cotton balls. Here comes Grandfather Frost is ready.

Thank you for your attention. Happy New Year!
Click Class
Tell VK
Who is the main symbol of the New Year? I believe this is Santa Claus. This old man pleases us with gifts and magic. What else do we expect from this holiday? Well, since we have already made Christmas trees, glued them, sewed them, then we definitely need to make Morozko.
Moreover, there are also many ideas for this. We will select options for every taste and for any material. After all, what is the most important thing in this craft? That's right, red hat and white beard. And that’s it, a guest from Veliky Ustyug is coming to us for a holiday. Well, for those who are closer to Santa Claus, there will also be ideas.
In general, it’s time for us to create and be inspired!
First, let's look at what creative individuals tried to make Grandfather out of. What happened to them at the first moment of creative thought? And for some reason I wanted to start the article with large interior and volumetric crafts.
Santa Claus from cups
These Frosts inspired me. All are made using the same technique, but how different they are, it’s simply amazing!
The combination of red and white cups immediately brings to mind who it is. Look at what beards are made of: cotton wool, cotton pads, paper, yarn.


And this Grandfather even has a beard made from cups.


So how do you make them? Let's look at the diagram. Draw the blank on paper with the diameter you choose. We will immediately lay out the equator of our ball. The larger the diameter, the larger the ball!

Then we lay out the cups along the line. We fasten them with a stapler and make a second, third row, removing 1-2 pieces from each layer to make a circle.
Or here’s an option where you only need one glass.

For the body we used a toilet paper or paper towel roll.
From candy
Next we have simple crafts and gifts with candies and lollipops. Remember, we looked at, and so there are also ideas with Frost and candies. I won't repeat myself. True, I only found one diagram. I am attaching it.


I was amused by the idea of wood. It turns out that to create, you just need to take the right paint colors.

From the cones
Since we started talking about natural materials, here are some ideas from pine cones.


If there are a lot of cones, then you can do the same for Big Frost. But, of course, this craft is not for one day.

Another interesting option is made from napkins. From a distance, they also resemble cones.

Maybe someone likes to felt wool? Then here is a craft for you as an example with step-by-step actions.

This drawing was used as a basis.

Let's start with the body.

Using it we make a pattern from red fabric, leaving room for the head.


Turn it inside out and sew it together. We put it on a body made of wool.

Tighten the bottom edges with thread.


We make a hat, fur and beard.
Made from plaster or salt dough
Nowadays it is fashionable to make crafts from plaster. But for those who have children under five years old, it is better to make salt dough.
And you need to make an imprint of an outstretched palm, look.


Making a palm print. Dry the material.

Mark the drawing.

And we will implement it in colors.

We thread the string through the hole and hang it on the tree.
I’m sharing with you my discovery of popsicle sticks.


From threads
Have you ever seen the technique of pulling thread through nails? So, for those who are interested, these are the frosties you can create.


And with the help of a cone base and yarn, a very simple but interesting craft is made.

- felt,
- heat gun,
- yarn,
- paper cone,
- decor.
First, let's start with this felt face.


We cut out the necessary parts and glue them with hot glue.


Now we need to make a cone out of paper and wrap it with threads to make it look like this. Make sure there are no gaps.

The edges need to be well fixed with glue. 
Let's put the craft together and don't forget about the handles. 
From disposable plates
Yes, many people definitely have this improvised material lying around in their kitchens. Great craft idea for kids.


For this master class you will only need part of the plate. It will act as a sleigh.


Let's now take a step-by-step look at how frosting is made.
Take a plate and cut off 1/4 of it. Paint the inside, where the flat and smooth part is beige.
Take a red paper triangle and glue a plate onto it. All that remains is to form the eyes, mustache and pompoms.

Look what a cool beard Grandfather can make from disposable spoons.

And even eyebrows can be made from them.

Of course, there is an idea made from plasticine. Everything is shown in detail in the photo instructions.

If you happen to have a sheet of foam plastic at home, here’s what can come out of it.

There's a plastic water bottle lying around, dress that up too.

Well, there’s also a cool option with one plastic spoon, a cotton pad and yarn.


Take a spoon and cut off a stalk from it. We wrap the edge with thread. And coat the convex side with glue. Roll up the cotton pad. And glue it onto the spoon. All that remains is to add the missing elements.
How to make a craft from nylon tights, master class in video
There is a cool idea for creating dolls using the stocking technique. Unfortunately, I am not a master at this, so I am providing a master class in video format.
And here I’ll give you an idea from a sock

You can make a body without handles. The main thing is that it is sustainable.

Well, do you often find balloons in your house? They also make wonderful Santa Clauses.


That's not all. We can say that we are only at the very beginning of the journey!
Patterns for Santa Claus made of fabric (tilde)
Now I'll give you a lot of patterns. There are ideas using the Tilda technique, and there are just patterns for soft toys.


Scheme 3. 


For inspiration!


Scheme 10.
Scheme 11. 


Scheme 14. 


If you can’t save or download the diagram, then take a screenshot of the screen and edit the picture in Painte. This graphic editor is installed on all operating systems.
Knitted Morozko and patterns
Now options for crafts for those craftswomen who knit. I liked these non-standard Morozushki. And it doesn’t matter that none of them is wearing a red hat; you still can’t confuse them with anyone else.

This selection shows how to knit such beauties.

Of course, there is a scheme.

The idea is the same, but here the crochet pattern is different.

You can also make a three-dimensional Santa.

Or just cross-stitch it.
We'll talk more about embroidery below. There will be enough diagrams there.
Video on how to make Grandfather from cotton wool
In our childhood, Father Frost and the Snow Maiden were made from cotton wool. If you miss those times, then here is a master class for you. It is presented in video format to eliminate all possible questions, because the craft is complex.
Of course, here you need to practice a little, but it’s still not that easy.
Simple paper crafts
Of course, we will now make crafts from paper and cardboard. There is simply nowhere without this. This is the most accessible material for us. Especially if the children make the crafts.


In addition to this Frost, you can decorate the windows. For example, using this stencil.


Cones make a lot of different ideas. In the photo below you will see a detailed master class on how to create such funny Frosts. This cone pattern can be used for any other crafts.


Well, here’s another great idea made from cardboard and paper. The main thing is what kind of beard turns out gorgeous with 0 rings!


And these little grandfathers can even be hung on the Christmas tree. I really loved the bow mustache idea.


Here are more cone blanks.

Based on them, such crafts are made.

Or you can simplify the task. And make the base yourself. The main thing is to secure the edges of the cone well so that they do not unravel.

Another fun craft and a master class for it.

Now for a more complex idea. This Frost is made from two paper balls.

Such balls are made according to this scheme. By the way, you can do it at the same time.
For those who are familiar with the quilling technique, here are some ideas.

You can make an individual gift for each party participant from corrugated paper and sweets.

I laughed at this craft. How funny Santa turned out.

The hat folded like an accordion is simply incomparable. Both volume and relief are created at once.

Another craft with a curly beard. 
You can create such an interesting Frost from cardboard.

Idea for little kids! Use your own stencils for crafts.

This craft can be made from pieces of paper or plasticine balls.

Hello Santa from Peppa Pig!

Our parents keep making crafts and crafts. And we thank them and take them into service!

Now I’ll give you a few stencils for gift boxes with Santa Claus elements.


And I almost forgot to show you these pendants.

You can also make them as postcards.
Making crafts from cotton pads for kindergarten children
Of course, it’s very easy to make crafts from cotton pads. For example, like this Frost. You just need to prepare the materials in advance. So that there is enough for each child. and there are usually about 30 of them in kindergarten groups.

Idea for home creativity.

It is very easy to glue paper and cotton pads with PVA glue. Moreover, this is the safest type of glue. It can be used for creativity even by the smallest children.

This option was in the first section, but I decided to remind you.

Santa Claus's beard can be very useful at various matinees.

Put on a red cap and a red T-shirt and young Santa Claus is ready. Or Santa Claus.
DIY Santa Claus made from felt
Certainly, ! They don’t make anything out of it! And definitely a lot of patterns and templates. Let's get started, please!
This is your first master class. This is a Christmas tree toy. You can, of course, play with it like that, but it’s too unstable. 

Pattern for Santa Claus.

These crafts simply amaze with their thoroughness and presentability.

There may be several patterns for them. For example, this one. 
It also turns out to be such a Morozushko.

For the cap, take this diagram.

The next pattern for the pendants. 
Now for detailed instructions on how to sew such a boot for gifts.


A very unusual idea. You can use not only felt, but also fabric.


Another template for inspiration.

You can make a lot of wreaths. They are suitable as decor for any room.

This Frost will not leave anyone indifferent. It can also be used as a pendant, because the hat has a convenient hole for this.


For decoration, you can make several New Year's symbols: a Christmas tree, a star, a Christmas ball, deer, etc.


Fantasy is limitless. Therefore, based on one pattern, you can create many new ones.

What attracted me to this craft were the bells. How festive they ring!

You can also make three-dimensional and flat figures. I provide patterns for both.


This Frost is very similar to the New Year's gnome, but does not lose its relevance and charm at all!

In general, only your imagination is important. And we will provide you with the diagrams!

How do you like this craft using bushings?

There is nothing complicated here and you don’t even need to sew anything.
How to quickly and easily make Santa Claus from a bottle
So, the bottles are different. Someone decorates the beauty with champagne. And someone creates something out of a plastic water container.

Of course, if we are talking about children, then we will take a closer look at the ideas. Here, for example, is a stand for office supplies or small toys.

Or just an interesting craft for decoration.


Santa can be the packaging for a child's sweet gift.

For inspiration, here are more options for oldies.


Cotton swabs come in handy too!

I think that a child can choose for himself what idea he wants to bring to life.
Santa Claus for New Year from origami
Origami is popular among schoolchildren. This is a bit difficult for small children. We once tried to make a dog with a child of about 18 years old, he understands everything, but it’s not possible to repeat it a bit. Therefore, this section is for those who are older.

There will be several master classes. All with a step-by-step description of the work.

Diagram with arms and legs.

Are you familiar with the modular origami technique? There, first many blanks of the same shape are made. and from them a craft is formed.

The following is a step-by-step diagram.

Another option.

Detailed step-by-step photographs will not let you get confused. 
How do you like this option? 
And the Santa Clauses have already gone.


Well, one more variation.

In general, attentiveness is important here.
New Year Card Ideas
Finally, let's look at ideas for postcards with our character. It can be flat, three-dimensional, monochrome or colorful. Small or big. It depends on you! The main thing is the mood in which you created it!

Use different techniques and unusual shapes.

Combine different materials: pompoms, buttons, paper and cardboard, wood and wire.

And also several drawings to create a postcard. you can simply print them out and give them as a gift, signing your wishes on the back. They can also be used as window decorations.


Here is the simplest card idea that you can create together with your child.

For inspiration, you can look at crafts and just take their outline.

The postcard itself can be of different shapes; it can unfold, shrink, or simply open.

Or it may be in the form of an envelope.


As you can see, there are no restrictions anywhere, it’s just important to think through the composition, prepare the materials and start creating! I wish you health and every success.
Tweet
Tell VK
What could be better than making New Year's crafts with your own hands? Only making crafts together with children! The most important New Year's character can be made from absolutely simple and affordable materials, and very little effort and skill is required to create it.
Roll is not only sushi
An original paper Santa Claus can even be made from a sheet of thick red cardboard rolled into a roll. But the simplest material for making a New Year's figurine is a cardboard roll from toilet paper or paper towels.
Manufacturing stages:
- A sheet of red colored paper should be glued on top of the roller, and then the lower and upper edges of the cylinder should be folded in different directions as shown in Figures 1-6.
- A white triangle should be placed on the top of the video - this is where the face of Santa Claus will be.
- Using a black marker, draw boots on the lower corners of the cone and a belt around the cylinder.
- Draw the character's face. Secure a loop between the upper corners of the cylinder to hang the toy on the Christmas tree.

Paper tricks
Fans of the popular origami technique can use various schemes for making paper crafts. It should be noted that the first version of the toy can be made from simple one-sided red colored paper, while the original craft from the second diagram will require independent coloring of a white sheet, taking into account the details indicated on the diagram.


Santa Claus made from cones
A minimal amount of effort and time will be required to make Santa Claus from a paper cone. This type of craft is perfect for a creative activity in kindergarten or for a pleasant pre-New Year's leisure activity. Santa Claus can be made from a ready-made printed template or made independently.

For this you will need:
- 1 sheet of white paper;
- 1 sheet of red colored paper;
- glue;
- stapler;
- scissors;
- a bead or small pompom in gold or white.
Progress:
- Draw a circle on a piece of red paper. The desired height of the future figure should be equal to the radius of the circle.
- Cut a circle out of red paper, fold it in half, roll it into a cone and secure the edges of the shape with glue or a stapler.
- From a sheet of white paper, cut out an oval shape with wavy edges. Using the slot in the upper part of the oval, secure the part to the cone.
- Draw the character’s face on the oval, glue on a red nose and white mustache. Add a bead or pompom to the finished figurine at the end of the cone.

Santa Claus - box
A figurine of Santa Claus under a decorated Christmas tree is a traditional element of New Year's celebrations. An unusual Santa Claus, made in the form of a surprise box, will help diversify the festive interior, as well as pleasantly surprise everyone who looks under the tree in search of gifts and sweets. Even one piece of candy or a small souvenir hidden inside the box will bring joy and a sense of celebration to the child who finds it.
Crafts using ready-made templates and stencils
The main New Year's character made by children for their loved ones will become the most expensive and desired gift. To make these, just print the templates on thick paper. A large selection of options will allow you to make several different crafts, which will undoubtedly be useful for sharing or in a large company.