Bright kanzashi rubber bands. Making kanzashi gum: a master class for beginners
1. CHOOSE HAIR SCRIPS AND DECORATE WITH CRAFTS IN KANZASHI STYLE
Decorating women's hair accessories Every year it is gaining widespread popularity in many countries around the world. Hairpins, crabs, combs, elastic bands and other devices for shaping hairstyles are decorated elegant fabric crafts or from satin ribbons.
One of the most interesting trends in decorative and applied arts is the kanzashi technique. , which came to us from Japan. At one time, geishas were very fond of decorating hairpins for their intricate hairstyles. original flowers, whose petals folded in a special way from pieces of fabric.
From this material you will learn how to make beautiful flowers with your own hands or openwork butterflies using the kanzashi technique. By using simple lessons With photos and visual videos of master classes, you will learn how to correctly fold the petals, connect them together, and fasten them with hair elastic bands.
First, let me tell you how to choose the right rubber bands for decorating in the kanzashi style.
Important Tips for choosing hair ties:
First of all, you need to pay attention to the material from which the hair tie is made. This is especially true for owners long strands, since a low-quality accessory can damage the hair structure;
Some girls buy rubber bands to quickly solve the problem of strands getting out of their hair or interfering with their view. But it is very difficult to remove such devices without tearing out a clump of hair. Therefore, we will not use them to decorate with flowers or butterflies from ribbons in kanzashi style;
Another option unsuitable for women's hair rubber bands. On the shelves of some stores you can see examples with a rough black finish and with metal clips. Such elastic bands compress the hair shaft too much and severely damage the structure (especially dry and brittle hair). We will also ignore these accessories and will not decorate them with kanzashi decor;
Very a good option comfortable and inexpensive elastic bands for fixing curls. They are made of silicone and are easy to remove, and can be transparent or match the color of your hair. With their help you can quickly get your hair in order. and are practically invisible in the hair. These silicone rubber bands can be decorated small one-color kanzashi flowers , but such accessories are not very durable;
There are also hair ties with hooks. They can be different sizes, wide and thin, different colors. They hold the curls in the hair very well, their presence is not felt (they do not pull out the hair tufts). Unfortunately, these options are difficult to find on sale. But if you have such rubber bands, then be sure to use them for decorating using the kanzashi technique;
There are also very comfortable and functional hair ties. They are usually sold 3 pieces per pack, have good stretch, with a shell made of soft fabric. This is also a suitable option for us - such accessories are easily decorated with kanzashi flowers of different sizes.
2. WHAT DECORATIONS ARE MADE FROM FABRIC IN THE KANZASHI STYLE TO DECORATE HAIR SCRIPS
Using the kanzashi technique you can make the most various decorations for hair. But the main element in this type of needlework is a petal made of ribbons (fabric). From the petals you can collect not only the most diverse different flowers, but also fancy bows, graceful butterflies, exotic birds. The finished product can be decorated with beads , beads, buttons, rhinestones (with the help of jewelry elements you can easily hide some flaws, joints and seams) and then attach it to an elastic band.
It is enough to master the simplest rules of folding petals from pieces of fabric , as well as connection methods individual parts and you can do unique crafts in kanzashi style. Good, step by step wizard There are more than enough classes and video lessons for beginners.
3. MK FOR BEGINNERS. WE MAKE CRAFTS KANZASHI FOR HAIR ELASTIC BANDS
Master class 1
IF THIS IS YOUR FIRST TIME
.
Master class 2
USEFUL MK FOR BEGINNERS. DIAGRAMS AND PHOTOS DESCRIBING ALL STEPS FOR MANUFACTURING SHARP AND ROUND PETALS IN KANZASHI STYLE. LEARNING TO MAKE BEAUTIFUL FLOWERS FOR RUBBERS .
Master class 3
ANOTHER OBJECT LESSON WITH STEP-BY-STEP ILLUSTRATIONS. WE MAKE A CUTE FLOWER FOR A SOFT RUBBER WITH YOUR OWN HANDS .
Master class 4
HOW TO MAKE A LARGE FLOWER FROM RED AND WHITE SATIN Ribbons USING THE KANZASHI TECHNIQUE. WE RECOMMEND YOU TO GO TO THIS OBJECT LESSON AFTER YOU HAVE MASTERED THE BASICS OF FOLDING PETALS AND COLLECTING THEM INTO A SINGLE CRAFTS FOR RUBBERS .
4. VIDEO LESSONS. WE DECORATE HAIR TIPS USING THE KANZASHI TECHNIQUE
Beautiful summer addition Kanzashi (rubber bands) can become images. Give free rein to your imagination and create unique hair decorations. Also it will be a great gift for the young lady. Every woman will be pleased to wear such an original accessory.
What materials are needed to make kanzashi?
Rubber bands are made from basic set materials:
- Matching tapes.
- Lighter or candle. Necessary for creating a special effect for the flower and for melting the shaggy edges of the ribbon.
- Threads matching the color of the ribbons.
- Needle.
- Scissors.
- Glue for assembling the parts, but in most cases you can just stitch them together.
To further decorate the flower, beads, seed beads, sparkles, sequins, and stones can be added.
Rose
The favorite flower of most girls and women is the rose. It will help you to create an unusual accessory with your own hands using a rose as follows:
- Take a tape 2.5 centimeters wide.
- Cut 20 strips 5 centimeters long.
- Burn the edges to prevent fraying.
- Take the first strip and place it so that you can see the wrong side.
- Fold the strip diagonally in the center, forming a right angle between the protruding edges.
- Fold the edge that we see from the front side again in the center.
- Now we lower the folded section down, placing it on the bottom strip.
- If you turn it over, the shape of the workpiece will resemble a house.
- Leave the workpiece for front side tapes and walk below simple stitches to the middle of the petal.
- Make the next petal.
- Place it on the first one and connect them with small stitches, reaching only to the middle of the second petal.
- Do the same with the third petal, but sew to the end.
- Pull the thread so that the petals form a circle and secure.
- Make five petals and sew them In a similar way together, finally pulling them into a circle. But the second circle should be looser, not so tight.
- Now do the same with seven petals. When you pull it together, leave a small hole in the middle.
- To make the center, start folding the ribbon like a petal. But at the stage when you need to lower side part down, do it under acute angle and twist several times.
- Sew the core to secure it in this position.
- Sew three petals to the core as you did before.
- Connect everything in a circle.
- Now let's collect the details. You can use glue or thread. Connect so that there is a circle with seven petals at the bottom, and three at the top.
The kanzashi technique is very interesting. Hair bands with roses are ready. You can add green leaves or leave it as is.

simple flower
The kanzashi technique is gaining popularity among needlewomen. Hair ties (for beginners, this option will probably be one of the simplest) can be made from satin fabric or wide tape.
- Cut out some circles different diameters. Each one should differ from the previous one by half a centimeter.
- Sear the edges until they become slightly wavy and curled.
- Place the circles on top of each other from largest to smallest.
- Sew down the center.
- Cover the middle with a bead.
This flower is made very quickly and easily.

Carnation
Everyone will love jewelry made using the kanzashi technique. Rubber bands with carnations are made in almost the same way as the simple flower described above. But this work a little more difficult, and the result is worth it. In addition to the basic set, you will need well-melted fabric and cardboard.
Progress:
- Make a circle template with a diameter of 7 centimeters from cardboard.
- Cut 12 circles from the fabric.
- Melt the edges over the fire. To make them wavy, bend them in different sides until they cool down.
- Take one circle and fold it in half twice.
- Secure the resulting shape with thread.
- Do the same with the remaining petals.
- Cut from thick fabric circle (for example, you can use felt).
- Start gluing or sewing petals to it.
- The first layer consists of four petals, the rest are glued in a checkerboard pattern.
The carnation is ready!

Narcissus
Each item is unique if it is made using the kanzashi technique. It won’t be difficult for you to make rubber bands with daffodils. You will need a white tape five centimeters wide and a yellow tape four centimeters wide.
Progress:
- Cut equal squares: six from white ribbon, and seven from yellow ribbon.
- Fold the white square to form a triangle. Fold again.
- Fold in half so you can see the center line.
- Start bending the workpiece like an accordion along the base towards the center from each edge.
- Sew, securing the shape, and melt.
- Now take the yellow square and fold it into a triangle.
- Fold the side corners down through the center.
- Fold in half.
- Melt the edge.
- Cut the bottom in half, don’t forget to melt it.
- Glue the blanks obtained from the yellow tape in a circle to form a bell.
- Also connect the petals together in a circle.
- Sew the core with the petals to create a flower.

Dahlia
You will need a tape 2.5 and 5 centimeters wide.
Progress:
- Take a ribbon 2.5 centimeters wide and cut 30 strips 5 centimeters long.
- Fold one strip in half front side up. Cut a 45 degree angle. Melt it.
- Melt or glue the bottom edges to the center.
- Make 29 petals.
- Make a circle with a diameter of 5 centimeters from thick fabric.
- Start attaching the petals to the base. The first row should accommodate 12 petals, the second - 8, the third - 6, and the fourth - 4.
- To cover the center and give the flower an elegant look, glue on a bead.

Little roses
You can make a whole bouquet of small roses on an elastic band. For this you will need any satin ribbon. What to do:
- Cut ten strips seven centimeters long.
- Bend the edges of the rectangle at a 45 degree angle. It should turn out so that in the center you can see a rectangle from the wrong side, and at the edges - two triangles from the front side.
- Sew along the bottom, gather a little and secure the thread. The result was a crushed petal.

- Do the same with the others.
- Take the ribbon and start rolling it tightly, making the last turn weak.
- Secure. The result is a core.
- Sew the petals around it.
You can adjust the size and splendor of the flower yourself by increasing or decreasing the width of the ribbon and the number of petals.

Can be made into hair bands. The master classes discussed in the article tell in detail how to create different flowers. Buy a simple elastic band without unnecessary details, glue or sew your craft to it. That's all! Fashion accessory ready.
DIY hair ties. Kanzashi. Master class with step-by-step photos
This master class will be interesting creative people who love to create things they need in everyday life with their own hands and decorate their lives beautiful things.
Target: Making a flower elastic band for hair.
Tasks:
introduce Kanzashi’s type of arts and crafts;
master the technique of making: round petals; petals with a curl; sharp leaves;
practice working with satin ribbons different widths;
develop imagination, imagination, creative abilities.
Historical reference
Kanzashi (in Russian, “kanzashi” is more often used) is a decoration for long hair, which are used in traditional Japanese and Chinese hairstyles.
In Japan, women's hairstyles have changed over the years. Women began to collect their long hair in interesting and fancy hairstyles, which needed to be decorated with a comb, hairpins, and sticks with flowers. But since fresh flowers quickly withered, they were replaced with flowers that were made of fabric, ribbons and decorated with beads. Thus, a simple hairstyle of a Japanese woman turned into an elegant, bright and exclusive work of art. By such decorations one could judge social status, the woman’s character, the number of children and whether she is married.
Sometimes, like Japanese women, you want to decorate your hair with an exclusive accessory or make a gift with your own hands for friends and family. I'm making it for my daughter various elastic bands, hairpins and hair clips in Kanzashi style. In my master class I want to tell and show one of the types of making a flower that can be attached to a hair elastic.
To make rubber bands you will need:
1. Satin ribbons 5 cm wide, color: crimson, raspberry, light caral
2. Satin ribbons 2.5 cm wide, color: green, light green (you can choose one color for the leaves)
3. 2 rubber bands
4. 2 flat back beads
5. Scissors, tweezers, hot glue, ruler, lighter, felt-tip pen, spool of needle.

Cut ribbons 5 cm wide into squares (5x5 cm). For one flower you will need 6 squares of each color (18 pieces in total). Each square at the cut site must be burned with a lighter or candle.

round petal Let's make it from raspberry color. Fold each square diagonally.

We fold the resulting triangle in half again and iron the fold.

We begin to lay folds from the middle to the edges; for convenience, we use tweezers.

We unfold the petal and lay the folds in the other direction.

We cut off the excess tail and process it with a lighter. You will need 6 such petals.

Pointed petal with curl We will make it from crimson and light caral colors. We fold a square of crimson and light caral color diagonally, and solder the joined corners with a lighter for convenience.

Fold the resulting triangle in half.

We grab two corners with tweezers and twist them inward to the middle, securing them with glue.

We wrap the resulting curl on both sides with the remaining corners. We cut off these corners a little and solder them.

We unfold the petal and cut off the lower side of the petal (about 5 mm) and seal it.

You will need 6 such petals.

We collect 6 resulting petals (with a curl) onto a thread, pull them together and tie them into a flower.

For leaves Take a green and light green ribbon 2.5 cm wide, cut off a 6 cm long strip of each ribbon (you can only take one color). Let's add them up wrong side to the wrong side. We solder the sections together. Use a felt-tip pen to draw a diagonal line.

Cut diagonally and solder the cuts. It turned out 2 leaves.

You need 6 such leaves.

Cut a circle with a diameter of 5 cm from a satin ribbon and trim the edge with a lighter.

Hot glue all the green leaves to the wrong side.


Glue 6 round crimson petals in a circle.

Glue the flower we made earlier into the center.

Glue a bead into the center of the flower.
The flower is ready.

Glue an elastic band to the wrong side.

The rubber band with the flower is ready.

I made another rubber band. The decoration for the braids is ready.

My works using the kanzashi technique:


DIY ribbon hairpins with photo tutorials
IN Lately, become popular, make your own hairpins from ribbons, as well as elastic bands and braid hair with ribbons. In such needlework, the tsumami kanzashi technique made from satin ribbons helps. Our master class, as well as video lessons, will be devoted to creating hair jewelry in the Tsumami Kanzashi style. 


Making a hairpin from ribbons
We will start our master class with creating kanzashi hairpins for beginners. To do this, we need the following accessories, namely:
- pieces of satin ribbons, you can also grosgrain ribbons, orange and white;
- decorative material in the form of a rosette and black beads;
- scissors;
- textile glue;
- fire from a candle or lighter;
- simple hairpin.
The pattern for creating a hairpin is simple. Take the tapes and put markings on them with a simple pencil, size 5 by 5, in the amount of 16 pieces. We do the same procedure with white tape. Cut everything into squares and pour fire over candles or lighters so that the threads do not unravel, and you can make tsumami kanzashi. Look at the photo, this is what you should get. 

For such a hairpin, we will make pointed petals. This technique is very common and you can easily find it in videos on the Internet.
Pointed double petal, let's make orange, inside it, there will be white color. Take the orange square and bend it diagonally, then once more and pour fire on the corner. Fold the white blank also diagonally, only three times. Look at the photo to see what happens. 

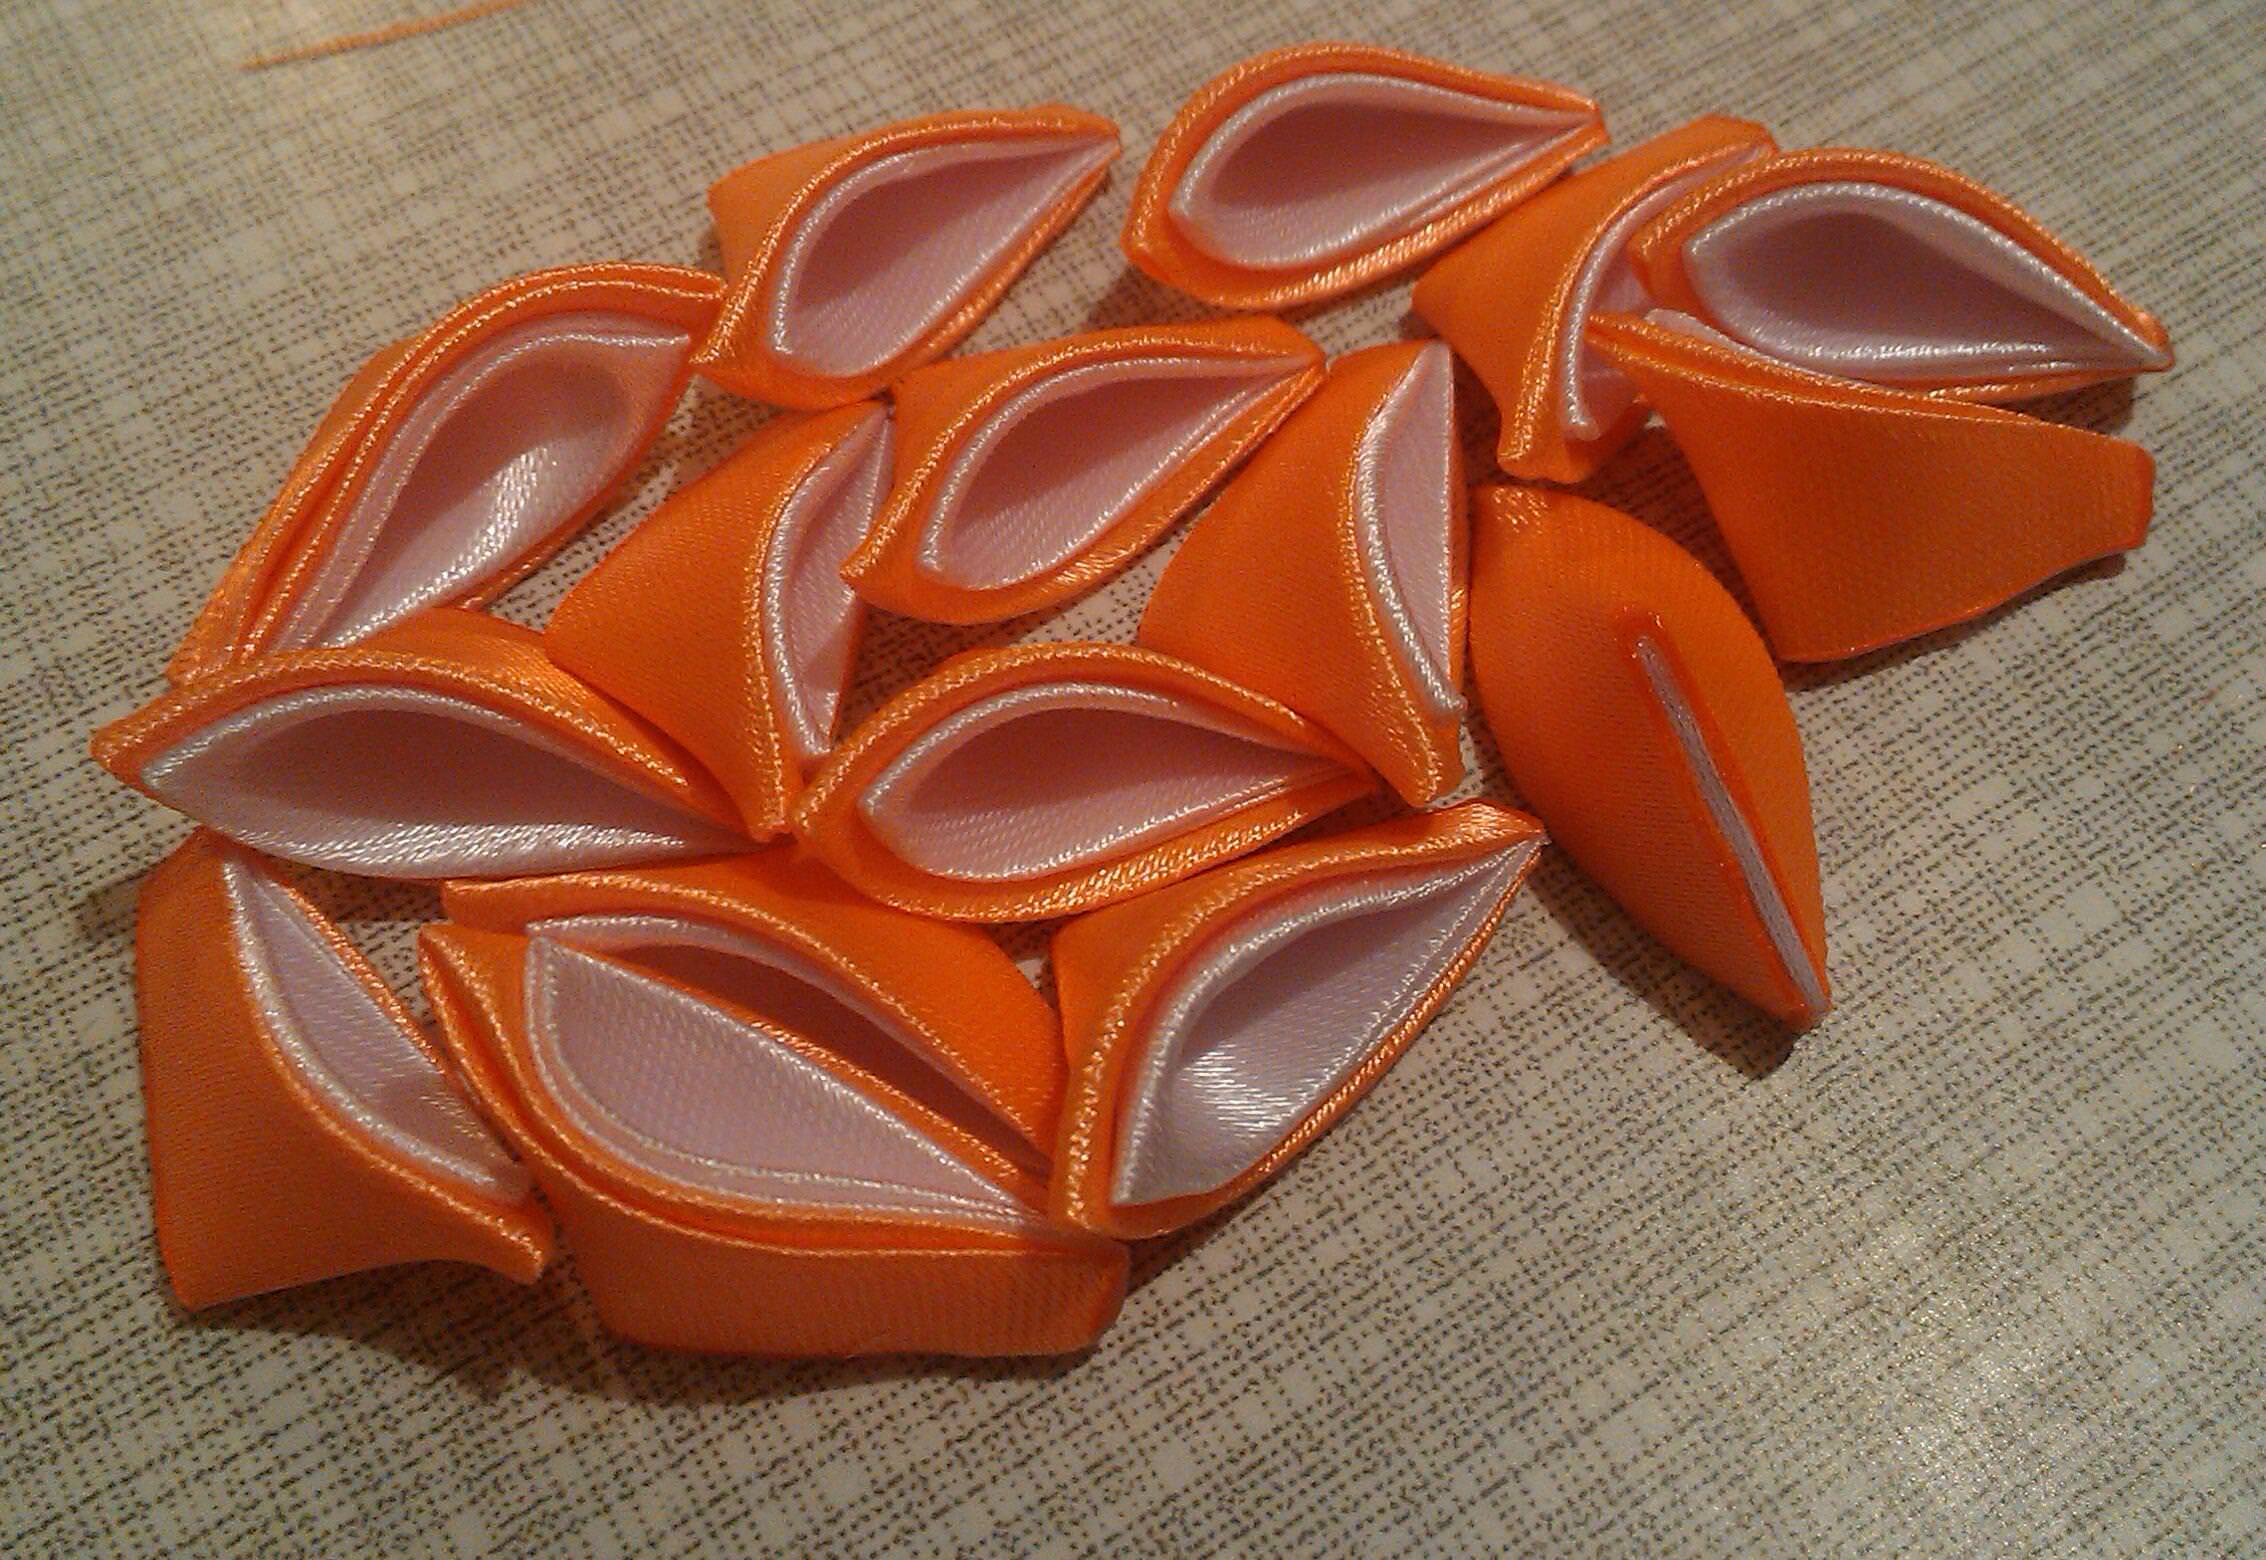
Attach the white blank to the orange one and make a petal. Remove the end and excess material and scorch with flame. We should have 16 such elements.
To decorate the hairpin, we need a few more simple single-layer blanks. From a piece of tape, do exactly the same actions that we did above in the text. 
Simple pointed petals are made in the same way as two-layer ones. Let's not repeat ourselves so as not to waste time. This process can be seen in the video or photo in the text. 
We need twelve pieces of such blanks.
Our master class continues, and we begin to make the main part of the hair clip with our own hands. Cut from thick cardboard, a circle with a diameter of 3.5 cm and stick tape on it. In the end, such an element should be formed. 
Now we move on to connecting all the elements together. Take the double pointed petals, and after smearing them with glue, attach them to the round base. We do this in a circle. Do this technology, clearly along the edge, attaching all the petals tightly. This should be the first tier of the flower, as shown in the photo. 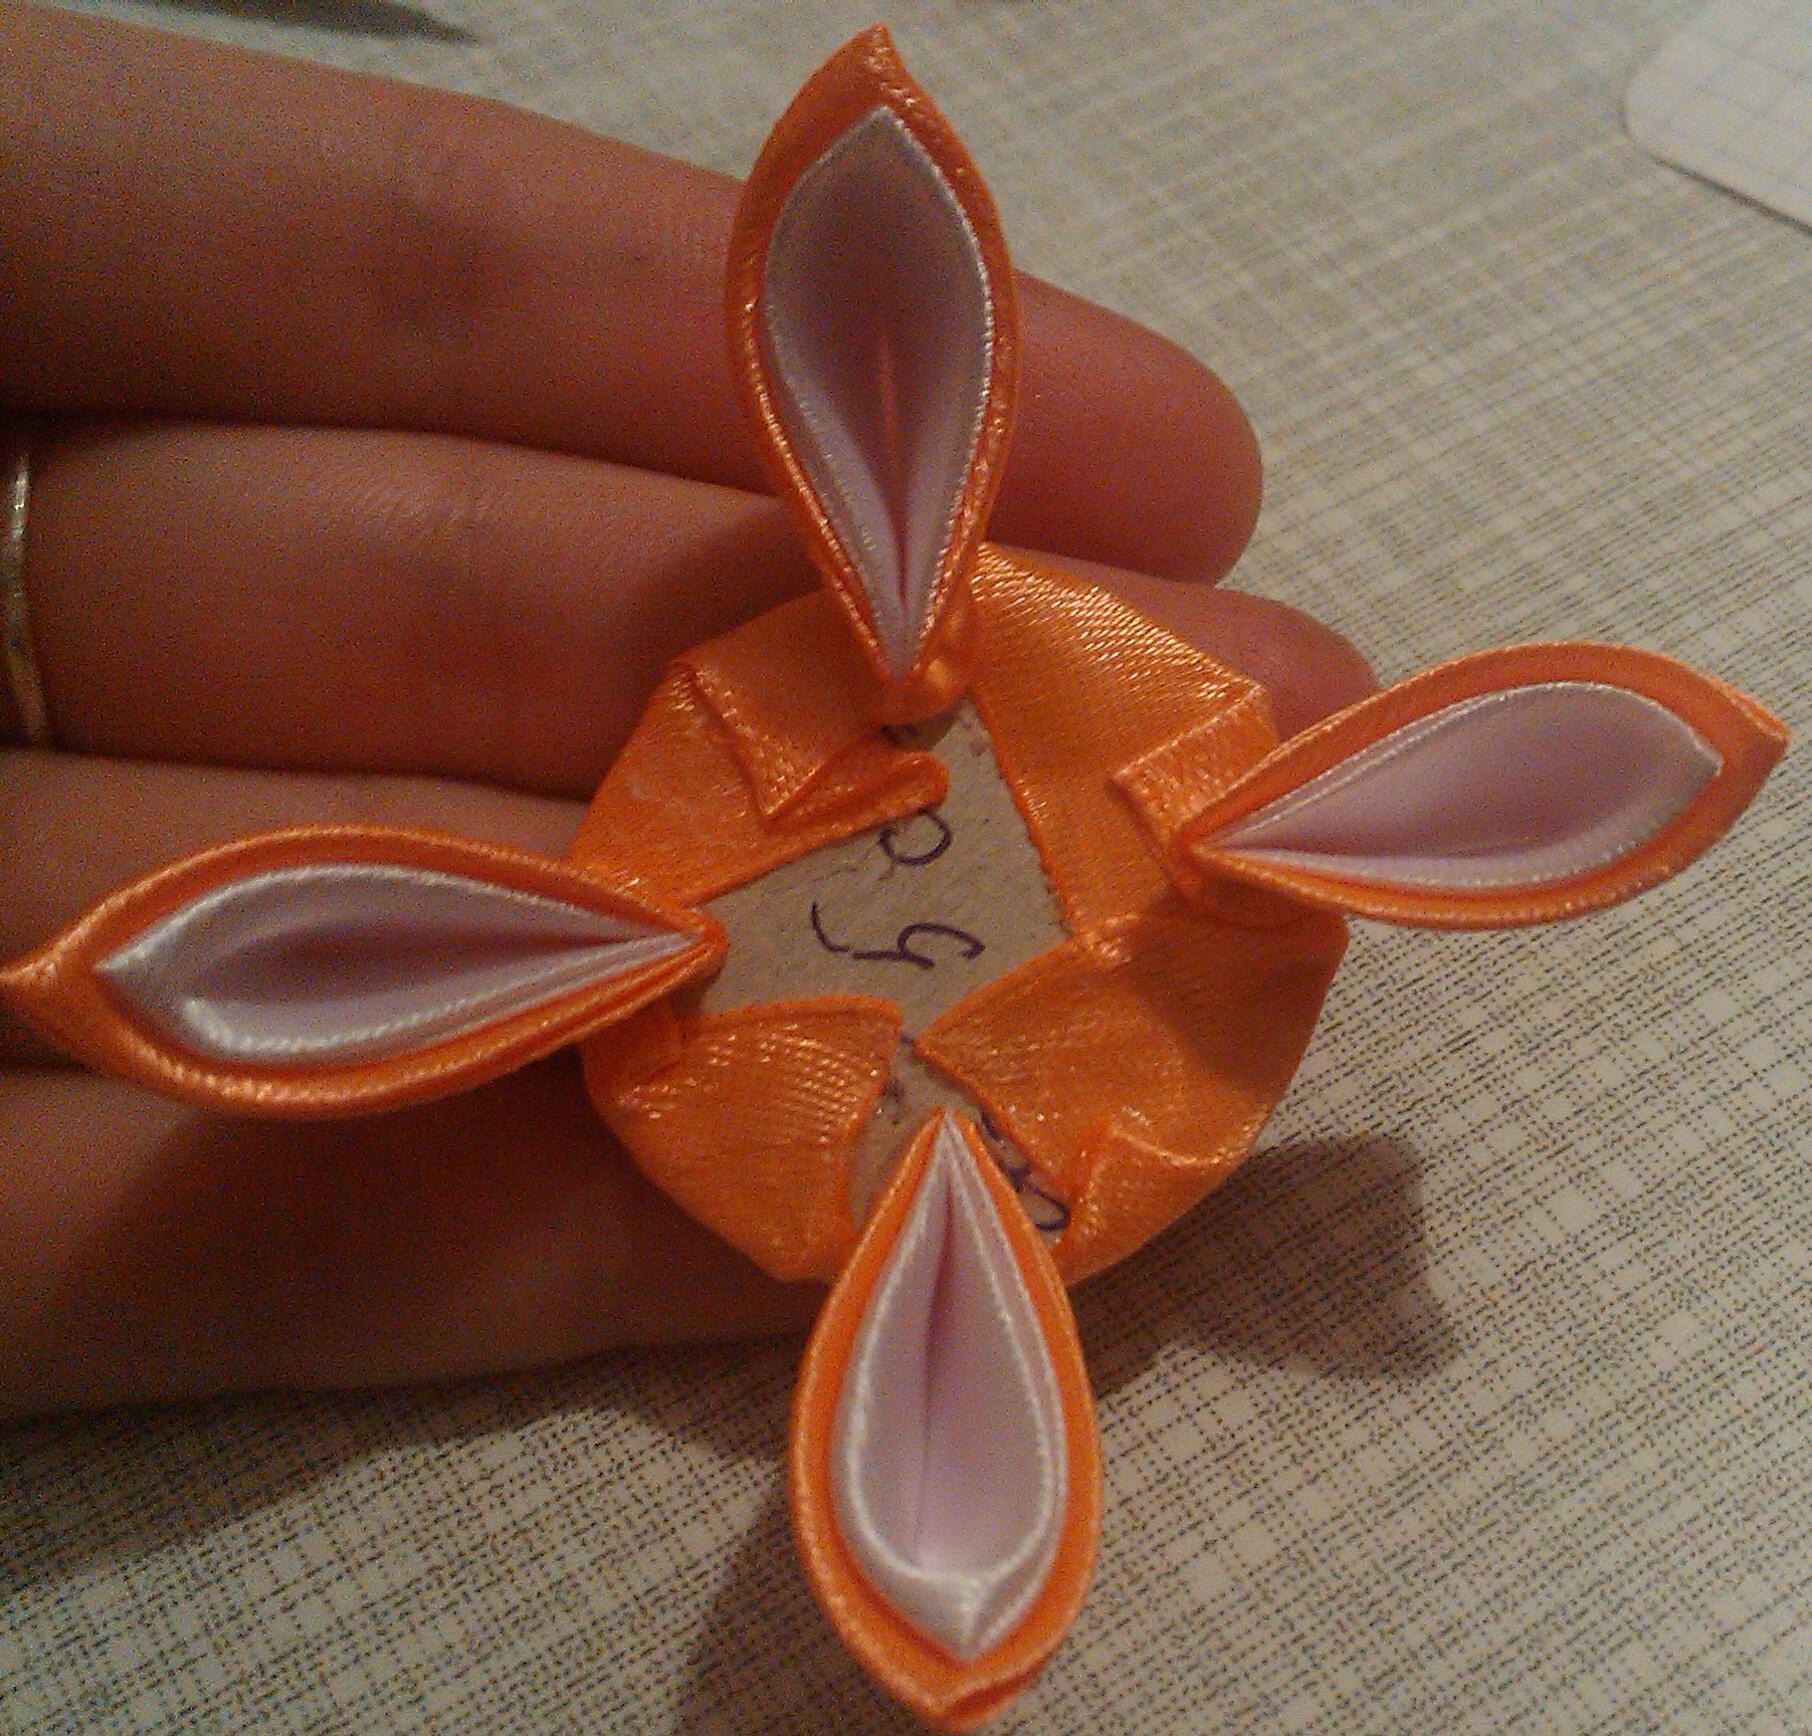


Next, you need to cut out another circle with a diameter of 2.5 cm and also cover it with satin. Then, in a circle, glue simple petals. In the end, you should end up with a do-it-yourself piece using the tsumami kanzashi technique. 


This small flower, you need to coat it with glue on the wrong side and carefully glue it to a large bud. 

Our master class is coming to an end, all that remains is to decorate the flower. For this, we need a socket with a black bead. 
Place a drop of glue on the rosette and then on the bead, glue this decor into the center of the flower and press with your finger. Look what a tsumami kanzashi we got. 
Now take a simple hairpin, crab or elastic bands, onto which we will attach a flower.
Apply glue to the hairpin or crab, and press the flower against it, holding it a little with your fingers until it hardens completely. 


Spray a little hairspray onto the finished accessory.
This master class is for beginners, completely completed. In the same way, you can decorate hairpins or elastic bands. We hope that our video tutorials will be useful to you, and you will be able to create new hair decorations with your own hands.
Kanzashi hair band
Such interesting master class, will be devoted to creating an elastic band for hair using the tsumami kanzashi technique. For this, we will need the following materials:
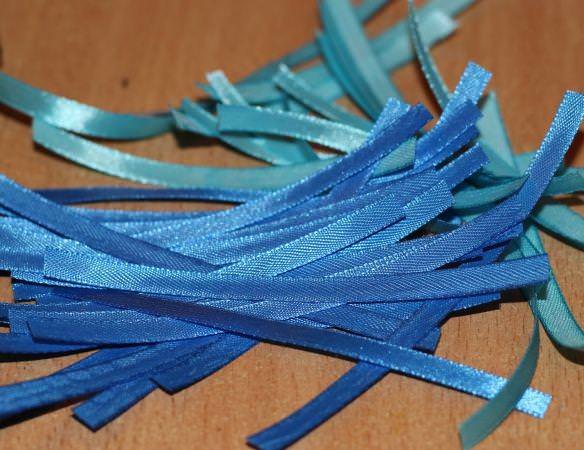
- narrow blue and blue ribbon. For use, it is better to take satin ribbons, but you can make an elastic band from grosgrain ribbons;
- scissors;
- candle or lighter;
- textile glue;
- a piece of satin fabric;
- rhinestones;
- regular elastic band or crab.
We will make these rubber bands two-color. To do this, take blue and blue ribbons. One is two meters long, and the second is one meter long. Cut the blue material into pieces of eight centimeters, and the blue material into pieces of seven centimeters. 
Fold each flap in half so that it overlaps and pour over the fire. 
From a piece of fabric, you need to cut a circle with a diameter of 2.5 cm and douse it with fire. Then, we begin to glue the blanks, symmetrically to each other. 


From the first to the third tier, the petal color will be blue. The next two tiers need to be created blue tint. Trim the topmost elements to make them shorter. 
In the middle of our tsumami kanzashi flower, which we made entirely with our own hands, we glue beautiful rhinestone, shaped like a heart. 
On the wrong side, we attach a simple elastic band or crab, bought in a store, for little money. Before doing this, make a small mount for it. 

Ours is not complex master class on creating an elastic band, completed. We hope that these lessons for beginners on kanzashi techniques have impressed you. The same method is used when decorating hairpins. Detailed video, can be viewed on our portal.
Master class on weaving ribbon into a braid
Since ancient times, brilliant and beautiful hair, was calculated as a sign of beauty in women. A braid with a ribbon was considered a symbol of chastity and wisdom. If your hair is well-groomed and shiny, then you are a wonderful housewife.
Nowadays, braids with ribbons have not lost their uniqueness. On the contrary, they gained many admirers. How to weave a ribbon into a braid is a question every representative of the fairer sex asks herself when she is going to a holiday or just to work.
Our lessons will help you master the skill of weaving braids with ribbons.
Braids with satin ribbons woven into them make a woman more mysterious and tender. The ribbon looks especially interesting on dark and long hair. If you don’t have a suitable ribbon at hand, you can create it with your own hands using a thread with beads. Such an accessory will turn simple hairstyle in the evening version. 
Get everything ready necessary materials to create a beautiful hairstyle, such as:
- crest;
- satin ribbon;
- crab and studs;
- decorative material for hair, such as a tsumami kanzashi flower.
You can insert the ribbon into a simple braid. If you want to create a bow at the end, then take longer material. So let's start our lessons:
- comb your hair well and make a ponytail with an elastic band;
- Tie a ribbon around the elastic band to hide it underneath. The resulting edges of the tape should be the same length;
- Divide your hair into three buns and connect the outermost strand with a ribbon. Then, braid your hair as always;
- upon completion of this work, tie an elastic band and make a bow on top of it.
This hairstyle, like a braid with a ribbon, can be woven not only on the back of the head, but also on the sides or on the top of the head. If you have very long hair, braid the braid around your head, securing it with a hairpin.
Now let's weave french braid for beginners, also decorated with ribbons. Let's start the lessons:
- comb your hair and make an even parting. Braid the braid from one side and then from the other;
- make three bundles of hair on top, grabbing auxiliary strands from the face and begin to weave french braid. When your braid reaches your neck, secure it with bobby pins. On the other side, do exactly the same actions;
- connect the braids together and decorate with a ribbon. Then, start weaving a simple braid with a ribbon.
Our wonderful master class is completely finished, with the help of your imagination, you can weave beautiful braids, decorating them with ribbons at your discretion. Interesting video You can see how to weave braids with ribbons on our website or on the Internet.
Video: Do-it-yourself kanzashi hairpin
Comments
Related posts:
 DIY beaded hairpins in a master class (photo)
Hello, dear readers! I’m a little late with the post, getting sick is bad, but our life doesn’t go by without sores, so the sores overtook me abruptly and inhumanly), I’ll write about it someday. And today I want to show what beautiful kanzashi hair bands I made for Children’s Day for my daughter. They are done very simply, even a beginner can master them. Moreover, I later made an explanatory video on how all types of petals are made in these elastic bands.
To make elastic bands from ribbons with blue and white petals we need:
- 40 cm white lace
- Satin ribbon 5 cm wide, white
- Satin ribbon 5 cm wide, blue
- Beautiful centers for future flowers to suit your taste
- White threads, needle
- Scissors
- Glue gun
- White felt
- Regular hair ties in white (can be blue)

Kanzashi hair bands
This is the set of items we will need. Now let's quickly get down to business. To make one elastic band, we need 7 white squares of white ribbon 5 by 5 cm wide, and 7 squares of blue ribbon 5 by 5 cm wide.
We cut the ribbons with scissors; for ease of work, the squares can be burned on a candle; I was in a hurry and did not burn them, because I had already learned to make friends with the ribbon).
We form a double sharp petal. To do this, fold the white square into a triangle, then again into a triangle and hold it between the index and middle fingers, and also fold the blue petal twice into a triangle.

Then we place the blue triangle on the white one, placing it slightly lower and connecting the lower corners of the triangle. We cut off the tip with scissors and grab it tightly with tweezers and solder it onto the candle.
Then I'll cut off bottom part petal, thus making it flatter and burning this trimmed lower part over the candle so that the petal does not crumble.
We need to make seven such petals. Now we glue them together using hot glue, applying it to the side of the petal and applying the next petal. We do this until all seven petals are glued together. All that remains is to glue a bead and a flower into the middle of the flower from the double sharp petals.

The beauty of the future product very much depends on the middle, for my daughter’s elastic bands, believe it or not, the middle of my blouse, which I decided to alter, and on the collar she had flowers with blue large rhinestones, just suitable for these elastic bands. So I quickly found a use for them, there are still two flowers left, just rhinestones of a different color, I’ll use them somewhere else.
Now we need to make a white lace base for our kanzashi flower. For one lace base we need 20 cm of lace, less is possible, I just wanted the elastic bands to be larger, like bows. Now we take a thread with a needle and string the lace onto the thread, then we tighten the thread and sew the beginning and end of the lace, getting lace flower, this is done easily and quickly and should not raise any questions, especially since there is a video tutorial.

Now, using hot glue, glue the ribbon flower to the lace flower. There is a small detail left to attach the elastic. To do this, first cut out a circle of felt with a diameter of 3 cm and stick it on the bottom of the lace flower, now cut out a strip of felt 1 cm wide and 3-4 cm long and, having threaded the strip through the hair elastic, use hot glue to attach it to just that to the glued felt circle. So our kanzashi hair tie is ready. I made two of these elastic bands so that I could tie my daughter’s ponytails.

These kanzashi elastic bands look very cute and elegant on a girl’s head. So don’t hesitate for a long time, but start creating for your daughter or daughters). They look very nice too, you can make them too.
Kanzashi hair bands master class
And I’ll also show you similar rubber bands that I gave recently, the flower is different, its petals are not sharp, but round, and there are also silvery stamens and green triple petals.
Kanzashi rubber bands master class
For pink kanzashi lace elastic bands we will need:
- pink lace - 40 cm
- satin ribbon Pink colour 5 by 5 cm wide - 8 squares for one flower)
- satin ribbon Green colour 5 by 5 cm wide - 3 squares (for one flower)
- Beautiful centers for flowers
- stamens - mine are silvery
- scissors
- pink or white threads and needle
- glue gun
- hair bands small size white or pink

To form round petal cut the ribbons into squares 5 by 5 cm. Fold the square into a triangle, then lower the triangle with the top down and bend two corners to the top, see photo and video tutorial. We cut off the ends of the tape with scissors and grab it tightly with tweezers and seal it on the candle.

We cut off the lower part of the petal and seal the resulting “ribs” on the candle so that the petal does not fall off. For one flower we will need 8 petals. When they are ready, glue them together using hot glue, applying it to the side of the petal and applying the next petal, thus forming a flower of 8 round petals. Now you need to glue the center into the middle of the flower.
To make the middle stick better, I cut it out first. small circle made of felt equal to the diameter of the middle or a little less and I glue this circle first onto the middle itself, and then I glue the middle to the flower using hot glue.
The flower itself is ready, now we need to make the green petals. To do this, cut the green ribbon into squares 5 by 5 cm; for one flower you will need three squares. From each square we fold a regular sharp petal, just like in the top flower sharp petals, only there were double ones, but here it’s even simpler - a single sharp petal.
First, we fold the square into a triangle, then again into a triangle, and connect the lower corners, cut off the ends with scissors, grab them with tweezers and solder them onto the candle. We cut off the lower part of the petal to make it flat and also seal it on the candle.

Now, using hot glue, first glue two green petals together, and then glue another one in the middle between them, you get a triple green leaf. Glue it to the flower between the pink petals.
Just like in the first case with blue and white elastic bands, we collect 20 cm of pink lace onto a thread, tighten it and sew a lace flower, glue the resulting one on top pink flower and if desired, decorate with stamens, as you like, I glued the stamens with hot glue.

We also glue a felt circle on the bottom, well, I will repeat, this stage of attaching a hair elastic to a flower is described above or watch in the video master class. This is how pink delicate kanzashi elastic bands turned out in round flower on a lace base. Simple, fast and beautiful! I hope that this master class and my article were useful to you. You can watch my video explanation of these rubber bands below.
P.S. Quite recently, the owner of one of my favorite blogs, Olya Andreeva, who runs a blog about children and grandchildren, “Children and Grandchildren,” handed over an award for my “old” blog. Olya, Thanks a lot You! As a sign of respect for Olya, I will answer her questions, but I will not pass the baton, because I read mostly old blogs, and such an award is still needed more by young blogs.
In general, I don’t like to write about myself, but it’s necessary, it’s necessary)
11 facts about me
- Orthodox Christian.
- In 2015 after 9 years life together I got married to my husband, now we are husband and wife not only before people, but also before God.
- I love my family and thank God that I have it. I have been married for almost 10 years, we have two children, a daughter and a son.
- I love learning new things.
- I love kanzashi and free time I spend it in creativity
- Modest), because of this I speak very quietly, so many do not believe that I can shout or scold children.
- Adherent to a sober lifestyle, I don’t drink anything alcoholic, not even champagne New Year), I do not smoke.
- I feel people, I avoid envious, evil and deceitful people.
- I love nature, animals, especially small puppies.
- I studied taekwondo for 9 months, received an initial white belt, and went to give birth to my son).
- I love spiritual books and calm music. I hate heavy rock and metal and cars that drive around the city with deafening demonic music, it unbalances me).
And now my answers to Olya’s questions:
How did you choose a topic for your blog?
My blog doesn’t have a specific topic, there are many of them, that’s why all the troubles in promoting it)
How do you solve technical problems on your blog?
I don’t know how to solve technical problems, I just do the basics, and if I need to get into the code, I turn to freelancers for help. If I decide to do something myself, the site definitely stops working).
Who are your teachers in the blogosphere? What courses helped you?
There are many teachers and the Internet itself is like a teacher, but you need to apply all the recommendations on time and blog correctly from the very beginning, which I haven’t done for many years, and I still can’t do it now). She took courses from A. Borisov and A. Kravchenko.
How long do you think your blog will last?
How long he will live, only God knows)
What is your main job?
Now my main job is maternity leave, and I really like it)))
Do you know how to forgive insults?
I can, but usually after a while it doesn’t work right away)
What qualities do you value in the opposite sex?
Honesty, loyalty, decency, punctuality.
Are you leading active image life: nutrition, physical activity? How do you feel about weight loss diets?
I try to lead, but it doesn’t always work out), I don’t have a good attitude towards diets, I’m very skinny myself and I dream of gaining 10 kilograms)
If you could take it all back, what would you change in your life?
I wouldn’t try to study perfectly, neglecting my health)
How do you plan to write a blog article? Write a plan
No, I never write an outline, but sometimes I plan the topic itself and think about it.
What do you dislike most about people?
Arrogance, rudeness and gossip.
Although I won’t give the award to anyone, I will say that I really love many blogs, including yours Olya. And lately I’ve fallen in love with this blog for the naturalness and sincerity of its owner, she doesn’t embellish anything, she writes honestly as it is, she uses a lot of humor and is generally very smart and mother of many children. I’ve been reading her for a long time, but I don’t leave comments on her blog, I’m such a secret reader). Here is the address of her blog, if anyone is interested, check it out http://komkoffa.blogspot.ru/?m=1
With respect and love, Elena Kurbatova.