Do-it-yourself slingobuses or how to tie slingobuses photo-master class. DIY sling beads: a crochet master class for beginners How to assemble sling beads correctly
Content
Slingobus is a very bright colorful women's jewelry, which is designed to entertain the baby while breastfeeding or when he is in a sling. Such a toy will not only be entertainment for the child, but will also help with teething. Such an accessory can be made independently, having spent quite a bit of time on work.
Crochet slingo beads
It is important that only natural and organic materials are used for the manufacture of slingobus.
For work we need:
- wood beads with a diameter of 5 and 10 mm;
- multi-colored cotton threads;
- crochet hook No. 1.0;
- sintepukh;
- rope;
- needle and thread floss.
Manufacturing process
Bead binding
We begin the work with tying wooden beads.
Armed with a hook and blue threads, let's get to work. We tie a weak knot from the threads, tie it, knitting 8 single crochets through the center. We connect the circle, tighten the loop by pulling the end of the thread.

1 p. - we knit two in each loop;

2 p. - we knit every second loop twice;

from 3 to 7 p. - knit without changing the number of loops.

In the resulting hemisphere we lay a large bead, as shown in the photo.

8 p. - we shorten every third column, i.e. we knit two, skip the third;

9 p. - we shorten every second column, i.e. knit through one.

Now we tighten the knitting, fix everything with a knot, cut off the thread, leaving a small tail. The protruding ponytails are carefully tightened with a hook inwards under the knitting.

Thus, we tie 10 beads with threads of different colors: one red, orange, green, yellow and two purple, blue and light blue.
Knitting fruit slices
Now we start knitting citrus slices. First we knit a slice of lemon. We make a loop from a yellow thread, we tie it with 8 single crochets. We close the row, and we tighten the center.
1 p. - in each column we knit two;

2 p. - we knit every second loop twice;

3 p. - we knit every third loop twice;

4 p. - we knit loops without changing their number;

5 p. - we knit twice every third column;
6 p. - we knit a loop into a loop, without changing their number;

7 p. - knit twice every third column;
8 p. - repeat the 6th row;

9 p. - again we knit twice every third column;
10-12 p. - repeat the previous rows;

13 p. - we knit the entire row with a white thread, without changing the number of loops;


14 p. - with a yellow thread we knit the last circle, without changing the number of columns.

The base for the lemon slice is ready. Now we take a needle with a white thread, we lay a seam along the diameter of the circle.

In the same way, we embroider a perpendicular line and two more between them. We get a lemon with eight slices.

According to the same pattern, we knit and embroider an orange slice with orange and white threads.

To tie a watermelon slice, we knit in red according to the above pattern from the 1st to the 11th row.


We knit the 12th row with white yarn, and we tie the last one with green. To add realism, we embroider a watermelon slice with stitches of black thread, imitating seeds.


By the same principle, we knit a slice of melon. We start with white. From the fifth row, we change the thread to beige. We knit seven rows. We knit the last row of columns in orange.


Knitting daisies
To make a chamomile, we form a weak loop from white threads, we knit 8 single crochets into it. We close the knitting in a circle, tighten it tightly by pulling the free edge of the thread.
1 p. - we knit each column twice;
2 p. - we knit every second column twice;
3-4 p. - we knit every third column twice;
5-6 p. - knit without changing the number of loops;
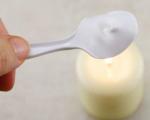
7-8 p. - we shorten every third column (at this stage we tightly fill the workpiece with natural soft filler);
9 p. - reduce every second column.

Now we tightly tighten the last row, fixing it with a knot, cut off the thread. Chamomile base is ready.
We take a needle with a yellow thread, we begin to embroider the middle of a camomile. To do this, it is enough to embroider a snowflake in the center of the flower with a few stitches.
To designate the petals, without tearing the thread from the center, we clasp the circle, prying the loop on the side of the part with a needle. We make stitches on both sides of the workpiece, tighten the thread a little so that the edge of the petal is slightly rounded.
Now we make the same stitch on the opposite side, bringing the yellow thread through the center of the chamomile. By the same principle, we wrap the workpiece in a circle, making 6 symmetrical separation stitches. We fix the thread with a strong knot. We knit another one of the same chamomile.
Knitting strawberries
We complement the fruit and berry composition of our baby carriers with a beautiful strawberry. To tie it, from a red thread, as in the previous case, we make a loop, we knit 8 single crochets through it. We close the knitting in a circle, pull it together by pulling the short end of the thread.

We continue knitting according to the scheme with single crochets:
1 p. - in each loop we knit two columns;

2 p. - in every third loop we knit two columns;
3-4 p. - we knit without changing the number of loops;

5 p. - we knit twice every fourth column;
6-12 p. - we knit without changes (in each loop, one column);

13-14 row - we cut every third column (at this stage we tightly stuff the part with sintepuh)
15 p. - reduce every second column.

We add a little more filler, we tighten the knitting, fixing it with a knot.

Now we begin to embroider green sepals with a needle with a green thread. Insert the needle into the top of the berry.

In the direction from bottom to top, we hook one of the loops, stretch the needle, making a stitch and not pulling the fabric together.

We return to the top of the part, fix the thread.

We return again, insert the needle from the bottom up, prying the loop located just below the previous one.

We return to the crown again, fix the thread with a stitch. One sepal is ready. In the same way we embroider five more.

With a yellow thread, we embroider bones on a strawberry.

We insert the needle directly into the lower part of the sepals, make a small stitch between the sepals - this will be the first seed.

We bring the needle between the next sepals, make a stitch. This is how the first row of seeds is obtained. Row by row we embroider the bones, placing them in a checkerboard pattern.

The strawberries are ready.

Slingo bus assembly
When we have all the details ready, we proceed to the assembly of the product. We will string the elements of the beads in the sequence of the colors of the rainbow. All elements will be separated by small wooden beads.


First, we put a red bead on the rope. Now we fix the orange slice. We fold it in half (the rope should pass through the center).


Now we sew a slice along the contour with white threads. At the end, tightly stuff the part with sintepuh, sew to the end.


Now we put on blue and blue beads, not forgetting to separate them with wooden beads. We string along a camomile, a purple bead, a strawberry, an orange bead, a lemon slice, green and blue beads.

Then we put on and sew a melon, followed by blue and purple beads. The second chamomile closes our beads.

Recently, a new word has appeared in the vocabulary of young mothers - sling beads, mumbuses, nursing beads, eco beads, a unique accessory for mother and a toy for a child. They develop coordination of movements, fine motor skills, contribute to the development of color perception. On a walk, on a trip, slingobuses will occupy the baby for a long time. They can be chewed when teeth are cut, sorted out, and a grown-up girl will be happy to wear her mother's beads. Slingobuses are very easy and simple to make with your own hands. To make the beads safe for the baby, you need to use cotton threads of different colors and beads made of natural wood.
Learning to make beautiful slingobus with your own hands in a master class
Medium size bead binding:- Make a chain of 6 loops, connect the first loop to the last, tighten to make a circle.
- The second row is knit with a double crochet.
- The third row is the same, only through one loop.
- Then raise the walls three or four rows, knit in a double column.
- Insert the bead into knitting, it's time to start decreasing, gradually in reverse order, first through one loop.
- Do the same on the next row.
- The last row is a low single crochet through one loop, finish the strapping.
Thus, tie several beads of different diameters with threads of two, three colors. Once again, I would like to emphasize that the threads should be cotton, and the beads should be made of natural wood, so that your child, taking a toy in his mouth, does not harm his health.
Flower:- Dial a chain of 6 loops, connect and fasten the first and last loop.
- Make the first circle, double crochet, the more double crochet, the more wavy the flower will be.
- The next circle, knit three columns in each arch, you get the effect of shirring, a shuttlecock is formed.
- The third circle, knit two columns into each arch.
- We collect sling beads on a cord, in order to tie it you need to choose thicker threads than for tying beads.
- Dial a chain of so many loops to end up with 86 centimeters, this is the length of the cord, in total you need two of them.
- It is necessary to form the center of the product, fasten the wooden ring by tying both cords to it on both sides, folding each cord in half.
- String on one side of the center a small wooden bead without wrapping, then a square bead, a flower, again a bead without wrapping, a tied bead of one color, just a wooden bead, a tied bead of a different color, and so on, as your fantasy tells.
- Similarly, to make the second side, you can collect the beads in a completely different order.
- Tie with a sea knot on both sides so that the work does not crumble. A wonderful product turned out, it can even be washed, as it is made from natural materials. Your baby will be very pleased. The first video at the end of the article will clearly show the whole process from start to finish. For beginners, this is the most suitable job in terms of complexity.

These are beads, they can be sorted out and this master class is for more experienced craftswomen.
Wooden beads made of juniper, beech, a hook, cotton threads of yellow, blue and orange colors imitating the body of a giraffe, cords for legs are used.
- Dial a chain of three air loops for tying a bead, close it in a circle and knit six single crochets into it.
- The next rows, 6 single crochets, are knitted until a cap is obtained that closes the bottom of the bead.
- Then straight rows of 6 pieces are knitted for a bead with a diameter of about 20 mm.
- Close using decreases.
- Next, the head of the giraffe is knitted. To do this, you need to make a double amigurumi ring. Wrap the index finger with a thread twice, you get a ring that is tied like this, 6 single crochets and the ring is tightened.
- Then knit up to 30 single crochets in a row.
- Knit three rows without increases, then decrease.
- Two rows of orange thread without decreases, a row with decreases, a row without decreases.
- Stuff the muzzle of a giraffe with holofiber - a hypoallergenic material that is safe for a child. You can also place bells there so that the baby has a rattle.
- Having made reductions, close knitting.
- Knit horns and ears. Eyes, eyebrows and nostrils, embroider with threads of a contrasting color, spots on the giraffe's body too.
- Assembly of a giraffe. You should follow a simple scheme: first, with the help of a hook, fasten the head, then string wooden beads on the cord, you will get a neck. To make the body of a giraffe, it is necessary to alternate the obligatory beads of different colors. Legs from laces, tie the ends with knots so that the work is preserved intact. Your child will be simply fascinated by such a bright toy - a rattle.
Very beautiful slingobuses are obtained with fruits, flowers, smeshariki, this can be seen in the photo, they are put on the mother's neck, and the child calmly sorts them out.
How useful and indispensable they are for a young mother.
Well, today for those who want to try make slingobuses with your own hands, I will talk about the main stages of their creation.
Work materials
1. Beads
To start, choose .
The number of beads - to taste from 12 pcs. and more.
Choose the diameter of the beads for tying to taste, the most optimal, in my opinion, is 20 mm.
For decor, you can use smaller beads - up to 10 mm.
 2. Yarn
In slingobuses, the most important thing is safety, and therefore, we choose cotton!
In principle, any natural yarn will do, such as linen, silk or bamboo. But, in my opinion, in terms of availability, color variety and thickness, cotton has no competitors.
Speaking of thickness...
The type of your bead will depend on what yarn you take. Beads tied with fine yarn look unusually neat and beautiful, but it will take more time to tie a bead with such a thread.With thick yarn, the bead will be tied in a matter of minutes, but it will also look completely different.
However, it all depends on your idea and the result that you would like to get in the end.
My recommendations: Vita Kotton Daisy, Vita Kotton Coco, Alize Forever, Nazar Assol, Alize Miss, Iris, Alize Diva (somewhat thicker than the other threads presented).
As you can see, Iris is in last place for me, despite the fact that both the color palette and the availability of this yarn are captivating, I like knitting with it the least of the presented series.
And, of course, do not forget about the compatibility of colors that you will use, the type of finished beads will depend on this.
3. Hook
The hook number must be selected in accordance with the yarn that was chosen for knitting. Hook number recommendations can be found on the yarn label. Well, for the above types of yarn, I use hook No. 1.0
4. Foundation
Waxed cord or satin ribbon, in general, what you will string beads on. If none of this is at hand, just crochet the cord.
5. Filler
Hollofiber, synthetic winterizer or drygots filler, in case you plan to knit soft beads or toys
6. Additional elements and decor
Tweeters, rustlers, rattles, wooden rings - at will and rampant imagination!
Stages of work
 1. We tie a bead
Description for beads 20 mm yarn Alize Forever
Please note that depending on the diameter of the bead, the thickness of the yarn and the number of the hook, the number of increases, decreases and rows may vary.
Designations:
RLS - single crochet
PR - increase: 2 RLS knitted in one column of the previous row
UB - decrease: 2 sc knitted together
- In the amigurumi ring, knit 12 sc
Don't know how to crochet an amigurumi ring? Watch the video lesson:
- (1 RLS, 1 PR) x6 = 18 RLS
- (2 sc, 1) x6 = 24 sc
Try on knitting to a bead, if the width is not sufficient, then we will make more increases
- (7 RLS, 1 PR) x3 = 27 RLS
- we knit without increments until our strapping is slightly higher than the middle of the bead - in total, from the beginning of knitting, I got 11 rows.
Next, we make decreases in the same quantities as the increases at the beginning.
Instead of decreasing, you can simply skip one column of the previous row.
- (7 RLS, 1 UB) x3 = 24 RLS
- (2 sc, 1 dec) x6 = 18 sc
- (1 RLS, 1 UB) x6 = 12 RLS
We cut the thread, leave a long tail and sheathe the edges of the hole, pulling it together a little.
We fix the thread and hide it under the canvas with a needle.
In addition to wooden beads, you can tie a rattle bead.
2. Toys and decor
If desired, we knit a toy for a slingobus, tie a wooden ring, and prepare other decorative elements.
3. Lay out the finished elements and form the beads
We lay out the finished beads and elements on the table, figure out how we would like to see them on the cord, make sure that they look harmonious both in colors and in the arrangement of all elements. You may need to knit or remove some beads.
4. We string beads and elements
If you do not have waxed cord or ribbon, just tie a neat and tight chain of air loops, it will work great for the cord.
With a needle with a large eye, stringing beads on a string will be much easier.
If necessary, make knots between the beads and be sure to fasten the outer beads.
5. Final stage
We align the ends of the beads, try on ourselves, leave such a length that it can be adjusted to taste, cut off the excess. Try to make the ends neat so that they do not fray and, if the cord was tied, do not unravel.
 So you made slingobuses with your own hands! Congratulations!
Do you have any questions? Ask them in the comments to this article.
Be sure to share your results there, did you manage to knit your first slingobuses?
No time to knit or the complexity of the work is a little scary? Just with us and please yourself and your baby with a new bright development!
Knitted beads, they are also slingobuses, were originally intended for mothers of babies, or rather, for the crumbs themselves, sitting in a sling, as an educational toy. But tied beads are such an unusual and attractive decorative element that knitted beads quickly migrated to the category of fashion jewelry. Regardless of what the goal is for decoration, in our master class you will quickly and easily learn how to tie beads and make a variety of sling beads.
To knit a slingobus with your own hands you will need:
acrylic or cotton threads in two colors (in my case, YarnArt Etamin);
suitable size crochet hook;
wooden beads with a diameter of 0.8-1.2 mm.

Do-it-yourself slingobuses: a master class with a description
How to tie a bead for a slingobus
To tie beads for the manufacture of original jewelry, you do not have to make special calculations. We knit 4 ch.

We close the chain into a ring with a connecting loop.

We tie the resulting ring with six single crochets.

The next row - 2 tbsp. single crochet in each loop of the previous row. The total will be 12 tbsp. b.s.

The third row is a row of single crochets. It is not necessary to add or decrease loops. You will get such a "hat".

Try on the resulting hat on a bead. I got it like this.

If the cap is small in diameter (after all, a lot depends on the density of knitting, the thickness of the threads, the size of the hook and the beads themselves), we tie it up: we tie the chain closed into a ring not with six, but with eight single crochets, and in the next row we double them.
Because my whole village is perfect, I continue to knit 2 more rows without adding or decreasing. The bead at this time lies on the sidelines, but until you have determined your suitable calculation, we will constantly try it on for “clothes”. Immediately position the bead correctly: the hole in the strapping should match the hole in the bead itself. Your crochet hook will help to combine them.

The next row is the reduction of every second loop.

If the hole is still wide, skip 1-2 loops, close it. We stretch the thread, cut it, leaving a small tail. We fill the tail between the strapping and the bead.

You can alternate two or three colors - you get colorful tied beads for a slingo bus.

Place them in front of you, fantasizing how they will gather into a finished decoration. Add loose beads.

Thread for assembling a slingo bus with your own hands
We knit a long chain of air loops - the length we need, plus a good swing for tying! Short ponytails are extremely inconvenient to tie. At the end of the chain, tie any flower. For example, this: 4 v.p. close in a ring and tie 6 tbsp. without a crochet. The next row - 6 columns with 1 crochet, and between them - 3 ch. Close the row with a connecting loop.
The next row is a row of columns with 1 crochet, 3 columns in chains of air loops and 1 column in the columns of the previous row. Close the row with a connecting loop.
And tie the last row of pico from ch 3. It turned out like this:

Fasten the thread, cut it off, hide the tail or hem it.
On the second edge, without a flower, string our beads and jewelry, if any. And tie the same flower at the second end of the thread to assemble the slingobus.


The choice of materials for knitting slingobus
The base is wooden beads. I prefer to buy juniper beads at sea. They have good processing, and the beads have the “correct” size for a slingobus and an indescribable aroma! In knitted beads, I use them both tied and in kind.
What yarn to use? Acrylic is practical and durable, modern threads are pleasant, and not everyone recognizes synthetics in them. And cotton is cotton. Caring for such a product is somewhat more difficult, but many are very warm at the thought of Natural Jewelry. Why not? Both options are suitable for a slingo bus: the main thing is that the threads are lint-free and of high quality.
The thread on which I collect slingobuses is also most often knitted by myself. Less often I use ready-made options: waxed or silk braided cord, even less often - suede or leather cord - the latter option is not for children to chew on, of course. It is much easier to tie a rope with air loops, and you don’t have to be smart with the color - take one of the colors used in knitting beads, and you're done!
Any clasp can be made. It is very convenient to tie in a bow: you can make slingobuses of a convenient length and vary as you wish. A rough rope made of air loops perfectly “links” the bow ties together - the slingobuses do not strive to untie themselves spontaneously.
As for decorations for the slingobus, although there are many options, not all are suitable for children's games. Wooden beads without strapping in very high quality workmanship will do. Plastic flower beads are unlikely: there is a risk that the child will bite off a piece or get scratched. The best option is to use knitted ornaments: for example, a knitted rose.


Love to knit? Knit in addition to slingo beads in the same color scheme.
Eva Casio specially for the site
Before the birth of my first daughter, I had not even heard of the existence of such a wonderful and necessary device as a sling. Unfortunately, not all mothers manage to adapt to it and get the maximum benefit as a result. And in the end, mom is disappointed, and the money is thrown away. But how good it is when the baby is always with his mother!
And it happens that the baby, on the one hand, wants to be in his mother's arms, and on the other hand, he spins and spins all the time, as if he wants to occupy himself with something.
In this case, no less useful thing called slingobuses can come to the rescue.
In this article we will talk about how to tie slingo beads with your own hands.
To make slingobuses with your own hands you will need:
Beech or juniper beads: 3 pieces 30 mm in diameter (can be unpolished), 4 pieces 25 mm (can be unpolished), 8 pieces polished 15 mm (of course, the number of beads may be different, but I describe how to knit sling beads such as me);
Threads of white, yellow, green, black, cotton is better (threads "Iris", " Rose, Sharm "or any others);
Large needle;
Hook 1.2.
Do-it-yourself slingobuses description:
I will describe how to tie beads, because they are all tied in the same way.
In a double amigurumi ring, we collect 6 single crochets, tighten the ring, but leave a small hole so that you can then put the bead on the cord. Next, knit in a spiral:
1 row: first we add in each column, as a result we will have 12 columns in a row;
2 row: we add in every 2nd column (we get 18 columns);
3 row: we add in every 3rd column (we get 24 columns);
4th, 5th and 6th row: we knit without increments in a spiral, that is, 24 columns in each row.
When crocheting a slingobus, you should not rush, then the tying of beads will turn out without holes. It is necessary to try on the connected piece to the bead, you may have to do 1-2 more rows of increments, since the thickness of the thread you have may differ from mine.
For example, if your knitting did not close the bottom of the bead, then:
4 row: add in every 4th column;
5 row: add in every 5th column;


10 row: decrease (i.e., knit two columns together) in every 3rd column (18 columns remain);
11 row: in a circle without increments;
12 row: decrease in every 2nd column (12 columns remain)
13 row: decrease in each column until a small hole remains.

We hide the thread with a hook.


To make a chamomile, we tie it in a circle with a chain of air loops, attaching it with single crochets to the bead.
Petal: 1 single crochet, 1 half double crochet, 1 double crochet, 2 double crochet, 1 double crochet, 1 half double crochet, 1 single crochet.
Do-it-yourself slingobus chamomiles can be more than one, or you can tie not a chamomile at all, but, for example, a poppy!
The scheme for tying the rest of the beads is the same. Experiment with color, add toys (for example, this one is suitable for a slingobus) to make slingobuses with your own hands and turned out bright and original.
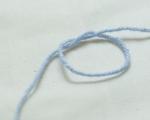
As a lace for my slingobus, I used a chain of air loops in 2 threads.

Slingobuses are not just beads, they are an educational toy that is always with mom, and therefore the most expensive.