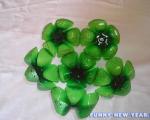
We make New Year's pictures from colored paper. Craft made from paper loops
Our dear and beloved children produce very interesting cotton panels, paintings, or in other words, applications for the New Year. Gluing cotton wool and pieces of paper, and then gluing them onto cardboard with your own hands is one of the favorite activities of kids. Therefore, we want to bring to your attention the most interesting children's works taken from open Internet sources.
Possibly ideas for applications on New Year's theme will give you even more interesting ideas. And if not, then invite the children to make applications from cotton wool and cotton pads from the works proposed below.
New Year's applications for children 4-6 years old in kindergarten
Exactly at kindergarten Children begin to instill perseverance and develop a love of creativity. The kids in the group collectively make various crafts with great interest not only from cotton pads, but also from other available materials. Children show particular interest in crafts made from natural material, but more on that later. Now look at the ideas for making appliques for the New Year from our dear children.
As you can see, applications for children can be made from either cotton wool and cotton pads, or mixed media. Below is another work using cotton wool, plasticine, pasta and various cereals. By making such a panel, a child not only develops imagination, but also fine motor skills hands Of course, for the little ones it will be difficult to make such a large-scale application, but when improving your skills to more simple crafts children will be able to create a similar New Year's masterpiece faster :)

It will also be interesting and easy for kids to make a Christmas tree from cotton pads. Below is one of the simplest simple ideas:

And next to the Christmas tree on the applique there could be a bunny like this.

Crafts for the New Year for schoolchildren of grades 1, 2, 3
For children school age There are also ideas for crafts made from cotton wool, but more complicated. Many schoolchildren already have skills in working with scissors, and some already in the first grade can cut blanks fairly evenly along the lines. Just for this age, you can make a New Year-themed card, for example, “Bears on the server pole”:

You can also make a card like this “Happy New Year!” with cotton wool appliqué elements:
 |  |
You can give a Christmas tree to mom and a bunny to dad, or vice versa :)
For older children, it will be interesting to make a Christmas tree like this:
In the first craft cotton pads painted and glued to cardboard cone, in the second they are simply strung on a thread.
And in conclusion, a very interesting idea. Of course, it’s difficult to call it an applique - this is a craft in which appliques are partially present, but still the idea is very beautiful.

In order to make something like this you need a box, colored paper, glue, paints, cotton wool and cotton swabs.
So, let's see what applications on a New Year's theme you can implement in application classes in kindergarten groups.
Package of ideas No. 1
New Year's applications with Christmas trees.
The simplest and most bright applique made of paper on the theme “New Year” - this is a decorated Christmas tree. This application is very easy to prepare and is always understandable to children.
The most primitive The New Year's tree applique is created according to the principle of laying strips on top of each other (starting from the longest to the shortest). The strips can be cut or torn (as was done on the New Year's applique with the left Christmas tree in the picture below). A simple Christmas tree applique for children 4-5 years old.

The most classic The Christmas tree applique looks like three triangles glued overlapping each other in a pyramid. You can complement this method by beautifully cutting fringe along the bottom edge of each triangular tier of the tree (as was done in the left photo from the picture below). Or you can make a backing tier out of white paper for each green paper tier of the tree. So that it looks out from under the green silhouette (as it is designed on right picture with photo of the Christmas tree below). This application is suitable for children (5-6 years old).

In the younger group of kindergarten (for children 3-4 years old), you can make very simple New Year's applications with a Christmas tree. Here the Christmas tree is presented just one triangle of green paper. And you need to put it on red beanie cap, add white trim and pompom. And then add a stand leg and a red nose. And then draw snow around the tree with white gouache using your fingertips. A simple and bright applique for kids.

Also, young children will really enjoy making an applique with their own hands, where the silhouette of a Christmas tree is made from colored paper, even before gluing on cardboard, needs to be decorated with stamps.
To do this you need to use STAMPS ( bottle caps) and containers with thick paint. I put gouache in ordinary plastic jar lids, a little at a time - and put it in each lid a teaspoon of PVA GLUE- stir with paint into a homogeneous mass - like this in the lids it turns out more paint and gouache is used more economically). And then I put a stamp in each paint - a bottle cap. On the table where 4 children are sitting I put 4 lids with different colors paints. And the children take turns taking different stamps and making prints.
Then carefully apply glue to a sheet of paper, where the same silhouette has already been drawn Christmas tree– and onto this glue silhouette spot we carefully transfer our Christmas tree part decorated with stamps. This is also a suitable application for kids 3-4 years old.

Children also love geometric pyramid applique in the form of a New Year tree. Where you need to lay strips and rows of circles with your own hands according to the logic of their number.
First the children themselves must understand which circles are larger, which are smaller, and determine which stripe which circles belong to. I deliberately cut circles of a different color from the one in the sample, so that the children do not stupidly guess from the color sample how to do it - but they themselves compare their own sets of circles - highlight the larger, middle and smaller set. And then they laid out and pasted them into an applique.
And here is an applique of a New Year tree using the ORIGAMI technique (for children 6-7 years old). Where modules are made of paper - which are then arranged into the image of a Christmas tree. I showed in detail exactly how to fold the modules for this application in the article, where we glued similar Christmas trees onto postcards -

And here are New Year's tree appliqués with interesting overlapping and folding techniques. If you look closely at the photo you will understand exactly how these works were done. And you can teach children to make a similar carved pattern with their own children’s hands.

Here's an idea Christmas tree appliques using QUILLING technique. The difficulty here is that you need Prepare quilling modules yourself in advance.

How to make modules for quilling.
A strip of paper is wound on a stick for quilling (or a regular toothpick) - then the twist is placed into a stencil ruler with round holes– and is released into free unwinding within the framework of this stencil.
Next, the twist that has untwisted to the size of the stencil is removed from the stencil and Glue the tail-tip to the side of the twist. We make several twists like this - due to straightening in the stencil, they all turn out to be the same size.
Then we bend each twist and flatten it with our fingers, giving it drop or petal shape. And from such drops (petals) we lay out a Christmas tree - we place the twist modules on PVA glue.
Package of ideas No. 2
Applique Father Frost and Snow Maiden.
And now we move on to New Year's applications with the traditional participants of the New Year holiday - Father Frost and Snow Maiden.
You can make a simple symmetrical silhouette of Santa Claus with a triangular beard (in the left photo below). Or you can make an applique of Santa Claus with smooth rounded lines of all the details.

How to copy an idea for an applique from a computer screen.
You can copy the lines of all applique details straight from the screen this monitor. To do this, I place a sheet directly on the screen office paper– the picture on the screen shines through the paper and with light pencil movements I trace it along the contour. And I receive ready-made template for application.
If I need to enlarge or reduce the image on the screen, I press the button with one hand Ctrl on the keyboard and with the second hand spin the mouse wheel– forward (to increase) back (to decrease). This way I get the applique size that I need. If, when enlarged, the picture creeps sideways off the screen, then the arrow buttons on the keyboard help left and right.
Here are more beautiful motives for a DIY New Year's applique with Santa Claus, where he is presented in long fur coat and felt boots and a duffel bag.

Santa Claus's hands can be placed to the sides, or pressed to the belly (to save paper consumption). The beard can be pointed in the shape of a triangle, or rounded in the shape of a cloud (see photo below).

Here's another simple one beautiful applique with Santa Claus full size. I like the technique here that the white mustache is glued on top of the beard. Red round nose and buttons add bright richness to such a children's New Year's applique.

You can make your own collage applique, which contains many details of New Year's paraphernalia, where there are silhouettes of Christmas trees, gifts, gingerbread houses, reindeer, and Santa Clauses are layered on top of each other in cheerful holiday chaos (as is done in the appliqué below).
You can create your own collage from funny snowmen playing hide and seek behind the fir trees. Or scatter it everywhere New Year's deer, penguins in red caps, etc.

You can find an idea for a collage applique on any New Year's picture on the Internet or postcard. And bring this idea to life using colored paper. Removing something original and adding something of our own.
It is not necessary to depict Santa Claus in full height. You can make an economical version of the application, where the character is displayed only in portrait.
It will look beautiful if you glue the face and nose of Santa Claus out of paper beige colour(light orange) and then put a red imprint on the cheeks and on the tip of the nose (with a weak solution of red and using not a brush, but foam sponge– or you can use blush and apply it with your finger to the application). This is a simple, quick and economical application of colored paper. Suitable for parents - for a crafts competition in kindergarten.

You can get templates for such applications, if you place a sheet of paper directly on the monitor screen and trace with a pencil the drawing that is visible from the screen. To enlarge the image to the size you need, press the Ctrl button with your left hand and while holding this button down, roll the mouse wheel forward.
And below is an example of a New Year's application where, in addition to colored paper, paper lace napkin for decorating the beard of Santa Claus (you can buy such napkins in the store, or cut them out of paper with your own hands). We're just cutting out a BIG SNOWFLAKE with lace pattern and place it under the cut out round face Santa Claus - the same effect will be achieved.

But here are simple applications of Father Frost and the Snow Maiden, where each element is a rectangle of colored paper with a white back side.
If a square of blue paper bend the white corner outward– then we get white face Snow Maidens against the background of a blue kokoshnik (see in the photo below). And the Snow Maiden’s hands are obtained due to double bends left and right corners simple RECTANGLE from blue paper.

A simple DIY New Year's applique - with design elements made from colored paper.
Here's another silhouette applique Snow Maidens – decorated with cotton wool and rhinestones. Suitable for children 5-7 years old.

Package of ideas No. 3
New Year's applications with cotton wool.
And here is a series of applications where white soft cotton wool is used as snow material. Here is an example where the snowman is made from cotton pads, and the snowy crown of the trees is made from cotton balls(you tear off a piece of cotton wool and roll it into a ball with your hands - take a bowl of such balls and start creating a New Year's applique.

And here is the craft made from smooth cotton pads– to save money, I tear the disk into two layers.

And here is an applique of Santa Claus, made from cotton pads beard and pompom on the hat.

And here Santa Claus's beard is made of large cotton balls - they are sold ready-made ball form in pharmacies - just tell the pharmacist: I need cotton wool in balls.

Package of ideas No. 4
Layered applications for the New Year.
I like very much voluminous applications– when the picture jumps out of the sheet. The 3D effect on applications always looks attractive and increases the pleasure of the work done.
Here Christmas bell idea – simple applique for children middle group. They themselves must roll the yellow flat paper circle like a bell. And fold the holly leaves in half. You already prepare the beads on the strings yourself. Or they can be replaced with plasticine beads rolled onto twine.

And here multi-layer applique with our own hands, where the parts are glued to each other with an air space between them - this is achieved due to the fact that we glue the parts not with glue, but with WINDOW INSULATION (such a thick foam tape with an adhesive edge).

We lay the insulation tape between the applique parts (if necessary, we use double-sided tape - since one side of the insulation tape is not sticky, but we need the adhesive surface to be on both sides).
There is also double-sided PLUGGY tape on sale - it is as thick as insulation - and it can be used for such plump New Year's appliques.
Package of ideas No. 5
SNOWMAN on New Year's applications.
And here is the snowman applique. It can be made using the three-dimensional SHIP technique - as in the right photo, or it can be done in the usual flat form - but then, try to come up with some interesting angle for the snowman. For example, let him throw his head up and admire the snowflakes.

I give only the simplest snowman applique for junior group kindergarten – Snowman inside glass snow globe. A simple and very beautiful New Year's applique.

Package of ideas No. 6
New Year's applications with DEER.
Also, New Year-themed applications may contain other characters- for example, a deer or a penguin.
It’s very easy to depict a deer on an applique with your own children’s hands. Bend the pointed triangle point downwards. Add eyes, horns and nose.

You can make an applique from the silhouette of a deer's face. WITH big eyes and with elegant bright horns.

If you don’t mind the paper, you can depict a full-length deer on the New Year’s applique. With a big red nose and a bright striped scarf.

And very often a deer is depicted with Christmas decorations on branchy horns. You can see options for such images in my article

Package of ideas No. 7
New Year's city on applications.
And here is another beautiful application for children in the form winter city. If you add to a given cityscape decorated Christmas tree then the application will take on a New Year's theme.

The snowflakes on this applique are made with a hole punch with stencil cutting of snowflakes. Such shaped hole punches are sold in craft stores. And the cheapest way to order them is on the Ali-Express website with free delivery from China - one piece will cost 0.5 dollars.

The windows on such an application can be drawn with a regular black marker. The moon can also be made from a cotton pad painted yellow.

Here's an idea on how to make a remote mountain town. Snow-capped mountains are depicted using white paper napkins. We scatter houses and Christmas trees on the mountain slopes, and scatter confetti snowflakes across the sky (they can also be pressed with a regular office round hole punch). And in the sky we add a Christmas star with a long train-tail from narrow stripes paper Beautiful Christmas applique for children for the New Year.

And above the winter town you can stick an applique of Santa Claus flying on his magic sleigh with deer. Beautiful magical applique for the New Year.

Package of ideas No. 8
New Year's applique ON THE WINDOWS.
Separately, I would like to bring up such a topic as applications on windows. Ready-made window sticker applications are available for sale. But why buy if you can make it yourself. Large sheets of colored paper in A3 and A2 formats are now on sale, so you can cut them yourself New Year's characters for window applications.

In kindergartens, we are used to decorating windows with silhouettes of Christmas trees and angels. But why not break this stereotype and set something NEW this year? Christmas mood with a new storyline.
For example, make this white bear or Santa Claus on the glass, which seems to be looking into our window. Beautiful window application for a kindergarten.


It could be a brave snowman or a timid deer.

Or your window can be decorated with an applique of friendly penguins or snowmen in knitted hats.

You can make a window applique in the form of bullfinches sitting on rowan branches.

This is the selection of applique ideas for the New Year theme that I have prepared for you today. Your children and you yourself will enjoy spending these pre-New Year days with interesting activities in kindergarten or cheerful home leisure.
Just a little colored paper and real magic will come into your home. After all, a child’s hands are clean. And what they do will definitely come true. Let your children create the magical reality of happiness in your family.
Happy New Year to you.
Olga Klishevskaya, especially for the site ""
If you like our site, you can support the enthusiasm of those who work for you.
Happy New Year to the author of this article, Olga Klishevskaya.
This is a very simple applique, but on New Year's Day it can serve as a cute gift and decorate your home. In anticipation big holidays, and even more so for the New Year, most organize thematic competitions children's and family creativity, thereby allowing children to express themselves, and parents
- take part in the life of a small children's group.
A New Year's craft for a kindergarten should be quite expressive, but at the same time not difficult to make, and even if an adult takes on the bulk of the work, the baby should also be actively involved in creative process. One of the most available options crafts - applique.
We show how to lubricate the parts with glue and glue them to the main figure. The main thing here is to work carefully with the glue, since careless handling can ruin it. appearance crafts. Therefore, it is better to take liquid glue in a tube with a limiter roller, or even easier - use an adhesive stick.
New Year's paper applications
We offer two options for New Year's applique for the little ones: a Christmas shoe for a gift and Christmas tree. We give the child a figurine of a Christmas tree or a shoe and offer to decorate them.

After the baby decorates the Christmas tree or shoe, we fix it on the main background. That's all!

A very beautiful herringbone applique is made from a cardboard base, sequins and threads.

New Year's applications made of paper and cotton wool
Very expressive applications for New Year and winter theme are obtained from cotton wool.


You can decorate New Year's applications made of paper and cotton wool with colored stickers with your favorite characters.

Application "Snowman" made of cotton wool
One of the most favorite applications for the New Year is a snowman made of cotton wool.

We cut out the outline of the snowman from the cotton wool and begin to glue the cotton balls onto the glue.

Glue on the snowman handles-twigs, scarf, buttons, top hat, eyes and nose. We glue the snowman onto a suitable background. The snowman applique is ready!

Application "snowman" made of cotton wool
You can make a very cute one out of the snowman applique. New Year's ball- Christmas decorations.

Christmas tree decoration "snowman"
When the entire surface of the snowman is covered with balls, glue the handles of the twig. We make the cylinder, nose and scarf from felt. Glue on ball buttons and factory eyes. Snowman - ready!
New Year's applique made from cotton pads "Snowman"
To work, we will need a cardboard base, cotton pads, colored sequins and balls.

Glue cotton pads, forming them into snowmen. We glue factory eyes on them. We make the nose from balls, and the buttons from sequins. The snowmen applique is ready!

New Year's applique "snowmen"
New Year's appliques from disposable plates "Herringbone"
The herringbone applique looks beautiful and is quite simple to make. Color and cut the paper plate.

Glue the parts one above the other to form a Christmas tree.


New Year's applications from disposable plates "Grandfather Frost"


Interesting applications can be made from disposable plates.

Beautiful winter application “Snow slide” (video):
New Year's applique from pasta
Perhaps the most unusual winter applications made from pasta.

The applique can be painted or decorated with sparkles.

New Year's applique made of plasticine
Another popular way to make an applique for the New Year is to do it using the technique of drawing with plasticine. We will make Santa Claus. Spread over cardboard circle blue plasticine - this will be the main background of the craft. Glue on the body, head and beard.

We make the face and beard of Grandfather from plasticine.

We sculpt a hat and hands for grandfather.

We sculpt the legs, the festive bag and the edge of the fur coat with mittens. Decorate the craft in a circle frosty pattern. Plasticine New Year's applique - ready!

If the details are selected juicy flowers, and the work is done carefully, it will look very impressive and will take its rightful place at an exhibition of children's creativity.
Application on the theme Winter for kindergarten
Master Class. "New Year's panel"
Netuzhilova Olga Sergeevna, teacher-speech therapist MBDOU " Kindergarten compensating type No. 105", Cherepovets, Vologda region.Target: making a New Year's panel using a combination unconventional technology drawings and applications.
Tasks:
- develop Creative skills in children;
- develop fine motor skills in children;
- cultivate accuracy while performing work.
Purpose of work: This master class is designed for children preschool age, parents, as well as teachers of preschool groups.
This panel can be used as an element of group decoration for the New Year or as a homemade gift for parents.
To complete the work we will need:
- blue cardboard;
- double-sided colored paper;
- cotton pads and cotton wool;
- black beads;
- rhinestones or figured stones for decoration;
- White paint;
- PVA glue and instant glue;
- scissors, glue brush, Toothbrush, hole puncher.
- stencils of figures


Progress:
1. Using a toothbrush (spray technique) create a background future work– white snowflakes throughout the entire space front side cardboard

2. While the background is drying, we prepare materials for the applique using stencils:
- fold the green paper in half, draw and cut out two identical Christmas trees;

- cut out three even circles from cotton pads different sizes(our future snowman);
- cut out a bucket and twigs from black paper, a carrot nose from orange paper, and from leftovers multi-colored paper Using a hole punch, we prepare confetti to decorate the Christmas tree (you can use ready-made ones).

3. Now that's all necessary materials prepared, we begin to glue our blanks onto cardboard:
- having smeared bottom part cardboard with PVA glue, lay out a voluminous snowdrift of cotton wool, disassembling it with your fingers into fluffy fibers:

- then we take the Christmas trees bent in half and spread them with PVA glue: at the first Christmas tree left side, the second one has the right one and glue them next to each other to get one volumetric Christmas tree. Middle part Do not glue the trees together.

- for the snowman we glue circles from cotton pads using PVA glue in accordance with the sizes, on middle circle We attach the branches-handles using PVA glue. We decorate the snowman by gluing the nose and bucket with PVA glue, and the eyes and bead buttons with instant glue.

- we complete our work: glue a lace ribbon along the edges of the cardboard, decorate the Christmas tree with confetti, and glue several snowflake pebbles onto the snowdrift.


4. Our New Year's panel is ready!


This happens in the world...
It happens in the world,
That only once a year
They light up the Christmas tree
A beautiful star.
The star burns, does not melt,
Beautiful ice glitters.
And it comes right away
Happy New Year! (I. Tokmakova)
In preparation for the upcoming holiday, you can make many unique decorations, as well as creative activity with younger family members. Children will willingly take part in creating applications for the New Year 2018. Such crafts are easy to make, but will be interesting even for adults, as they allow you to create stunning compositions from a wide variety of materials, using various techniques.
The advantage of appliqués is that they can be designed in different ways. For example, they can be a wonderful decoration for holiday card, and some of them are made in the form of panels or paintings. Such works look like a real work of art and will be spectacular New Year's gifts from kids.
You should start by recreating the symbol of the coming year - the dog. Its color is yellow, but you can add shades of brown and white if desired. You can use the puppy from this master class as an example. It is collected from the most simple figures and elements.
To create such a talisman of the year you will need:
- colored paper, single sided will do;
- artificial eyes;
- scissors;
- PVA glue;
- pencils for marks.

First of all, you need to cut out the head of the future dog. It has the shape of a circle, therefore, it is recommended to use a compass or attach any object of a similar shape to the paper and circle it. All pencil lines must remain on back side sheet, otherwise the work will look untidy.

Then you need to make the cheeks. To do this, cut out a small rectangle from brown paper, fold it in half and round its edges using scissors. It is important not to cut the paper at the fold, as the part will be damaged.


Next, the two parts can be glued together. When the puppy's cheeks are already marked, the tongue, nose and eyes are glued on top of them. If desired, you can draw all this with a marker or make eyes out of white paper, adding black pupils.


The next step is to create the ears. For them, cut out a large rectangle and fold it diagonally. It is necessary to cut the paper along this line, thus obtaining two identical triangles.


At your discretion, the ears can be given any shape, for example, you can round them sharp ends. If the details seem too large, you can always make them smaller. The main thing is to maintain symmetry. To do this, it is better to superimpose one part onto another.

Large floppy ears should be placed slightly behind the dog's head. Don't rush and glue all the parts at once. It is recommended to first cut out all the parts, arranging them together, and then place them on paper and glue them.

At the next stage from yellow leaf paper cut out the body. Its outlines should first be drawn with a pencil on the reverse side. IN in this case the body has the shape of an oblong egg, slightly trimmed at the edges to give the animal’s breast more expressiveness.

Then they begin to create the front legs. First, two brown ovals are cut out, and then a notch is made on one side. You can rely on the shape of the beans. Due to this, in the finished composition the puppy’s paws are slightly raised up.


Next you need to do the dog hind legs. According to the idea, she sits, so the legs will consist of two elements. First of all, you need to cut out 2 circles from brown paper. They will serve as the basis.

After this, you should cut out a circle of the same size from yellow paper and cut it in half. These will be the pads on the paws. You can see how the parts are located in the photo. The front paws should also not be left without pads. All that remains is to cut and glue the tail. The application is ready.


Making applications for the new year 2018 with your own hands is a real pleasure. The following composition is perfect for decorating cards, as well as paintings New Year theme. For example, such a Christmas tree will be perfectly complemented by gifts cut out from magazines, children’s drawings, and images of all the relatives around holiday tree, and even real sweets in colorful wrappers.
Application "New Year tree"

To create you will need:
- thick sheet of cardboard;
- decorative paper or ribbon;
- double-sided narrow tape;
- green corrugated paper;
- Christmas tree decorations;
- scissors.
This master class presents an option for creating an application on greeting card. When planning to make a picture, you can skip the first stage.
To decorate the card a little, cover a sheet of cardboard with a thin strip. decorative paper or tape. To do this, you can use regular PVA glue, but double-sided tape will also work.

Next, you need to use tape to mark the silhouette of the future Christmas tree. It is worth noting that each subsequent tier is larger than the previous one. It is recommended to start marking from the top. A small square of tape is enough for it.
Since the strips of adhesive tape are even, they are cut a little, and in no case completely, with scissors. This is done in order to give the tree a crescent shape and make it more magnificent. In the photo you can see that the stripes are not straight, but slightly curved.

Then the protective film is removed from the tape and, starting from the lowest tier, stripes are placed on top of it corrugated paper. The photo shows how to correctly fold paper like a small accordion. Upon completion of the work, it is important to thoroughly iron the area where the paper adheres to the tape with your fingers.

The top can be decorated with a bright star by pressing it onto the last layer of paper. Small beads are suitable for decorating a Christmas tree; you can string large beads on a string, or use sparkles and other materials to give it a snowy look.

The following application is different unusual technology execution. This Christmas tree is assembled from several elements and decorated with improvised means, but each tier is made of paper folded using the origami technique. This work is not difficult and will be very useful for the development of motor skills of the child’s hands.

To create such a volume of application you will need:
- several sheets of paper, mostly green;
- PVA glue;
- scissors;
- additional decorations.
First of all, you need to cut out a square with equal sides from paper.

Then it is folded diagonally to form a triangle. If the square is initially uneven, this is a good opportunity to trim it using scissors. To maintain symmetry, it is recommended to press the corners of the paper together and only then fold it. Any slight misalignment can affect the final result.


Afterwards, the paper should be carefully unfolded. As you can see, the square is now divided into 4 triangles, two of them are divided in half. Further work will be performed with them.

The square must be folded in half, while simultaneously pressing these side triangles inward. You should end up with two volumetric triangles connected to each other.

At the last stage, the edges of the upper one are folded towards the center. With this, the first fragment for the Christmas tree is ready. You will need at least five of these, in addition, different in size.


Original application “Bullfinches”
The latest applique master class describes step by step the process of creating an entire composition - bullfinches on branches in a snowy forest. This picture will become a great gift and decoration for the home on the eve of the New Year.

For production you will need:
- velvet paper or felt of your choice, in red, black and gray shades;
- polyethylene foam, used for packaging goods;
- a piece of foam;
- blue or light blue cardboard;
- branches of any bush;
- wooden frame without glass;
- Super glue;
- pencil and scissors.

Templates are also included with the work. They can be redrawn by hand or printed and cut out. It is recommended to make templates from cardboard, as they wear out less and hold their shape much better.

At the first stage, you need to prepare a sheet of cardboard and cut out snowdrifts from polyethylene foam. They are arranged in three tiers, but it is important that they do not fill more than half the space. Instead of polyethylene foam, you can purchase a meter of padding polyester. The material is no less pleasant to the touch and matches the texture.

The snowdrifts begin to stick from the center of the sheet and gradually fall down. The elements are placed on top of each other, thereby giving the work volume and the snow airiness. Gluing with overlap is also necessary in order to avoid background gaps.

Next, several Christmas trees are cut out according to the template. As you can see, they are made of thinner material, due to which they look advantageous against the background of snow. Trees should not be placed too close to each other, as this may spoil their snow-covered silhouettes, but they can touch slightly. In addition, each tree has its own height and width; they do not have to be the same.


Once the cardboard is already inserted into the frame, you can begin placing the branches. They are arranged to your taste or trimmed a little so that they do not go beyond the frame. In addition, the branches can be pre-painted or decorated with small pieces of cotton wool, giving them a snowy look. It is not recommended to apply a lot of glue to the branches, as excess glue can leave unsightly stains.

While the branches are drying out, it’s time to start creating bullfinches. This composition required only 4 birds. All parts are cut out according to templates and then assembled together.


First of all, the wings are assembled. They consist of a black base and a gray fragment near the base so that the wing does not merge with the body. If desired, you can lightly draw the feathers with a marker. Then a red breast is glued to the body of the bird. And only after that the wings are glued on top of the breast. Eyes can be drawn using a corrector and a marker or glued on with a small shiny bead.

All that remains is to place the birds on the branches and add some foam snow. Rowan berries are perfect as an additional decoration; they will help enliven the picture, and the bullfinches will have something to eat.

It is worth noting that there are many more various methods creating applications. For example, based on the first master class, you can make a simple, but no less cute dog from hearts, and in its paws it can hold New Year's treats.

The application for the new year 2018 can take the form pet. It is enough to depict its silhouette on paper and fill it with pieces of paper using the free mosaic technique, observing the natural spots inherent to the animal.

Having certain templates you can create the most amazing applications. Don't limit yourself to paper, because there are still many cute fabric appliques. You just need to cut out the parts from a dense material, this can be not only fabric, but also felt, and then glue them together and sew them onto clothes or a fabric handbag.
If desired, the edges can be covered with an overcast seam or each element of two halves can be sewn together, filling them with padding polyester just a little.


The work can combine the most various materials, both natural resources: branches, cones, etc., and stationery. The puppy applique can also be made from faux fur. You will get a fluffy and cute baby.
While creating New Year's composition If your dog is involved, don't forget to wear red party hat, put on the widest smile and hand over a bag of candy or several boxes tied with ribbons. Such a talisman next year will bring only joy and prosperity to the house, especially if you put it in a frame in a prominent place.