How to make decorative eggs for decoration. Easter egg decoration
Decorating Easter eggs is one of the favorite activities before Easter 2019 for both adults and children. Often families even arrange competitions for the most original way to decorate an Easter egg! If you're looking for some new inspiration, try some of these 21 ideas.
We can't wait to start decorating Easter eggs! By the way, you can also try to do with children. It is not difficult at all, but you will get a lot of pleasure from joint creativity.
But back to our ideas on how to decorate eggs for Easter with your own hands.
1. Easter eggs - Ice cream
Kids will have tons of fun with these delicious ice cream Easter eggs!
2. Graphic black and white Easter eggs
In order to make such a graphic egg decoration, it is enough to have a black marker and a little patience. And ideas for it can be peeped at the photo below.

How to decorate eggs for Easter (photo)
3. Marble Easter eggs
You can use any nail polish you like to create these marbled Easter eggs, but you will agree that this indigo shade looks especially beautiful.

How to decorate eggs for Easter (photo)
4. Easter eggs - Alphabet
Moms who, even on holidays, do not forget about the development of the child, may like the idea of \u200b\u200bdecorating Easter eggs in the form of an alphabet. Perhaps, already in the process of work, the baby will learn all the letters! For older children, the task can be complicated and make Easter eggs with the English alphabet.

5. Easter eggs - Eyeballs
This is the easiest way to decorate, which even a very small child can handle. Simply glue eyes (available at any toy store) to a hard-boiled egg, and then use a marker to draw funny or surprised faces. Better yet, let your baby do it all. It will be fun!

Decorating eggs for Easter with your own hands (photo)
6. Easter eggs - Minions
Fans of these funny characters will be delighted in the form of Mions. For this decor, you will need blue and yellow egg paint, movable eyes, black thread, glue and a marker.

7. Natural Easter eggs
Easter ideas can be very simple, but no less interesting. Take ordinary brown eggs and apply a pattern (dots, lines, zigzags) on them with white paint or a corrector.

How to paint an egg: decorating eggs for Easter with your own hands (photo)
8. Easter egg - Cactus
Another great idea on how to make original egg decor that will delight your child. Agree - an Easter egg in the form of a cactus is not common. Let's surprise! Just some green coloring and permanent black marker, and voila... Cactus Easter egg is ready!

9. Easter eggs - Donuts
Donut lovers will love the donut Easter egg decor with colorful sprinkles.

Easter ideas: How to decorate eggs for Easter (photo)
10 Glamorous Easter Eggs
Looking for glamorous Easter egg decor? Just use Easter sprinkles to decorate eggs, which are usually used to decorate paska.

Easter ideas: How to decorate eggs for Easter (photo)
11. Lace Easter Eggs
This egg decor requires a little more effort, but the result is worth it! Before dyeing eggs in dye (do this according to package instructions), cut out paper lace and attach with rubber bands. When the eggs are dry after the dye, just remove the elastic bands and unfold the lace.

Easter ideas: How to decorate eggs for Easter (photo)
12. Botanical Easter Eggs
Easter eggs decorated with delicate forms of young leaves and herbs announce the arrival of spring. For such decor of eggs, it is better to use eggs from which the contents were previously extracted. But you can also try hard-boiled eggs.

Easter ideas: How to decorate eggs for Easter (photo)
13. Vintage Easter eggs using decoupage technique
Decorated eggs in vintage style will appeal to decoupage lovers. Everything is as usual: you will need napkins, glue, a brush and, of course, the eggs themselves. Here are some Easter inspirations for you!

How to decorate eggs for Easter (photo): Decoupage of Easter eggs
14. Black Easter eggs
We hope you're modern enough not to be intimidated by black Easter eggs. They can be made using board paint, then it is easy to draw any drawings on such eggs with ordinary crayons. Your child will definitely love this unusual idea! Please note: plastic or wooden eggs are taken for this decor.

Easter ideas: How to decorate eggs for Easter (photo)
15. Black and white Easter eggs
And to continue the black and white theme, why not make these really mature and elegant Easter eggs? You can paint already black-dyed eggs, or you can stick a stencil on them before dyeing.

Easter ideas: How to decorate eggs for Easter (photo)
16. Lilac Easter eggs
Let's get back to the topic of spring. After all, everything is blooming and fragrant. So let's please ourselves with gentle tones by painting Easter eggs in lilac colors! Together they will be a wonderful decoration for the Easter table.

Easter ideas: How to decorate eggs for Easter (photo)
17. Delicate Easter eggs
Continuing with the flowering theme, look at this simple Easter egg decor that looks so pretty with the delicate blossoms of the fruit trees.

Easter ideas: How to decorate eggs for Easter (photo)
18. Pink Easter eggs
These Easter eggs are similar to the previous ones, but the pink color is more intense. You can also appreciate how simple horizontal and vertical lines look original on them. It is not necessary to invent something complicated to make it look beautiful.

Easter ideas: How to decorate eggs for Easter (photo)
19. Easter eggs - Ninja
Let's not be surprised at all. if your child, as soon as you hand him an egg for creativity, he will immediately make a Ninja out of it. But if, suddenly, such an idea did not occur to him, you can give him a little hint. Moreover, such decor of eggs is made quite simply. See for yourself.

Easter ideas: How to decorate eggs for Easter (photo)
20. Easter Eggs Pineapple
Easter eggs in the form of a cactus are not the only exotic in our feed. The original decoration of the Easter table can be such Easter pineapple eggs. Simply attach green colored paper or felt tails to bright yellow colored eggs.

Easter ideas: How to decorate eggs for Easter (photo)
21. Easter eggs Rabbit and his friends
Perfect Easter ideas for a group of little ones: make Easter eggs Bunny and his friends!

Easter eggs have long been a symbol of this wonderful religious holiday, and it is impossible to imagine a festive table without them. Many housewives show a fair amount of imagination in decorating them, and now there are several dozen ways to make this holiday attribute creative. How to decorate eggs for Easter with your own hands, and what nuances should be taken into account here?
Interpretation of patterns and colors when decorating
In ancient times, not every color could be used to decorate a festive treat. So, for example, black was considered a shade of sorrow, and if the hostess painted eggs with it, she needed to put a bright pattern on top of it. Otherwise, the design directly contradicted the bright holiday of Easter.
What colors can be safely used for decoration, and what do they mean?


- The white color was considered noble and denoted the fate of a person, which is lined up in the sky.
- Cherry blossom was considered a symbol of new life, so on such a background they made a painting for the kids.
- The brown color was associated with the earth and foreshadowed fertility.
- Also, yellow was often used for decoration, personifying the sun and heavenly blessings.
There were also auspicious designs for decorating Easter eggs. Their use could bring success and financial profit to the family.


- If the hostess wanted to paint eggs brown for Easter, then she could use various images of berries (a symbol of fertility) as a pattern.
- Also, eggs were often decorated with the image of doves, which meant the human soul and its freedom.
- If a girl wanted to quickly find her betrothed, she decorated Easter eggs with flowers, which symbolized girlish purity.
Now all these traditions and symbols have already been forgotten, and people decorate Easter eggs in a variety of ways, almost without thinking about what this or that drawing means. Coloring eggs for Easter has long become a tradition, and not some kind of magical rite, but here you should show your imagination so that the decor is extremely original.
The most popular coloring methods
You can beautifully decorate an egg without making any special efforts. The most elementary way of painting is with the help of onion peel.
Step-by-step instruction:
- The hostess needs to boil the onion peel in a vat of water for an hour. Eggs should lie on the table all this time, because, warmed to room temperature, they definitely will not burst and retain their attractiveness.
- Next, the onion peel should be pulled out by dipping the eggs into the pan. In order for the shell to better absorb the onion solution, the eggs should be rubbed with vinegar before immersion in water.
- Now it remains only to cook them on low heat for 20 minutes. A similar staining method was widely used a couple of centuries ago, and now the procedure has not changed much.
Decorating Easter eggs is an art, and more and more housewives are abandoning the standard dyeing with onion skins, since there is no element of creativity in it.
You can create a fancy drawing using the well-known technique in the following ways:
- to make the drawing more original, after a vat of onion peel, the eggs should be dipped into a container with a few drops of brilliant green;
- before lowering the Easter symbols into the water, it is necessary to wrap several sprigs of dill around the eggs with a bandage, so that in the end you get an interesting pattern in the form of a pattern left over from the plant;
- before lowering the eggs into the water, several threads should be wrapped around them so that the pattern is uneven and creative.
At first glance, this technique of decorating Easter eggs is extremely simple, but the resulting effect can pleasantly surprise you. Instead of the boring brownish color from onion skins, you can get creative coloring with a variety of ornaments or even a combination of several colors.


- By the way, coloring with brilliant green is also very popular. To carry it out, add 7-8 drops of brilliant green to the water, and then lower the eggs there. The more dye a person adds, the brighter and more effective the color will turn out.
- To obtain a pleasant purple color, experts recommend using beetroot broth. To do this, boil 2-3 beets for half an hour in boiling water, and then add Easter symbols to this water.
Easter egg dyeing methods almost always involve the use of natural dyes. They certainly will not harm health, and the color obtained as a result will not disappoint in terms of its brightness.
Decorating with napkins and wax
How to decorate Easter eggs with napkins? This is a fairly popular question, to which there is a simple and prosaic answer.
A beautiful drawing from a napkin can be easily transferred to an Easter symbol. So, how is such decoration carried out: 
- The area where the napkin will be used is covered with white paint and left to dry completely.
- Next, PVA glue is applied to the same area.
- A beautiful pattern from a napkin should be fixed on top of the glue.
- As soon as the image dries, it must be coated on top with a simple colorless varnish.
This decoration option is good for several reasons:
- First, it is elementary simple.
- Secondly, it can be used to create a very unusual and whimsical decor. You can cut out images of birds, plants and flowers from napkins.
For example:
- After standard staining with onion peel, you can stick tiny pieces of napkins on some areas for a couple of minutes.
- After two or three minutes, these wipes should be removed.
- As a result, small color gaps will remain on the surface of the egg. With the help of the resulting effect, you can create the most bizarre and unusual drawings.
The method of staining with wax is extremely popular. Here are the following steps: 
- First, the symbol of the celebration should be painted in one color, it is advisable to choose a light, bright shade.
- Then, with the help of melted wax, tiny dots or lines should be applied to the eggs.
- Now it remains to lower the eggs into a vat with another coloring liquid so that a contrasting color appears in place of the dots.
- After that, it remains only to remove the wax, and the creative design is ready.
A similar option for decorating Easter eggs is suitable for those housewives who do not want to complicate their life too much with design. The procedure itself takes no more than half an hour, and the resulting effect will later be pleasant to admire.
Egg Coloring Options - Simple and Creative
Options for painting Easter eggs often involve drawing a picture, and this can be done in a variety of ways. If the hostess does not want to apply the image using napkins, as described above, then she can create a creative design using acrylic paints.


Using them, you can create a variety of decor options. You should not limit yourself to standard symbols like a cross or the letters “XB”, because a variety of flowers and leaves look much more creative.
If a person does not know how to draw well, but still wants to put an original drawing on the surface, he should use the gifts of nature. For example:

You can use a variety of drawings for coloring, ranging from abstract symbols to natural motifs. Since Easter always falls in the last months of spring, natural motifs as a symbol of awakening nature will be most relevant.
The original decoration of Easter eggs with the help of colorful drawings can be obtained if a person uses special dyes of different shades that are sold in stores on the eve of the holiday. With their help, you can create the most original drawings, experimenting with colors and mixing them in a variety of ways.
Easter symbol decoration with beads and newspapers
Ideas for decorating Easter eggs are not limited to drawings and using onion peels. Now people with fantasy approach the process of decorating very seriously, literally using everything that they can just turn up at hand. 
There are a variety of ways to decorate Easter eggs with beads, and here are just a few of them:
- you can make a kind of egg braid from beads by tying a small belt using a fishing line;
- you can also plant beads on PVA glue, creating fancy patterns over the entire surface of the holiday symbol;
- with the help of a few beads, you can decorate drawings, indicating, for example, the eyes of an animal or focusing on some details of flowers.
Of course, working with beads can seem extremely tiring, but the resulting decor turns out to be simply unforgettable. Using this technique, you can decorate a wooden Easter egg. Guided by the size of the egg, you can weave a single design for it with the help of beads and fishing line. Such a braid will, like a caftan, be put on a wooden egg, decorating it from all sides.
How to decorate a wooden egg with paints? Here a person can show full imagination, using any drawings and the most unusual decor elements. Drawing on wood is quite simple, but after the end of the procedure, the craft should be varnished to make the resulting image look more interesting. 
If a person is wondering how to decorate eggs for children, then the method of working with beads will suit him too. The drawings are usually very bright, and therefore kids like them.
By the way, lovers of everything original will be delighted with the way to creatively decorate the symbol of the holiday with the help of newspapers: 
- To do this, cover the entire surface of the egg with PVA glue.
- Next, carefully attach the newspaper, enveloping the holiday symbol like a cocoon.
- As soon as the newspaper dries, it can be decorated with a wide variety of colors. After the paint has dried, it remains only to cover the product with varnish.
Such a design looks extremely creative and is unlikely to leave anyone indifferent. In addition, it is simple in execution, which means that a person will be able to cope with the decor in a matter of minutes.
Decorating with threads and groats
Decorating Easter eggs with threads is one of the most popular decor options. It was already mentioned above that you can wrap the eggs with threads before painting, so that the color turns out to be uneven, and the whole design is more interesting.

Interesting coloring of eggs or decorating them with a variety of items are great ways to show your imagination. On the eve of Easter, you can decorate the symbols of the holiday with the whole family, coming up with your own decor options. The most important thing here is not to overdo it with decorating eggs, because it is important that the symbol of Easter is not only elegant, but also edible.
The tradition of painting Easter eggs with your own hands has a long history. According to legend, Mary Magdalene, having learned about the resurrection of Christ, appeared in Rome to the emperor Tiberius. According to tradition, the emperor was supposed to give gifts, but since Mary Magdalene had nothing but faith in Jesus, she presented him with an egg with the words “Christ is Risen”.
Be sure to check out these recipes:
The emperor considered that a miraculous resurrection was as impossible as turning a white egg into red, but before he could finish the phrase, the egg turned bright red. Since then, the egg has been considered a symbol of the miraculous ascension of Christ into heaven, and with it the purification.
For Easter, most Russians paint Easter eggs burgundy, by boiling in onion skins. This is the least expensive and easiest way to follow traditions. But, in order to approach this matter more creatively, many make a herbarium of leaves and plants in advance. And someone has already grown fresh herbs. Let's see how all this can be applied to DIY Easter egg painting.
Beautiful Easter eggs with your own hands
Painted Easter eggs with onion skins with ornament
There is nothing complicated here. Prepare for the ornament some greens, leaves, grass, and even something carved with your own hands. Nylon tights that you do not wear, but wanted to throw away, and a thin rope, or vice versa, a thick thread.

We will glue the leaves and other things to the eggs with the help of a paste, so that for sure it will not move out. This is a universal paste recipe that will come in handy when decorating Easter eggs with your own hands, and in other ways.
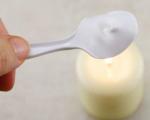
Paste preparation: For one glass of water, one teaspoon with a slide of starch is taken. Dilute starch in a small amount of cold water and pour a glass of boiling water in a stream, stirring all the time. The starch should turn from white to clear and thicken. You can put it on the stove and boil for a couple of minutes.
All the paste is ready, cool down and you can use it. Starch is a food product; kissels and much more are made on its basis. Therefore, using a starch paste when decorating Easter eggs, you should not be afraid of anything, feel free to use it. Further, when decorating eggs, where the words will be used: glue, stick, grease with glue. So keep in mind that a paste is used here.
Let me give you one more hint: Well, you don’t have starch, or you just don’t want to mess with it, you can lubricate the surface with egg white and stick whatever you want. But, in this case, your art can peel off faster. Because, when the protein solidifies, it turns into a film. In a word, you choose how to stick decorations on Easter eggs with your own hands.
For coloring eggs in onion peel with an ornament, we naturally take the onion peel itself, the pan. We put the husk in it, fill it with cold water. For boiling eggs, it is advisable to salt the water, since it is impossible to see microcracks on the eggs. Such eggs will simply leak out when boiled, but this will not happen in salt water.
Remove the eggs for dyeing and boiling from the refrigerator in advance so that they warm up to room temperature. We take an egg, stick a leaf on it, or whatever you have prepared there. We cut off a piece of nylon (tights), carefully tighten the egg with a leaf so that it does not wrinkle and tie it with a thread.

We do this with all the eggs, put them in a saucepan and cook, as usual, no more than 10 minutes. I cook for 5-7 minutes, then turn off and leave the eggs in the husk (they will reach) so that they gain more color. Then we take out, remove the stocking, wash the eggs, dry them. They are all ready!

By the way, this same process can be done with food coloring. Only the eggs should already be cooked, do not forget about it.

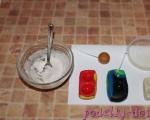
Coloring Easter eggs with stains and different intensities

I also think this process of coloring eggs is not difficult, but a little more laborious. Boil the eggs first. While they are cooking, we dilute a different dye, in different containers, of course. We put boiled eggs in dyes, paint to the color that you need.
Take out, dry. And in the container to the dyes, add a teaspoon of vegetable oil. Again we release the eggs into the dye with the addition of oil. We take it out, blot it with paper napkins and at this moment beautiful and unusual stains appear on the eggs.
Another way of dyeing Easter eggs, where the colors will be of different intensities. In containers (preferably in glasses), we dilute food coloring, and add not much water at all, for starters. We release the boiled egg, it should only hide the bottom.

Then, as the eggs are colored, we add water all the time. And you get very beautiful stripes, different in color.

And now for those who want to get more creative with the process, here are some ideas for decorating Easter eggs with your own hands. To do this, of course, you need to go to the nearest store to purchase what will be needed. And, we will look for something at home.
We will go with you to buy paints, brushes, colored paper, permanent markers, multi-colored beads, culinary sprinkles (if you haven’t already bought them for Easter cakes). Various interesting stickers for Easter eggs (in the form of eyes, smiles, different faces), multi-colored napkins, colored threads, elastic bands of different widths, adhesive tape (if you don’t have one), gold foil.
Decorating Easter eggs with decoupage
For work, as you understand, we will need: hard-boiled eggs (it is highly desirable that they do not crack, since an egg with cracks, you see, somewhat worsens the appearance of the product). Well, we begin to create, with decoupage. What is decoupage, I think it is not necessary to explain?

We take the multi-colored napkins we bought, cut out the drawings we like and glue them on the eggs with the help of a paste. Here we give free rein to our imagination and create for our own pleasure. See how beautiful do-it-yourself Easter eggs look with the help of decoupage.

To keep the napkin stronger, you can varnish the egg. But, if you eat it, then you do not need to do this. Just keep in mind for the future, if you want to give someone a gift, then you can apply a transparent varnish on a pasted napkin.

Hand drawn Easter eggs

This type of art on Easter eggs is suitable for those who love and know how to draw. On a painted egg, first we apply a drawing with a pencil (any subject of the drawing), then we take a very thin brush and circle it with paints. Let's dry. And to fix the picture, you can cover it with varnish.

Drawing on Easter eggs with a permanent felt-tip pen
This type of egg decoration is also more suitable for people who can draw. And, I will tell you this, it is not necessary to draw some unpretentious patterns. Draw what you want, the main thing is that you like it.

DIY Easter eggs with patina and gold
Golden eggs are not difficult to make. Gold food coloring, dilute in water and dip boiled eggs into it. I just think that golden eggs must be on the Easter table. Just like in a fairy tale, a chicken laid a testicle not simple, but golden ...

Under the patina, boiled eggs are first painted with colored dyes. Then grease with paste, wrap tightly in gold foil. Dry, unfold, rub over the egg with a brush or nail file, revealing the main color in places. It turns out a very beautiful color.

Coloring Easter eggs in an interesting ornament
This will require silk material, or an unwanted tie that your husband no longer wears, and you are about to throw it away. Do not hurry! Such a tie will turn Easter eggs into a real masterpiece. Cut the tie into strips, wrap the egg in the front side, tie. Put to boil in water with the addition of vinegar.

Cool, untie and you will get such a beauty.

Coloring Easter eggs with glitter
Scatter glitter on newspaper. Spread the boiled egg with paste and roll in glitter, let dry. And, if desired, you can draw pictures and sprinkle with sparkles. Looks very nice.

Easter egg coloring with lace
We wrap the boiled egg in lace fabric, tie it, let it go into the dye, take it out, wash it, dry it.


Easy dyeing of Easter eggs with colored threads

It's quite simple here. Gently wrap multi-colored threads around the egg, tie the ends, and boil the eggs in water with the addition of vinegar. Then remove everything, wash the eggs, dry them and you're done.
DIY Easter egg coloring with scotch tape
Also not a difficult option for coloring eggs. With your imagination, everything can be done wonderfully. Cut out squares, stripes, of different lengths and widths from adhesive tape, stick on the eggs as you like and cook in the husk. Or release into dyes. In this case, you can make multi-colored eggs by changing the shape of the tape and releasing the egg into a different dye. It will be bright, beautiful and interesting!

Coloring Easter eggs with rubber bands
Wrap the boiled egg with rubber bands, you can have different thicknesses and release it into the dye. Then remove the gum, rinse and dry. It turns out not bad.

Coloring Easter eggs with your own hands marbled
Here, we will not color the shell, I am the egg itself. So, if you have eggs that cracked during cooking, do not despair. Now we will color them. Break the shell with a spoon, pour strong tea leaves or soy sauce. Let stand for a while, then peel, and ... voila, you have a marbled and very beautiful egg.


We decorate Easter eggs with our own hands with beads
Pour the beads on a plate or paper. Lubricate the boiled egg with paste and roll the eggs in beads, let dry. They look very beautiful.

We decorate Easter eggs with confectionery topping with our own hands
This is the same as in the previous two versions. Pour the culinary dressing into bowls, grease the eggs with paste, roll, let dry. Not difficult, but eggs look very rich and beautiful.


Decorating Easter eggs with seeds and cereals

Also a very original way to decorate eggs. You will need cereals, what you have, peas, rice, lentils, beans, sunflower seeds, pumpkin seeds, you can sesame seeds, flower vermicelli, etc.

Lubricate the boiled egg with a paste and lay out any ornament from cereals and seeds. Let dry. It turns out very original, interesting and beautiful eggs. See for yourself.

By the way, eggs can even be colored with colored sugar. The technique is the same as that of beads or culinary sprinkling, just smear a boiled egg with a paste and roll in colored sugar. Simple, fast and beautiful!

How to make colored sugar: Take a tight plastic bag or jar, pour sugar into it, drop dye and shake until all the sand is the same color. That's all! And, even such sugar can be used to decorate confectionery. For example, whip cream with colored sugar, it will be beautiful and festive.
We decorate Easter eggs with our own hands using a mosaic
The decorating process is not fast and creative, but it's worth it. The eggs turn out amazing. Here you will need eggshells and always multi-colored. We spread different, beautiful ornaments from the shell of a different color on the painted eggs. See what beauty can be done. Glue with glue.

We make crafts from Easter eggs with our own hands
For such crafts, I propose to invite children and grandchildren to help you, let them help you with their participation. I think they will gladly agree. Boil and color the eggs, prepare everything you need, various stickers, scissors, felt-tip pens, pencils, colored paper, paste, and let's get started.

We make colorful bunnies. We cut out the ears from colored paper, glue or draw, eyes, nose, mouth. Naughty bunnies, ready!

Cute faces with eye and mouth stickers peek out from the egg stand.

The same pretty, but the eyes and mouth can be drawn.

Folk-style stickers are used for these faces. Nice.

And these cute animals are made and glued from colored paper. The eyes are drawn.

I think your children and grandchildren will be very pleased with their results. Of course, there is far from everything that you can think of for decorating eggs with your own hands. But still, a lot of ideas. Take, use, decorate eggs, give joy and kindness to your loved ones.
Well, finishing my article, I want to give a few photos of natural dyes. This is just in case, so that, as they say, it was. And for those people who do not use anything but the nature of products to decorate Easter eggs with their own hands. Christ is risen!

1 - Beets, 2 - hibiscus tea, 3 - spinach, 4 - chokeberry, 5 - blue cabbage, 6 - turmeric


Multi-colored eggs are the universal symbol of Easter. The tradition has its roots in ancient Mesopotamia. Some cultures today are more interested in buying colored or even chocolate eggs, but let's be honest, decorating them yourself is always much more fun!
Luckily, there are endless ways and tons of different materials that you can use to create amazing Easter eggs. Flowers, ribbons, and even an old tie can all work. We invite visitors to experiment and make eggs exclusive.

Imagine Christmas without a Christmas tree and Easter without painted eggs. It is very easy and convenient to buy a few egg stickers, but, you see, Easter is a holiday for the whole family. Just as you have fun decorating a Christmas tree, you can also spend time painting.
In this case, fantasy is limitless. For example, take dyed millet and sprinkle it with an egg previously rubbed with glue. If you're worried about boiled insides, wasted product, you can use the same concept for styrofoam or wood artificial eggs that are sold in craft stores.

Try your hand at cotton-stringing styrofoam eggs, decorating with flowers cut from old scraps, ribbons, or decorative trim. Everything you need for this is at your fingertips: glue, a wooden skewer (to support the egg), well, look for unnecessary things in cabinets or in the attic. Patience and imagination to you!


If you are a thrifty housewife or just a rag-maker, then in your wardrobe there is a pair of stockings or nylon tights that are not a pity to use for the old but interesting way of dyeing eggs in onion skins.
Put various leaves and flowers on the surface of the egg, wrap and tie with a stocking so that the leaves do not fall off during cooking. Cook in boiling onion skins. After removing the so-called cover, you will get eggs with an exclusive floral ornament.


Do you think you've seen everything? You are wrong. Some masters are stunning with the art of decorating Easter eggs with embroidery. When embroidering, use a drill for holes. Eggs are dipped into a liquid of sodium silicate, which hardens the shell. Beginners saw an empty egg in half, and after finishing they glue it, more experienced ones sew it through.


A silk tie will dye Easter eggs in cheerful colors. This method is less messy than buying a sticker pack or staining the kitchen with food coloring! First you need to find a 100% silk accessory.
You can buy at a consignment shop. A beautiful tie does not necessarily mean that the Easter egg will look beautiful, the uglier and more colorful the material, the brighter and more fun the result will be. Wrap the egg with the piece of cut out material, tie the ends with string, boil for 20 minutes with 1/4 cup of white vinegar.

For crafters who know how to handle a hook, the example of tying eggs is suitable. Surely, when making a large item, pieces of yarn remained, from which you can knit clothes with a minimum of time. Your dyes will look very creative.


You can buy a special dye in stores and on the market, the eggs turn out bright and cheerful, but by adding a little water to the diluted mixture, you can create different shades. Do not forget that the eggs must be boiled, and when painting, add 1/4 of a glass of vinegar.


The easiest way to create unique and colorful Easter eggs is with watercolors. Keep in mind that this is a non-permanent painting option, just fun and you can do art with the kids.
Do not forget that the paint is easily washed off and also gets your hands dirty. Use watercolor pencils to paint over the wet surface of the pre-painted eggs. Rich and soft lines are great for drawing small elements.


Making beautiful Easter eggs doesn't have to be difficult or impossible, in fact, you don't even have to paint them! Dye-free dyes can also look attractive. Throw an Easter party.
Guests are the most important, true reason for celebrating the resurrection of Jesus Christ. Give everyone a non-toxic marker and let everyone try their art.


Beautiful and incomprehensible geometric shapes will help you make an ordinary adhesive tape, adhesive tape or adhesive tape. Cut into thin strips, glue and dip the egg in the dye with the addition of table vinegar.
After drying, remove the film, the result will be amazing. Repeat two (or even three!) times with additional colors, make natural dyes from beets, blueberries, carrot juice, or other ingredients.


How about this option? Stick any grains, cereals and even small pasta that you have on stock on the krashenki. Your Easter eggs are guaranteed to take center stage at the family table.

Another easy way to keep your eggs happy. After painting, draw faces on them with a black marker. Remember that dyes can saturate the shell, try to use non-toxic felt-tip pens or markers. Feel free to break away from tradition and let your dyes express different emotions.


With the help of sticky tape, letters, numbers and even words will appear on Easter eggs. Before each new painting, glue a new strip, you will get multi-colored and striped dyed eggs. Wipe with a soft cloth with sunflower oil for shine.


An easy way to decorate Easter eggs is with lace for beautiful and unique patterns. In principle, the method is similar to the one in which eggs with glued leaves or flowers are dipped in paint.
You need a few patches of lace, multi-colored dyes and, of course, eggs. Wrap the eggs in a piece of lace, dip in the paint for four to five minutes, then remove the lace - and the Easter egg is ready.


It is very easy to create marbled eggs by leaving the cracked ones in steeply brewed tea for 10-15 minutes. Chinese marbled eggs dyed in black tea, soy sauce or spice blends are a ubiquitous and cheap snack sold in Chinese eateries and shops.
Nowadays, colored eggs not only decorate the festive Easter table. They are also given to friends, acquaintances and relatives throughout the Easter week. According to the Orthodox custom, you need to paint and paint eggs on Maundy Thursday. Of all the known ways of painting and decorating eggs, we have chosen the most original and interesting.
Before starting work on painting an Easter egg, it must be painted in any traditional way, of which there are a lot. They paint eggs in onion peel, food coloring, acrylic paints, cloth, brilliant green, beetroot, and so on.
Everyone has their own recipes and skills on how to paint eggs for Easter. There are usual ways of decorating, and there are quite original ones.
Such an interesting decoration of the testicles is possible after coloring. We will paint in two ways: with the help of food coloring and onion peel. In order for the eggs to turn out well and equally colored, they need to be washed well. Read the method of painting with food coloring on the pack of the Easter set.
We will focus on the method of coloring with onion peel:
- We collect onion peel, the more peel - the darker the color will turn out.
- Pour water into a bowl, put the husk, cook for 40-45 minutes over low heat.
- Cool the resulting paint, filter through a sieve.
- Pour 0.5 tablespoons of salt, 0.5 tbsp. tablespoons of vinegar, put the eggs, bring to a boil and cook for 10 minutes. We take out and dry on a napkin.

We will get the fabulous beauty of the eggs if we decorate them with our own hands with the help of wax.
For work you will need:
- Wax crayons (sold in a stationery store), paraffin candles.
- Copper wire and pencil.
- The spoon is metal.
We take a piece of copper wire (copper retains temperature for a long time). Keep in mind that the tip of the wire should be like a pinhead, it will be more convenient for them to draw. If there is no copper, use a simple pin, needle, crochet hook. We insert the metal into the pencil, we get a convenient tool for drawing with wax.


We melt the wax for work: In the middle of a tablespoon, put a small piece of chalk and a little wax from the candle. We light the candle and hold the spoon over the flame. Can be replaced with a water bath. We heat up to 65 degrees. Wax should not boil.

When the wax and crayon in the spoon are hot and melted, mix them thoroughly until smooth. We draw patterns with hot wax, apply strokes quickly so that the wax does not have time to harden. Wax periodically stir.


The egg for waxing should be at room temperature, not cold.


In order to better understand the technology of painting, watch the video, it has a very clear master class:
In this master class, there is also wax painting, but a slightly different technology: the egg is first painted and then boiled:
Easter eggs made of materials such as beads are a very beautiful and memorable gift for such a bright holiday as Easter. For this work, we need a wooden or simple blown egg. How to make a base:
To do this, with a sharp needle or awl, make two holes in the shell against each other and blow the contents into the cup. Glue the shell over with 4-5 layers of a white napkin, smearing it with PVA glue. Let the product dry and you will have a great, solid base for decoration.
We will decorate our egg with simple, uncomplicated beadwork. Even a beginner can cope with the work.

For work you will need:
- Egg blank 6-8 cm high, 9-9.5 cm in diameter.
- Beads (Czech number 11 or Chinese), white, red, green, gold, blue.
- Beaded needle.
- Nylon thread.
- Wax (rubbed thread is less tangled).

First, we will weave a beaded belt, then weave the crowns. Before you is a diagram of 1 weaving a belt. Rapport (basic, repeating element of the pattern) is repeated depending on the volume of the workpiece. For example, 4 times with a volume of 9 cm.

We fix the very first bead by threading a needle with a nylon thread into it 3 times.


Here is such a beauty:


Then, we connect the belt according to scheme 2, where the number 1 indicates the first bead in the belt:

You will get a belt like this:


Now our task is to weave the tops. It's best to start at the bottom. Figure 3 shows how this is done.

In order for the belt not to hang on the workpiece, you need to make a row at the top and bottom.

We begin to braid the crown:

We look at how to finish the row and where the needle for the next one comes from.

Here the crown should be reduced, two rows of gold beads should be collected, 2 beads each, and then only 1 each.


Finishing the bottom crown.

Similarly, we make the top crown.


Here's a gift for Easter.

You can decorate eggs for Easter using decoupage technique. The work is simple, even a child can handle it. We will do decoupage with starch.

For work you will need:
- White boiled eggs.
- Tassel.
- Napkins.
- Food starch.
- Food dyes.

We need napkins with a small pattern, for example, with roses. For napkins, you need to remove 2 lower layers and leave one, with a pattern. We cut out the drawings inaccurately along the contour, but with an allowance. You can cut it out, or you can just tear it with your hands, as you like.

With the help of a brush and water, we distribute parts of the napkins over the surface of the workpiece. Make sure that all small wrinkles are smoothed out.

We cook a paste from starch. You need to cook it in the same way as wallpaper paste. We do not need a lot of glue, take 3 teaspoons of starch (corn or potato) and half a glass of hot water. The water should be hot, but not boiling water, 80 degrees. Pour the starch into the water and mix well with a spoon so that there are no lumps. Let cool to room temperature. The paste is ready. We coat the eggs and wait until they dry.

After the testicles have dried, we smear the last time by adding food coloring to the paste. It is better to dry all this beauty on a wire rack. This decoration is safe, because we did not use any chemicals.

Here is such an interesting Rooster egg that you can knit with your own hands and give or decorate the Easter table.

For work you will need:
- Plastic egg from children's toys (put some small change inside for weight). If there is no large container, take from Kinder Surprise.
- Hook.
- 2 rhinestones for the eyes (you can use simple beads).
- A little yellow, red, green yarn.
We crochet 6 loops and connect into a ring. Next, we knit in a circle, adding loops to the diameter we need, which is equal to our container.

Then, we knit a circle. We knit to the middle of the container.

We tie our container, gradually decreasing the loops. We remove the crown. Next, we knit a scallop on the head. To do this, we fix the red thread and collect 8 loops at the crown.


We outline the place of the cockerel's beak.

We marked the place of the cockerel's beak and with a red thread we collect several loops so that the circle in diameter is at least 1 cm. We knit in a circle.