MK “Christmas tree woven from paper tubes. Christmas toys from newspaper tubes
This master class provides a detailed description of how to make Christmas decorations from newspaper tubes. Its very fast to make. It will look great on your Christmas tree.
To make a New Year's toy from newspaper tubes, we need:
- newspapers or magazines;
- scissors;
- glue stick;
- spoke;
- threads.
Master class of New Year's toys from newspaper tubes
Let's get to work. We twist the tubes in the usual way. We cut the prepared magazine or newspaper into strips. And with the help of a knitting needle we turn the tube. We glue the edge with glue - a pencil. We prepare the required number of tubes that will be needed to weave the toy.

Let's move on to weaving. To do this, we will need three long tubes, take 6 tubes and connect them in two.

We stack them on top of each other in the form of a snowflake.

We press the tubes together. And mentally divide the tubes into numbers. Top left-to-right from 1 to 3, and bottom, also to the left, from 4 to 6.

Since the lowest tube is number 2, we will start with it. We put it on top of 4. Placing it between the fourth and fifth.

Then we put the first on the fifth. Placing it among 5 and 6.

Then again we take the fifth and put it on top of the first. Leaving it between 1 and 6.

Now we take the first and direct it between the sixth and the third. Take the 6 tube and wrap it around the first and put it on the fourth.


And now we begin the usual spiral weaving.

Weave several rows tightly. We put the tube on the knot.

Now let's make an extension. To do this, we lay the tube not on the knot, but parallel to the one with which we will wrap.

This is how we gradually expand our Christmas tree toy.


We knit to the required size.


Then we need to weave a couple of rows, laying the tube on a knot.

Now it's time to shrink the toy. To do this, we will impose the tubes not on the knot, but retreating 0.5-1 cm inward.

So, we continue to weave.

Weaving is considered one of the oldest ways of needlework. If earlier only a vine was used to make a product, now craftsmen can create true masterpieces from a variety of improvised materials. Weaving from newspaper tubes is a special kind of creativity that allows you not only to get rid of old newspapers, but also to make a variety of crafts, to spend time in an exciting and useful way.
Weaving is considered one of the oldest ways of needlework.
Even novice creators can weave a beautiful, original vase. The technique is quite simple, and if you master it, you can move to the next level and create unusual things that will definitely find application in everyday life.
- newspapers;
- jar;
- glue;
- knitting needle;
- cardboard;
- tassel;
- ruler;
- paints (acrylic);
- scissors.
Weave in stages:
- Using a ruler, divide newspaper sheets into long strips, the width of which should be about ten centimeters.
- Wrap the strips on the knitting needle, and fix the edge with glue.
- According to this principle, make at least thirty tubes.
- Put a jar on cardboard and circle it with a pencil, cut out a couple of circles.
- Press the tubes that will be used for the frame from one edge with your fingers.
- Apply glue to the cardboard round bottom and immediately glue the prepared tubes.
- Coat the second cardboard circle with glue and lay it on top.
- Be sure to put the press and leave the workpiece to dry completely.
- Raise the newspaper vine up and secure with an elastic band.
- Glue another prepared newspaper vine to the bottom and bring it into the near right frame tube.
- Grasp the next vine from the inside.
- By this principle, weave a whole series.
- When the material used for weaving runs out, you need to insert the next one into its end and continue to weave further.
- Before the start of the second row, insert a jar into the workpiece.
- Continue weaving until the desired height of the product is reached.
- Cut off the remaining tip obliquely and carefully bring it inward, be sure to fix it with glue.
- Cut the frame vines, but leave a small tail and smear with glue, wrap it inward.
- Using a brush, apply paint to the finished vase and let it dry.
- Paint it twice more.
Gallery: weaving from newspaper tubes (25 photos)


Twisting tubes from newspapers: secrets and nuances for beginners (video)
Ideas for DIY Christmas crafts from newspaper tubes
Newspaper weaving can be used not only for the manufacture of baskets and boxes. Increasingly, they resort to this type of needlework in preparation for the New Year holidays. Interesting, unusual products will certainly fit into the magical atmosphere.
Christmas tree from newspaper tubes
The technique of making a festive tree is quite simple. Even novice needlewomen who do not know all the intricacies of weaving can make such an ornament.
Necessary tools and materials:
- Styrofoam;
- newspapers;
- glue;
- acrylic paints.

The technique of making a festive tree is quite simple.
Progress:
- You need to start with the manufacture of tubes. It is best to twist them on a knitting needle, and fix the ends with glue.
- Cut out a cone from the foam - the base of the Christmas tree.
- Lay out five newspaper vines on top of each other, and place foam plastic in the place of their connection.
- Braid the foam base with prepared vines.
Mix glue with acrylic paint and cover the product with this mixture.
New Year's paper candlestick
An excellent decoration for the New Year's holiday will be self-made candlesticks.
To make them you will need:
- newspapers;
- glue;
- clothespins;
- paints;
- decor elements.

An excellent decoration for the New Year's holiday will be self-made candlesticks
Progress:
- Lay out newspaper blanks in the shape of a star.
- Braid the workpiece along the contour.
- Fix the intersections immediately with clothespins.
- Continue braiding the workpiece and at the first opportunity, when the product is already well fixed, remove the clothespins.
- Give the candlestick the desired shape and immediately paint.
- Decorate the finished candlestick as you wish.
Types of weaving
Methods for making products from newspaper tubes are different. Some of them are quite simple, while others, newer ones, will only be possible for experienced needlewomen. If desired, anyone can master these techniques.
Among the most common of them are the following:
- Spiral twist. This technique is considered the simplest.
- Layer by layer. The tubes alternately pass in front of the rack, then behind.
- Rope method. Convolutions are intertwined not only with racks, but also with each other.
- Spiral weaving. Paper bundles are woven at an angle.
- Edge braid. The racks are woven counterclockwise and the ends are brought out alternately inward and outward.
- Overlay pigtail. Additionally, they take several flagella and weave them with the edge.
- Openwork. In one technique, simple and complex elements are synthesized. The result is openwork patterns.
This is not all types of weaving, but having mastered all of the above, it will be possible to easily master all the others.
Workshop on weaving a basket from newspaper tubes
Before you start making baskets, you need to clearly define what shape they should be. The product can have both a square bottom and a round one. Further work depends on the choice of form. The easiest way to weave a basket is using a regular box.
Necessary tools and materials:
- box;
- newspapers;
- glue;
- spoke;
- paints.

Before you start making baskets, you need to clearly define what shape they should be.
Progress:
- Turn the box upside down.
- Glue the prepared bundles to the bottom at a distance of about five centimeters from each other.
- Put the box upside down, lift the prepared racks up.
- Make the first row simple weaving.
- After that, glue a new vine to the bottom and draw it over and under the existing ones.
- Thus, continue to work until the walls of the flagella reach the edges of the finished box, which was taken as the basis.
- Fix all ends with glue, cut off the excess and use a knitting needle to fill the ends inward.
Paint the inside of the basket three times, and then the outside.
Rooster from newspaper tubes
In addition to classic baskets and vases, many original toys are also made using the weaving technique. The easiest way to make a fabulous rooster in this way. Such an unusual toy is sure to delight everyone who is lucky enough to see it.
Necessary tools and materials:
- flower pot;
- glue;
- spoke;
- newspapers;
- decor elements.

In addition to classic baskets and vases, many original toys are also made using the weaving technique.
Progress:
- Roll the newspaper strips tightly into tubes and immediately coat them with varnish.
- After the blanks have dried, fold sixteen bundles in pairs.
- Braid the flower pot in a circle.
- Separately make the tail and paws, attach them to the base.
Add decorative elements.
How to weave a monkey from newspaper tubes
The craft in the form of a monkey looks original. Its production may seem difficult only initially, but as soon as you start work, you get so carried away that you don’t even notice how the funny monkey is already ready.
Required materials and tools:
- a pen;
- paper;
- newspaper;
- glue;
- spoke;
- dye;
- sponge;
- thread;
- wire.
Progress:
- On a paper sheet, draw a monkey, the length of which should be about ten centimeters.
- Twist thirty tubes from newspaper strips.
- Bend the tubes around the glue stick. Thus, the bases for the ears, head and muzzle are obtained.
- Gradually braid the head and torso.
- Braid the ears in the form of a figure eight and tuck the tails under the coils with a knitting needle or a toothpick.
- Now fix the bases for the paws, having previously threaded the wire into these tubes.
- Move the bundles to the end and also braid in the form of a figure eight.
- Weave a circle, forming a spout.
- Fill the tip from the inside out.
- Attach the round blank to the head with the tips of the flagella and tuck the ends under the turns.
- Cut out circles from paper, attach them to the body of the monkey.
- Apply paint to the sponge and use it to draw a cobweb.
- In the same way, draw a cobweb on the muzzle.
- Decorate the nose with brown color.
- Make a mouth out of the thread and glue it with glue.
- Cut out eyes from paper and glue them on.
- After that, finish the paws by wrapping the inside of the base and making a few fingers.
- Wrap the paws with a newspaper tube and also apply cobwebs.
- Pull the wire into the flagellum and fix it on the body. Thus, the monkey also has a tail.
Newspaper tube basket: master class (video)
Weaving from newspaper tubes is a fascinating process. Thus, it is possible to make both practical, necessary things in everyday life, as well as toys, souvenirs. For example, a do-it-yourself brownie will be a great housewarming gift. Any toy created in such an original technique will certainly appeal to children.
Katia
I wove a small laundry basket from such tubes, it turned out very beautifully, it is no different from the purchased one. Despite the fact that it is made of paper, the basket can withstand quite a lot of weight.
Anya
I made a small box, I store my jewelry there. It looks very nice, you can make absolutely any size. It takes very little time to create such crafts.
DIY toy box. Master class with step by step photos
Master class on needlework with step-by-step photos "Making a box for toys."
Author: Gubeeva Nailya Gaptullovna
Place of work: educator, MADOU "Child Development Center - Kindergarten No. 104" Belekech "of the city of Naberezhnye Chelny.
Nomination: the best master class of a preschool teacher
Description: this master class is intended for school children, educators, parents and creative people. This master class provides a detailed description of the manufacture of crafts from newspaper tubes.
Purpose: storage of toys in a beautiful box.
Target: making a box for toys from newspaper tubes with your own hands.
Tasks:
teach the technique of weaving with a rope and layered weaving;
to consolidate the skills and abilities of working with newspaper tubes;
develop creativity, imagination, imagination;
develop artistic and aesthetic taste.
For weaving, you need the following materials and tools:
1. Old newspapers (if the product is for food, then we take office paper);
2. PVA glue, glue stick, you can "Titan";
3. Scissors or stationery knife;
4. Kohler with water;
5. Colorless varnish for baths and saunas;
6. Knitting needle 2.5 mm;
7. Three boxes;
8. Napkins with drawings;
9. Double-sided cattle;
10.Tassel;
Preface.
From newspapers, you can create very beautiful and unusual items, both for decoration and for household needs. Weaving from newspapers comes from wicker weaving. But weaving from newspapers gives the product a beautiful decorative look, since newspaper tubes can be dyed in any color.
After looking at the works of Richard Bernaus, Natalia Sorokina and Elena Tishchenko, one cannot but be inspired. Making crafts from newspaper tubes by watching video tutorials is quite simple. We gain patience and start with the simplest forms and types of weaving.
Progress:
You need to take pieces of newspaper, approximately 7-8 centimeters wide (we lay out the newspaper along the length and divide it into 4 parts). We twist the strips into tubes using a knitting needle. Glue the ends.


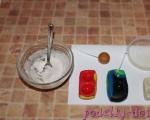
When they are all dry, you can start creating the bottom. Someone puts the tubes under the press. It is necessary to paint over the surface with paint of the color that you liked. Paint the tubes with color with water. After painting, you need to wait for drying.
We take a box, cut out two side walls for the bottom of such a size as the bottom of an empty box, in order to put the box on the workpiece. We glue the cardboard with napkins on one side.

We take scissors and double-sided tape (or glue).

We glue double-sided tape to the bottom of our future box along the edges on 4 sides and on the sides in the middle to glue another similar blank.

We glue the tubes along the edge at a distance of about 2 cm. We connect and glue both cardboards, i.e. one with newspaper tubes and the other without them. Leave overnight under pressure.

We raise the tubes to the top, now these are our risers. In order to weave an even basket or box, you need to take a box that will allow more even weaving. First weave with a simple rope of two purple tubes. We begin to weave by folding the tube into two unequal parts so that it catches on the riser. You can make an edge so that no holes can be seen from below.


Weave 5 rows in purple. One red. Then we glue or thread tubes of different colors between the pattern to each stand (in this example, 1 red-2 green-2 yellow-1 red-2 yellow-2 green and so on in a circle). The glued newspaper tube must be brought behind the counter, and the other left in front of the counter. And now we are doing the opposite, that is, we need to pass the second tube behind the second rack, and leave the first one in front of the rack. Thus, changing the tubes in places, we continue to weave.

We weave rows 18-20 in layers on the first under the second. For beginners, of course, it’s better to watch a video tutorial, since it’s hard to explain in words how you weave. We start weaving, for example, with a red tube. We take it and go around one pair of racks in front and wind up behind the next main rack. We take the next (green or yellow, depending on which pattern) tube, go around the main rack in front and start behind the next one, continuing the entire row.

In the middle, we again repeat the pattern with a string of purple. When one tube ends, you just need to carefully insert the next tube into the hole and continue the process until you have woven the required number of rows. Violet in the middle of the 3rd row.

Then again layer-by-layer weaving for about 18 rows. Weave in the opposite direction. Braid the ends. To prevent the corners from “leaving”, you can use clothespins. At the very end of the weaving, cut or glue the remnants and hook with a clothespin.


Let's move on to the lid. The same manufacturing process as the bottom. Stands can be taken shorter in length. We weave the edge in purple, then 3 rows in green (others can also be used). And the last row is again red, green, yellow, so that the pattern on the lid merges with the pattern on the box. We cover with a colorless varnish for baths and saunas.


What a beautiful decor for the New Year's decoration of the house. Such a Christmas tree can be made from materials that are likely to be found in every home.
For work we need:
How to twist the tubes and some types of weaving can be seen in more detail.
Stages of work
First, draw a circle on cardboard (or on any thick sheet of paper, I have a cover from an old magazine) (I have a circle diameter of 13 cm) and make a hole around the hole at a distance of 1.5-2 cm (photo 1). I got 20 holes.
We attach the cone to the circle on the cardboard (to make the construction heavier, I put a champagne bottle in the cone) and insert the tubes into the holes (for the racks I took office paper tubes - they are stronger) - photo 3.
Before inserting the tube, we bend the tip of it, as in photo 4.
Under the whole structure, I put a sheet of paper, so it will be more convenient to rotate the product, the curved tips remain between the sheets (photo 5).
We increase the racks to achieve the required height. We fasten all the tubes at the top with an elastic band (photo 6).
We take a green working tube (the working tubes should be wet), bend it in half and apply it to the rack (photo 7).
Weave the first row with a “rope” (photo 8).
Then we add a third green tube and three more gray ones (Pic 9).
We weave one row with a “rope of three tubes” with paired tubes (photo 10).
So we weave only 6 rows (3 green and 3 gray) - photo 12.
Now we continue to weave with the same tubes, but we will start each one in front of three racks for the fourth (photo 13-14).
We should have 8 rows in total (photo 15).
And again we add the tubes to make three pairs (photo 16). We weave a row with a “rope of three pairs of tubes”.
Then we leave two gray tubes and weave (photo 17) with a “string” one row.
It should look like this (photo 18). The tubes are cut and glued.
Now we retreat from the last row about 2 cm, attach a gray working tube and weave one row with a “rope” (photo 19-20).
"Chittz" weaving 6 rows (photo 22).
10 rows - weaving in front of three racks for the fourth (photo 23).
We complete this part in the same way - a row of “rope of three pairs of tubes” and a row of “rope” of gray tubes (photo 24).
We retreat 2 cm and repeat the weaving: 1 row with a “rope” of gray tubes; 4 rows of "calico" weaving; 12 rows "in front of three racks for the fourth."
We also add tubes to weave a “rope of three pairs of tubes”, but when weaving we will cut off some racks. It is necessary to cut 5 racks - this means every fourth (photo 25). First we cut, and then weave a row with a “rope of three pairs of tubes”, distributing evenly the remaining racks and a row of “rope” with gray tubes.
Once again we retreat from the last row. We weave one glad with a "rope" of gray tubes. Two rows of "calico weave" (photo 26).
Weave the next rows in front of three racks for the fourth. After about 7 cm from the beginning of the fourth part of the tree, we cut a few more racks - every third (photo 27).
Weave another 3 cm with the same weave. Then we just wrap the top of the Christmas tree - this is another 5 cm (photo 28).
We cut off the ends of the racks, except for one (we will put a star on it), glue the ends of the tubes, clamp them with a clothespin so that they stick well - photo 29-32.
We take out our Christmas tree from the cardboard, remove the cone from it. Here's what happened (photo 33).
We fill the protruding tips, as in the photo 34-37.
Now we need to weave a star.
We put the star on the left rack (see photo 38).
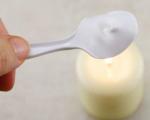
Here we have such a beauty. We prime it (PVA glue + water 1: 1), let it dry well and apply varnish.
It remains to dress her up.
We decorate the Christmas tree with lace, ribbons and decorative balls (or any other decor). And the asterisk can be covered with a patina (apply white paint with a sponge).
Such a Christmas tree can be presented for the New Year. A very original gift! The real handmade product 🙂
Anastasia Yata
Currently, the manufacture of handmade Christmas decorations is becoming an increasingly popular and relevant activity, and for good reason! Indeed, in addition to the fact that an adult or a child, making a toy on a Christmas tree, puts his soul into the work, he also connects his imagination, plunging into the New Year's magical world.
Christmas decorations from newspaper tubes - are able to best fit into the New Year's decor of the room and decorate it in an original way. Therefore, do not put off your idea indefinitely and start making Christmas tree decorations from tubes right now, and we will teach you how to make them.
Volumetric Christmas decorations from newspaper tubes or how and with what to decorate the Christmas tree in an original way for the New Year
| A star made of tubules will decorate your beautiful Christmas tree in the best possible way. In addition, you will spend very little time on its manufacture. The product also does not require any special knowledge of the matter and weaving skills, so even a novice craftsman or a child can handle it. | |
 | A heart on a Christmas tree ... How do you think such a toy will look on a Christmas tree? Of course, great! We are completely sure of this. Although it is customary to give this symbol and decorate a house with it on another holiday known to all of us, but the new year is worse. Therefore, let's move away from stereotypes instead and make this new year extraordinary and truly interesting. See the master class on. |
 | Do not know how to weave such a wonderful bell? We will gladly enlighten you on this matter. You just need to prepare the necessary material at hand, namely newspaper tubes and. |
We hope you liked the ideas of New Year decorations from Olga Bukreeva. The master tried very hard to make all master classes for crafts easy to understand. We express our special gratitude to Olga for the work done, and from the bottom of our hearts we wish you a creative mood and successful crafts not only in this technique.