Crocheting fabric napkins. A few simple tricks and small scraps of fabric and you have a great piece for home decor.
Good afternoon friends!
First of all, I want to congratulate you on all the spring holidays! Peace and goodness in your home, well-being and joy, health, all the brightest!
And the topic of today's publication will be cloth napkins.
For a long time I like such beautiful crocheted cloth napkins.
It is not difficult to make them, and the thing turns out to be stylish, modern, suitable for different interiors. It can be used both as a decorative napkin and as a tablecloth if you make squares of large fabric.
You can take such a cloth napkin with you to nature, cover the table with it in the country.
Probably, many who first took a hook in their hands tied a handkerchief with a border. Here, in principle, you are already familiar with this crochet edge tying method, which is used to create beautiful fabric napkins.
And what if you tie and connect four handkerchiefs together? You will get a delicate table napkin that can be used in table setting. Well, these are my fantasies.
And I wanted to tell you about a beautiful napkin made of fabric with embroidery, published on the pages of a Portuguese magazine. I couldn't find the name.
Beautiful crocheted embroidered doily
For a napkin, you will need a piece of dense fabric such as linen, cotton iris threads to match the fabric, a hook number 1.5, as well as materials for cross-stitching.
If you cut out squares of fabric measuring 23 x 23 cm, then after crocheting them, the size will be approximately 30 x 30 cm.
This means that the entire napkin of four squares will be 60 x 60 cm in size.
We embroider a picture
First, we cut out the squares from the fabric and embroider a pattern on them.
I am attaching the embroidery scheme from the magazine, it ( link is clickable), but you can, of course, use any pattern to your liking, or you can skip this step and make a napkin from some beautiful colored plain fabric or fabric with a pattern, even checkered.
Crocheting the edge
To do this, insert the hook into the fabric at a distance of about 5 mm from the edge and tie the edge of the fabric with single crochets in a circle.
You need to try to insert the hook at the same small distance from the column column. It's better to start from the corner.
Knitting should be loose, do not tighten the fabric too much.
In the corners, knit three single crochets from one point.
Having processed all four sides, connect the last column with the first and start knitting the border according to the pattern.

I really liked this pattern of tying a cloth napkin.
But you can use any other schemes, I have already posted several in an article about. And here is another very beautiful border for a table napkin.
Connecting a crocheted fabric doily

The connection of crocheted squares of fabric is made in the process of knitting the last row of each next square. When knitting the second - with the first, the third - with the second and first, the fourth - with all three.
We make the connection when knitting a picot: we knit a picot, then 1 VP, insert the hook into the picot of the strapping of another square and connect both squares with a single crochet, knit another air loop and return to knitting the current row.
You can watch the video for more information on connecting motifs.
I already mentioned that I really like such beautiful crocheted fabric doilies. And not just like it, I planned to make myself a tablecloth in this style. Or like this
Often the question arises of what to give to loved ones. Or how to express your sympathy to a familiar person. In this case, the ideal option would be a product made by hand. An embroidered or hand-tied handkerchief is considered symbolic enough.
Traditionally, our grandmothers tied handkerchiefs for their beloved ones. It was believed that such a gift would save the life of a soldier in battle. Indeed, many military men noted the magical power of a handkerchief presented to their beloved. Now such a scarf can be purchased at any store, but if you experience quivering feelings, then tie the scarf yourself. This is done quite simply with a hook.
Instructions for tying a scarf crochet:
- Most often, the simplest elements are used for strapping. These are air loops, double crochets and without.
- First, iron the handkerchief well, its edges should be overlocked.
- After that, stick the hook into the extreme part of the skin and make the VP, close it with a blind loop.
- Now tie a scarf with single crochets in two rows. Now you can start knitting. To do this, dial 10 VP and close them with RLS.
- Tie the entire perimeter of the fabric in this way. Now just tie the air loops of RLS. This is the easiest option and is ideal for beginners. The pattern looks pretty and complements a simple cotton scarf.
Below are the most popular patterns for tying handkerchiefs.


VIDEO: Openwork border
How to crochet a napkin: diagram, description, photo, video
Crocheting a doily is quite easy. You need to be patient and have the necessary materials. Ideal for tying napkins and hooks are #10 threads or iris. Thin threads and a thin hook are selected if openwork and dense lace is needed.
Instruction:
- Tying a napkin is pretty easy. It is necessary that the fabric is dense, and the head of the hook is sharp enough. This is necessary to simply pierce the canvas.
- At the very beginning, close the blind loop. Knitting starts from the corner of the napkin. Next, knit a row with BN columns.
- After that, knit in a new row of RLS, and then stepping back a little, knit 5 CHs at one point. Work 1 sc and work 5 ch again in one hole.
- Continue until you have knitted the entire perimeter. It turns out a very interesting strapping, reminiscent of petals. It is also quite simple and even a beginner can handle it. It is enough to master the basic skills.


Very interesting are sharp strappings that resemble corners. More options can be seen in the photo. More details about the execution of the elements can be seen in the video.
VIDEO: Crochet voluminous border
In general, for tying scarves, it is better to choose more voluminous options. Since the scarf is larger than the handkerchief, there should be more rows of strapping. Usually these are various festoons. Crocheted lace is tied along the edges.
Instruction:
- There is no need to tie a scarf with RLS. Just dial 15 VPs and close them with RLS. You get petals. Now they need to be tied.
- When you have completely knitted the entire row with petals from the VP, it is now necessary to work with these petals. Now to the middle in each petal, knit 4 CH, and then 10 VP. Again in the same petal 4 CH.
- After that, knit 4 VP and close in the middle of the petal from the VP. Again knit 4 VP and continue as with the previous petal.
More details can be seen in the diagram below. Apply a variety of lace options. The schemes are shown in the photo below.


Crochet patterns for tying handkerchiefs: diagrams, descriptions, photos
There are a lot of options for tying handkerchiefs. With basic knitting skills, you can tie a handkerchief yourself. Such a product will be an excellent souvenir and a sign of attention.
Description:
- This is a simple, but very pretty version of lace for tying a handkerchief.
- It is enough to be able to perform VP and RLS. These are the main elements for this harness.
- For work it is worth using thin threads and a thin hook with a small head. The binding must be tight.
- Tie the entire scarf around the perimeter in blocks of 10 VPs, closing RLS. You get petals.
- Now you need to knit the second row. Only now, in the center of each petal, you need to knit RLS, every 15 VP.
- The next three rows are knitted by analogy with the rest. Below are diagrams and photos of finished handkerchiefs with strapping.
 Crochet patterns for tying handkerchiefs: patterns
 From the smallest scraps of fabric left after sewing large things, you can make a beautiful napkin. Now if you have a piece of beautiful colors left, you can use it. You only need a few simple tricks that a novice master can handle.
You can limit yourself to one napkin, or tie several identical squares in this way, connecting them together with ordinary loops into a blanket or tablecloth.
First, choose a fabric. The thickness of the thread and the hook is selected in accordance with its thickness. It is easier and faster to work with thick fabric and threads. But if you are not afraid of long and difficult work, you can take a small hook and thin threads.
First, measure a rectangle of the desired size. If you are going to make a canvas from many parts, it is better to work with even squares.
First you need to take a needle and process the fabric with stitches located at the same distance from each other. The seam should imitate overlock. After that, you should insert the hook into the seam on the napkin and form the first air loop. 
Leave the first loop on the hook and insert it into the second loop of the seam. We knit together two loops on the hook, forming one. We continue to tie the entire napkin in this way to the corner. In the corner area, you need to add a few air loops. 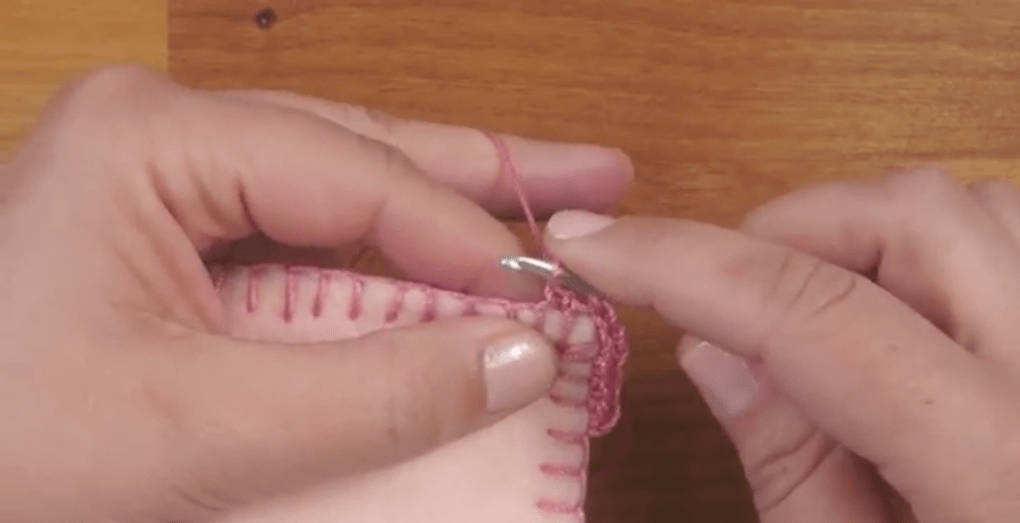
We tie the entire napkin and connect the first level of loops. 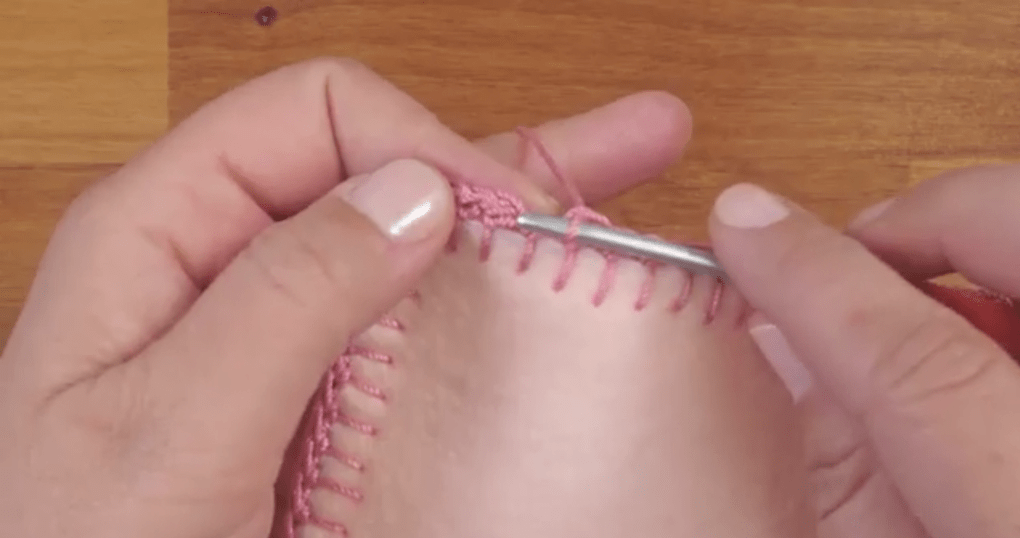
We connect the loops and go to the second level. 
To do this, we form 4 air loops, then we make two crochets on the hook and knit the loops together.

We insert the hook into the loop on the napkin and again bring out four air loops. You need to make several sticks, and then knit a loop on the hook with a loop on the napkin. 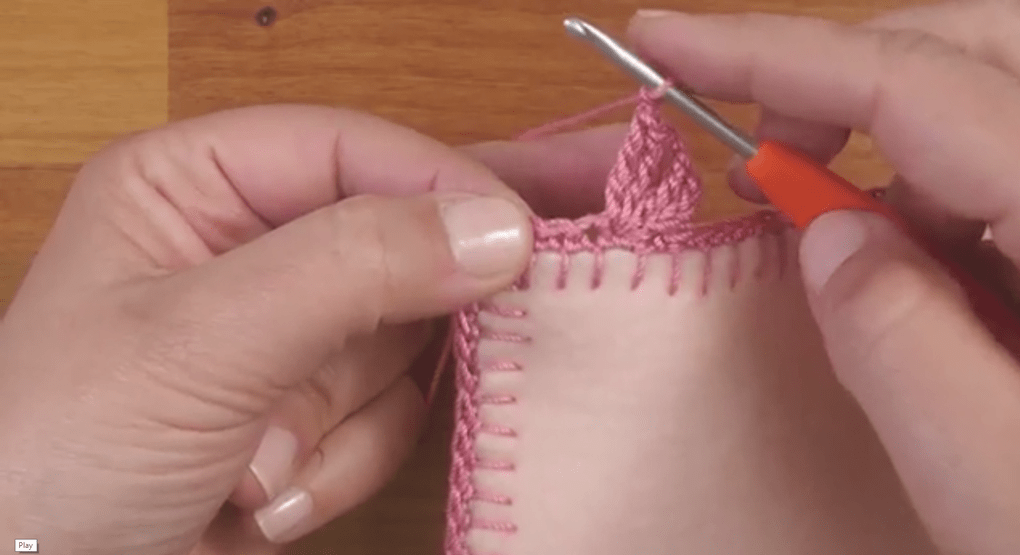
It turns out a kind of petal. With such petals we knit a napkin to the corner. 
At the corner, the number of sticks needs to be increased. 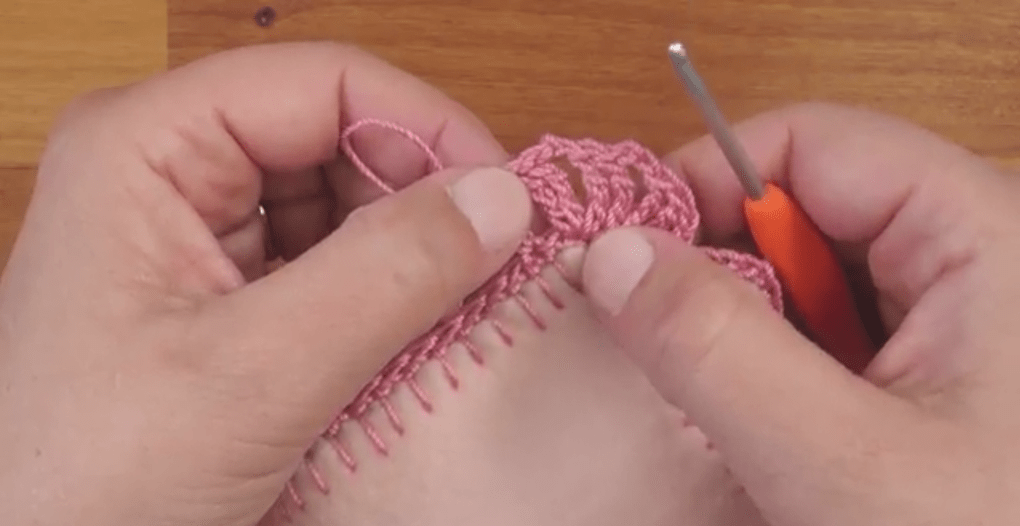
Having knitted a napkin in a circle, we connect the petal and knit it with simple loops along the edge of the petal, rising to its top. 
Now you need to tie jumpers from air loops that will unite the tops of the petals. The number of loops in each jumper should be equal, except for those that connect the petals that are located at the corners with neighboring ones.

Having tied this level, we connect the edges of the napkin with a loop. 
COMBINATION: FABRIC + HOOK in PRODUCTS for home COMFORT. (finished products with diagrams, IDEAS and diagrams of elements, CORNER and ROUND strapping for the creative embodiment of a blanket, pillow, napkin, tablecloth, towel, rug ...) Sewing skills are required very little and knitting time is much less than if would be fully crocheted from squares. Materials used: Such a bedspread can be made from any fabric: thin cotton or denim and other material. You can use various patches and make a bright patchwork blanket from squares. If you have a lot of old denim stuff, here's a great idea to make this denim blanket. I can’t even formulate the action correctly, either sew or tie? For tying squares, acrylic or cotton yarn in a color that matches the color of the fabric is suitable. We select the hook with the number corresponding to the thickness of the yarn. How to prepare squares from fabric for a bedspread From the fabric we have chosen, we cut the required number of squares of the same size. Squares can be 12 cm or more on a side. I would make 20 centimeters. Depending on the size of the future bedspread, we calculate how many squares will be needed in width and length. A bedspread measuring 210x150 cm will require approximately 352 squares measuring 12x12 cm. The process of creating a bedspread from squares in the proposed technique is facilitated by the fact that the lining is not required to be sewn here. Squares of thin fabric with crumbling edges should be cut with seam allowances. Hem the edges of the squares on a typewriter. You can also make a double-sided bedspread, in this case, sew two squares together along the perimeter from the wrong side, leaving a small area through which to turn the square on the front side. Squares made of thick fabric do not need to be hemmed. But, before tying them with a crochet, you need to mark the puncture sites. On the wrong side of the square, at a distance of 0.5-0.9 cm from the edge, we draw a line parallel to the edge with dry soap. The thicker the fabric, the greater the distance from the edge. Then, along this line, we mark the holes at a distance of 0.5-1.2 cm. The markup must be started from the corner, then to the left, then to the right. In the middle of the side, you can adjust the distance between two or three holes, slightly increasing or decreasing it. In the intended places we make punctures with an awl. Crocheting squares The next step in the production of a bedspread from squares is crocheting them. We tie squares of thin fabric with single crochets at a short distance from each other. We begin to tie from the middle of the side. In the corners we knit three columns without a crochet. On squares of thick fabric, it is better to knit two or three single crochets into each punched hole, depending on the distance between the holes. In the corners, in this case, we knit 7 single crochets. You can also, in principle, tie squares of thin fabric. We choose the edge tying scheme that we like and then we tie the squares according to the scheme. I offer you a small selection of strapping patterns. It is enough to tie the squares with just a few first rows according to the patterns, and apply the rest of the pattern to the border on the bedspread. If, when knitting napkins from motifs, it is more convenient to connect them in the process of knitting the last row, then for a bulky bedspread it is still more convenient to sew ready-made squares tied with a needle and thread for the extreme walls of the loops. The final stage - we knit a border with a blanket of squares The final stage - we tie a finished blanket of squares with a border according to the same patterns above. You can also make a blanket, tablecloth, napkin, pillow. Combining separate parts into one, craftswomen invented several variants of such combinations. A method for tying rectangles or patches of a different shape from fabric along the perimeter and a method for including knitted fragments by sheathing with fabric. These items are very beautiful. Plaid of crocheted motifs and fabrics: My friend made such bedspreads even from old drape coats. She tied and crocheted squares of drape. It turned out very beautiful, unusual. Another interesting idea is to make a similar blanket from fabric and knitted squares, placing them in a checkerboard pattern. Who will be the first to show off their exclusive bedspread? Good luck with your creativity! And check back for new ideas!
A large number of Internet sources allows you to choose product schemes for any requirements, including shape and size. But there is a problem - the choice of how to tie a round napkin.
Pattern combination
The secret of a beautiful crocheted napkin strapping is compatibility with the original pattern. The simpler the napkin itself, the easier the strapping, and vice versa. The product should look harmonious. To achieve this, you need to choose a pattern for strapping that is close to the main one. When changing the pattern, a sharp transition should not be evident, the strapping should not look like something foreign.
Strapping repeat
Before you start tying a round napkin, you need. Then you should count the number of loops in the last row of the napkin, from which you will begin to tie it. The number of loops along the edge of the napkin should be such that when divided by the number of loops of the strapping repeat, an integer is obtained (without decimal places). If it doesn’t work out, the loops must be evenly added to the desired amount by knitting another row of napkins.
Below are various options for tying round napkins. They can also be used for fabric napkins, and not for crocheted products. Simpler schemes are universal, more complex ones should be very clearly combined with the main pattern.


Didn't find a suitable pattern for crocheting a round napkin? Perhaps we should just leave this idea. Most napkins look great without tying, so in some cases, extra rows will only be superfluous. Approach this issue wisely so as not to spoil the product.