How to make a decorative bicycle with your hands. Handmade souvenirs
This article contains several workshops on making a bicycle quickly and easily with your own hands from improvised materials with step by step photos and video. Such a product will serve as an excellent element of home decor and will be the subject of surprise and admiration for all guests.
We make the composition "Flower Bicycle" with our own hands
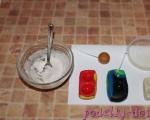
To create this decorative composition we need:
- Decorative bicycle, which can be purchased at a specialized store, or made by yourself, guided by master classes from the Internet;
- corrugated paper;
- Styrofoam;
- toothpicks, glue, glue gun, threads or wire for attaching flowers;
- Decor elements: tulle, bows, beads, ribbons, homemade beaded flowers, sisal;
First you need to do small bouquet corrugated paper flowers. To do this, you need to cut a rectangle measuring five by seven centimeters, fold it in half, round one edge and gently stretch it.
Now you can start making petals. You need to cut a strip of paper measuring ten by five centimeters, and fold it in half twice. Then you need to cut out a petal of this shape, as shown in the photo below, and tuck it a little with an ordinary handle. Further, these petals must be attached to the bud and secured with wire.
Flowers can be made in any shape and size, and when you have enough of them, you can start creating the composition itself. The bottom of the wicker basket of the bicycle must be filled with a piece of foam and fasten paper flowers and beads on it with toothpicks. You can also add green sisal and various elements in the form of decorative bugs and butterflies. Our flower charm is ready!
We make a bicycle from straws for a cocktail quickly and easily
To make such a charm, you need a little waste material and a few hours of free time.
Tools and materials for creating this product:
- Tubes for cocktails;
- Disposable plastic cup;
- Scissors, toothpicks, cotton buds, scotch;
- Threads, bandage.
For greater clarity, this master class is presented in the video photo instructions.
In this master class, we will show you how to make an original flower pot with your own hands.
A planter in the shape of a bicycle will be a very unusual home decor or a gift for relatives and friends.
To create such charms with our own hands, we need:
- Wire two to three millimeters wide;
- Teip tape white;
- Four white buttons;
- Glue "Moment" or glue gun.
First you need to make three circles from the wire different size and wrap them with tape. Now you can add curls to them and fix them well.
The same curls need to decorate the entire bike.
The next step is to create a basket for our bike. It is made using the same technology as the bicycle itself and is fixed with glue.
It remains only to make flowers from sweets and decorate the product with them.
We create a very cute decorative bicycle with our own hands

To create such a miracle, we need:
- Several blanks from cardboard;
- Small wooden stick;
- A piece of thread, toothpicks;
- Scissors, glue.
First you need to make a basket out of cardboard. To do this, cardboard strips must be glued to the bottom of the product, as shown in the photo below.
And then weave a basket out of them.

In the same way, only with the absence of weaving, you need to make three wheels.
Next, you need to take a small wooden stick, two strips of cardboard and a thread and make a fork out of them for a future bicycle.
The details that turned out at the end need to be glued.
The handlebar of a bicycle is made of cardboard and thread, and is also decorated with some kind of decorative element.
Here is what should be the output:

Let's make a decorative planter bike out of twine and fragrant coffee beans

For work we need:
- Cardboard;
- Tubes for cocktails;
- Leg-split;
- Coffee beans;
- Polymer glue;
- Scissors.
On cardboard with a compass, you need to draw circles, as shown in the photo below and cut them out with scissors.
Then these blanks must be wrapped with twine.
In the straw for cocktails, you need to cut off the excess, leaving about two centimeters from the bend on both sides. You need four such blanks to make one wheel for a bicycle. Next, each tube must be tightly wrapped with twine.
Now you can assemble the wheels, as shown in the photo below.

Then you need to take two tubes, stretch one, and cut off the other upper part and connect them as in the photo below. Two such blanks need to be wrapped with twine.
The steering wheel must be created by cutting off the top of the tube, leaving two centimeters before the bend and three after it. Wrap them with twine.
The next blank for the steering wheel is a tube eleven centimeters long, wrapped with twine.

The wheel needs to be decorated with coffee beans. It is necessary to insert two blanks into the front wheel and fix them with polymer glue.
Between the rear wheels you need to insert a straight tube and fix it with glue.
A piece of tubing must be inserted between the upper ones. And wrap the place of their attachment with twine.
The role of the cache-pot here will be played by an empty jar. You can decorate according to your taste.
Video related to the article
At the end of this article, a selection of thematic videos is presented on how to make a topiary with a bicycle, make a cute cradle for this type of transport, or arrange your composition in the steampunk style.
Bicycle for flowers with your own hands. Master class with step by step photo
Master class on needlework "Decorative bicycle with a flower pot"
Author of the work: Dizhak Alena Valerievna, teacher additional education MBOU DOD "House children's creativity» Osinniki, Kemerovo regionThe master class is calculated for teachers of additional education and all comers.
Purpose of the master class: The original flower pots themselves can become a decoration if you decorate them accordingly, adding your imagination and skillful hands. Besides original thing handmade will become great gift for a holiday or just decorate your interior.
Target: making a decorative bicycle with flower pots.
Tasks:
- develop self-employment skills artistic activity;
- mastering the technology of making a planter-bicycle;
- develop imagination and Creative skills;
- to form artistic taste, aesthetic experience.
To work you need:
cocktail tubes,
kapron thread,
glue "Master",
cardboard,
scissors,
A glass or small pot
scissors,
beads,
ribbons and sequins for decoration.

Step by step process manufacturing
We cut out three wheels from cardboard and wrap them with nylon thread.


Cut off the upper part of the cocktail tube (about 2 cm from the bend with different sides). To create one wheel, you need to prepare 4 blanks. We wrap the tubes with thread.


Collecting inner part wheels and connect both parts together.


We use 2 tubes. We stretch one at the fold, and cut off the upper part of the other, inserting it into the short part of the stretched tube. We wrap all the blanks with thread.

Let's move on to the next step: creating the steering wheel. We cut off the upper part of the tube (2 cm before the fold and 3 cm after the fold). We connect and wrap the thread.

Let's start building the bike. In order to fasten the rear wheels, we need an 11 cm tube, we also wrap it with a thread. We insert two blanks into the front wheel and glue them with polymer glue. We insert a straight tube between the rear wheels, fix it with glue.

The role of a cache-pot will be performed by empty food jars or pots for indoor flowers. We glue the pot with nylon thread and glue it to the crossbar on the rear wheels. Fill the pot with flowers. From width satin ribbon will depend on the size of the rose.
Keep the tapes horizontal. Fold from the right corner diagonally so that you have about 1.5 cm of the end of the tape left. Holding the tape in your left hand and the folded end in your right hand, roll the tape tightly in a clockwise direction one turn.

Let's make a couple more turns to get the middle of the rose.
The master class is calculated for students in grades 3-4, teachers and parents.
Target: for interior decoration, original packaging for a gift.
Necessary materials:
3. scissors
4. stationery knife
5. ruler
6. straws for a cocktail
7. glue "Moment"
8. compass
9. double sided tape
Progress:
1. Cut out 3 circles with a radius of 5 cm from cardboard. Inside each circle with the same center, draw a circle with a radius of 4 cm, carefully cut out stationery knife. We get 3 blanks of wheels.
.jpg)
2. We glue thin strips of double-sided tape on each blank on both sides and wrap it with twine, glue it.
.jpg)
3. We take 4 tubes, bend and cut so that the resulting corner has sides of 2 cm. Each wheel requires 4 corners (12 corners in total).
.jpg)
4. We wrap the resulting corners with twine and glue.
.jpg)
5. We insert the corners into the wheel blank and glue the joints.
.jpg)
6. We get 3 wheels.
.jpg)
7. We take 3 more tubes. Of these, we will make a frame for a bicycle (2 blanks must be made). The length of the first blank is 11 cm, and the second is an angle (insert the tube into the tube and glue) with sides equal to 20 cm.
.jpg)
8. We wrap the resulting parts with twine and glue them.
.jpg)
9. We take the first part (axle) and insert it into the central holes of the two wheels. We glue the joints.
.jpg)
10. We pass the second part into the third wheel (it will be the front one), clamp it and pull it with twine behind the wheel. We connect the ends of the part and glue it with the axle and two wheels.
.jpg)
11. We take 4 more tubes. Let's make a steering wheel. We cut two from the short end, leaving 3 cm. From the other two, we leave only the place of the fold, the sides of the corner should be 1.5 cm each. Insert the corners into the short sides of the first blanks.
.jpg)
12. We wrap the resulting parts with twine, connect them together (we tightly rewind the twine in the middle of the long sides) and glue it to the front wheel.
.jpg)
.jpg)
.jpg)
14. Or as a gift stand (this is a slightly different bike).
.jpg)
15. You can make a composition of several crafts.
.jpg)
.jpg)
Souvenirs self made. Wire bike.

Handmade souvenirs. Wire bicycle
So, to create this bike, we need wire, a spool of tape, a roll of toilet paper, white corrugated paper, PVA glue and all sorts of differences and beauty for decoration

We cut the roll and reel into rings 5-6 mm wide

Now we will twist the spokes from the wire, periodically trying them on the ring (so that they fit freely in the wheel and hold there confidently), if everything is adjusted exactly, then they don’t even need to be glued, they will hold on)


We start wrapping cut into strips 7-9 cm corrugated paper our wheels and spokes.


Now we will cut or twist the wire (if it is thin) for the axle .. in my case it is 5 cm, we will also wrap it with corrugated paper and connect the rear wheels (they are smaller than the front). I connected with toothpicks ... as far as I could pierce the wheel and the axle simultaneously ... the rest cut off.

Let's start making the steering wheel. Since I have a double wire, I decided to do it as in the picture, if you have a single one, then just two wires on each side and wind them together over the wheel. The size of the wire for the steering wheel is 14 cm .. then 4 cm from each bend the sides onto the steering wheel). Having tried this case several times, we also wrap the steering wheel with paper.


Where there will be handles at the helm, wind up more paper)

We connect our parts into a single whole using the same wire. If it is thin, then duplicate it several times, so the main load is on the frame. We will also wrap it with paper.

Well, now we decorate at will) I have these roses in a basket)) pearls on wheels and a strazik instead of a headlight))
you can say the second MK.
It’s easy to make a basket: cover from hairspray (slightly cut the height to a smaller one) spread with PVA glue and wrap it with a hemp rope, you can also go over the top with glue, when it dries, paint it white acrylic paint without fanaticism)) let our rope shine through ... it turns out something from "shabby"
We twist the roses from corrugated paper. Cut into strips (pink 2.5-6 in size ... .. green 2-4 cm) and twist like a ribbon rose. We fold the green strip so that we get 4-5 parts B and cut it out from one edge as in the picture. We twist the rose with leaves and place it in a basket)


To keep the roses better in the basket, put a little glue between them) Here are the baskets we got) I made two baskets of flowers, because I planned another basket for the front wheel .. but then I realized that it was too much) But the remaining basket was immediately taken away. .she found the owner)


It remains to attach a basket of flowers and our bike is ready))

Craftswomen always want to decorate their home in some way. embroideries, knitted products, various decorative details. We invite you to familiarize yourself with ways to make a bicycle with your own hands, which can serve as a highlight of your home.
From twine
We will need:
- leg-split;
- cardboard;
- pencil;
- tubes for cocktails;
- a container for a future planter (from under yogurt, for example);
- glue "Titan" or "Moment";
- coffee beans;
- scissors.
We cut out the bases for the wheels from cardboard using a compass or other round objects. It is necessary to make 6 such blanks, two for each wheel.

Having glued the blanks in pairs, we wrap them with twine.

From the tubes we make spokes for the wheels. To do this, measure from the fold two centimeters in both directions. There are four such parts for each wheel. We also wrap them with twine and glue them together with Moment or Titan glue.


Now we place the spokes in the wheels, fasten with glue.

We decorate the rear wheels with coffee beans, as shown in the photo below.

We take the next tube and cut off 2 centimeters from the fold in one direction, 3 cm in the other. We make one more such detail. We connect them to each other with long sides. This will be our wheel. We also wrap it with twine.


We cut off a part without a fold from the tube 11 centimeters long. Wrap in twine. This blank will connect the rear wheels of the bike.

Now we close the ends of her and at the helm with coffee beans, which we plant on glue.

We take a new straw, fold it in a fold and stretch it. We cut it from the side of the short part, put a drop of glue and insert it into the segment that remains from previous work.


We need two such blanks. We also wrap them with twine.

We insert these long blanks into the front wheel, as shown below, and decorate the wheel with coffee beans on both sides.

Between the ends that will be at the top, we lay a piece of the tube 2 centimeters long, and close this place with twine.


We connect the rear wheels with a jumper.

Now we take the container that we chose for the future planter and glue it with twine. Top edge decorate with coffee beans.

We glue the steering wheel to the top bar and place the cache-pot between the rear wheels.

You can leave the planter for all sorts of little things, but with flowers, the bike will still look more harmonious.

Instead of a planter, you can make a bicycle with a cradle and place flowers there.

From wire
We will need:
- wire with a diameter of 2-3 mm;
- teip tape white;
- buttons of the same shade - 4 pieces;
- glue, you can "Moment-Crystal" or a thermal gun.
From the wire we turn three identical circles, put them together and wrap them with teip tape. It turns out the wheel. We need to make three wheels, one of which is large and the other two are the same size.


By the same principle, we make three curls in each wheel.


We do the frame and steering wheel in the same way.

Our bike will be with a basket, so we collect it too.

We fasten the basket between the rear wheels. And here is our bike. If we place a composition with candy flowers in it, it will be a wonderful gift. How to make such flowers, you can see in the video below.

From a three-core cable

cook the following materials and tools:
- three-core cable, always soft - 1.5 meters;
- wooden skewers;
- small blocks of wood;
- cotton wool;
- brown and white paint;
- coffee beans;
- threads;
- newspapers or office paper;
- cardboard;
- drill;
- silicone hot glue;
- screws;
- small pots made of plastic or ceramic;
- satin ribbons and decor as desired.
We cut three segments from a three-core cable: one more - on the front wheel, two smaller - on the rear. Pull out the blue wire from the middle. And with the help of a piece from it and glue, we connect each piece of cable into a ring.


We make a hole in a wooden block and wheel with a drill. We connect with a skewer.

Such holes must be made according to the number of spokes. The end result is this design.

We connect two wheels. We bend around the wooden block in the middle with another piece of cable, fix it with a screw.

We decorate the planter and attach it to the front wheel frame with a screw.

We make a steering wheel from the blue middle wire.

All parts must be painted white, and the cable joints closed with a satin ribbon.

Glue a piece of cable on both rear wheels.

We tie a bow from a ribbon 0.5 cm wide on the steering wheel.

For the basket, cut out a circle from cardboard and place it between the two wheels.

We cut out two more of the same circles and attach them to one of the tubes from the newspaper, these will be our racks. How to do them, see the video below.

We cover with the second circle and raise the racks up. Let's start weaving our basket. When it is ready, we fix it on the prepared platform. You can use glue or screw on a screw.


Now let's start making our topiary. On a blue wire folded in half, we attach a ball of crumpled newspaper. We glue the newspaper with cotton wool, then we drag it with a thread and paint it with brown paint.


Cover the ball with coffee beans. We install polystyrene foam in the basket or fill it with gypsum and install our coffee tree. Previously, the trunk can be closed with tape or thread.

So that the inside of the basket is not visible, fill it artificial plants branches for decoration.

We also decorate the pot on the steering wheel as we wish.
Like these ones beautiful compositions can be a decoration for your home or part of a gift. You can decorate such bicycles as you like, for example, in the style of Provence, steampunk, decorate with beads, rhinestones, ribbons, etc.
Video related to the article